LEGO House® Virtual Fan Day 2020

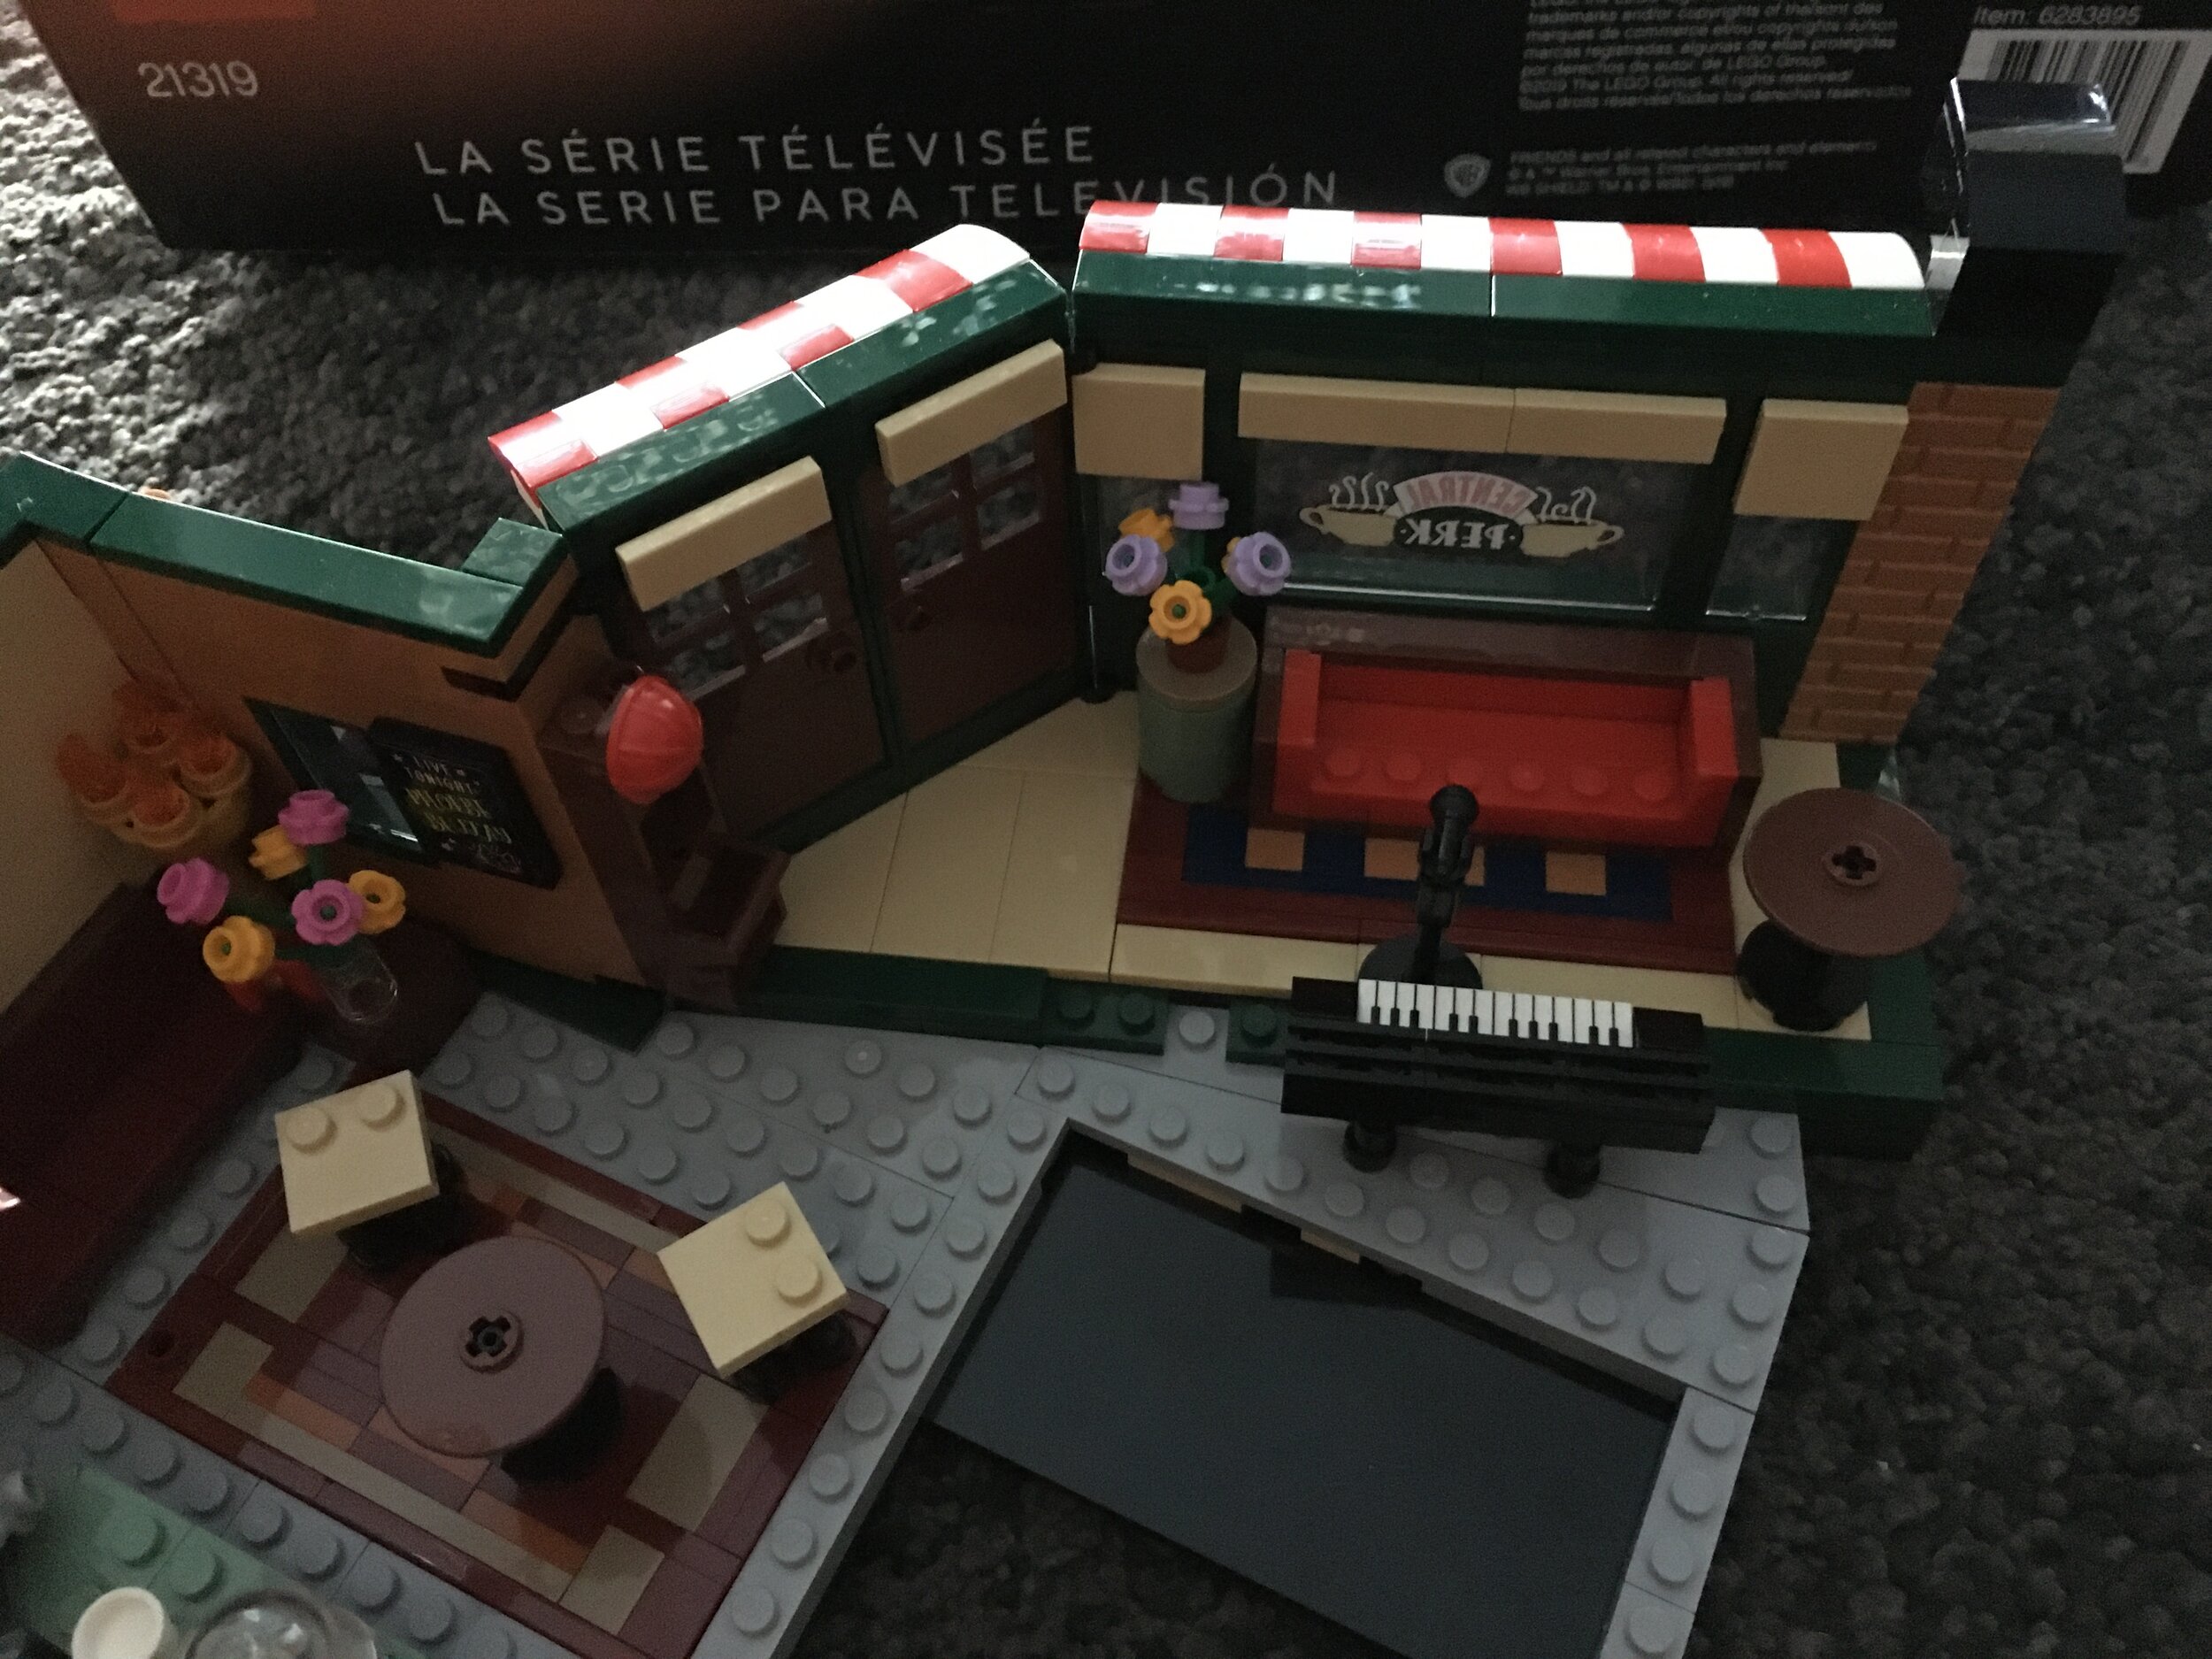
This weekend marks the time when the Skaerbaek Fan Weekend is normally held in Denmark. The event was cancelled due to COVID-19, but the LEGO House® still decided to participate. In previous years they have closed the House to the public and opened it to Skaerbaek Fan Weekend attendees only. This year they held a virtual event with a few presentations from various employees. To mix things up, most of the employees presenting were not designers so it was interesting to hear about different parts of the company. Here’s a quick run through of the event with a few screen shots I took.

virtual+fan+day.jpg

Quick admin… there were about 400 people logged in from across the world. I saw people check in from North America, Europe, Asia, and Australia. It occurred between 1PM and 5PM in my local time zone (Central European Time) so great for me and a good excuse to take a day off from work. Sorry for those of you who had to get up early or stay up late. Participants were in receive only mode. You could type questions into chat and Jan Beyer moderated and picked the questions for the presenters to answer.

DISCLAIMER: These are from the notes I took during the session. I may have made mistakes or heard things wrong. So don’t go quoting me on anything without confirmation from the LEGO Group.

To start off, there was a welcome by the Managing Director of LEGO House, Jesper Vilstrup.

Jesper+Vilstrup.jpg

Jesper gave a quick welcome and updated us on the LEGO House® and impacts due to COVID-19. It was closed for about 100 days until it re-opened at reduced capacity. They have re-opened with a bunch of new rules and increased hand washing. Also, they swap out all of the bricks every day and put them in a 72 hour quarantine. I can’t imagine how long that takes.

Next up was Julia Goldin (calling in from London). She is the Chief Marketing Officer and Executive Vice President of the LEGO Group. She is pictured on the right in the screen shot below.

Julia+Goldin.jpg

She gave an overview of what she does and talked about a few items before Q&A. The intro items were:

-LEGO is expanding offerings to adult fans and plans to continue the expansion
-70 or so projects in the portfolio geared towards adults (IDEAS and others)
-LEGO wants feedback from the fan community
-A quick overview of her personal use of LEGO
-A quick discussion on sustainability of LEGO to include removal of the plastic parts bags in 2021
-A focus on digital child safety
-A discussion on Diversity and Inclusion within the LEGO Company

Fan Q&A

-Will Bionicle return?
—It was phased out as it was not seen as part of the kid building experience, but it could return someday
-Any updates on the BrickLink acquisition?
—BrickLInk is getting new customers during COVID, adult fans are important to LEGO and she sees BrickLink as a way to support adults, using BrickLink to learn more (data mining?), LEGO does not want to change Bricklink
-Talk about the partnerships with Ikea, Levis, and Adidas
—Wanted an opportunity to show LEGO in a different way when two brands combine in new channels, looking for ways to expand brand awareness, don’t expect a lot of new partnerships beyond what has been seen, Ikea partnership was done as LEGO saw a need for buildable storage (not everyone has a giant room to store their massive collections)
-LEGO is open to releasing older themes
-LEGO is looking into releasing smaller sets geared towards adults at lower price points
-A quick discussion on the COVID-19 impacts

Next up was  Poul Schou. Poul is the Senior Vice President for product development in the LEGO Group and has been with the company for over 30 years.

Poul+Schon.jpg

Poul provided a quick history of his employment at LEGO to include traveling the world bringing LEGO to places that had never seen LEGO (to include a great story about bringing bricks to Papua New Guinea). He was involved in bringing LEGO to China in early 2000. He then worked in Denmark on marketing for a short period before switching to product development. He now has a team producing ~200- new products per year and he called them Product Group 1. They make products for younger kids (4+/Juniors), girls lines (Friends, Disney Princesses), Ninjago, City, Minifigures, and then IPs.

Then straight to fan Q&A:
-What’s the Asia strategy?
—China is LEGO’s fastest growing market and a discussion on the Monkey King line
-More on plant based pieces and the desire to expand their production
-What is the future of modular buildings with the new 18+ line?
—No plans now, but would like to have more modular type builds for families to build together
-Will LEGO continue to produce large numbers of new models?
—They are growing, but don’t want to go too fast/far
-What was his best LEGO moment?
—He mentioned the bringing bricks to children who had never seen them before and didn’t know what to do to them stories.
-What are some of the latest models?
—The Child, The Child Brickheadz, and a Ninjago model (I didn’t catch the name)
-Will shelf life decrease with more sets coming out?
—They would actually like to expand the shelf life
-Why re-release the two IDEAS sets (Ship in a Bottle and Saturn V)?
—It’s hard to predict product popularity and there was still demand even after the sets went to end of life
-What is the long term plan for LEGO apps?
—Need to determine how they will support them into the future
-A discussion on IPs
--Need to consider if kids like the IP, determine what LEGO can do with it, and if it fits within the brand
-A question about becoming a designer (been asked a lot so I won’t expand on the answer)
-A question on virtual designing (he wasn’t an expert there)
-How long does it take to design a set?
—Anywhere from 9 to 15 months to design a set
-How many people to design a set?
—It depends on the set, but there are around 400 designers and then 1,800 people who do marketing, packaging, and instruction development
-Why is LEGO successful?
—They’ve been able to make it a system and connect well with partners
-Any challenges with working form home?
—Designers have a hard time getting the pieces they need
-What are his favorite lines?
—Ninjago, Bionicle, and the new Nintendo line
-What are the long term plans for the Art line
—The Star Wars Sith set has done well. Expect more sets.
-Why are some sets phased out faster than others?
—They stick with what works. For example, Ninjago did better than Chima or Nexo Knights
-Could old sticker sheets be re-released?
—”That’s a good idea.”
-What is the design process?
—Talk to kids worldwide, get ideas, draw the ideas, show kids, build models, test with kids, do internal reviews
-How do you decide to do printed pieces versus stickers?
—Try to print more for younger kids and can get more authenticity with more stickers. They have more flexibility with fewer stickers.
-A discussion on LEGO animals
—Molded ones are meant for younger kids (Duplo) and brick built ones are for older kids and to expand creativity
-How many sets does each designer work on?
—Depends on the team and the product line. Ninjago team works on all sets, but they are the lead for one or two each year.
-Do they test sets with adults?
—Starting to test them with adults now. Small scale test. (how do I sign up for this?)

Next up was Stuart Harris who is the lead designer for the LEGO House®. He displayed some of the new fan designs they have on display in the Yellow Zone. I was too busy paying attention to the designs to take any screen shots. Sorry!

Okay… Next presentation was with Kim Yde Larsen, Nanna Mazanti Drejer Friborg and Thomas Folit. They are part of the BIX team or Building Instructions Experience team. Here are their minifig recreations from the slide show.

BIX+in+minifigs.jpg

Their presentation was focused on the building instruction process starting with the history to where they are today. This isn’t an area we hear a lot about so it was interesting to hear their perspective. There is a lot to think about besides making sure you can make the set. Who will be making the set? Are they young/old, familiar with LEGO or not, is the set large or small? They discussed how they go through this all as a set is designed. Then we moved to the Q&A:

-When are they involved in the process?
—During the early stages of development all the way through pre-launch and then post launch if needed
-Please tell customer service if you find issues so they can fix them.
-What happens when errors are found in models?
—The goal is to find errors before the model is released which is why they get involved very early in the process.
-Would it be possible to add a number code for color blind people?
—This is definitely a possibility.
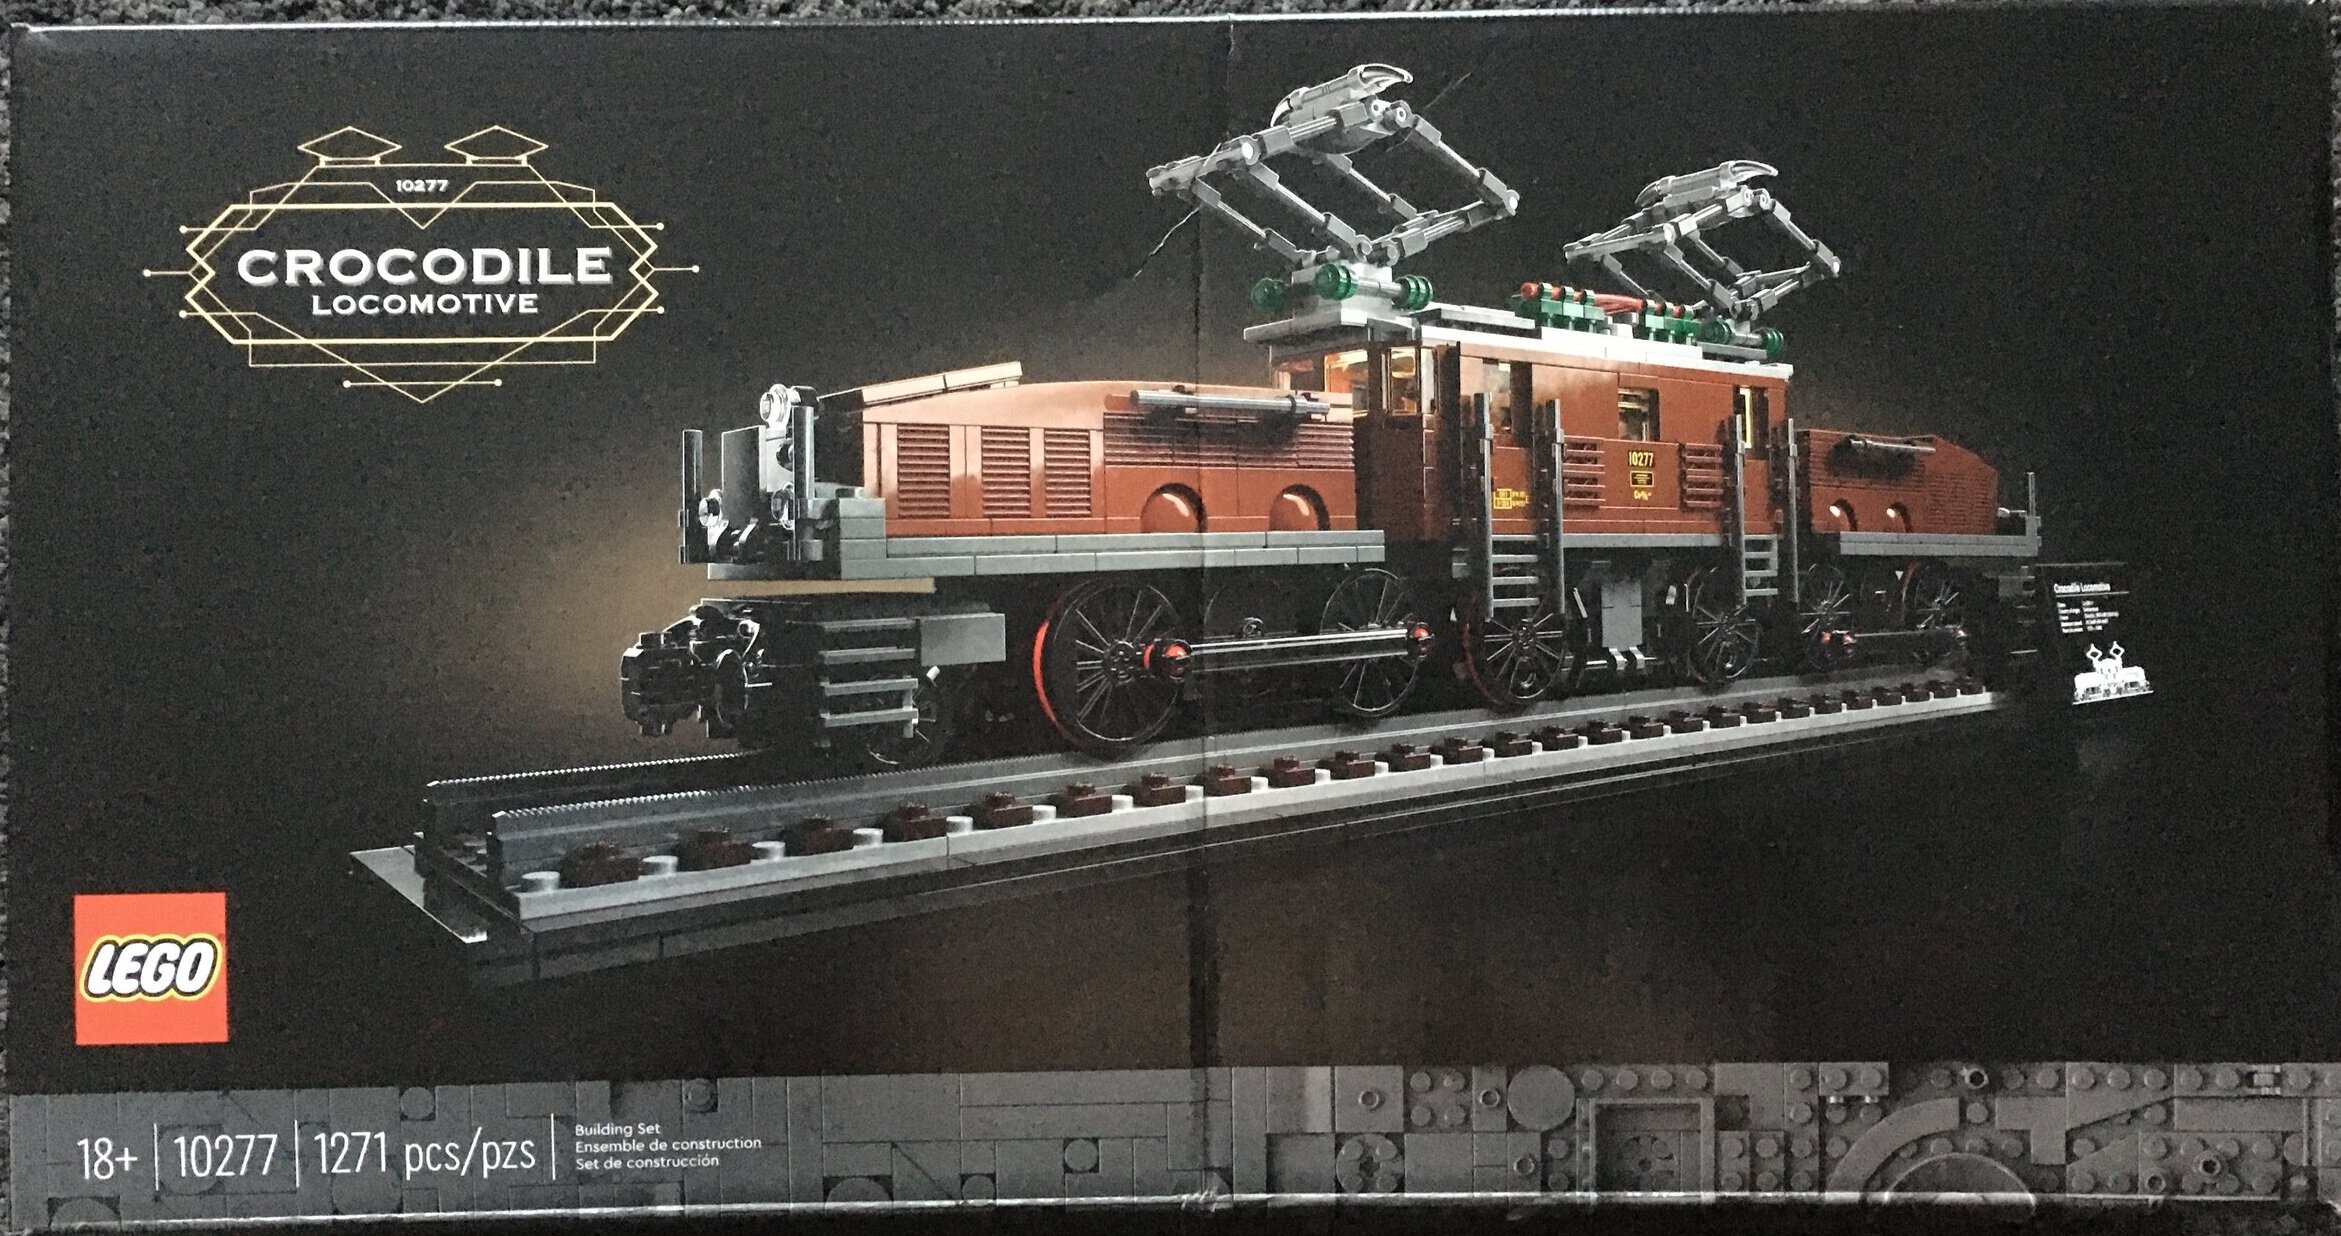
-They are aware of the concerns with the instruction issues with #10277-1 Crocodile Locomotive (dark pieces and a black background).
-Why is glossy papers used for instructions?
—It is readily available.
-What was the hardest set to make instructions for?
—It is not always complexity or a large adult set. Some of the sets designed for little kids can be harder because you have to make sure they can put it together
-The team has made changes post release of a set.
-How many people are on the instructions team?
—60

Here are the presenters for that section:

Kim

Kim

Nanna

Nanna

Thomis

Thomis

Next up Stephan Sander and Thomas Wesselski talked about Skaerbaek Fan Weekend and why it was cancelled.

Skaerbaek.jpg

Last presentation was Bjarke Schønwandt who is a quality director and works with Consumer-Perceived Quality at LEGO. I wasn’t sure what to expect on this one, but it was actually pretty interesting and I didn’t know LEGO did a lot of this stuff. I took a bunch of screen shots during this presentation so I’ll put a few up here. First, some info on Bjarke…

Bjarke.jpg

If I had to sum up what Bjarke does, the goal of him and his team is to make sure LEGO’s customers are happy. The product may meet LEGO’s standards, but if it doesn’t meet consumer standards, then it doesn’t work. Bjarke discussed how they measure consumer perceived quality. For example, they expect complaints to go up when sales increase and they expect more mistakes to happen with bigger sets.

He showed a chart with where LEGO sees its complaints. 86% come from missing pieces and 13% are faulty pieces. There rest in in a few smaller categories.

Missing pieces come from having the wrong element in the set, a customer losing the part, or missing minifigures. Bjarke noted that they see more Star Wars Storm Troopers and Ninjago figures going missing than City fire fighters. He made a quick quip that there is probably a reason for this.

Bjarke talked about systematic building mistakes. This is where people screw up the build and then have pieces “missing” later only to find out they followed the instructions wrong. I fully admit I have done this and so have you so just admit it.

Okay, I think we’re onto Q&A here…

-How often does LEGO make checks to parts during production?
—About once every 8 hours. It would be too hard to check every piece coming out of the factory.
-How often do they make changes to elements?
—Changes happen often. Some are for sustainability purposes.
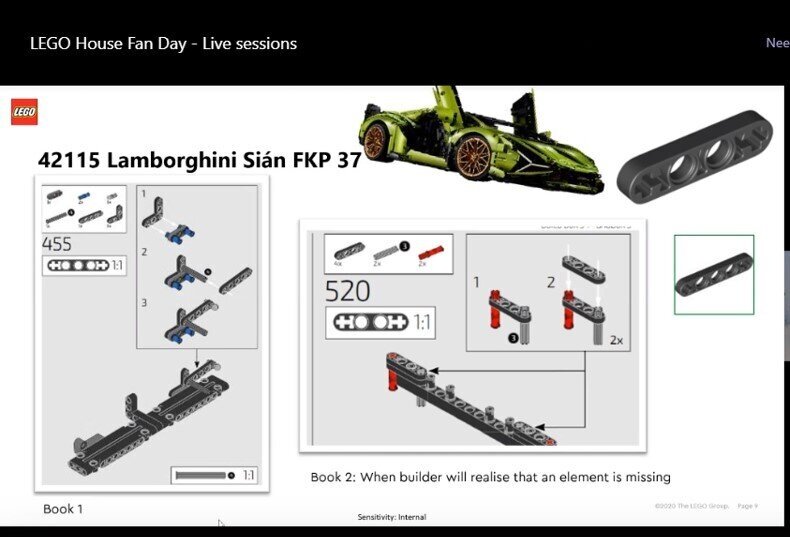
-What can you say about the LEGO Technic Lamborghini issues (#42115-1)?
—I will do my best to summarize the discussion. It was pretty detailed and technical, but it made sense when he was done. There were a few issues.
—-One element was out of spec as the color pigments burned in the mold as it was in the mold too long. They haven’t fixed the issue, but they cheated by using a different machine to get the elements in spec.
—-The other issue is related to material suppliers. They have a specific tolerance that they need the colors to be in. Then the material team has a tolerance. The tolerances can be in different directions (for a green piece, more red, more blue, more yellow, etc.) and so the supplier and the materials team can both go in different directions while still meeting spec. However, LEGO found out this didn’t work on the Lamborghini with color differences between parts next to each other as Bjarke showed us.

Bjarke conveniently brought the Technic Lamborghini with him to the presentation

Bjarke conveniently brought the Technic Lamborghini with him to the presentation

Bjarke explaining color tolerances

Bjarke explaining color tolerances

-What about the brown elements breaking?
—LEGO was aware of them too. They are working on fixing issues with suppliers and getting colors into the same quadrant of the color scale.
-A few examples of systematic building mistakes:

#1 - LEGO found a lot of people selecting the wrong piece at step #455 on the Technic Lamborghini (#42115-1). Then when they needed that piece at set #520, they didn’t have the correct piece. No one wants to disassemble at that point.

Lambo+build+issue.jpg

#2 - #75551-1: Minion has an error that many people make (including Bjarke) at step 21 and then find out they messed it up at step 79.

minions+build+issue.jpg

-What is perceived quality?
—If fans think it isn’t good, then it isn’t good.
-What other errors have you seen?
—The Ford Mustang (#10265-1) has a racing stripe that isn’t as straight as some fans want it to be.
-Why did you change the materials in the transparent bricks?
—To have more sustainable parts
-How do you get your white elements to stay white?
—Keep them out of the sun (he wasn’t sure what else to do).
-Why do some stickers crack after a while and some done?
—They don’t know.
-What are the hardest parts to make?
—The dark earth colors
-Why not just use one supplier so the colors are the same?
—Don’t want to use one supplier and then run supply chain risks if that supplier is disrupted
-How long did the Wall-E (#21303-1) fix take?
—1-2 weeks to rebuild, 1-2 weeks for instructions, production time, and then time to get it into the supply chain. It didn’t make sense to shut off a production run to do this fix and then re-start what was turned off.
-Please report issues to customer service. (I’m seeing a trend)
-Why don’t the instruction colors match the bricks you are using?
—They need to adjust the colors to make sure they can get the 3-D effect on the instructions.
-What are your biggest issues right now?
—#42115-1: Lamborghini Sian and parts sustainability


Whew! That was a lot. Some great information and very interesting. Definitely different from having designers talk which is what I’m used to seeing. I hope LEGO continues events like these and I hope my summary of the event was worthwhile for you to read if you couldn’t make the event.

Bye from Billund!

Bye from Billund!

Set Review - #31109-1: Pirate Ship - Creator 3-in-1

The LEGO® Pirate theme is not back, but they found a way to bring back Pirates in some other themes. We had the LEGO® Ideas #21322-1: Pirates of Barracuda Bay and now this set #31109-1: Pirate Ship which is part of the Creator 3-in-1 theme. The set was released in the US on 24 August 2020. It contains 1,264 pieces and retails for $99.99 which works out to $0.079 per piece. I picked it up locally here for ~$74 as the set has been out in Germany since June 2020 so the stores are running discounts 3 months later already.

Is the set worth it?

The front of the box shows the pirate ship with the Pirate’s Inn and Skull Island designs smaller and to the side. The back shows a few of the play features and shows the sets at different angles.

31109_box_front.jpg
31109_box_back.jpg

The set contains 11 parts bags. The bags are numbered one through nine. There is one of each with two numbered six. There is also a non-numbered bag with some larger parts. There are no stickers. WOOHOO!!! There are two instruction booklets wrapped in plastic. The larger booklet has the instructions for the Pirate Ship and Pirate’s Inn. The second booklet has the Skull Island instructions.

31109_contents.jpg

I started with the pirate ship. The ship instructions follow the numbered bags while the other two just have the parts, but not by bags.

Bag one builds some of the accessories to the ship. To start, there is a shark which is brick built. I like it much better than the 2-piece molded shark from the pirates theme. The tail moves along with the side fins and mouth. Plus you can adjust pieces to create movement.

There’s a barrel to store some weapons, a treasure chest with some gems (I miss the old gold coins), and then a brick build bird.

31109_build1a.jpg
31109_build1b.jpg

The set contains four minifigures. There’s a pirate captain with two pirates and then a skeleton. It’s a pretty decent spread and they are all in line with the theme.

There are 2 cannons in the set along with some 1x1 round bricks to use as ammo.

31109_build1c.jpg
31109_build1d.jpg

The second bag starts to build the hull of the ship. Unlike the Pirates of Barracuda Bay, this is a brick built hull versus a large BURP type piece as the base. I like the brick built version better I think. It doesn’t look as realistic, but it uses existing pieces versus the giant piece. It’s structurally sound too although not as big as the Pirates of Barracuda Bay ship.

31109_build2.jpg

Bag three is the stern (back) of the ship. Each half of the build is identical except for one half uses red while the other uses green. I think this was done just to help make the build process easier.

31109_build3.jpg

The bow (front) is included in bag four. it attaches on as you can see in the picture. Like the stern, it has a similar build process for each half, but one is green and the other is red.

31109_build4.jpg

The fifth bag starts to add details to the ship as a whole. There are covers to the four cannon windows and some structure for the masts.

31109_build5.jpg

The sixth bag builds the cabin at the stern of the ship for the captain. It is not as ornate as the Pirates of Barracuda Bay ship, but still has a bunch of detail in it. I like how the designers created angles in the build instead of making it square. The red, black, and gold are a great color scheme.

31109_build6.jpg

Bag seven finishes up the stern of the ship and the compartment for the Captain.

31109_build7.jpg

The eighth bag puts more on the top to include the steering wheel at the stern and more detail on the front.

31109_build8.jpg

To wrap things up, you add the masts and rigging. The masts are all brick built. They look okay, but I think I prefer the cloth ones. I do like the brick built skull and crossbones though. That’s a nice touch. The rigging is all rubberized pieces versus strings. It looks a little thick, but it works.

The front of the ship has a brick built figure. I think I like the minifigure body for the front better, but I get the idea of what they built.

31109_build9.jpg

A few more shots of the completed set. The front view shows the brick built skull and cross bones well. The other shot is a little closer on the front. There are four ports for cannons, but it only comes with two. There is no covering so you have easy access to get to that part of the ship.

31109_build 9b.jpg
31109_build9c.jpg

And for fun, here’s the ship next to the Pirates of Barracuda Bay ship. Definitely much smaller, but pretty similar in terms of rigging and masts. The brick skull and crossbones helps it to stand out, but it is missing the skull and crossbones flags.

Overall, it’s a great set. A fun build with a lot of potential for parts in future builds/MOCs. The price is decent considering the price per piece and I found it at a discount so even better. Definitely get this set if you’re looking to expand your brick pirates.

I’ll show the alternate builds in another post.

Happy building!

31109_comparison1.jpg
31109_comparison2.jpg

Motorizing the Crocodile Locomotive

The latest installment of LEGO® Train sets is #10277-1: Crocodile Locomotive. I reviewed the set last month and you can see my review here. As mentioned in the review, the set is just the locomotive and a display track. It does not include the motor so if you want to motorize the locomotive, you need to do something separate. You can attempt to motorize it on your own using a Power Functions or 9V motor on a separate car. Or you can use the new Powered UP set up that is now available. I decided to give Powered UP a try so here are my thoughts…

The first step is to remove the crew compartment from the cab area. This section comes out very easily without having to disconnect any pieces.

10277_cab.jpg

The motor is the Technic Large Motor (#88013) and it is currently retailing for $39.99 in the US. It’s a little pricey in my opinion, but the good part is you can use the motor in other models or sets.

The motor fits in very easily without having to snap it in anywhere. The only thing you have to do is remove the small Technic pin and gear. You place the motor in and then slide the pin in place. It was a pretty easy process.

10277_motor.jpg

The next piece to install is the Powered UP Hub (#88009). This part retails for $49.99 in the US. While it is a bit pricey in my opinion, you do save by not having to buy a controller or an IR sensor. The downside is you need to have a device which can handle the Powered UP app. I thankfully have a device which supports the app so that was good. The hub fits in easily and connects to the motor without any challenges. The only small concern I ran into was making sure all of the cable from the motor would fit in with the top of the cab installed. Not a major problem, but you just need to make sure the cables are arranged appropriately.

10277_hub.jpg

While assembly was easy, operations were not as easy for me. I installed some batteries and the app and expected to try it out, but it didn’t work right away. The instructions said to make sure the batteries were all the same. I did that, but it still didn’t work. I guess my batteries were too old as I bought some new ones and it worked after I installed them.

The app is easy to use with a control for the speed, a brake, and then some sounds (train whistle, conductor’s whistle, and then a bell). It also has sounds effects for starting, stopping, and braking. The downside is you can’t operate the train unless you have the app on. So don’t have any plans to send a text or check something out online.

Others noted issues with train operation. I didn’t install the rubber bands and I had no issues on the oval track I built. Granted I didn’t have it pulling any cars so that might make up the difference.

Overall, it’s a slightly expensive proposition. Given the expansion of sets using Powered UP, I’m hoping I can use the hub and motor elsewhere. One other concern is that LEGO® decides to stop supporting the app and it can’t be used anymore. We’ll have to see how the system evolves as it grows.

Or more importantly… we can hope LEGO® puts out more train sets for us to put the motor and hub in…

Happy building!

10277_ops.jpg

Set Review - #75979-1: Hedwig - Harry Potter

The next round of Harry Potter sets are out in the US. They were fully available starting on 1 September 2020. In Germany they have been out since May 2020. The price in the US is $39.99 which includes 630 pieces. The set works out to be $0.063 per piece. Thankfully, the set is already being sold at a discount here. I paid $34.01 here after a discount and the exchange rate. The dollar has been dropping against the Euro so buying sets in Europe at places like Smyths hasn’t been as beneficial for me.

Here’s the box. It’s the European version as you can see from the front where it doesn’t give the number of pieces or that the set is a “building toy.” The back of the box shows that the head can move, the wings flap, and give the dimensions of the set. It’s a 14 inch wingspan, 8 inches long, and 7 inches tall.

75979_box_front.jpg
75979_box_back.jpg

The set contains four numbered parts bags, an instruction booklet, and then a small sticker sheet. Thankfully there are only three stickers and they aren’t super small.

75979_contents.jpg

The first bag builds the base of the set and starts the stand. The base has translucent red and yellow 1x2 bricks around the bottom. It also has a sticker with the name “Hedwig” on it. You can see the start of the Technic pieces with the crank to move the wings later on.

Included in this bag is a Harry Potter minifigure and then a Hedwig minifigure to go with it. Harry has a wand and is the younger version with the short legs. He has blue hands which I assume mean he is wearing gloves. Hedwig has a small stand which is a gold telescope piece.

75979_build1.jpg
75979_minifigs.jpg

The second bag starts to build Hedwig’s body and you can see some of the Technic elements included.

75979_build2.jpg

The third bag starts to expand on Hedwig and builds a letter for Hedwig to carry. The letter has three stickers. Two create the envelope and once is the red seal for the envelope.

75979_build3.jpg

The fourth bag finishes up the set. The first picture shows the left wing and left part of the tail finished up. The next picture is the final figure from the back. You can see the wings spread out and the tail feathers split out.

75979_build4a.jpg
75979_build4b.jpg

Here are a few other views of the final model. Hedwig’s eyes are printed to come up with the color which I think works good. The head rotates although it doesn’t move with the crank. I had no issues with the Technic mechanism to make the wings move. They don’t move smoothly, but it’s not bad considering it is mechanical versus an actual owl.

Without having a picture of Hedwig from the movie to compare it to, this Hedwig seems to be in line with the design from the movie with bits of black mixed in with the white.

I’m a fan of this set. It seems to be in line with some of the larger model Star Wars sets like R2-D2 or BB-8. In addition the movement adds to the set besides just building Hedwig in a single pose.

The set isn’t priced too high and I was glad to get it on sale. Not bad considering it is a licensed set.

Overall, I’m glad I picked this one up. I hope LEGO continues on this trend of different scaled models and I look forward to digging into the Harry Potter theme this year.

Happy building!

75979_build4c.jpg
75979_build4d.jpg

Set Review - #21322-1: Pirates of Barracuda Bay - Build #15 - Ideas

I reviewed the first part of the build up through bag 14 here. It included everything to build the pirate ship turned living quarters set up which was very impressive. There is one more bag that comes with the set (#15) and it helps you convert the set into a ship.

The instructions start with removing a lot of pieces. You take off the plant life and some of the boarded up parts of the ship. Then you fix up some of the windows. Next it is the sails which look great when unfurled! Then you can add some containers for supplies and done. It didn’t take too long to make the conversion.

I put the minifigures on the ship and added the cannons for fun even though they’d probably be below decks. For the pictures I included the row boat and the shark.

Looking down from the top, it’s a pretty large ship.

21322_15a.jpg

Here’s a side shot. The ship is made up of the three sections, but it is pretty sturdy to pick up and move. Between the Technic pins and ball and joint clips, you also add a few plates/tiles so help secure it. Having some of the strings are a nice touch to make it look like you have some rigging for the masts. I was glad the string has studs on either side and we didn’t have to tie knots or anything.

21322_15b.jpg

One last picture from a forward angle. The downside is the sails only have the color on one side. It looks great from the angle pictured, but from the other side it doesn’t look as good. Not a huge issue, but a bit of a nit pick.

Now I just need to decide how I want to keep the set. Should I have it as a ship or as the living quarters on the island? What are you going to do?

For now I’ll leave it as a ship for a reason you’ll see soon…

Happy building! ARRRR!!!

21322_15c.jpg

Set Review - #21322-1: Pirates of Barracuda Bay - Ideas

It’s the 30th LEGO® Ideas set and a throwback to the classic Pirates theme from the 1980s and 1990s… The Pirates of Barracuda Bay was released in the US on 1 April 2020. It contains 2,545 pieces, contains 10 minifigures and retails for $199.99. At that rate, it is $0.079/piece.

I recall playing with Pirate themed sets as a kid and this set played right into that nostalgia with similar minifigures, the skull and cross bone flags, and even the parrot. The front of the box is even designed to look similar to the original Pirates sets. The fan designer for this set is Pablo Sanchez of Spain and he had that same idea for this set where it would be a chance to highlight the past theme that he played with as a kid.

Before I move on with the review, you can see the LEGO® Designer video here.

Onto the review… as mentioned the front of the box has the Ideas branding, but also looks like the historical Pirates sets from back in the day. Awesome! The back shows some of the details of the set, gives dimensions, and shows that you can assemble the set into a ship.

21322_boxfront.jpg
21322_boxback.jpg

The sides of the box… the US version gives the French and Spanish names and includes a grouping of the minifigures.

21322_side.jpg
IMG_1243.jpg
21322_box.jpg

I counted 25 numbered bags labeled one through 15. There are three unnumbered bags and then two large axles not in bags. There is a 459 page instruction book. It includes info on the story behind the set, details on the fan designer, details on the LEGO® designers, details on the minifigure crew, and then the instructions.

21322_contents1.jpg
21322_contents2.jpg

The sails are included in a separate package, but mine was shoved in the bag. This didn’t seem to be a problem as you roll up some of the sails for the initial build anyways. Also, and I haven’t tried it yet, I read on another blog that you can use an iron to flatten out the sails when you want to attach them to the ship part of the build. I’d recommend placing a towel or another cloth over the top first before ironing just to be safe. I wouldn’t go super hot either. Has anyone tried this yet?

21322_sails.jpg

I’m not going to go into great detail about each bag, but I tried to put pictures of most of the steps in so you could see how it comes together.

Bag one builds part of the island and includes a small boat and Port (one of the Broadside Brothers). I like the new palm tree design which includes minifigure heads as coconuts. There are also a few brick formations which appear to be ancient native sculptures from whatever island the crew has landed on.

Bag two adds some decking and starts to assemble the first part of the ship (middle section). The ship comes with some large BURP type pieces (Google it if you don’t know BURP). While some may prefer to build out a ship, I’m okay with the larger pieces as it makes the ship structurally more sound in my opinion.

21322_build1.jpg
21322_build2.jpg

Next up is the interior of the center part of the ship. It includes a few beds, an eating area with some extra cups and bottles, and some candles for light. This bag comes with the first female member of the crew named Robin Loot. Back in the day they were full up male crews so I like the addition of female pirates.

21322_build3.jpg

Bag four finishes up the interior and mostly covers the top. It also adds some of the plants that have grown since the crew has been stuck there. The cannon port holes are now windows. It works for the island build, but it would have been cool to have enough cannons for the ship when you re-build it later.

Of note, there is a printed flag piece that says “Jose’s Inn” in reference to the fan builder’s father who introduced him to the Pirate theme back in the day.

21322_build4.jpg
21322_build4a.jpg

The fifth bag finishes up the center section of the ship. It adds the masts and rigging for the crew to climb up. I am a big fan of the large sized pirate flag. This section of the ship attaches to the island section and the set starts to come together. This bag also includes Jack “Dark Shark” Doubloons who is a small minifig (short legs) member of the crew.

No complaints so far and it has been a great set to put together. I sadly didn’t have a lot of time to sit and crank it out so this was built over a few days. I learned that this is not a set to pick up and put down multiple times. Easy to put back together though.

21322_build5.jpg
21322_build5a.jpg

The sixth bag builds the other part of the island with another palm tree, some decking, another crab, and a pig eating some 1x1 round plates. It also includes a shark which seems to match the design of the original sharks from back in the day.

21322_build6.jpg

The seventh bag finishes up the island portion. It adds some food storage with a baguette, some bananas, and a pineapple. It also includes some tools and extra oars. This bag includes a skeleton wearing the original imperial army hat who is hidden under one of the decks. The minifigure here is Tattooga according to the instructions.

On the building technique front, There is a wall built with a window and the builder angled the window so it is not square with the bricks. It is slightly angled and the spaces are filled in well with bricks. You can see the window in the second picture below.

21322_build7a.jpg
21322_build7b.jpg
21322_build7c.jpg

Bags eight and nine build the bow of the ship (front). It starts with a BURP piece and that is built up with some additional pieces to make it more ornate. The yellow railings with the black really make it stand out. An anchor is attached here and you can move it up or down which is a fun detail.

21322_build8.jpg
21322_build9.jpg
21322_build9b.jpg

The tenth bag finishes the bow with another mast, a parrot, the minifigure "Quartermaster Riggins, and a partial minifigure as the front figurehead. You get a smaller pirate flag on the top of the mast.

You also finally use up the last of the long Technic axles. This was a good thing as I was done digging through the box to try and find them.

21322_build10.jpg

Bags 11 and 12 build the stern of the ship. Bag 11 includes the pirate Starboard.

21322_build11.jpg
21322_build12.jpg

Bags 13 and 14 wrap up the stern build. This includes Captain Redbeard’s office which is rather ornate and includes a bust statue, a treasure chest, a fancy desk chair and desk, and a map. There is a fold down bed which doesn’t seem to fit with the rest of the office, but we’ll take it. There is another large pirate flag on the back of the ship which is great. Bag 14 comes with the pirate Lady Anchor. It adds a top to Capt Redbeard’s office and a door. The steering column is on top, but the wheel itself is dangled off the ship on the back. There’s also another cannon on this section of the ship.

21322_build13.jpg
21322_build14.jpg

And then you put the stern on the second island section and connect the two sections and it looks awesome! I will do a separate post for bag 15 and the ship, but up to #14, this was an incredible build. I enjoyed the techniques, piece usage, the creativity in some of the things hidden in the set, and the story behind the set. The set has a lot of pieces and the price per piece isn’t bad, but $200 is a bunch to spend on a set. I used VIP points I’d been saving up so it was easier to swallow the cost, but something to consider going forward (especially if you have your eyes on some of the other bigger sets recently released).

This set has a lot of potential for expansion, re-build, and adding to larger pirate scenes. Well done LEGO and thank you!

You can see my post on build 15 and the island hideout turned ship here. .

21322_14d.jpg

Set Review - #21319-1: Central Perk - LEGO® Ideas

LEGO® Ideas set #27… #21319-1: Central Perk… cue the intro theme… and roll it!

Okay, I don’t do videos and I don’t have rights to stream that music, but you get the idea.

Released 1 September 2019, this set contains 1,070 pieces. It retails at $59.99 in the US. That works out to $0.056/piece. This set is based on the TV sitcom “Friends” which aired from 1994 until 2004. It captures the coffee house the gang used to meet up at very often. And for whatever reason, after 27 LEGO® Ideas sets, this is the second one of a TV studio. The first was #21302-1: Big Bang Theory (LEGO® Ideas set #10 from the 2015 to 2016 time frame).

The front of the box shows the full set with the minifigures highlighted on the bottom. The back provides a few close ups of some of the details. For fun, I included pictures of the sides so you can see some of the details to include “how you doin” and smelly cat.

21319_box_front.jpg
21319_box_side.jpg
21319_box_back.jpg
21319_box_side2.jpg

The set contains six parts bags, a small sticker sheet, and the instruction booklet. Like some of the previous Ideas sets, the instructions contain some information about the TV show, details about the fan designer, and details about the LEGO set designer and graphic designer.

21319_contents.jpg

Five stickers total. Not too bad. There are a bunch of printed elements so I can’t complain too much.

21319_stickers.jpg

Bag one builds the base of the TV studio. Nothing overly exciting here other than it’s great that it is not just a rectangle or square, but they included some angles.

21319_build1.jpg

The second bag builds the wall where the coffee bar is located. Lots of small little details are included with different cups and containers which helps it to match the scene. The menu board is printed versus a sticker which was a bonus.

21319_build2.jpg

Bag three builds another wall and starts to build the wall that goes around the angle with hinge bricks. The interior has some decorations to include the standard 1x2 tile with a bridge picture used in numerous other models. Brickset says it is in seven sets to include four modular buildings and then #21302-1: Big Bang Theory.

I was curious how the angled wall would be created. The designer used a mix of tiles and studs on the floor. Then the wall uses hinge bricks. The geometry was done just so in order for the hinge bricks to line up on the spots where there are studs in the base. Clever design in my opinion.

21319_build3a.jpg
21319_build3b.jpg

The fourth bag includes the coffee bar counter, some additional decorations, and a table and chairs. What stood out to me was how the patterned rug was made. Many of the modular buildings use tiles to create patterns on the floor. Here the designer built a design using plates and bricks and then you lay that on its side. It does not attach to the set in anyway, but it fits perfectly and won’t come out unless you tip the set over. They also included some SNOT pieces so you can connect the furniture or minifigures to the rug.

21319_build4.jpg

The fifth bag completes the wall in the “front” of the cafe. It has the angled wall, two doors, and the window with logo. The window with logo is printed and thankfully not a sticker. This part of the build also includes a couch for Phoebe or others to perform at with a microphone, stand, and keyboard. The keyboard is made with a 1x4 tile with printed keys. This section includes another “rug” with bricks placed on their side.

I also found it interesting how the wall hooked into the floor with clips to achieve the angle. A cool building technique I wouldn’t have thought of for sure.

21319_build5a.jpg
21319_build5b.jpg

The last bag builds the main part of the cafe you are used to seeing on the show… the couch and chairs where a lot of the discussions are held by the main cast members. This section of the build includes another “rug” built by laying bricks on their side. On top is a couch, an arm chair, two other chairs and a coffee table. The table has a reserved sign (with a sticker), a newspaper, and some studs to put cups or whatever else you want on the table.

This bag also includes three poles that would hold up the ceiling (if it wasn’t a studio) and then two brick built studio lights.

21319_build6.jpg

This set comes with seven minifigures. The top row from left to right in my picture is:

Chandler Bing (with laptop)
Phoebe Buffay (with guitar)
Gunther (with broom)

The bottom row of my picture from left to right is:

Joey Tribbiani (with pizza box, pizza slice, and a bag)
Monica Geller (with a chocolate pastry as I guess they didn’t have anything else for her to hold)
Rachel Green (with tray and mug)
Ross Geller (with… nothing)

I didn’t do a deep comparison between pictures of the actors and the minifigures, but from a top level I think the designers did a good job capturing the cast. You can easily discern which minifigure is which character and they are wearing outfits you remember from the show.

21319_minifigures.jpg

Here’s the full set with the minifigures inside. Overall it’s an interesting build with some good techniques. The piece count is high considering the price although a lot of the pieces are smaller. Otherwise, the price isn’t too bad. I would have preferred to pick this one up on sale, but it has yet to go on sale (that I have seen). The good thing is that the initial rush that led to this set being out of stock is over and it is pretty easy to find or pick up online.

From a LEGO fan standpoint, there was a great post on thebrickblogger.com about custom Central Perk sets. A number of fans took the set and then built full up buildings to go with the set. I don’t think you ever see the full outside of Central Perk so it’s cool to see what some people think it looks like. It’s something I will add to my long list of buildings to come up with someday.

If you’re a fan of “Friends,” definitely grab this set. It definitely meets the intent of the show and captures the likeness of each of the characters.

This might not be the set for people who aren’t fans of the show, but thankfully there are some great pieces for MOC builders to use elsewhere.

What are your thoughts on this one?

Happy building!

21319_final.jpg

Set Review - North Eastern Style Caboose - Brick Model Railroader

I enjoy building different LEGO themes, but when it comes down to it, I really trains make it to the top of the list. LEGO hasn’t offered much for a while and hopefully the new Crocodile Locomotive is a start towards more brick trains. Despite LEGO not diving into trains, the fan community has done their best to pick up the slack. One such group has a website called Brick Model Railroader. The site has been built by a group of LEGO train fans from around the world. You can read about them and find links to some of their work here. The team is trying to promote the hobby. They want to show other model railroad fans that the “L Gauge” is a real thing. They’ve built a standard for everyone to follow so people collaborating on a train display can build separately and then assemble it all at a show and have it fit together.

They’ve also done something great for fans like me who are not good at building MOCs. They’ve turned their detailed MOCs into sets that you can customize. You can peruse their shop here. I purchased a few of the sets and today I’ll take you through one of them.

Let me back up a bit. I purchased four sets and three decals. I received an order notification and shipping notification rather quickly. The package arrived promptly and was possibly one of the best packed items I’ve ever received. The box size was right and the sets were wrapped in bubble wrap. There was zero damage. Props to the BMR team! An order sheet specified that I would be receiving one of the decals in the mail directly from OKBrickWorks. It showed up a few days later.

Onto one of the sets. I ordered the North Eastern Style Caboose for $40. It arrived in the box pictured below. It is a plain white box with a BMR sticker affixed to the top.

bmr_caboose.jpg

Inside were the parts, an instruction book, and the decals I ordered. No bricks? Correct. You are buying the instructions, but they aren’t just any instructions. They provide the design for you to match multiple historical versions of the car based on what you want to build. Then you can use your own collection or purchase bricks to build one or multiple versions of the set. So not as easy as buying a LEGO produced set, but lots more options.

BMR_parts.jpg

The LEGO purists will freak out at this point, but the set includes some custom parts. GASP! It includes the train wheels with ball bearing axles and then some custom clips. I have not tested out the wheels yet, but BMR advertises that they run much smoother and cause less friction than standard LEGO train wheels. So we’ll see…

BMR_wheels.jpg
BMR_parts.jpg

The instructions are the key to the set. They come in an individually wrapped bag and weren’t crammed in like they usually are in LEGO sets. The first few pages contains some details about the actual caboose to include when it was first built, where it was used, and some of the stats about the caboose itself. The actual build instructions compare with ones you would see in a LEGO set where it shows you the pieces you need and a picture of where you are at with the build. I haven’t actually built the set so I can’t verify that they are good or not.

The back of the instructions comes with a bill of materials stating all of the pieces you will need for the set. For customization purposes, the bill of materials lists what pieces go on the inside, what goes on the outside, and which pieces should be specific color (mostly black). This way you can build based on actual cabooses or come up with your own color scheme. If it wasn’t helpful enough, the instructions also list the part numbers on BrickLink for your ordering purposes.

Last bit of usefulness to report… included in the instructions are details about replacement pieces to use if specific pieces aren’t available in another color. I found that useful on another set I purchased as the color I picked didn’t have a few of the pieces available in that color.

BMR_instructions.jpg
BMR_instructions2.jpg

The last bit of detail I ordered were some decals. These are printed by OKBrickWorks and cost $7.50. I purchased a Conrail version as I remember Conrail trains going through my town as a kid. I didn’t buy decals for all of the cars I purchased, but I figured I’d try them out on a few. As a kid, I built plastic model aircraft. I was never good at the decals that went on them so we’ll see how this goes.

decals1.jpg
decals2.jpg

Overall, I’m impressed with the set and look forward to building it. I’m holding off on the build process as most of my collection is in storage. I want to raid my own parts before I go out and buy more. I’m excited to see what the final end product looks like and can’t wait to someday run it on a train display somewhere. The set is a bit pricey considering you aren’t getting all of the parts, but you are paying for the time and effort to put a custom build into instruction form with a bill of materials for you to repeat as you desire. The ordering and shipping process was smooth and Cale took the time to make sure the sets showed up in pristine condition. Props to the BMR team for a great set!

Have you purchased a BMR set before? What are your thoughts?

Happy building!

Set Review - #10277-1: Crocodile Locomotive - 18+

The Crocodile Locomotive was released in the US on 3 July 2020. If you follow what I write, it took quite a while for it to finally get shipped here, but thanks LEGO for the extra 1,000 VIP points. This set contains 1,271 pieces and retails for $99.99. That works out to $0.079/piece which isn’t too bad in my opinion.

You can watch the official LEGO Designer video on YouTube here.

If you want a review from someone who is a big train fan and into LEGO trains, you can see the Brick Model Railroader’s review at their site here.

Finally, one last plug. There have been a lot of comments about this set in terms of its design. JANGBRICKS has a video where he explains some of the fixes he’s made. You can give your own opinion, but feel free to use his fixes or modify your set as you desire.

Onto the review!

Here is the box. It is the new 18+ designed box. It no longer shows the play features or minifigures. Instead it highlights the design with some shots showing the detail. The title of the set is listed on the front with a design around it. Finally the bottom of the box has a dark gray stripe of greebling which lists the 18+, set number, and number of pieces

10277_box_front.jpg
10277_box_back.jpg

The box contains nine numbered parts bags (2 one, 2 two, 2 three, 3 four), an bag without a number containing the large plates and train wheels, and then the instructions and sticker. The set has mostly printed elements, but the data plate has a large sticker for you to place.

10277_contents.jpg

The first set of bags builds the base. The base reminds me of the bases on Architecture themed sets with the one stud wide black tile around the edge. Instead of using the standard LEGO track, you build the track yourself which takes a bit of time repeating the steps and placing a lot of 1x1 plates. It is interesting that they chose to put tiles in the center, but plates on the outside of the rails. I wonder why that was?

There are two 1x4 bricks in the center for you to attach the locomotive to for display purposes. Also, you can see the sticker on the ramp piece which describes the set.

10277_build1.jpg

Here’s an up-close look at the sticker. I think I was mostly able to center it and I didn’t get any large air bubbles. There might be one small one, but it is not noticeable at a quick glance.

This set comes with two minifigures. A male with the old style had and a female with black hair (no hat with hair?). They both have the same torsos and legs. As shown, they have some tools available to hold which can also be stored inside the train. Nothing super exciting about these minifigures, but no complaints from me on them either. They go well with the set.

10277_build1a.jpg
10277_minifigs.jpg

The second set of bags completes the center section of the locomotive. The build starts with the Technic elements needed to motorize the locomotive (if desired). You then build the cabin area and the control areas for the minifigures.

While the set is an 18+ set, the build was not overly challenging. This part went together pretty smoothly for me. I was thankful to not have stickers to place. From this picture you can see the fans in the compartment and then two printed tiles on the side of the section which repeat on the other side.

10277_build2.jpg

Two more pictures… first is a closer shot of where the minfigures sit. Each figure has a wheel, two dials, and a brake handle. There is also a clip directly behind them to store the toolbox and wrench. Not a lot of comfort here and don’t lean back or let the train stop fast to have a tool hit you.

The second is the crew seating area. This section pulls out easily so you can place the motor and Powered Up Hub inside the compartment. I like how easy this is as compared to the Emerald Night (#10194-1) which required some decent overhaul to motorize it.

10277_build2a.jpg
10277_build2b.jpg

Here’s a peak inside the compartment without the crew positions in place. You can see the Technic elements where the motor will go. Everything went together pretty easily and seems to run smoothly without the motor connected so we’ll see what happens with the motor.

10277_build2c.jpg

The third set of bags completes the front and back of the compartment as well as the top. Most noticeable are the pantographs on the top. I placed one in the up position and one lowered. The pantographs took a bit of time to piece together and were a bit challenging to do given all of the small connections you have to make. They are pretty fragile as well so not something you’d want younger kiddos playing with. The top also had a bit of color with the red whip pieces as wiring and then a few spots of dark green to liven up the gray and brown color scheme.

The front and back have a one piece window frame that you insert a one piece clear window into. It makes the model look smoother and I can see why they did it, but it would have been interesting to see how you could have brick built the window screens.

10277_build3a.jpg

Here’s a side view of the center section.

10277_build3b.jpg

The last set of bags finish the set. They also build the front and back sections of the locomotive. These builds are identical and I built both sections at the same time. It was a bit repetitive, but for the most part this was the most advanced part of the build that provided a bit of challenge. Nothing crazy, but it seemed like more pieces and the use of different techniques.

I saw a few reviews where there were complaints about the black background of the instructions and the dark colored pieces. I concur that this was a bit of a challenge, but I managed to figure out the build okay.

10277_build4.jpg

Two more photos… one a side view of the whole locomotive and one is a front view so you can see the detail there.

Overall, I am pumped to have another train to add to the collection. It’s not my first choice for a set, but I can’t complain about having one. The build is not super challenging, but it was technical enough to keep me interested. The color is a bit bland, but that’s the least of my complaints. The price per piece is decent and the initial sell out seems to be over on Shop @ Home.

I can see why people have complained about the gap between the cab area and the front/back sections. It could have been easily fixed in the design process, but I agree that if it is that big of a deal to you, fix it yourself. For now, I’m okay with the locomotive as is, but I may look to change it in the future.

I have a motor and hub finally, but I haven’t installed it yet. Stay tuned for that post and I’ll give an assessment on how the locomotive actually runs. (here is my post on motorizing the train)

In the meantime, happy building!

10277_final.jpg
10277_final1.jpg

Set Review - #71027: Series 20 Collectible Minifigures

I just posted my review of #71026: DC Super Heroes and now once again I am late to the game. Series 20 was released back on 19 April 2020. The packs retail for $4.99 each. As I mentioned previously, I don’t want to pay that much so I have been waiting for discounts. I bought a few from LEGO.de here in Germany. The price here is 3,99€ so the few that I purchased there worked out to be around $4.30 to $4.50 after the exchange rate kicked in. Not the best price, but I’ll take the slight discount. I then found some locally for $3.45 and then Amazon.com had them for $3.44.

The bottom line is if you enjoy collecting the collectible minifigure series sets that LEGO produces, be patient with your purchases and you can get them at lower prices.

I’m not going to spend time talking about each minifigure. Instead I will give some overall comments.
-I’m a fan of the non-licensed collectible minifigures and I like the creativity that goes into them and the ability to use them in MOCs or with other sets.
-The costumed minifigures have been great through the years and LEGO didn’t disappoint with Series 20.
-I’m still frustrated with the dispersal of minifigures and how it always seems like you get extras of the ones you’d want least. I don’t need that many Super Warriors!
-Good to see that half of the series is female characters. As a kid, I remember arguing over who got to play with the few female minifigures that we had because they just weren’t made a lot. Now we have a bunch which is awesome!

That’s it on this one. I look forward to a late review again on the next collectible minifigure series.

Happy building!


Piñata Boy and Drone Boy

Piñata Boy and Drone Boy

Viking and Tournament Knight

Viking and Tournament Knight


Martial Arts Boy and 80s Musician

Martial Arts Boy and 80s Musician

Breakdancer and Athlete

Breakdancer and Athlete


Pajama Girl and Brick Costume Guy

Pajama Girl and Brick Costume Guy

Super Warrior and Pirate Girl

Super Warrior and Pirate Girl


Sea Rescuer and Space Fan

Sea Rescuer and Space Fan

Llama Costume Girl and Pea Pod Costume Girl

Llama Costume Girl and Pea Pod Costume Girl