LEGO Ideas

Set Review - #21334-1: Jazz Quartet - Ideas (#42)

We’re at LEGO Ideas set #42 already!?!?!?! What?!?!?! When did that happen?

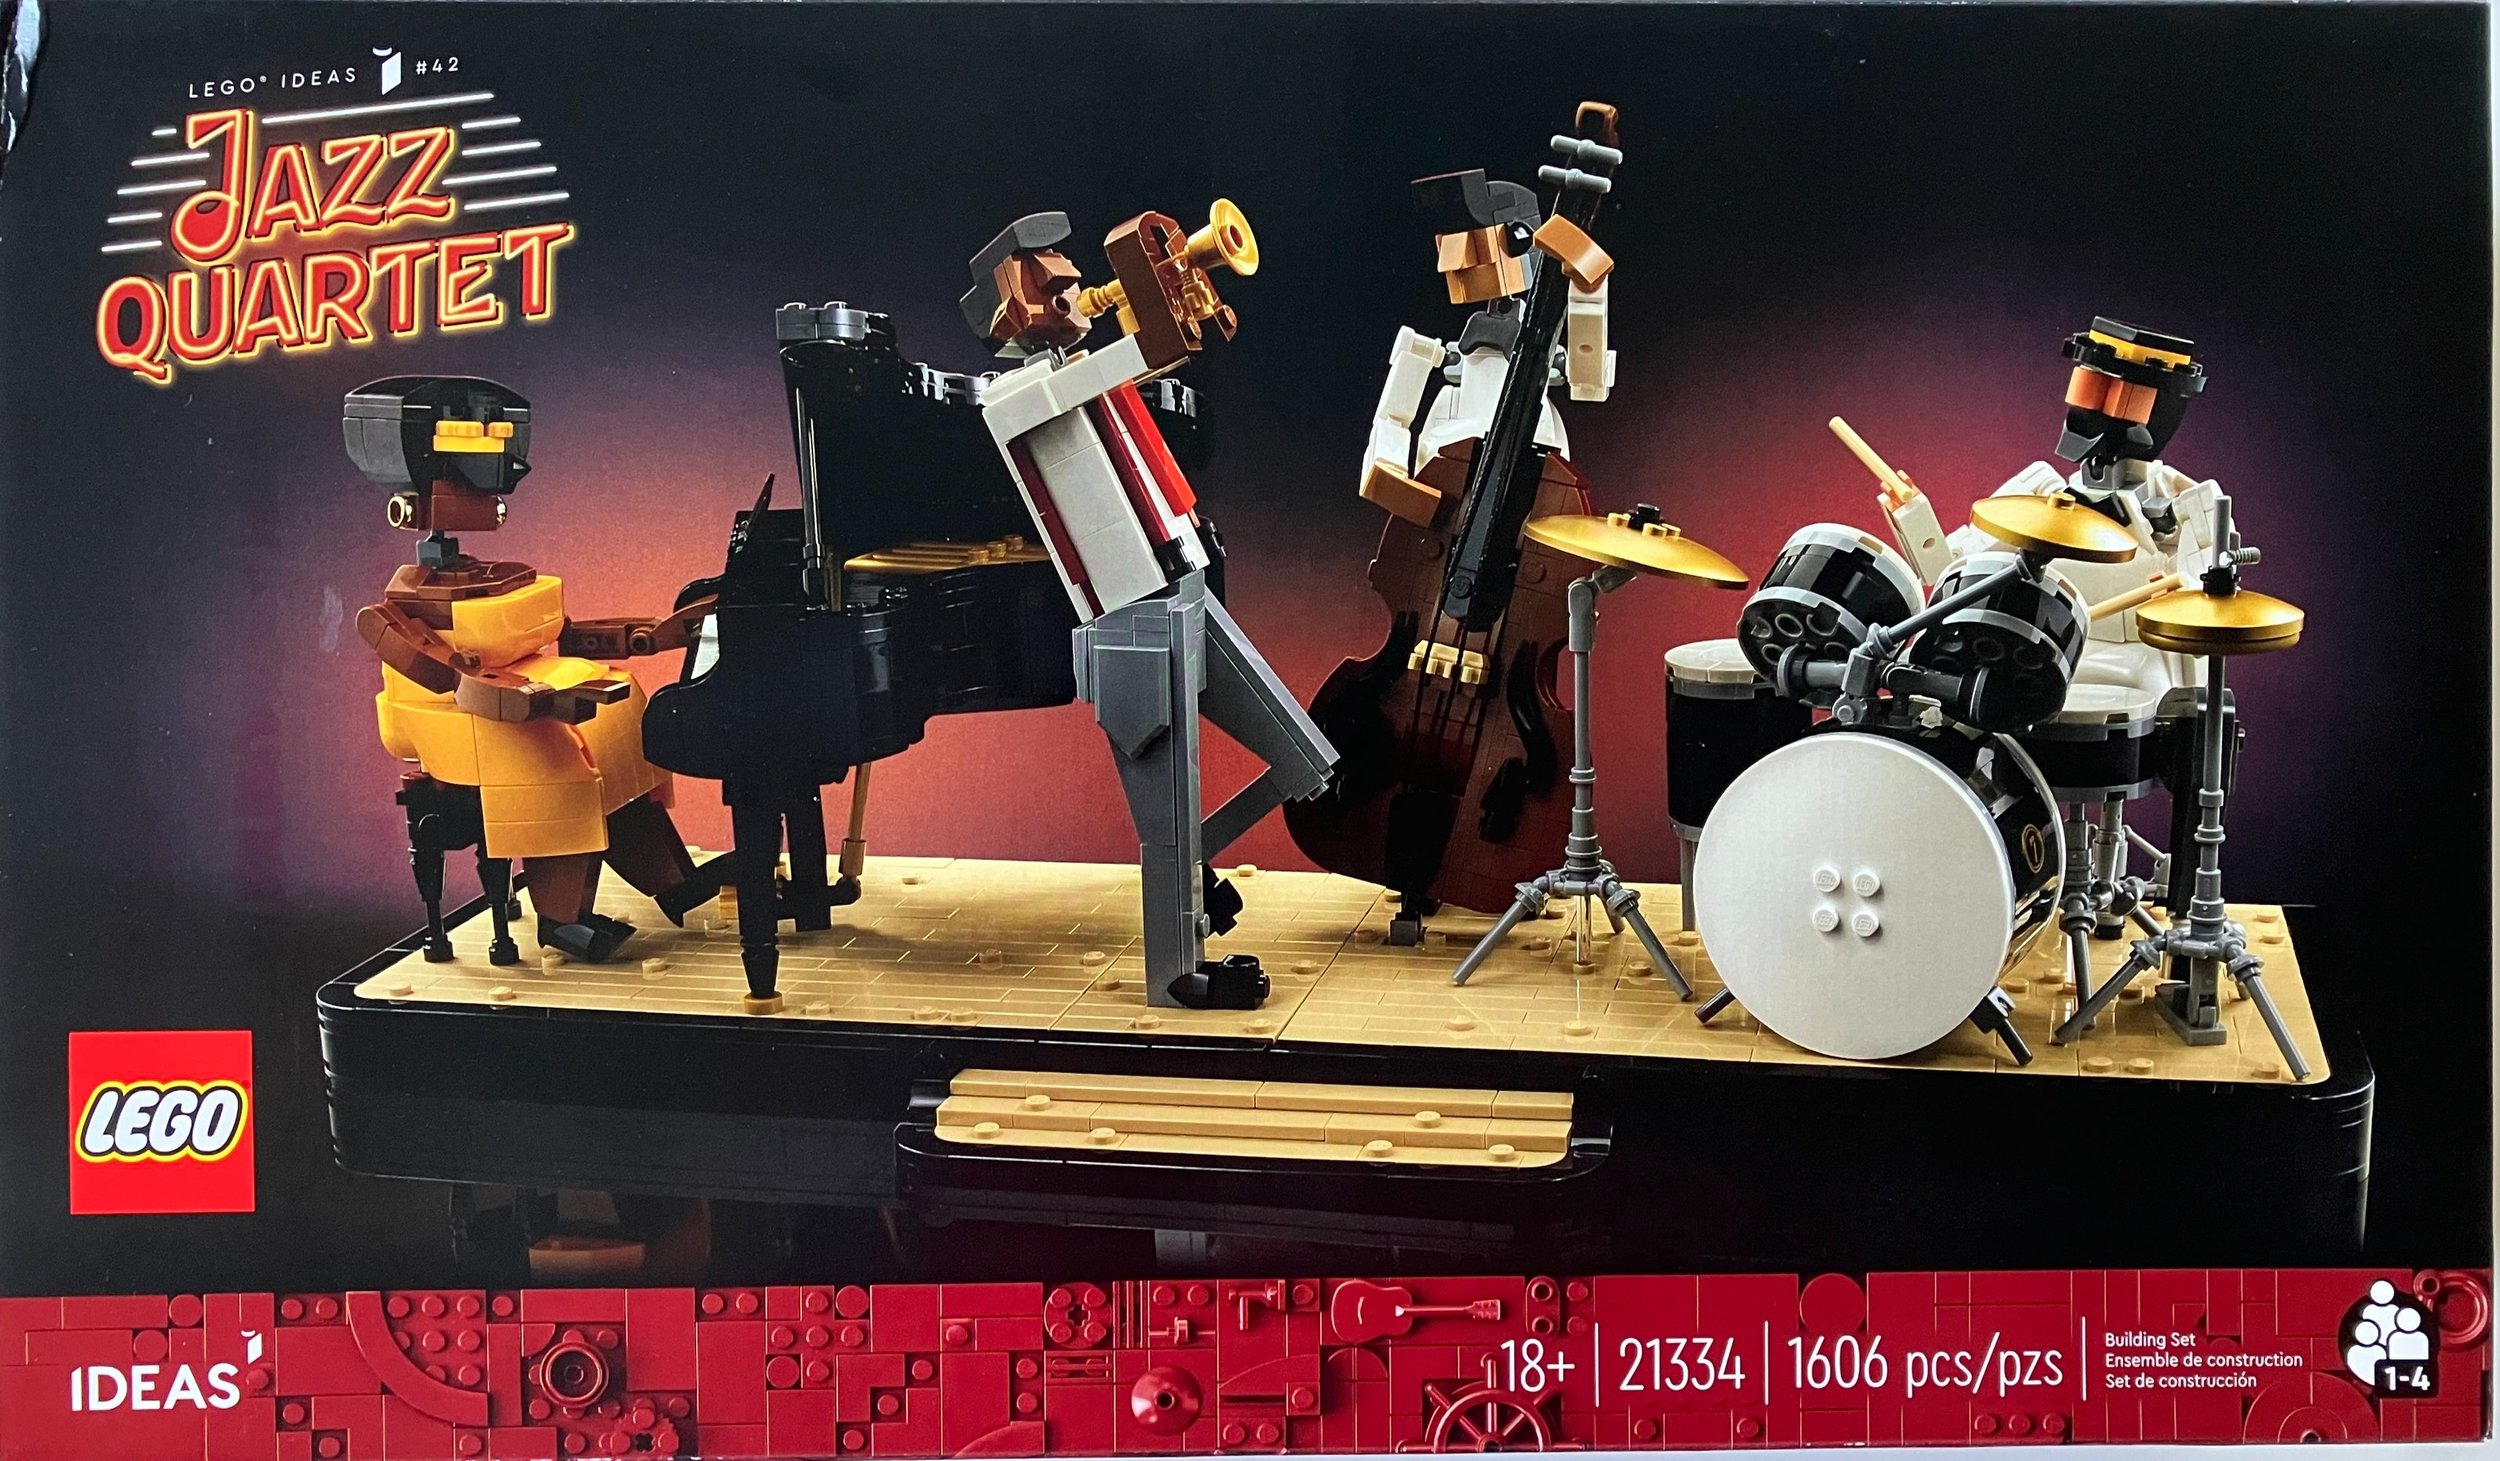
This is #21334-1: Jazz Quartet. It was released on 29 June 2022 in the US for $99.99. The set contains 1,606 pieces which works out to $0.062 per piece. This set is very different from any other we’ve seen. I don’t think we’ve had a set with figures that look like this ever (or at least that I can recall) and the jazz/music theme is something out of the ordinary from what we usually see. Let’s dig into this set…

The box has a fun design with the 18+ banner and then a cool looking neon light style title in the top left corner of the front of the set. Then it shows the set and it looks like there’s a spot light on the them as if they are performing. The back shows how you can break apart the stage to re-arrange how the figures are positioned. The back also shows the dimensions and how the set looks in an actual room.

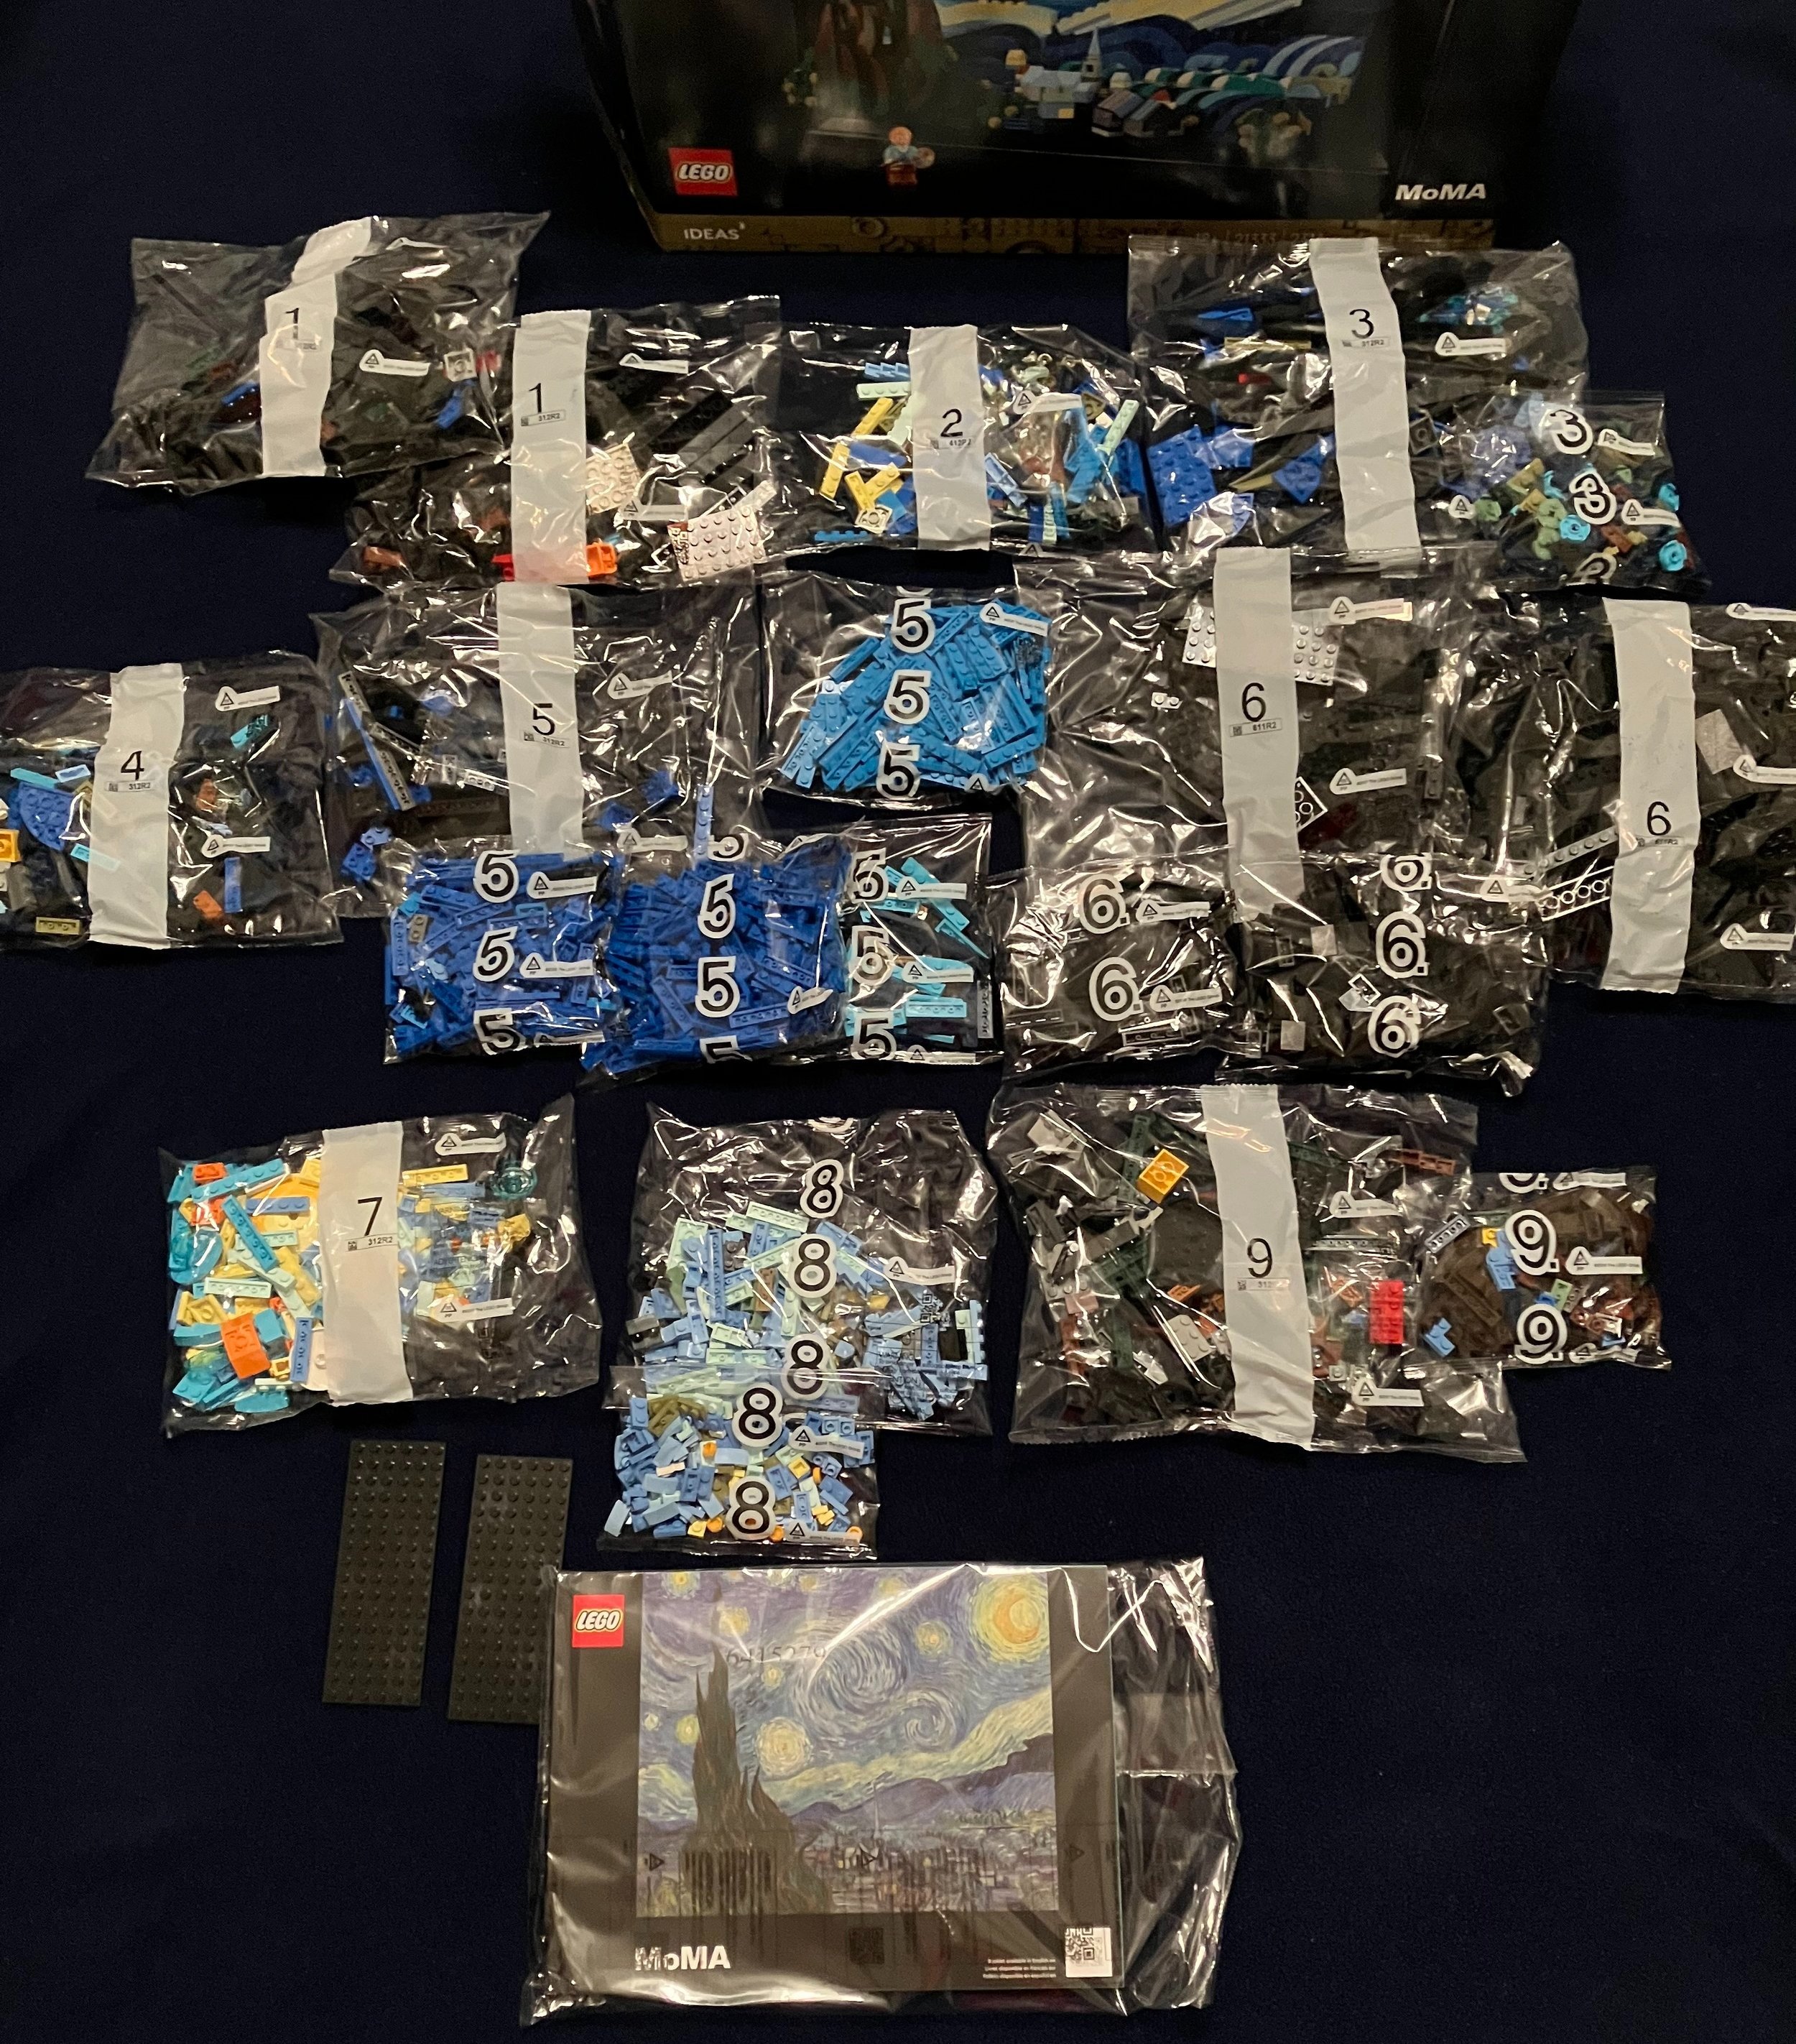
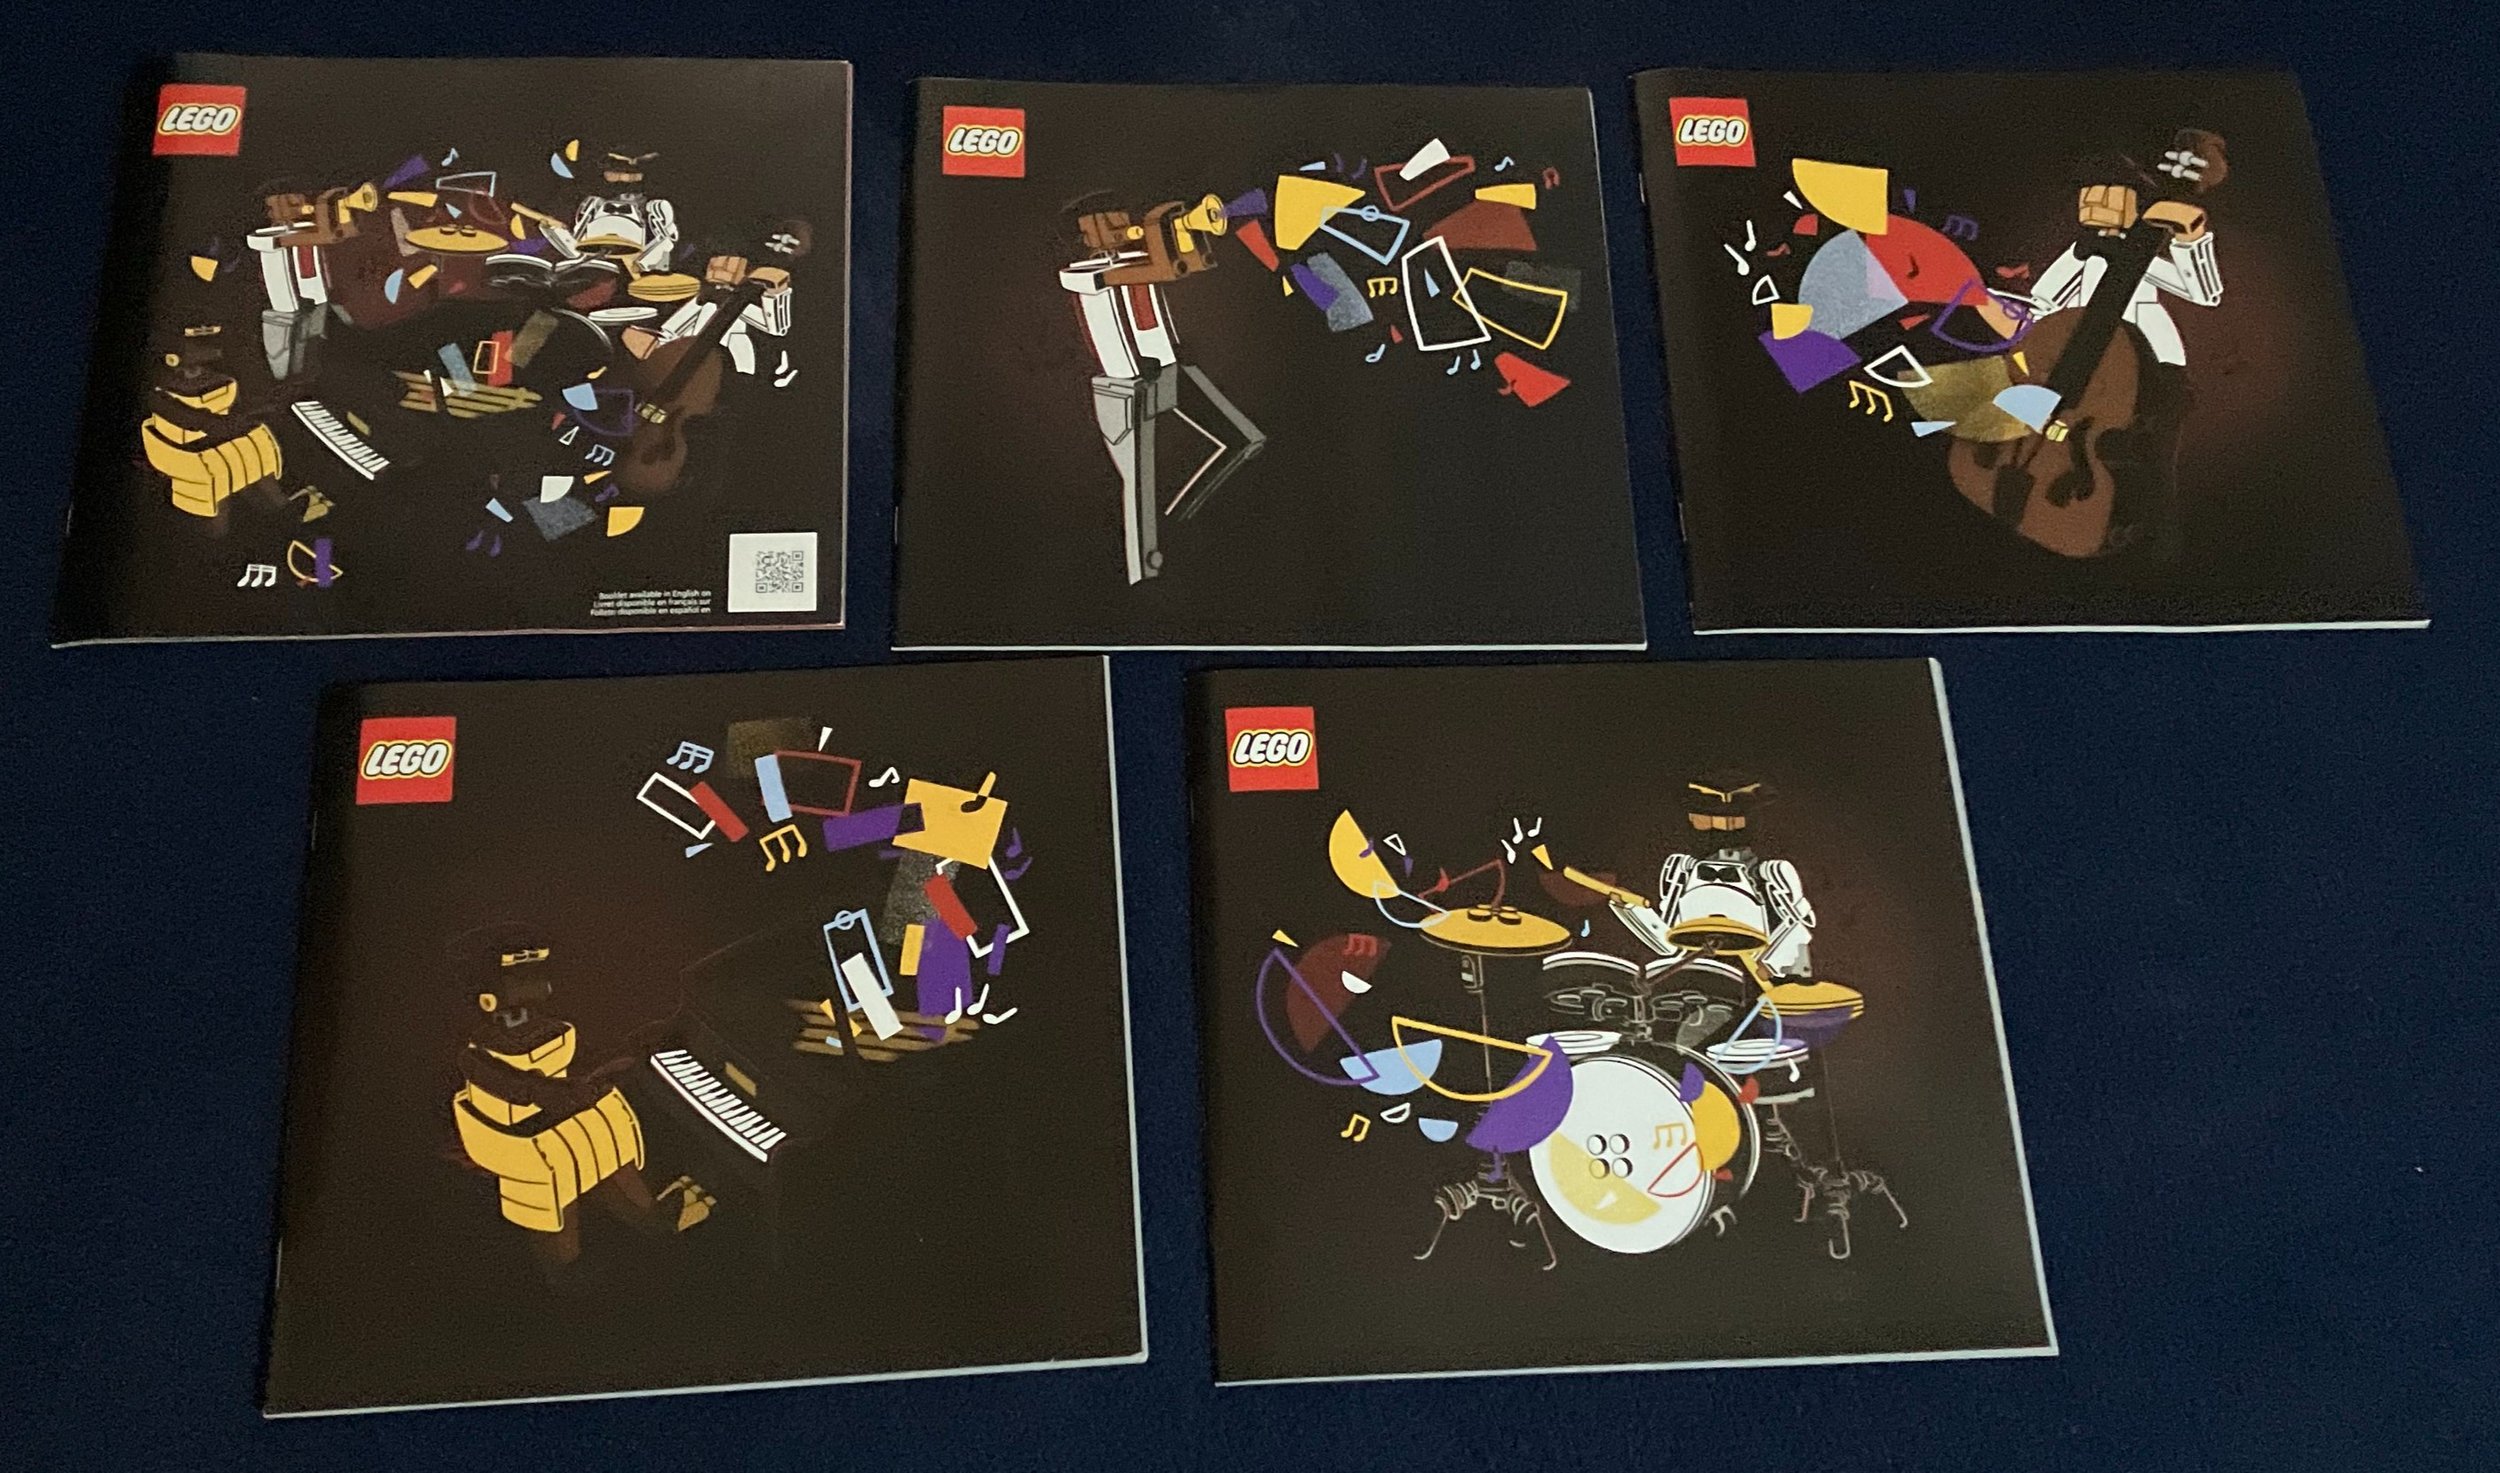
The set contains 11 numbered parts bags and two 16x16 black plates. The instructions are in a cardboard envelope for protection which is great as you can recycle the envelope and the instructions aren’t bent. There are five booklets in the envelope. The first one describes the set, talks about the fan designer, and gives information about the LEGO designers. The remaining booklets build each figure from the set and the figure is pictured on the front of each booklet.

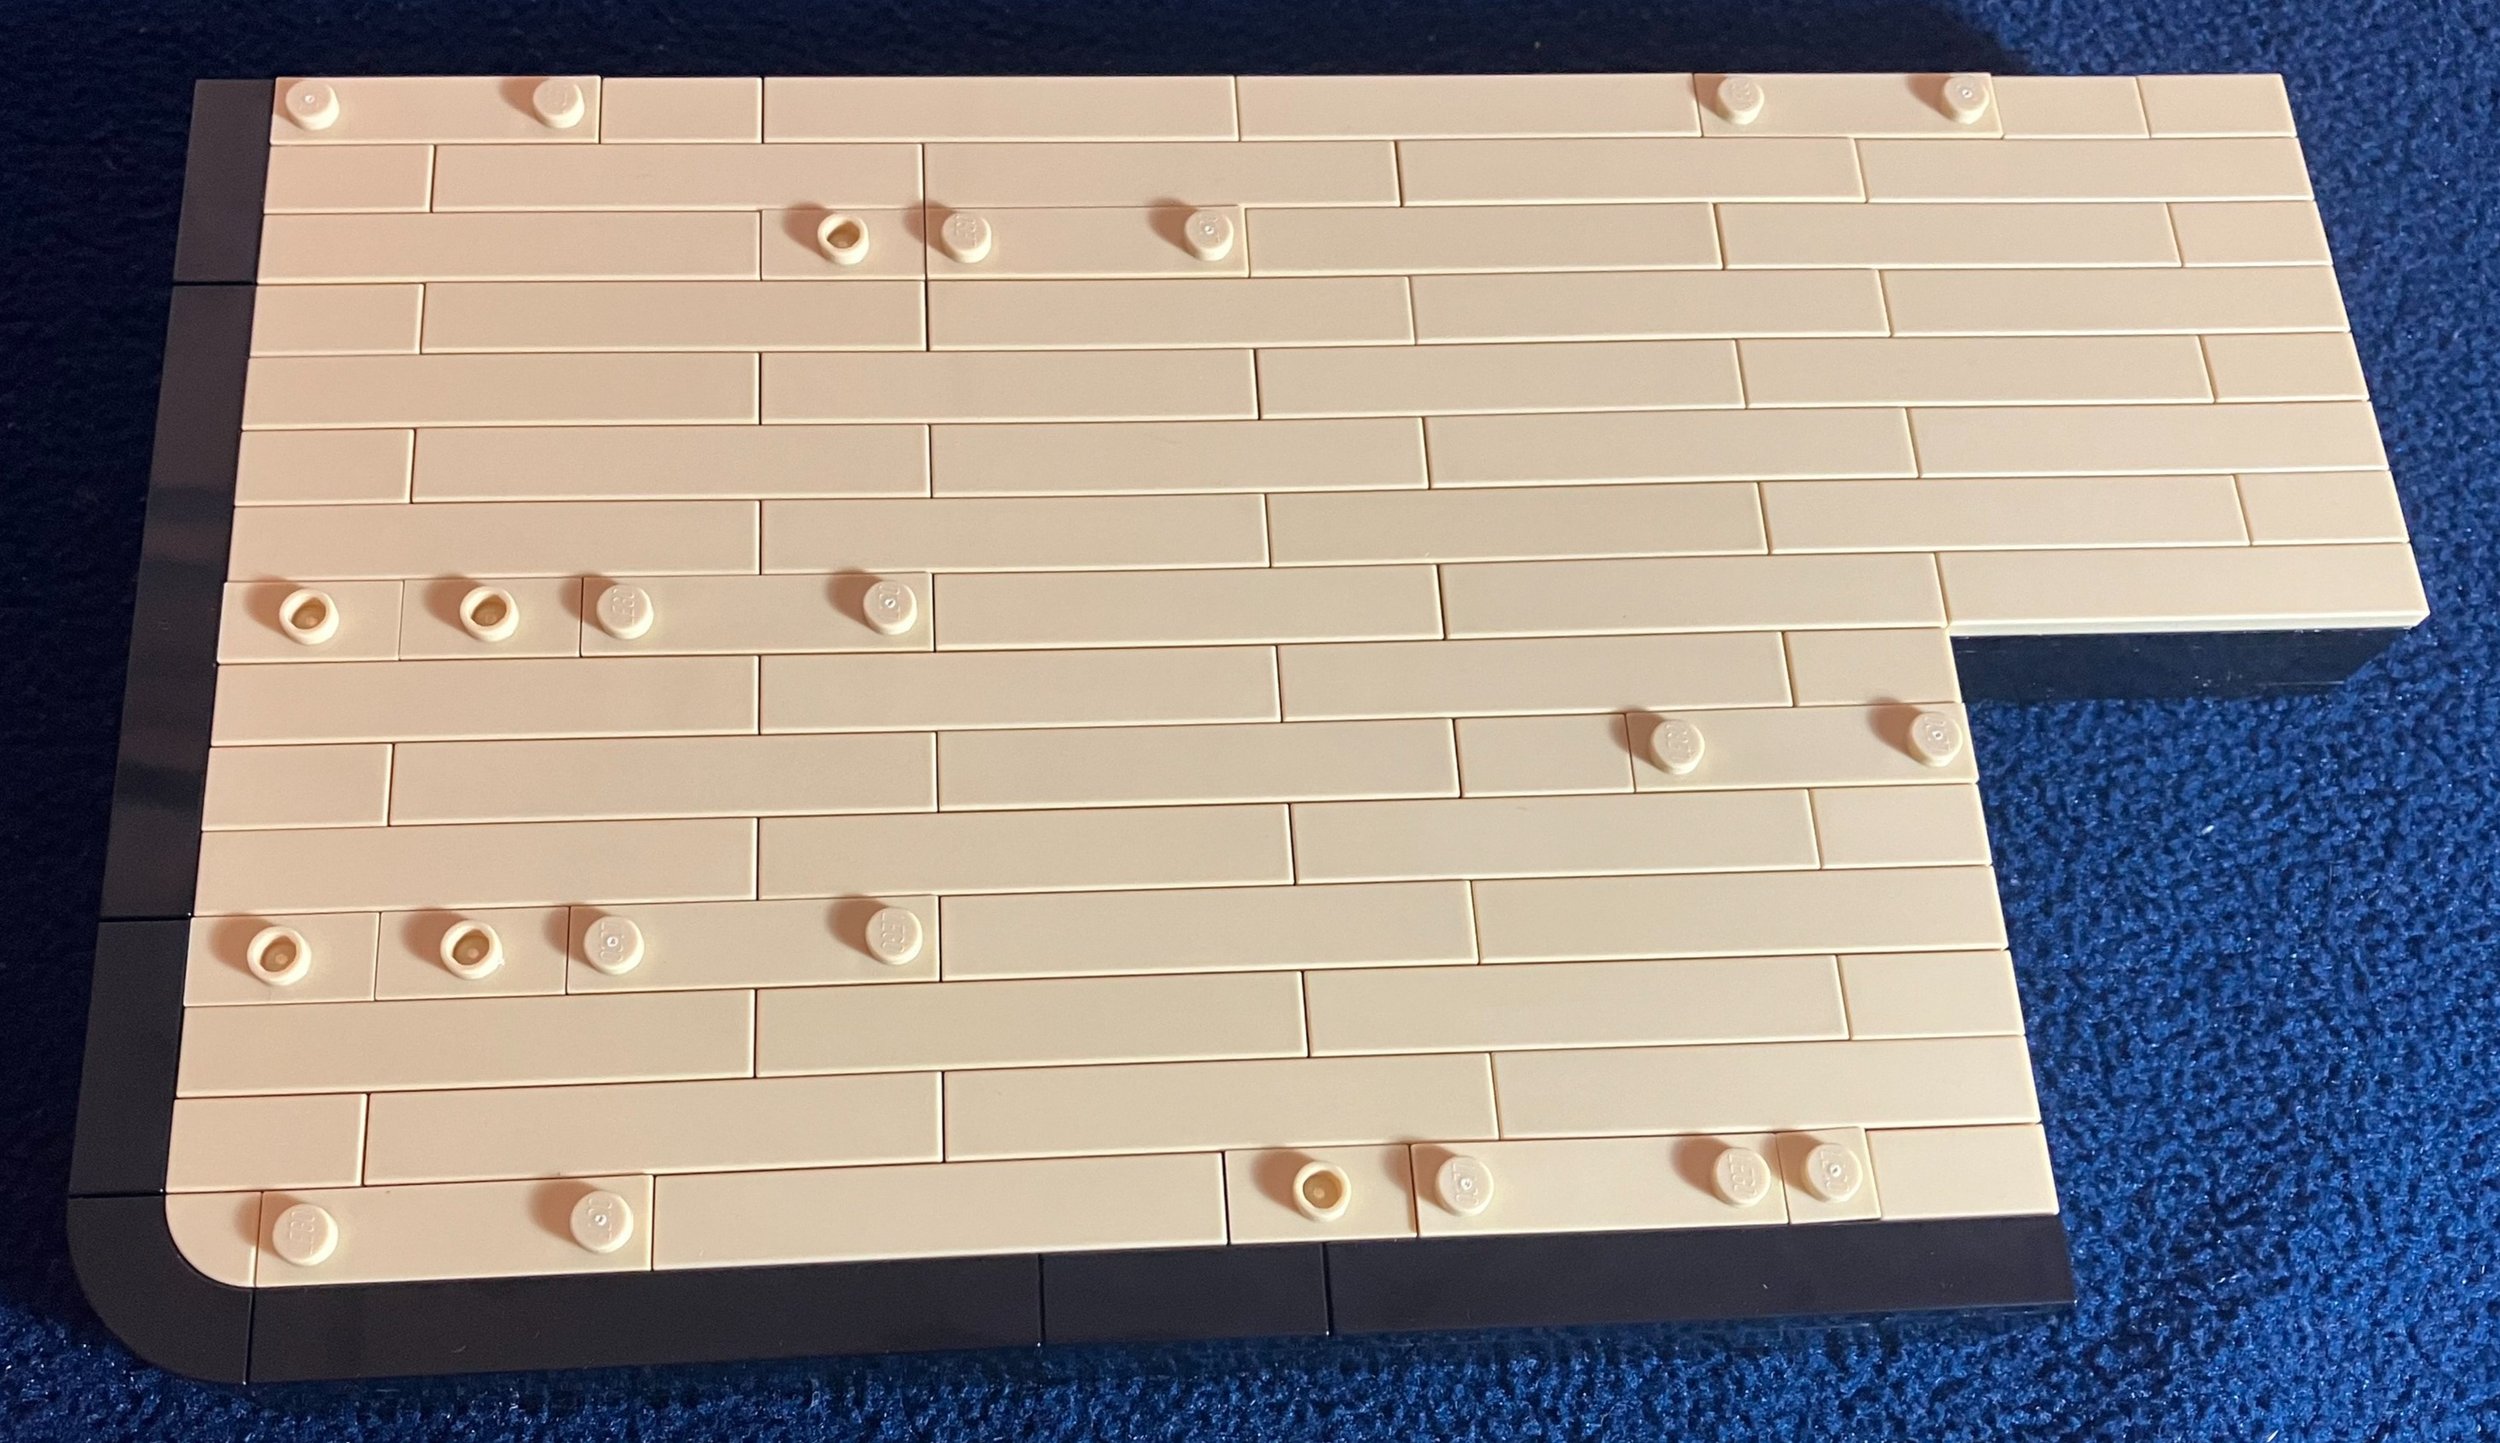
The first bag assembles the start of the trumpet player. The build is fairly similar for each of the parts of the stage. The top uses a mixture of tiles and tiles with studs. There is also a slot for where the trumpet playing figure will be attached. I like how the edges of the stage are made of black and there are curves without studs. Also, the step down is cool to mimic a real stage.

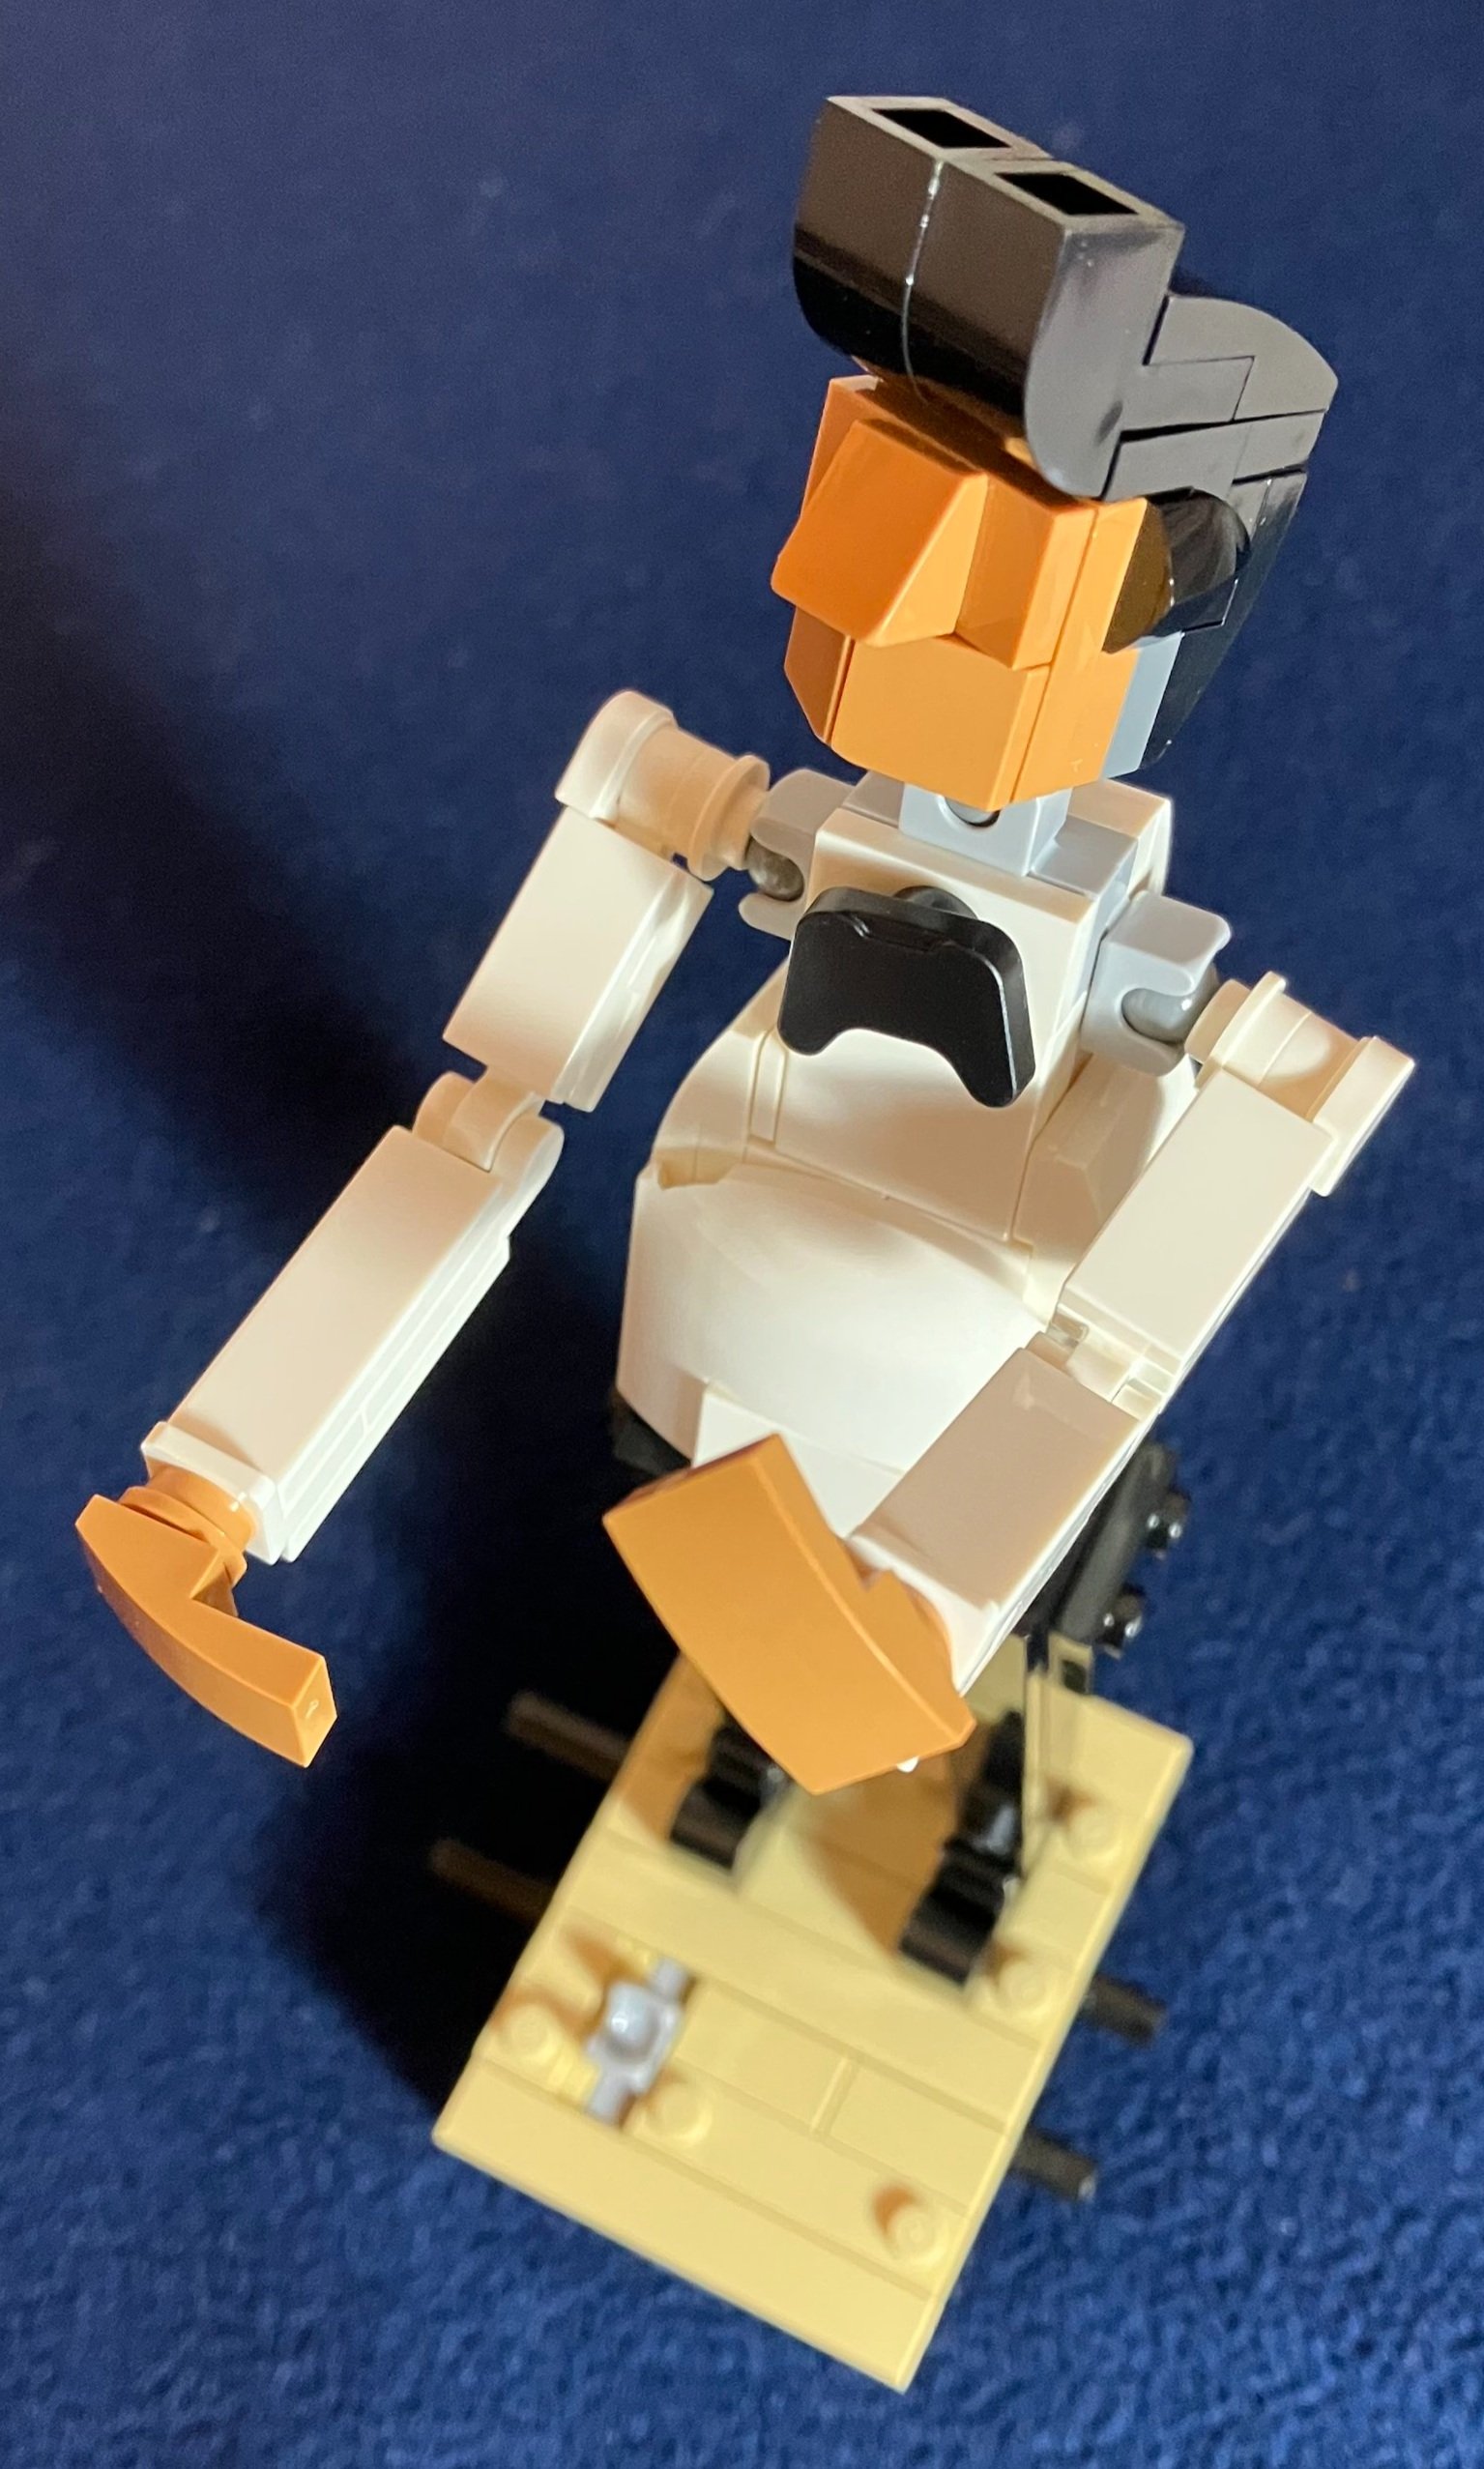
The second bag assembles the trumpet playing figure. Initially, it doesn’t make sense what you’re building, but then as you put it together you realize what is a leg, arm, head piece, etc. The details are great with the suspenders, tile for a tie, jumper plate as the mouth as if he is blowing out into the trumpet, and the use of sloped pieces for the hair to show his hair style. The trumpet is a pretty simple assembly, but it looks pretty realistic for a brick built version.

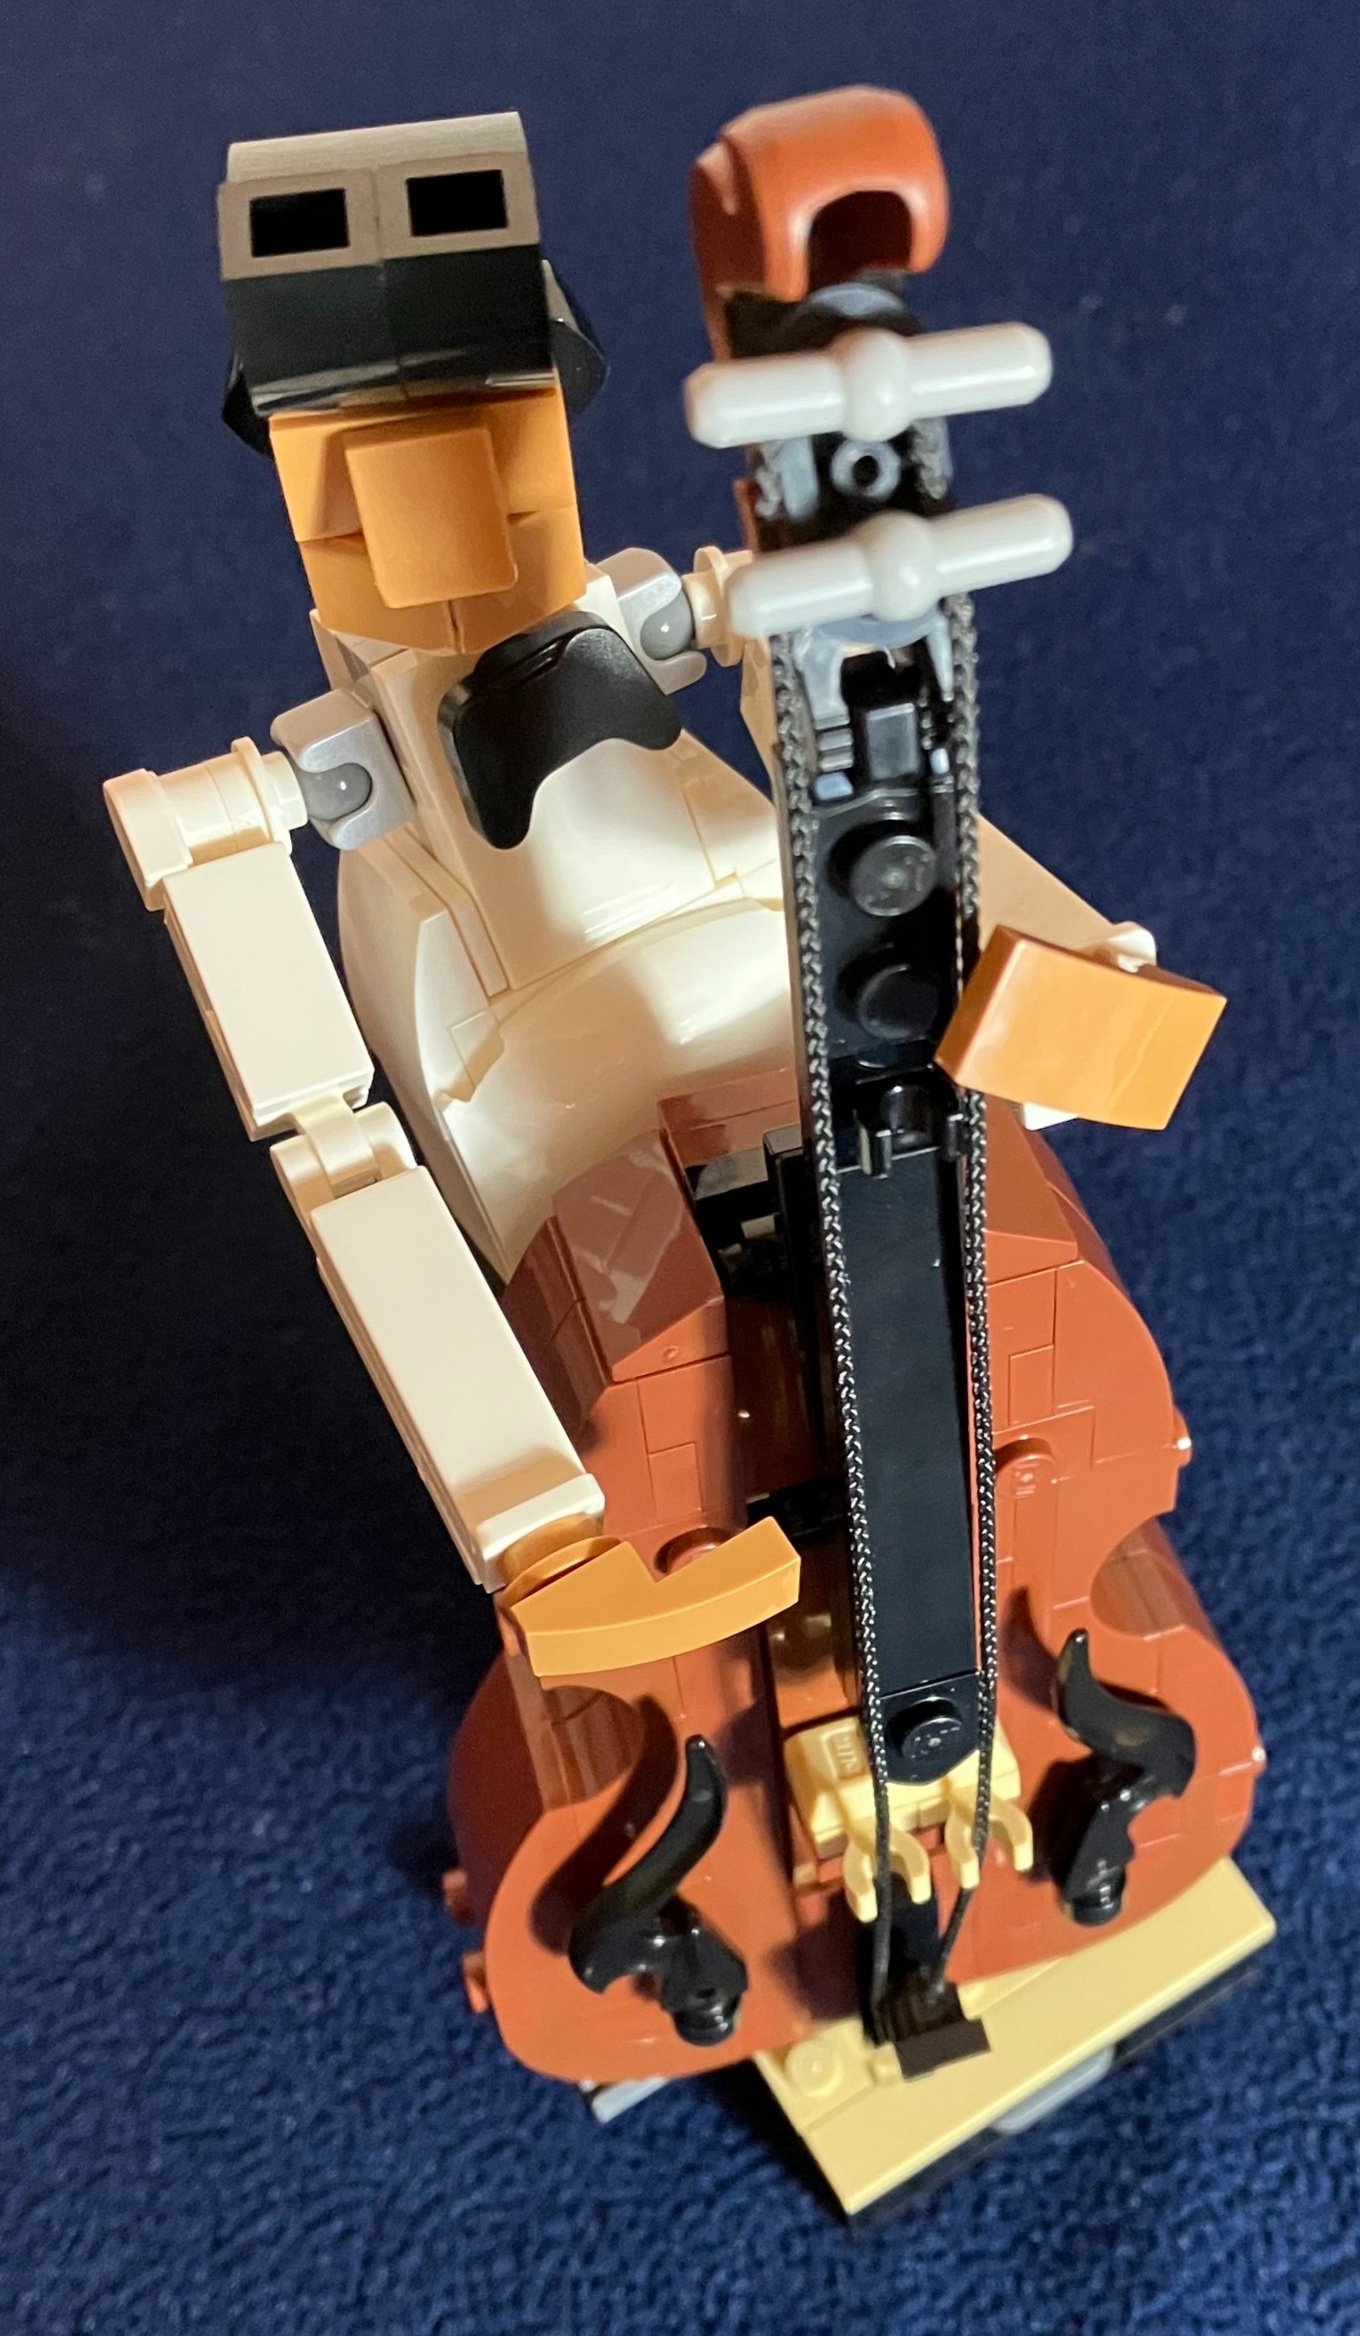
Bag three builds the small section of stage that the bass player is on and then the bass player himself. The figure is great with the bow tie and slick hairdo. The ball and joint pieces are gray so they look a bit out of place, but I don’t think they completely detract from the figure. The slicked up hair above the forehead is great, but the open studs on top look a little off. I’m not sure of the right way to fix that? Maybe a reverse stud tile piece? I’m not sure they even make a 1x2 version of a reverse stud tile like that.

The fourth bag builds the bass itself. I think the designers did a great job recreating the shape using existing pieces in the LEGO world. The curves look great and even the S shaped pieces to show the holes where the sound comes out (okay, I don’t know the technical names of everything… sorry) looks awesome. The minor issues of the open studs and gray ball joints don’t really stand out when you put the full set together.

The fifth bag assembles the stage for the drummer. It’s a much larger section of stage, but still follows the same pattern and style as the other sections. Instead of the drummer being attached to the stage, you connect him via studs on the stage. This part was a little tricky to follow as I had to make sure I put tiles and jumper plates in the right spots. It matters as you need the drum set, seat, and drummer to fit on the stage.

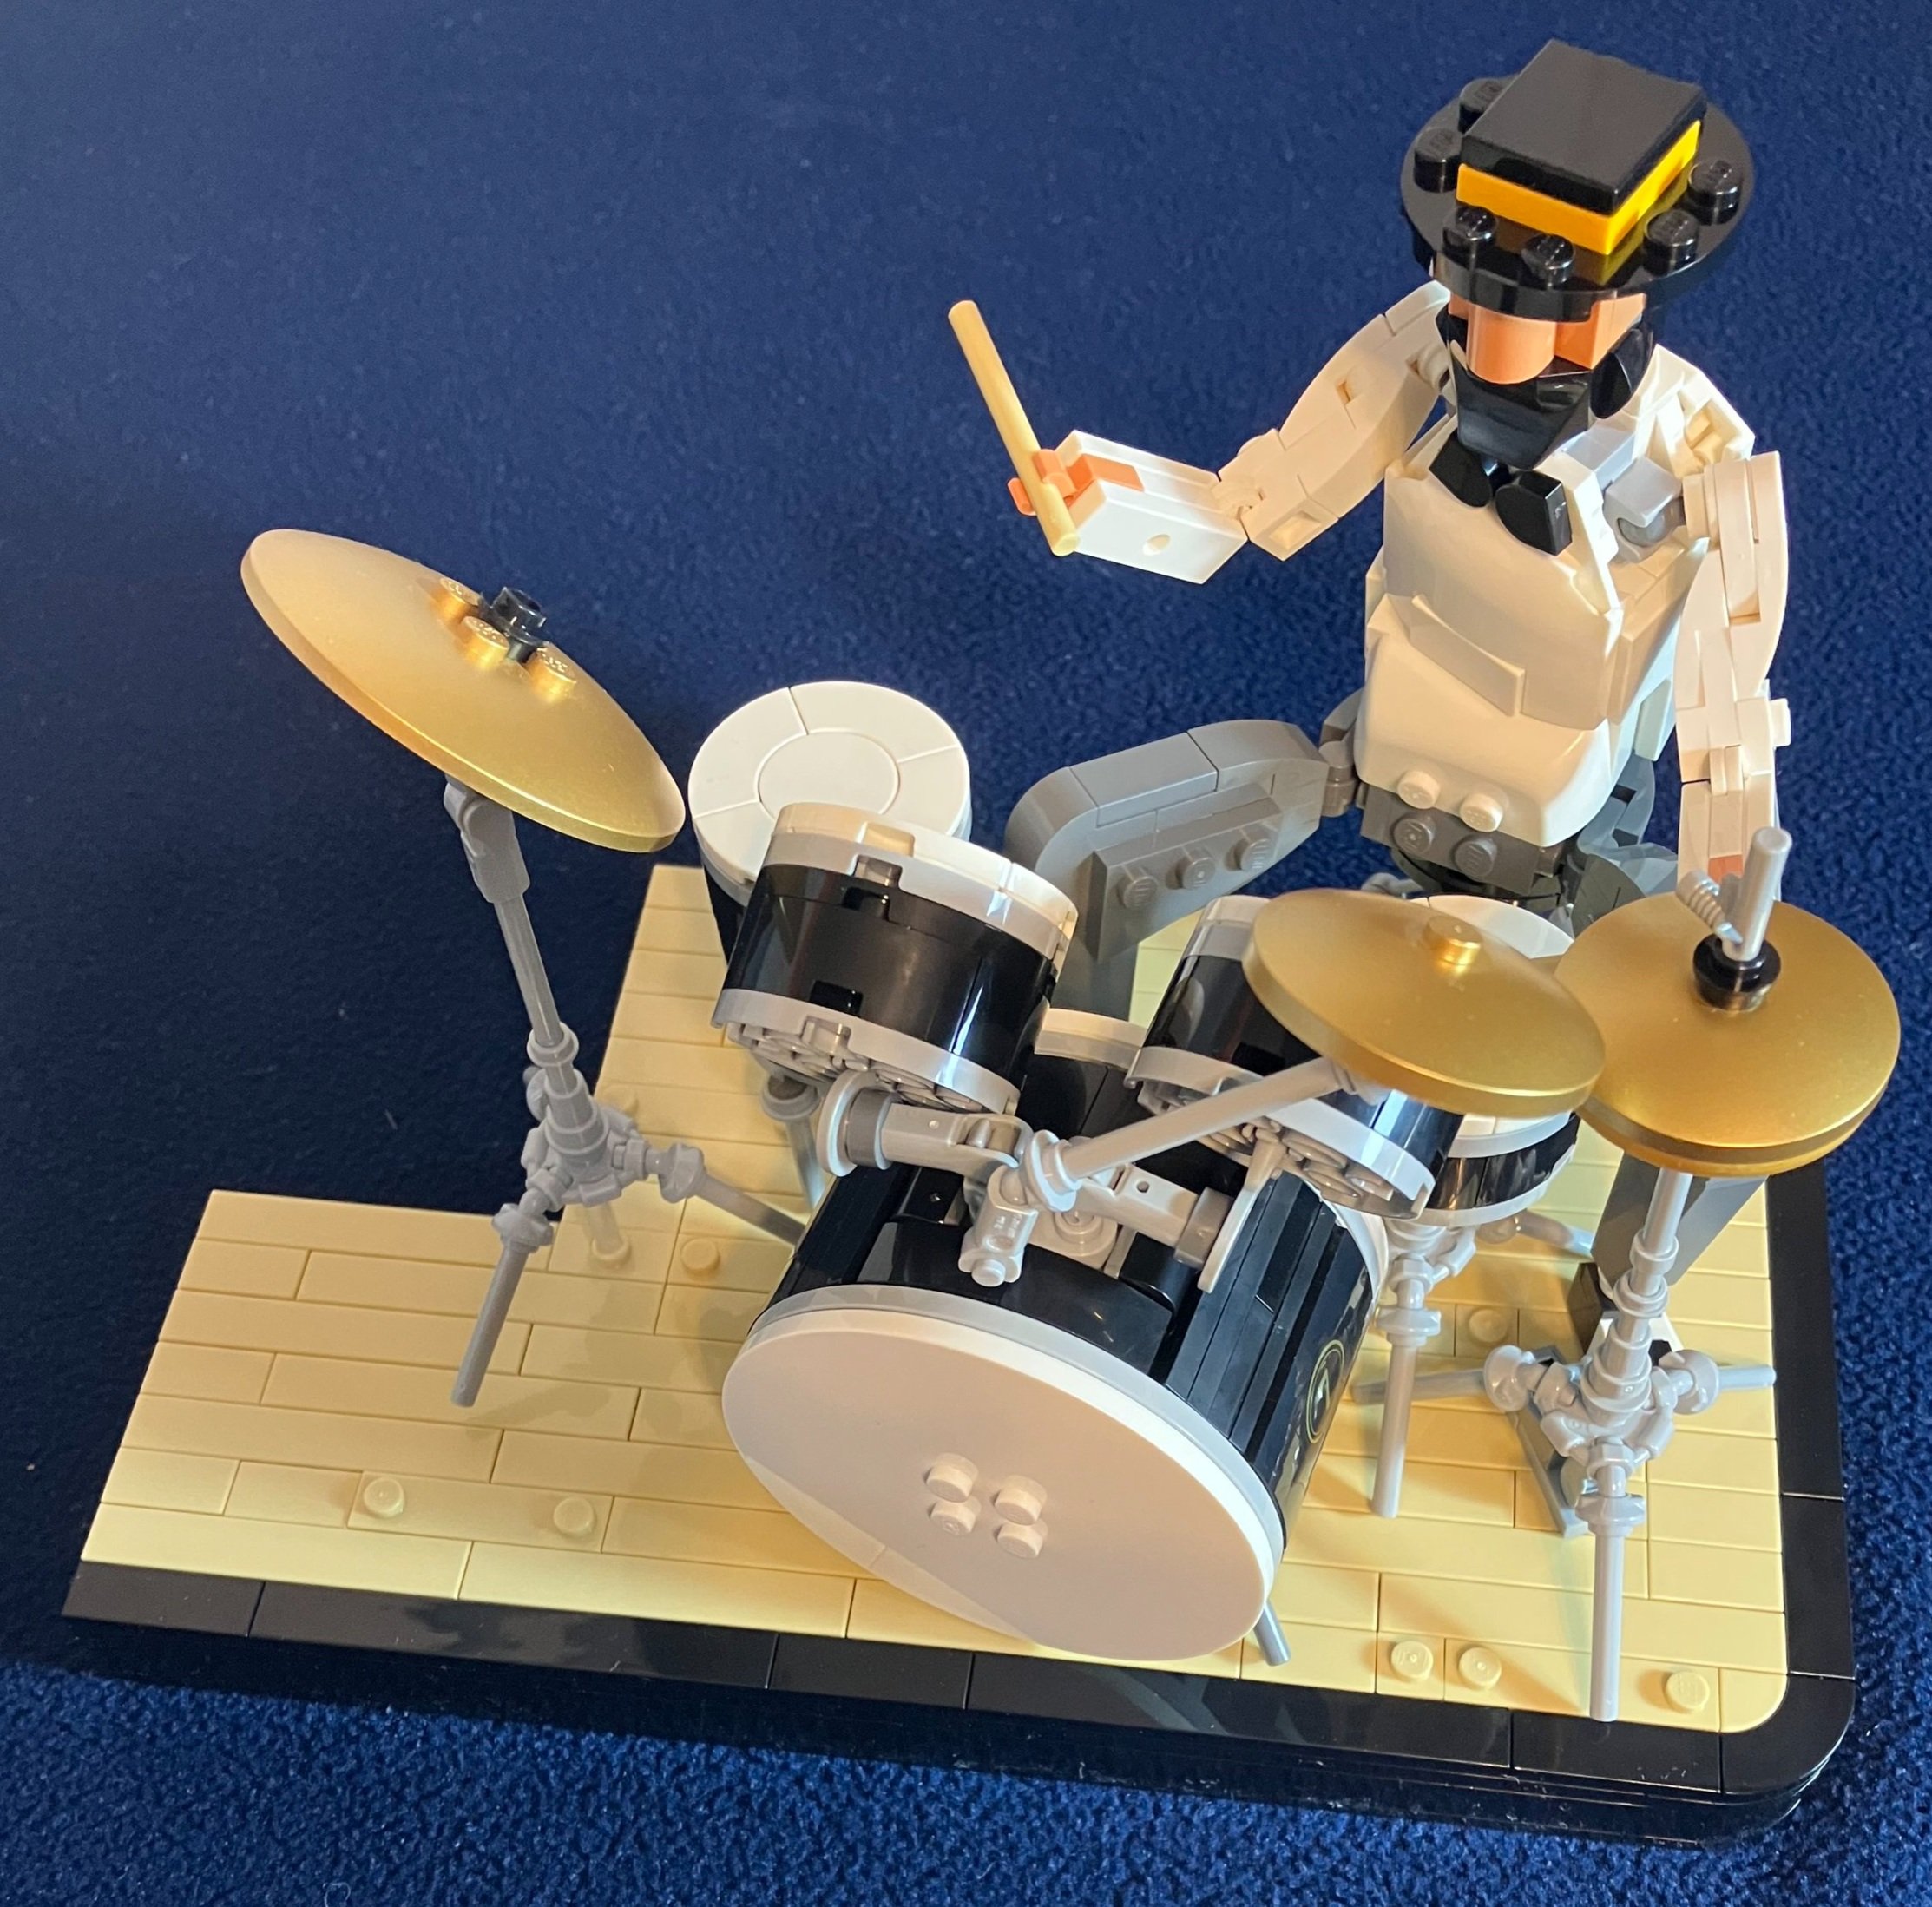
The sixth bag assembles the drum set without the cymbals or high hat. The base drum has a pedal to play it and gets the round shape well to include allowing it to hold up the tom-toms. The tom-toms, snare, and the… I’m not sure what it’s called, are all round with the use of round bricks, plates, and tiles. The shapes of everything match what a drum set would look like quite well in my opinion. It’s not a large drum set with all kinds of extra drums, but it does the trick. You also build some stands which will hold up the cymbals.

Bag seven adds the cymbals. They are gold in color and look pretty accurate. I like how they did the high hat. It looks like you could actually hit the pedal to make it work and they use the cymbals in opposite directions to create the looks of a high hat.

The drummer looks pretty swank. The hat is simple, but gives him a cool look and the beard and bow tie add to it. Interestingly enough, none of the figures have eyes, but it doesn’t seem to matter with how these are built. The pants are gray so the connectors for the legs to the torso don’t stand out, but the shoulder sockets are gray. Not too big of a deal in my opinion. I’m a big fan of the drummer!

Bag eight builds the stage for the piano and piano player. I again had to pay attention to where the jumper plates and plates with studs on them went as it helps to make sure the piano and seat attach to the stage.

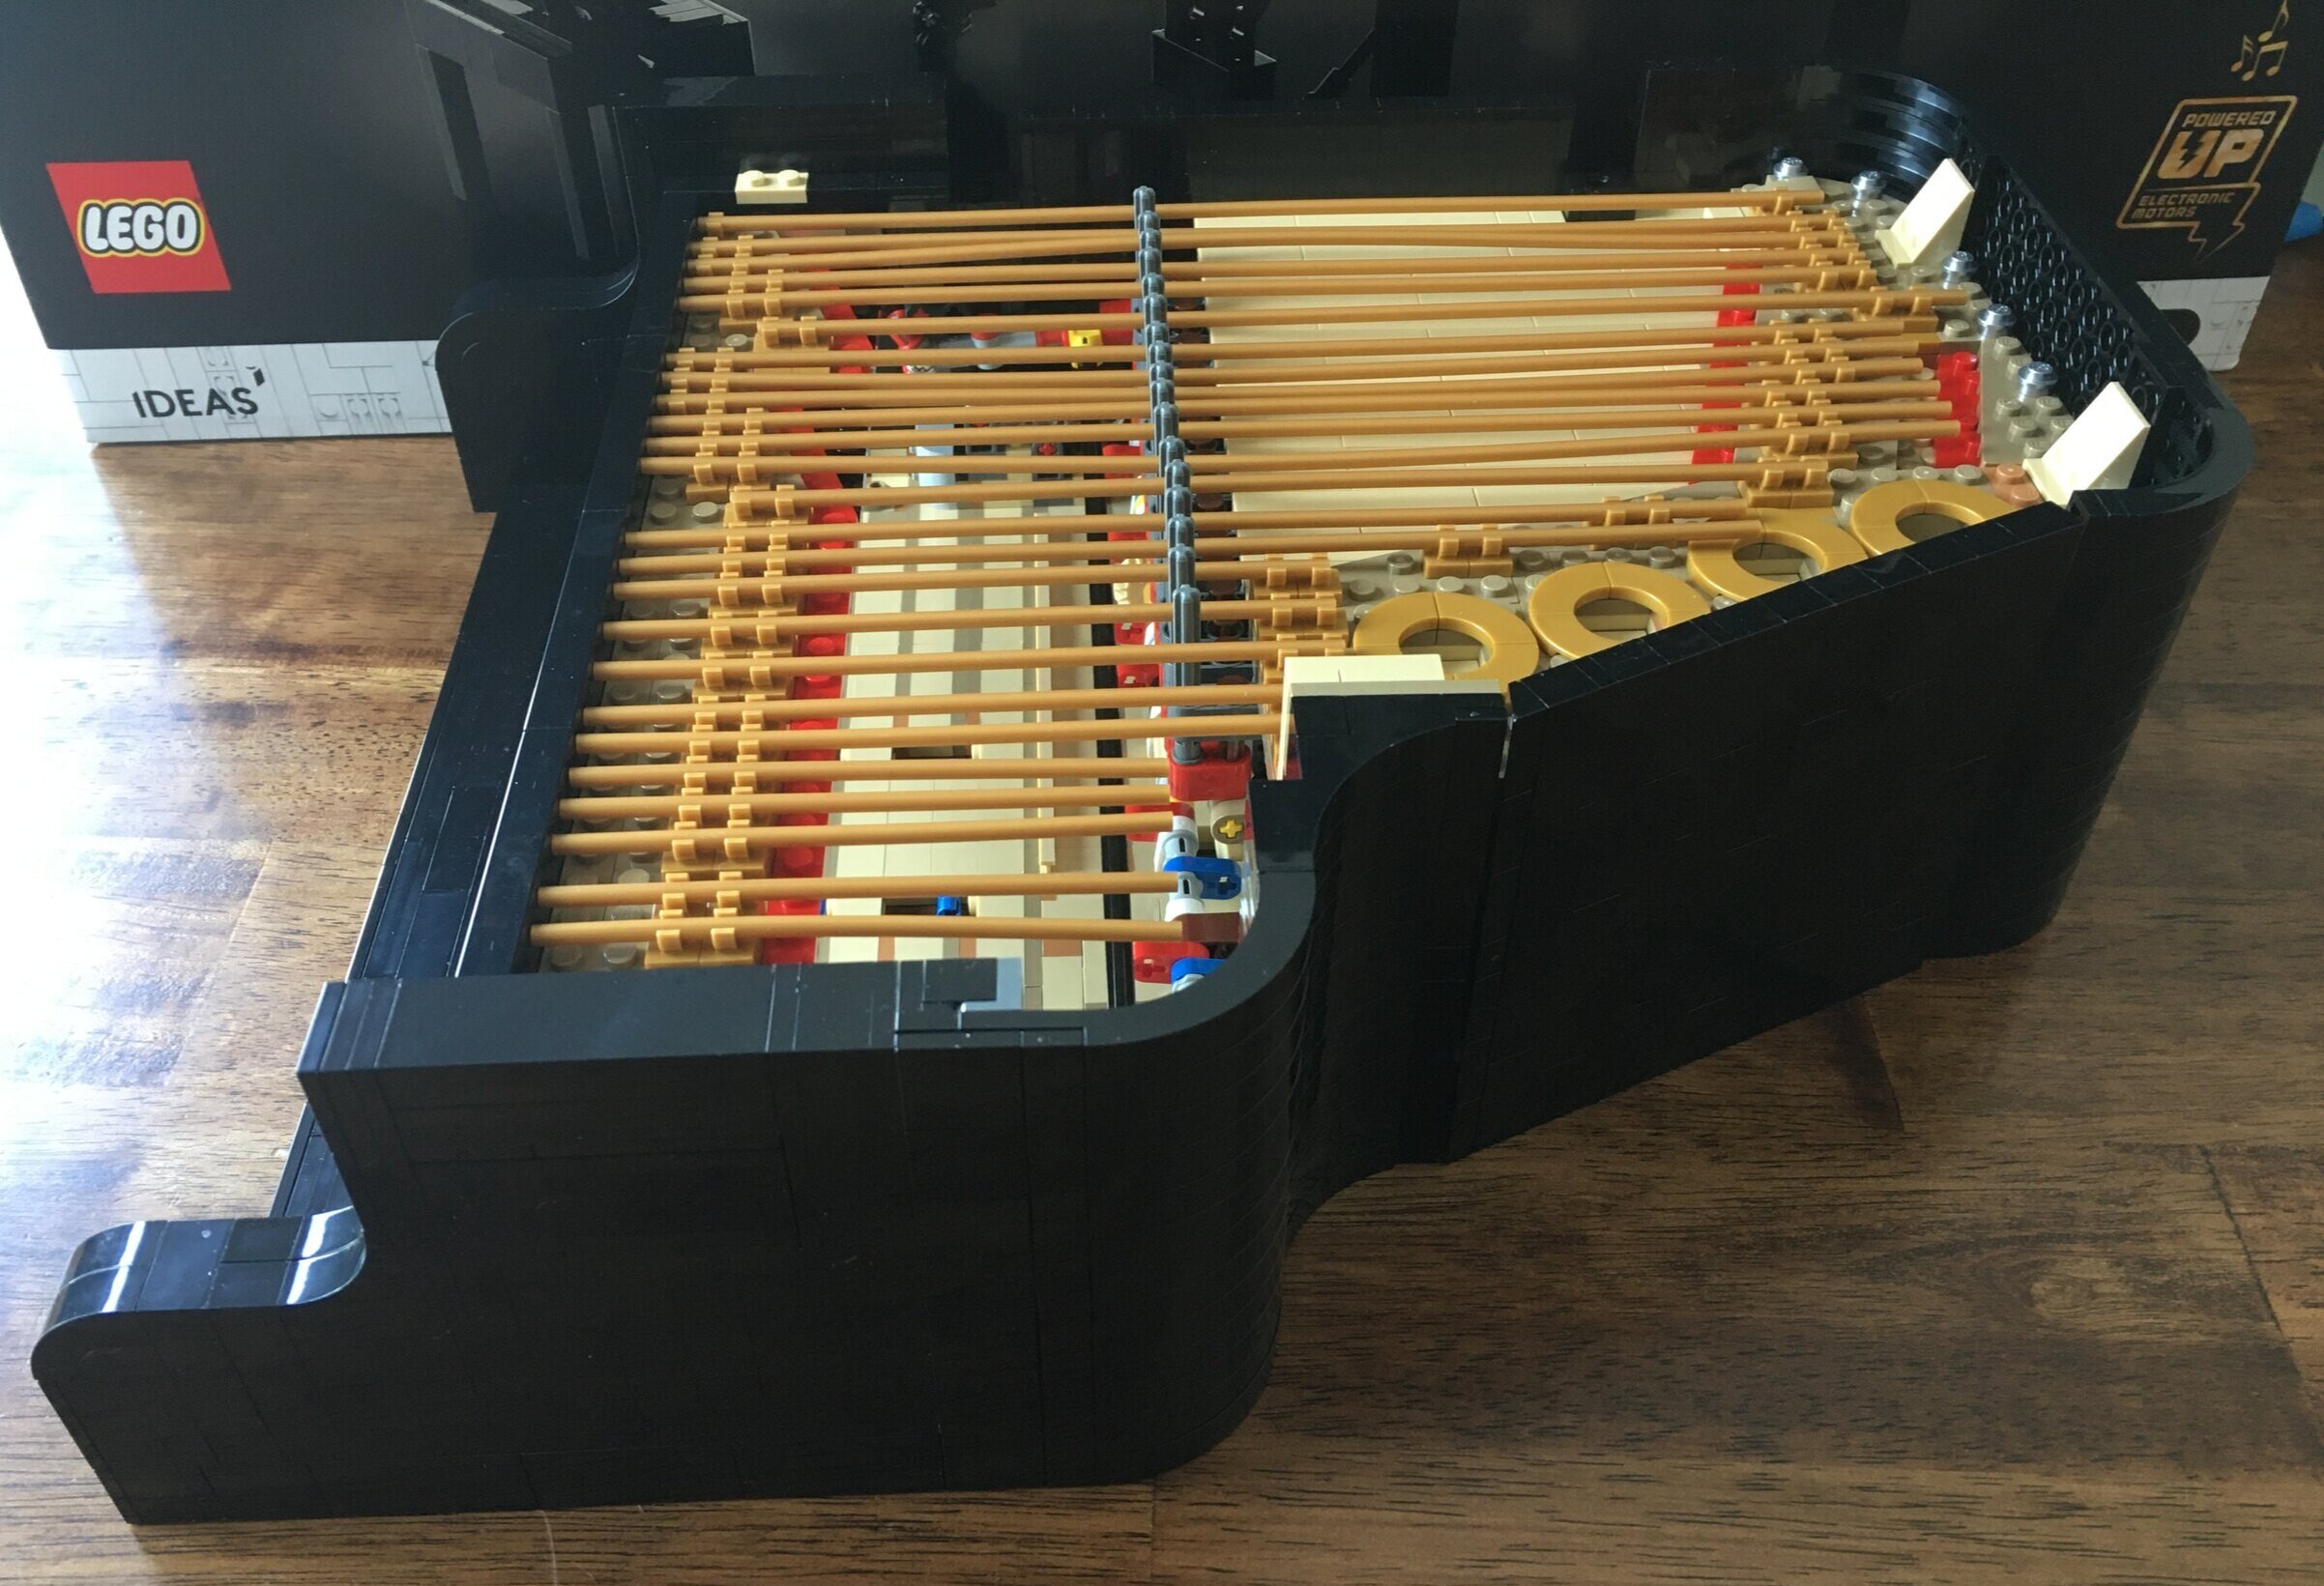
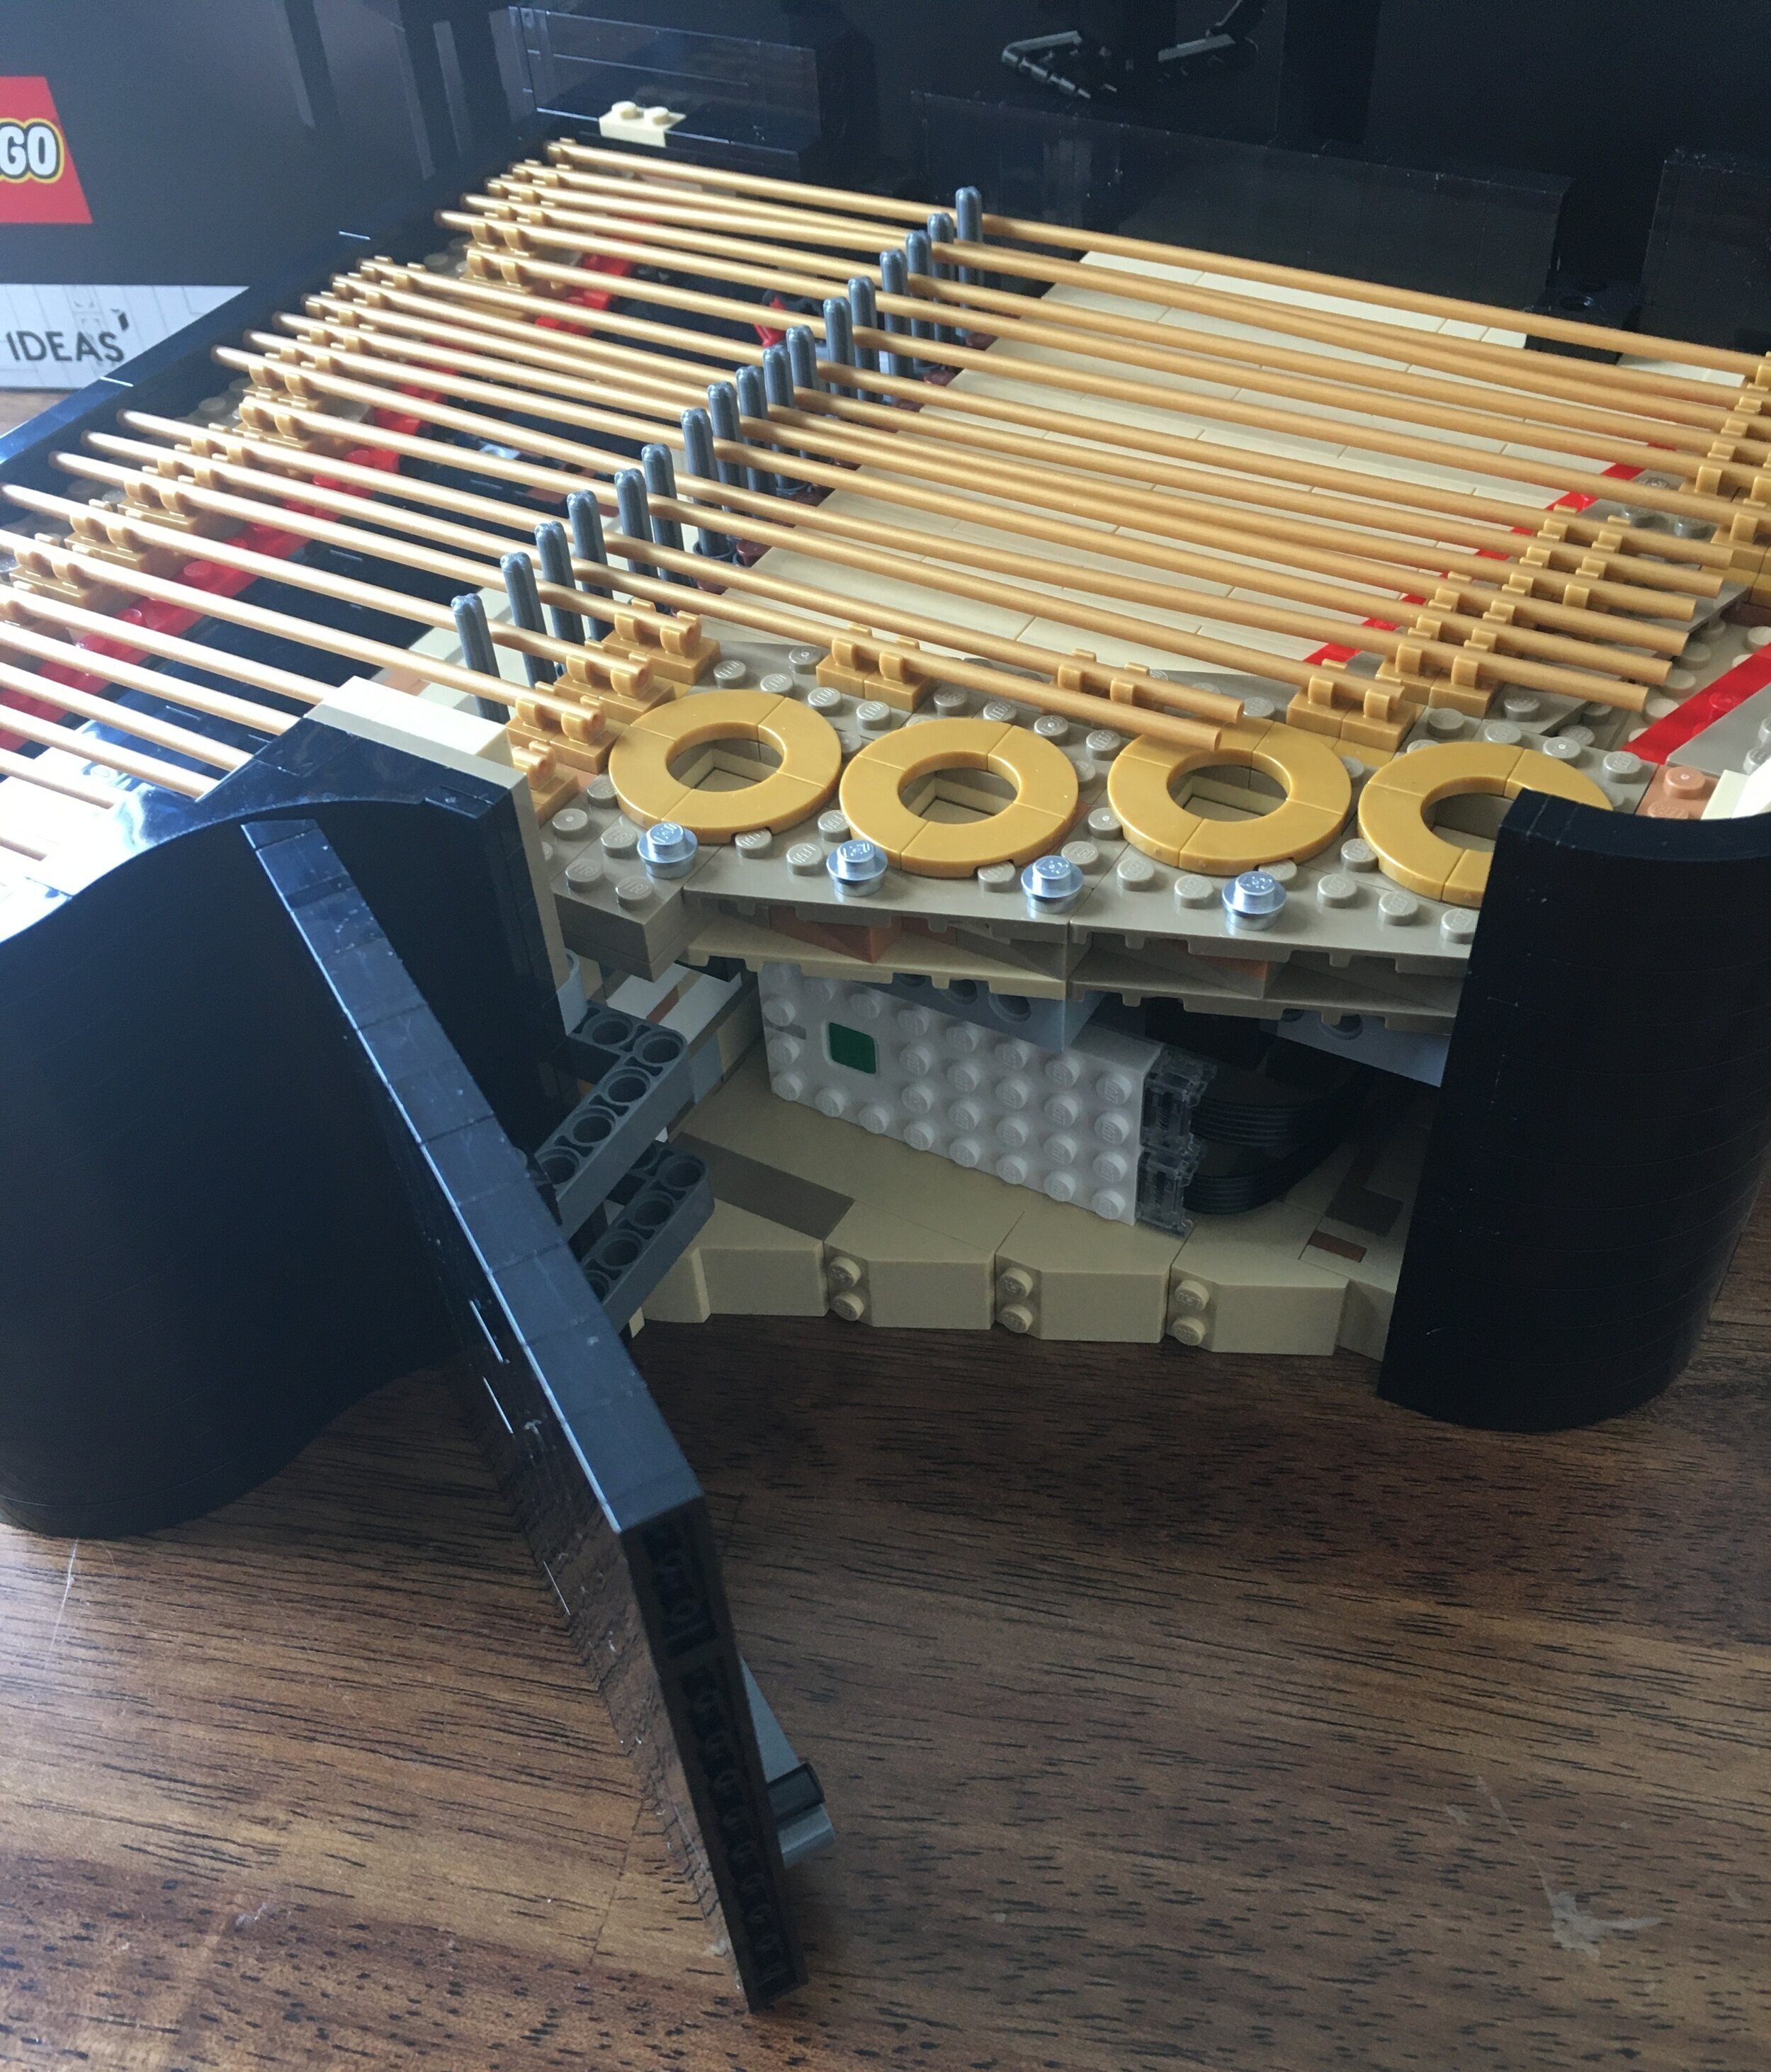
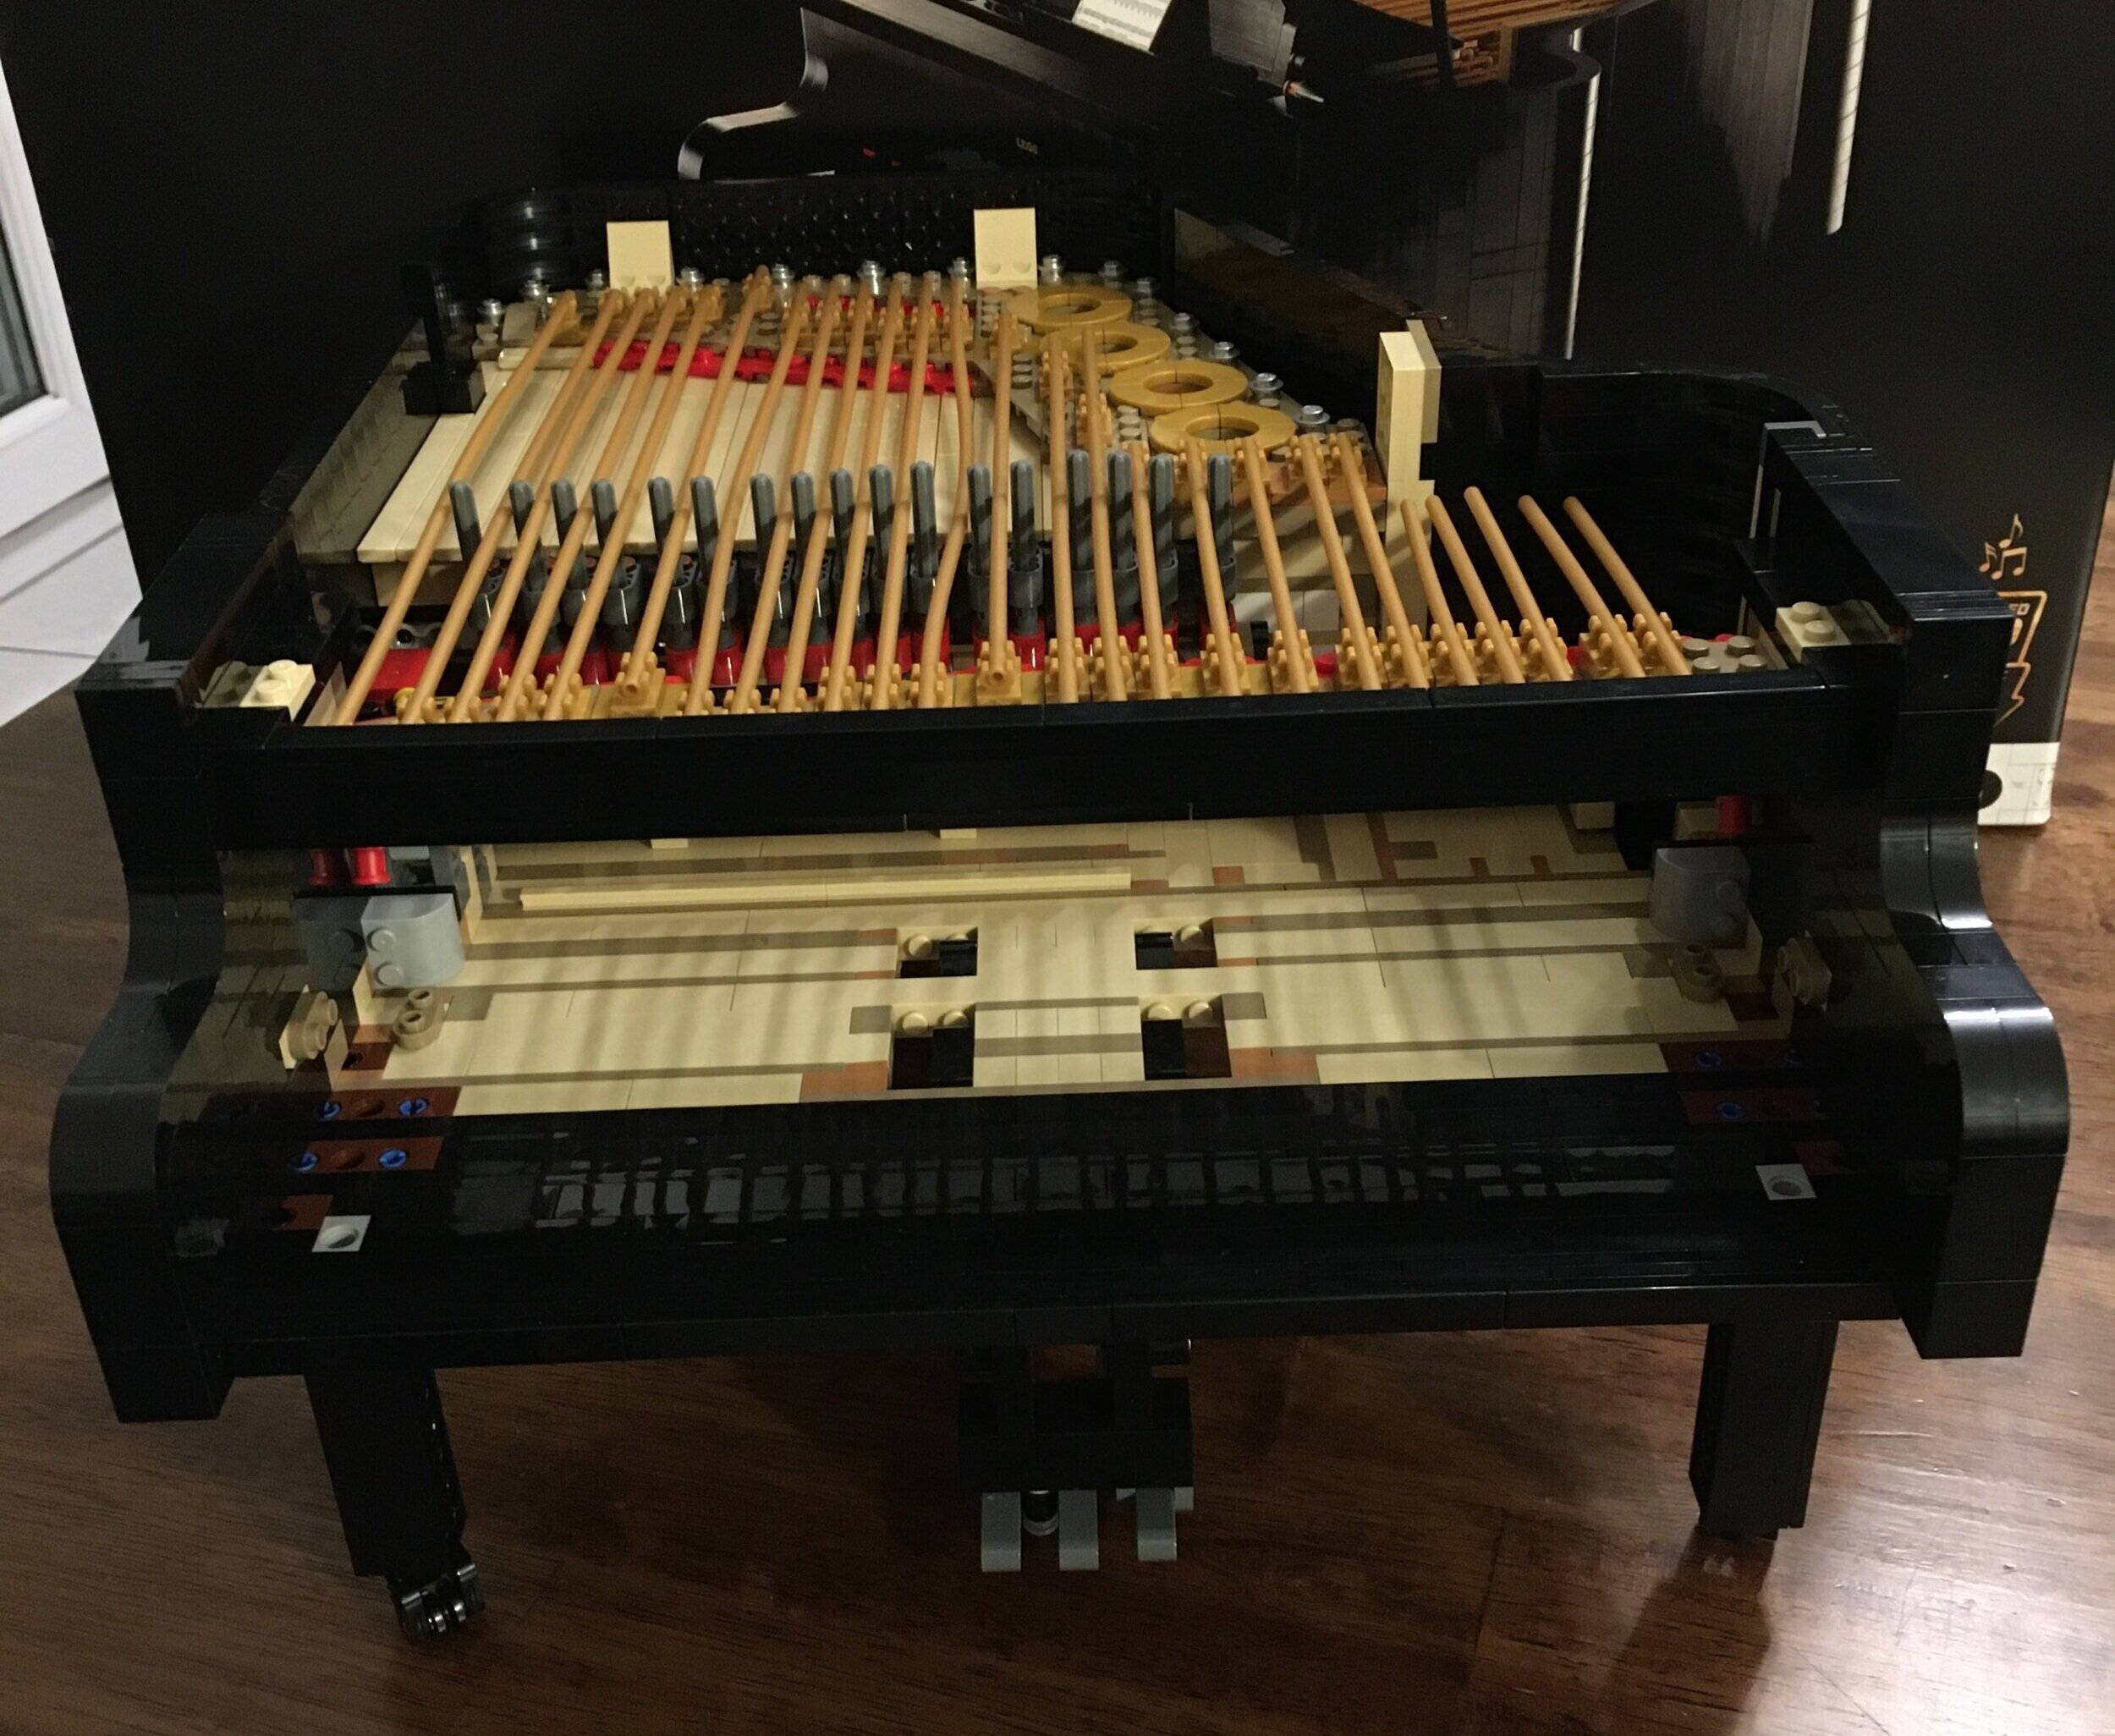
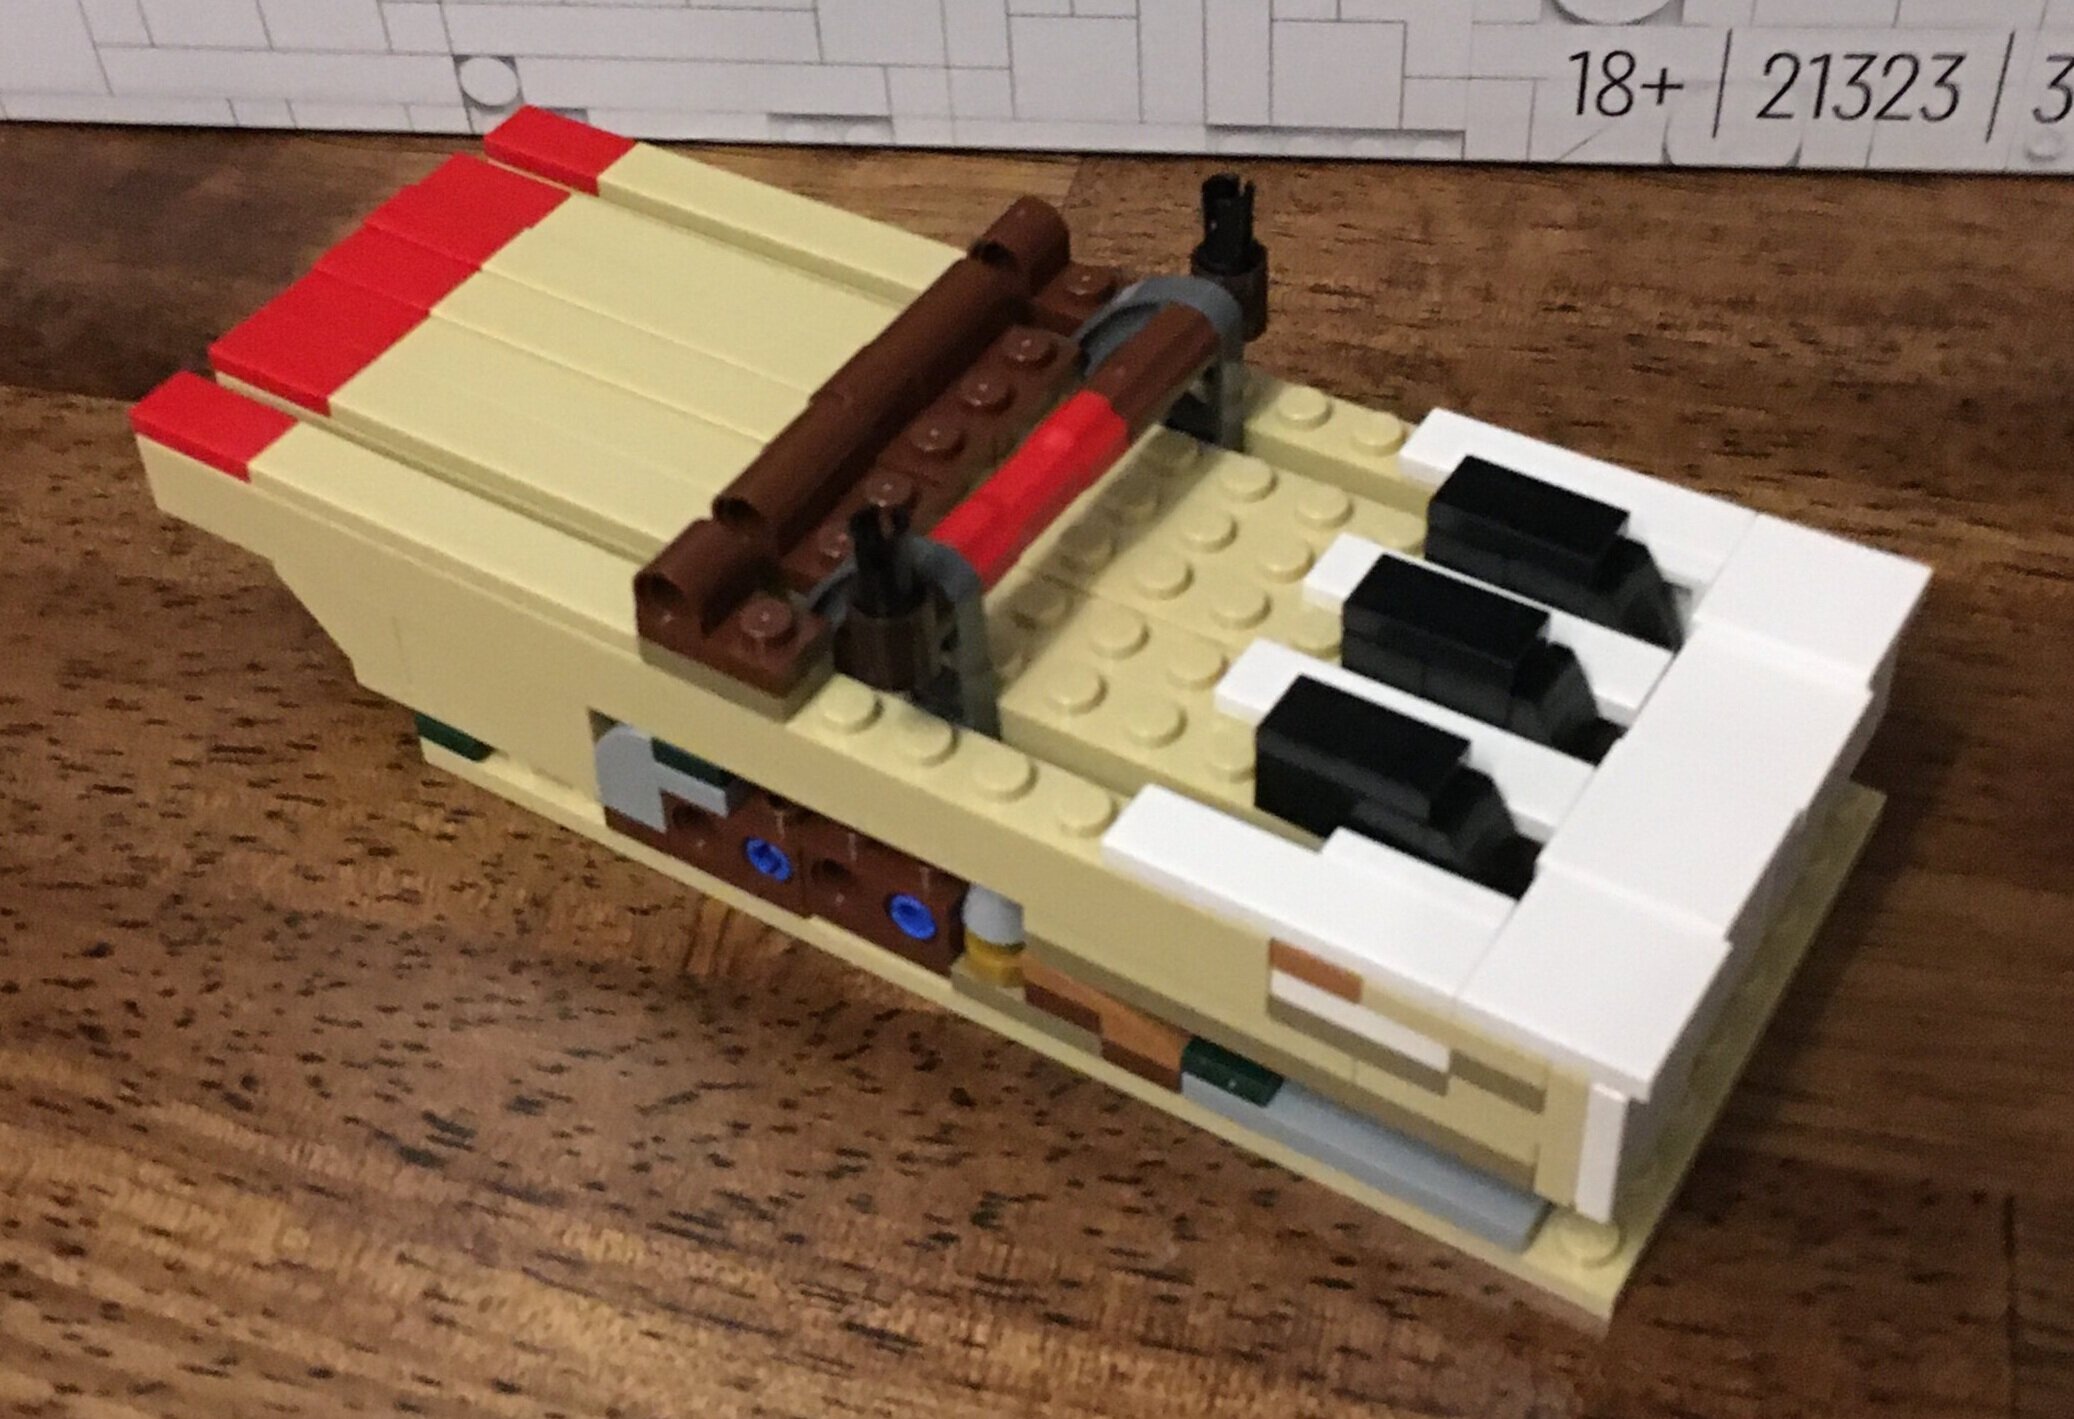
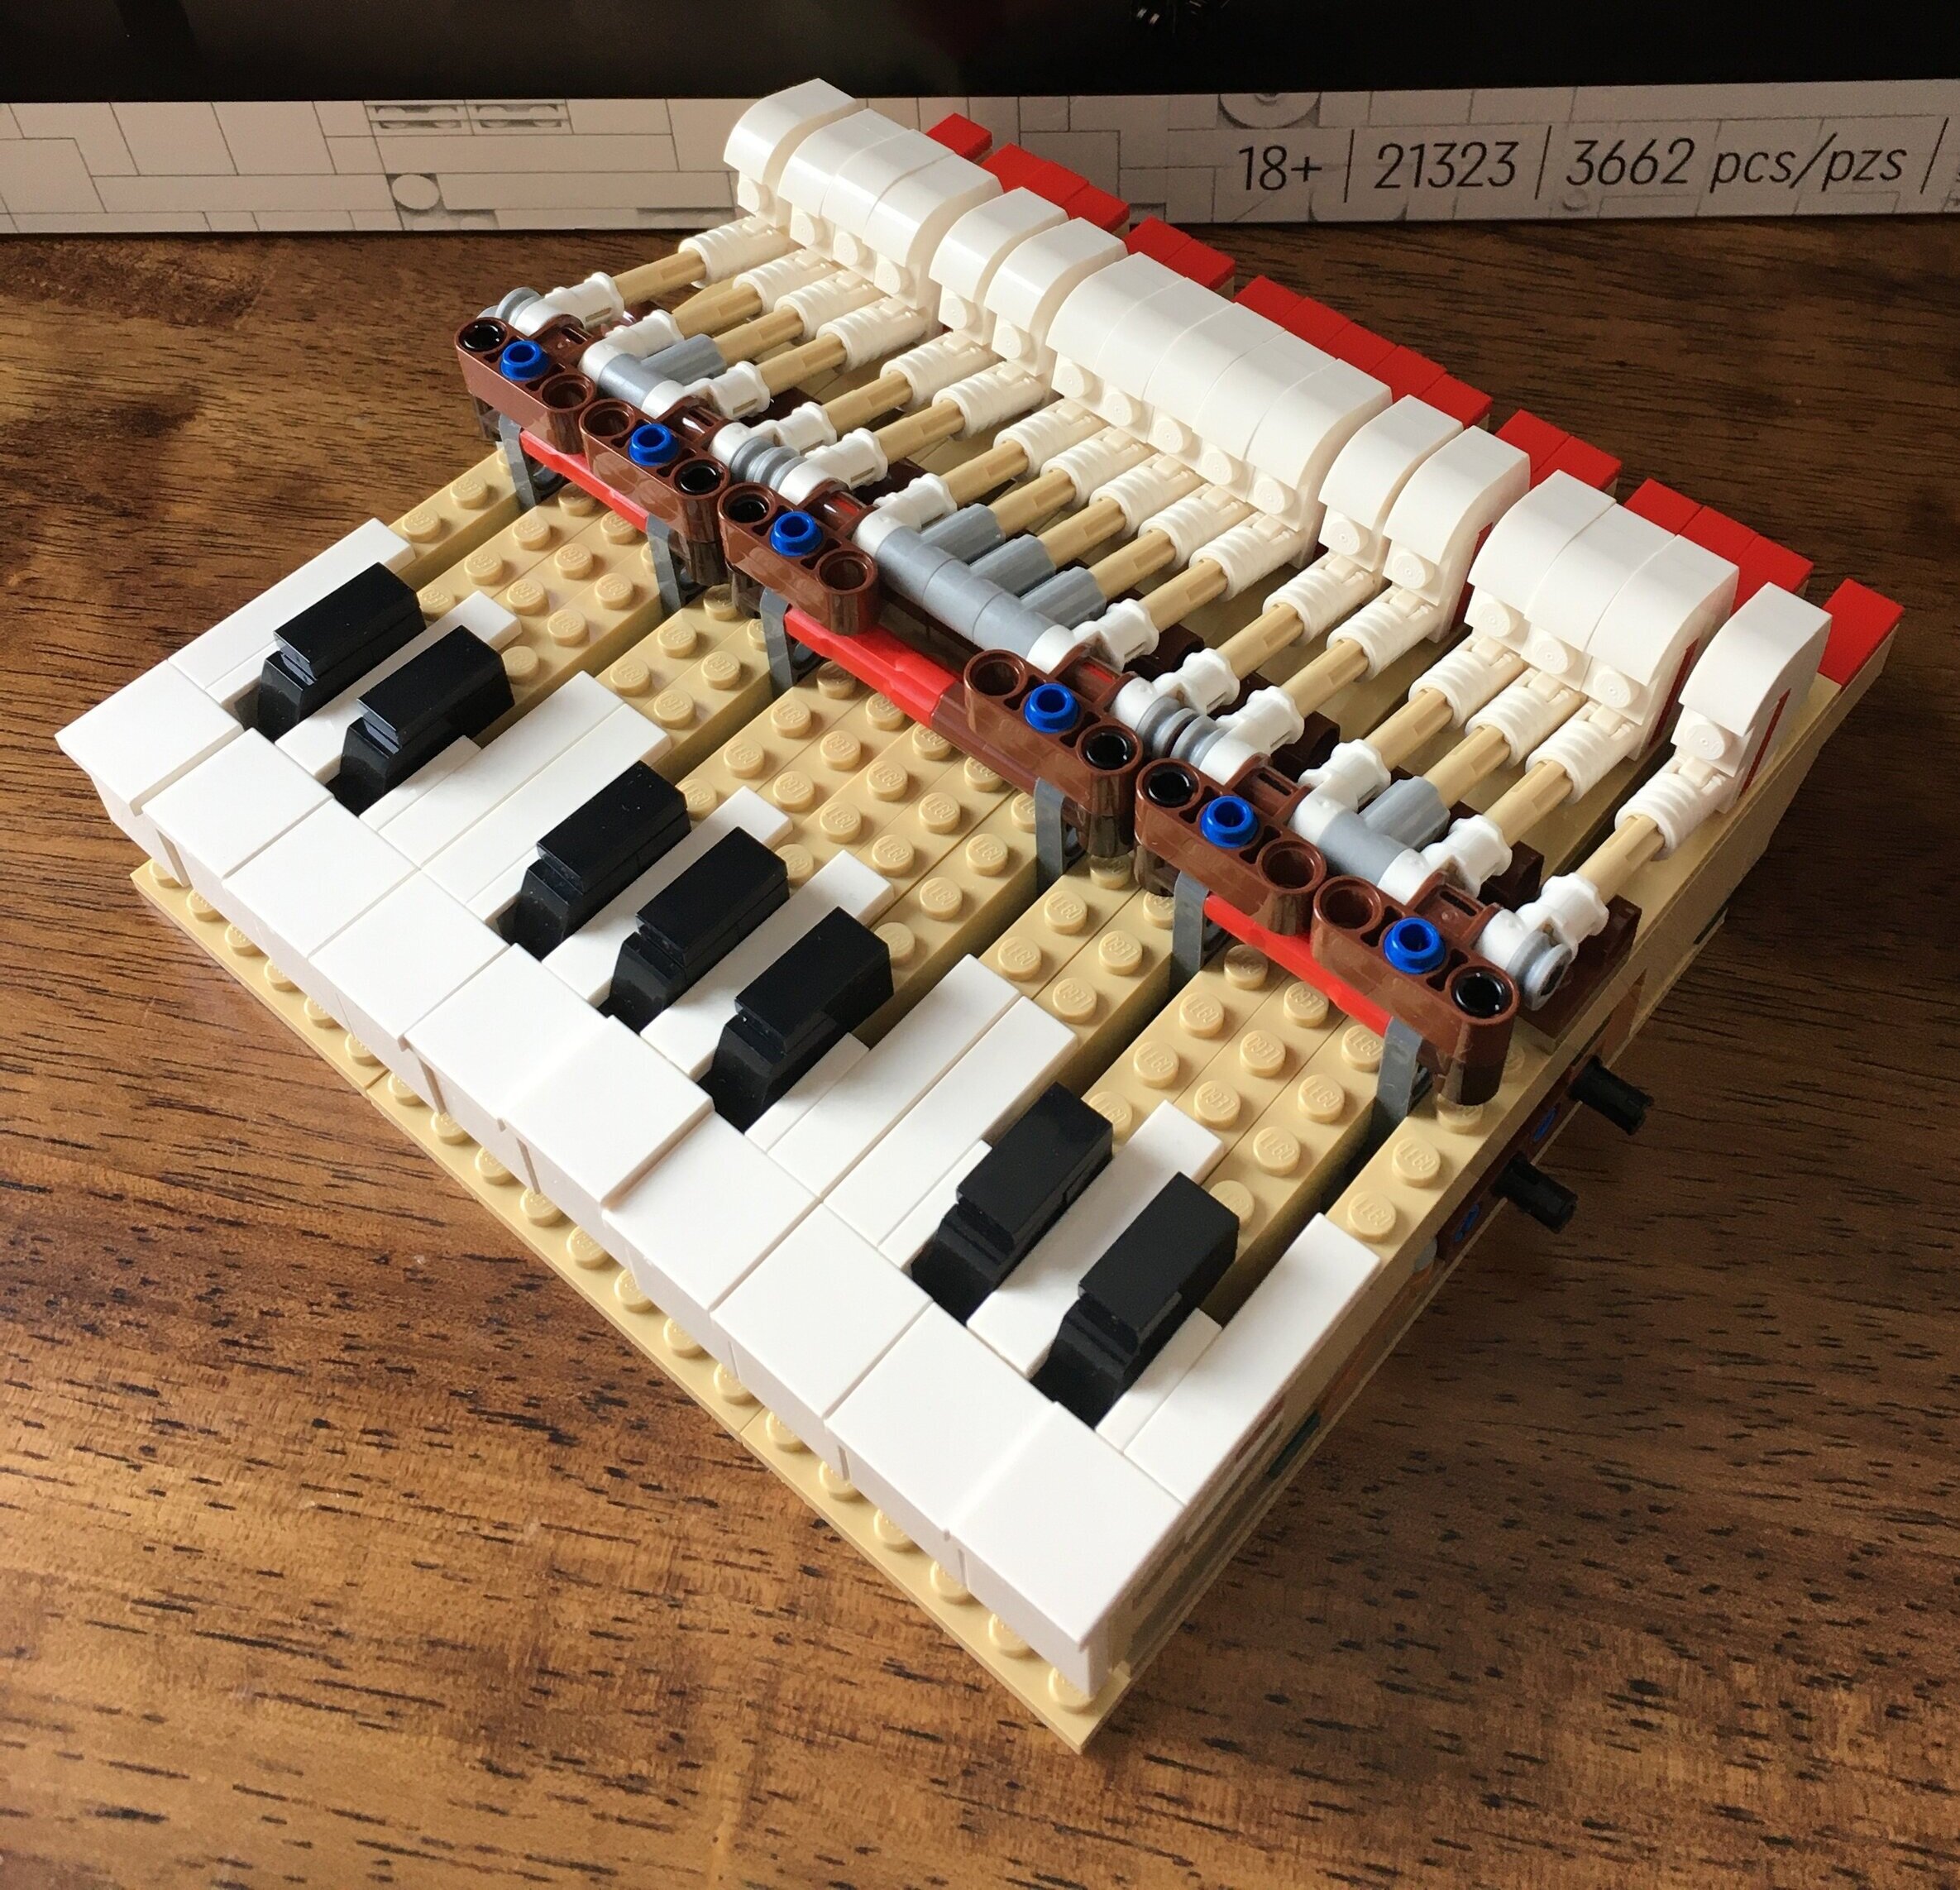
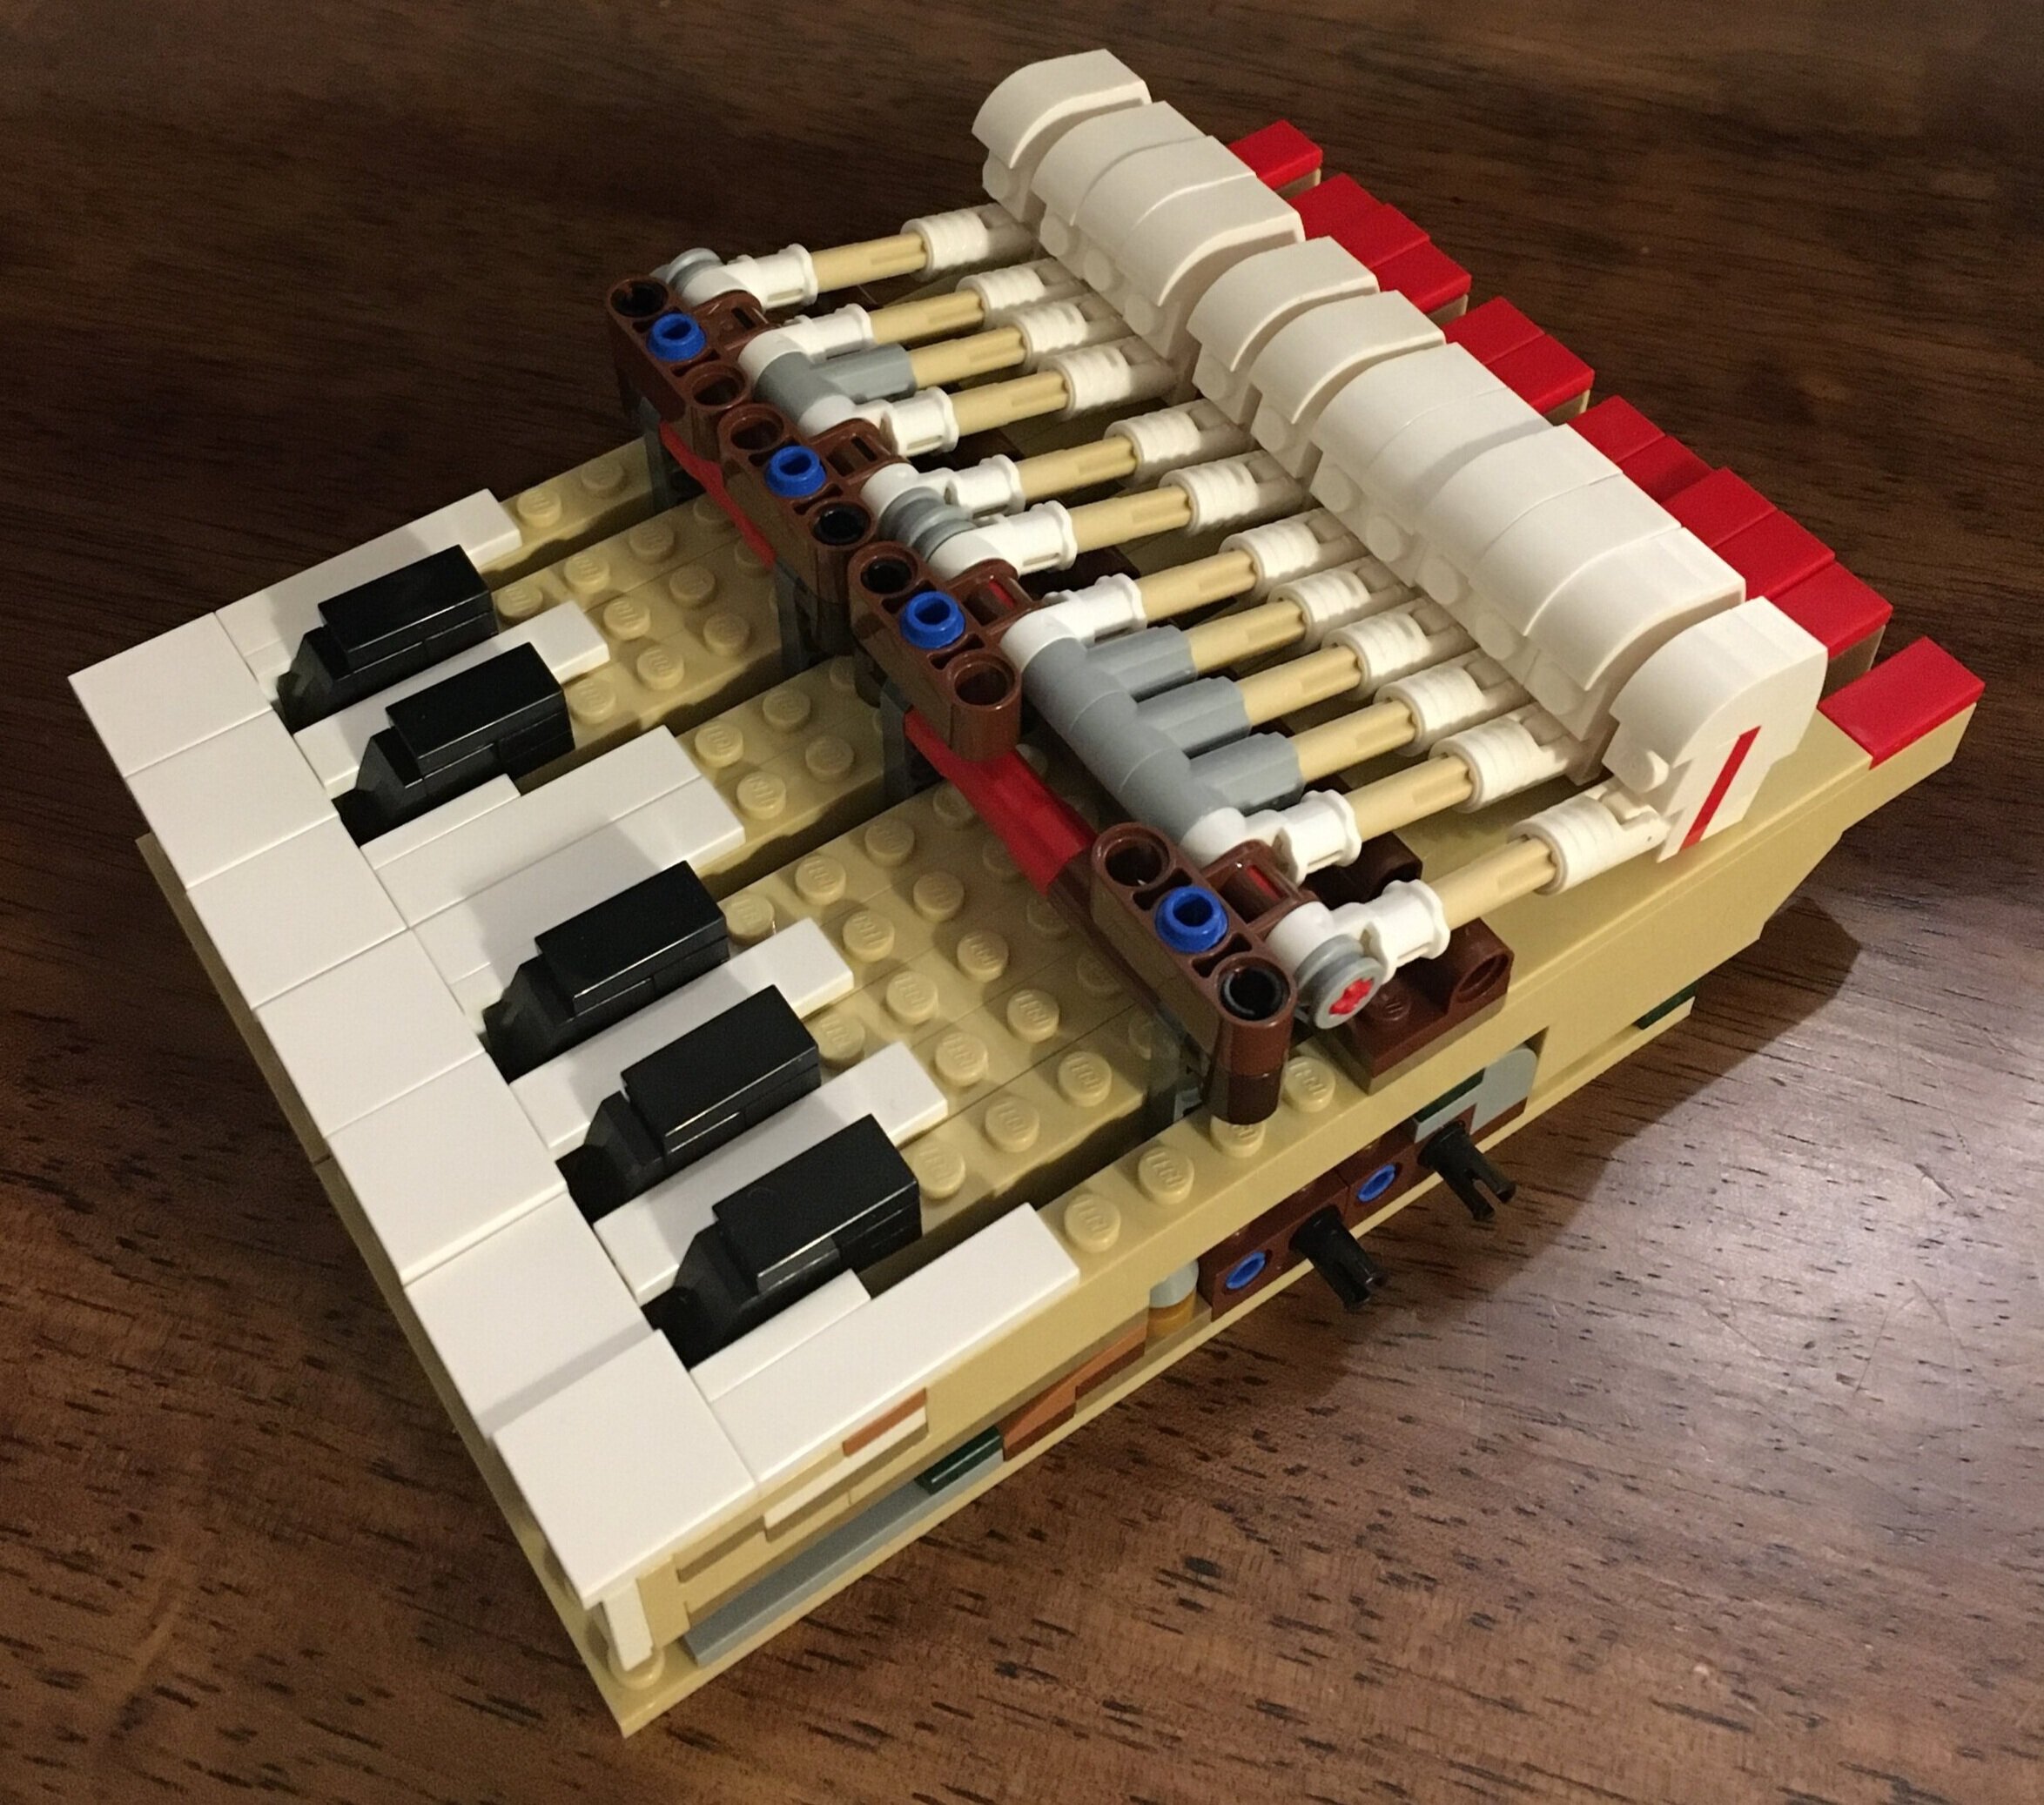
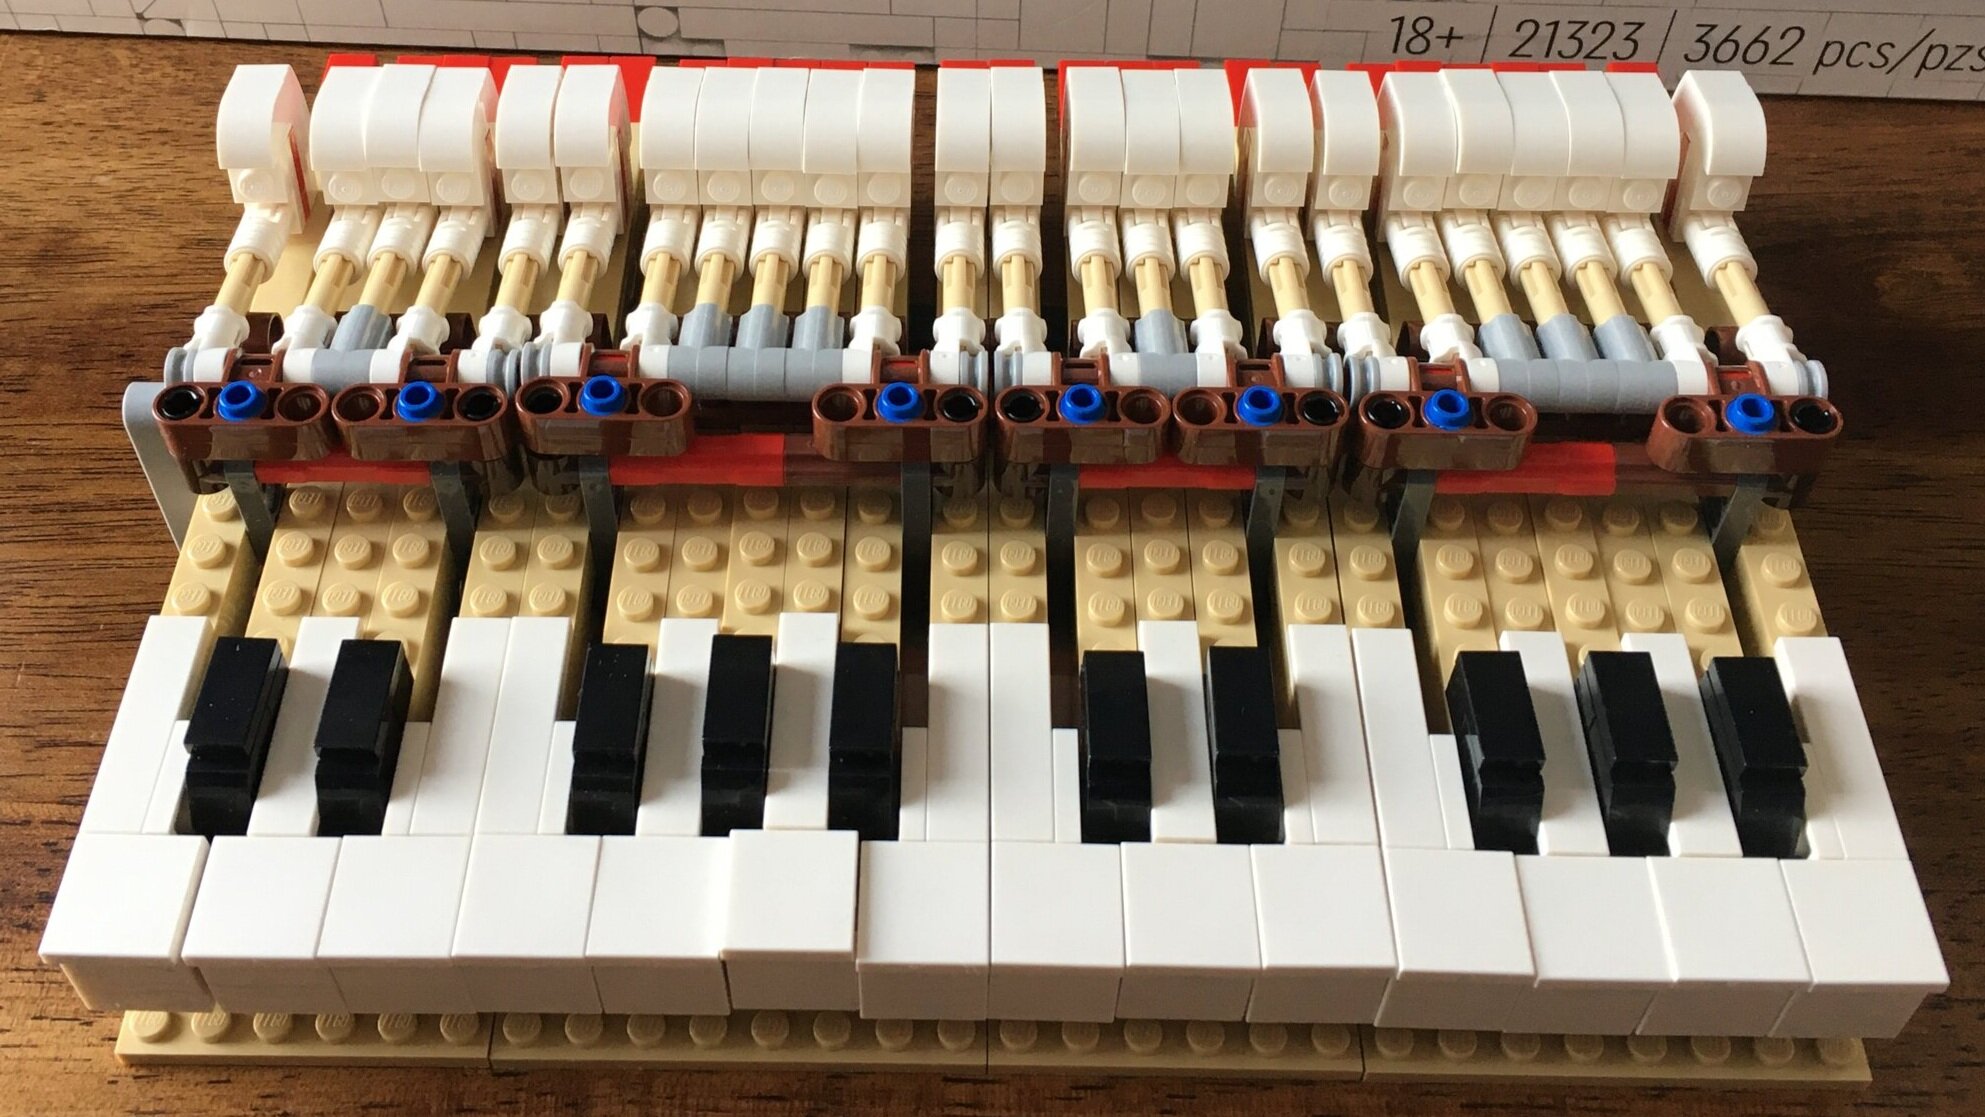
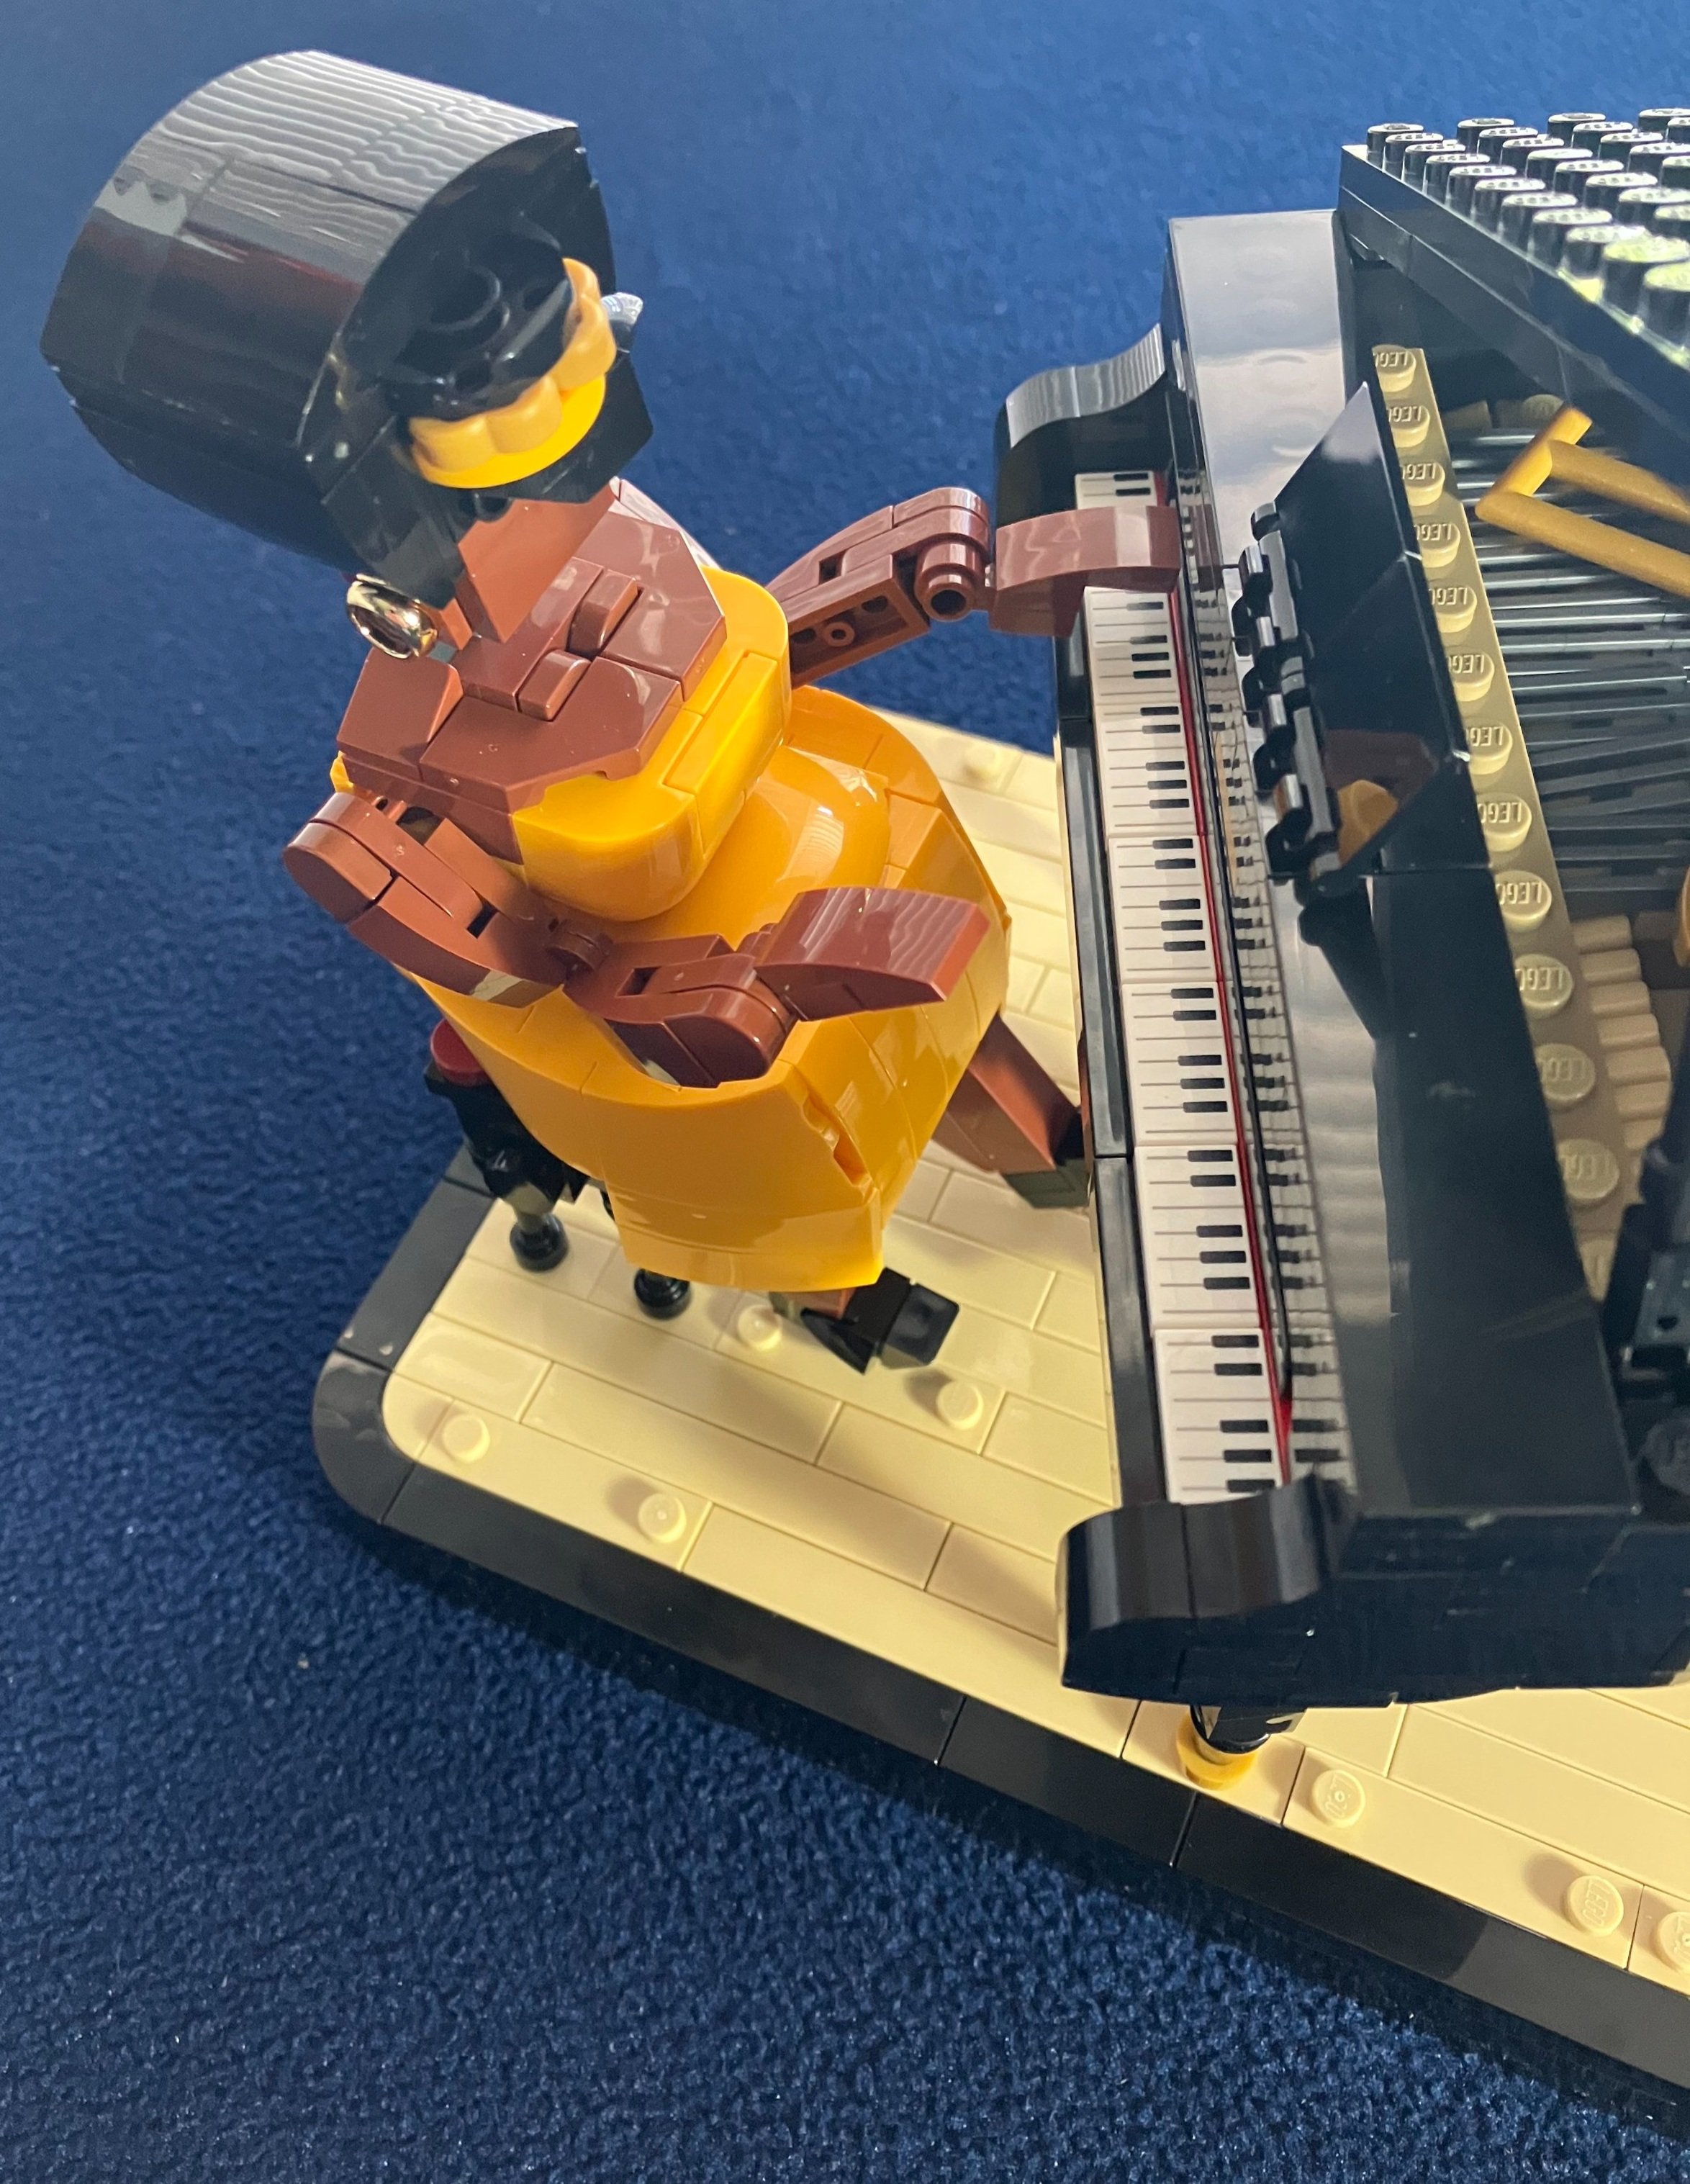
Bags nine and ten build the piano. It’s almost like a mini version of #21323-1: Grand Piano. I appreciated how the large one kept the shape of a grand piano and this one does the same only at a smaller scale. The piano isn’t as smooth as the larger Ideas set, but the outer edge is smooth. I like how the keyboard is printed tiles and you can still see the keys. The bench/seat looks like it belongs to a piano and the reddish colored tiles on top help to give it the look of a cushion.

Bag 11 builds the piano player and I think this design is awesome. Everything from the big poufy hair and the yellow headband to the yellow dress and heels really make her look like quite the soulful pianist. I also like the use of the gold rings as earrings. The way she’s built, she fits on the seat well and looks like she’s jamming away on the piano.

Here’s the final assembled set. In just looking at it, it looks like they are jamming away on stage. There isn’t any actual movement, but the poses really do add life to the set. I’m a big fan of this set and can’t wait until I have a place where I can display it. At $100 and over 1,000 pieces, the price works out pretty good for what you get. Plus there are no stickers and a few printed elements. If you don’t like the set, you get a bunch of great pieces for MOCs.

From my viewing of the fan media, this one came and then left the spotlight quickly which is too bad. I hope you enjoy it if you get to build it. Maybe we’ll see LEGO do more like these someday. What are your thoughts? Am I too positive on this one? Is it not as great as I make it out to be? Let me know what you think in the comments.

Happy building!

Set Review - #21333-1: Vincent Van Gogh - The Starry Night - Ideas (#41)

Set #21333-1: Vincent Van Gogh - The Starry Night was released in the US on 28 May 2022. I’ve had the set for a bit, but it took a while to put together as my NLS wanted to help and doesn’t dedicate as much time to brick building as I do. It’s finished now and I’m happy to review it as this one is completely out of the ordinary from any set we’ve seen in the past in my opinion. It contains 2,316 pieces and retails for $169.99 in the US. That works out to $0.073 per piece which isn’t too bad.

We’ve seen a lot of designs hit the 10K votes mark on the Ideas platform and this was one that when it hit 10K, I really hoped it would become a set. It was selected and I think the designers did a great job sticking to the original design while making it better. I usually wait until the end to give my overall impressions, but I’ll give it up front for this one. This set is incredible! The colors and how the original work of art is portrayed in brick form are amazing. It was a fun build and it’s quickly recognizable as to what it is. I understand that it might not be something everyone will like, but if you have the slightest interest in this set, I recommend giving it a shot. You won’t be disappointed in my opinion.

The box shows the set on the front and then the back shows it on display, a comparison to the actual painting, and then the minifigure feature where you can put it on a stand as if it is painting while looking at the larger set.

The contents are 20 parts bags labeled one through nine, two loose plates, and then the instruction manual comes wrapped.

I got this note in my set. I have yet to see a set without any of the single use plastic packaging. Looking forward to it though.

The first bag builds the Van Gogh minifigure with a small easel to paint on. The minifigure comes with a brush and painting palette. Thankfully, there are no stickers and everything is printed.

You then start the build with some mostly sub structure underneath to support the village and the rest of the build.

The second bag starts some of the microbuild of the village. Even if you’re not a fan of the set, you still get some great parts in some cool colors. This build has a lot of plate usage so get ready for that if you decide to jump in.

The third bag builds a separate section of the painting that is attached later. We did a lot of double checking the instructions and making sure it was all done right after each layer. It helped having two people as we could check work and hunt for pieces to make the build go smoother. With that being said, we still made a bunch of mistakes during the build.

The fourth set of bags completes the separate build and attaches it to the main build. The interlay of colors and staggering of the plates looks fantastic. I like the micro build houses and the church in the center is cool.

The challenge we found was when you go to attach pieces or try to press parts together, various pieces would fall off since it is a SNOT build. I recommend being careful in how you hold it and where you apply pressure so it doesn’t fall apart.

The fifth set of bags builds the sky background. There was a definite bonus here to team building as one person grabbed plates while the other attached plates. We did our best to match the instructions, but could have been slightly off somewhere. I’m not sure it really matters as in the end, the goal is to build the sky and I’m pretty sure no one is going to sit next to your build and figure out whether it matches the instructions perfectly or not. For this section, you also attach some of the connections on the front for the stars as well as the piece on the back to hang the set up on a wall. This is the same piece used with the LEGO Art sets so I’m guessing it works fine, but I haven’t tried to hang it up yet.

Here’s a close up of the village area with the sky background and then some of the extra pieces. Most sets will have a few one by one plates or tiles left over, but this section had a larger number of plates left. I assume this was because you would have made a mistake and the designers understood how painful it would be to tear down the whole sky to grab a specific plate or two. Good thinking!

The sixth set of bags adds the frame. Don’t be intimidated by all the black pieces. It wasn’t too hard to assemble and I think it looks great and helps to make the set pop out versus just having the set on its own. It also includes a Technic pin on the bottom in the front right side that you can use to help the set stand up vertically on its own if you don’t hang it on a wall.

Number seven adds in some of the stars and then more of the sky just on the horizon. The printed disc/saucer pieces are a nice touch to the set and I think are an improvement from the fan build.

The eighth set of bags adds the… um… not an art history buff here… swirl? I’m not sure what it is, but it’s a cool add and I like how the designers created the curves and angles using the various pieces.

The ninth set of bags adds the big tree in the front, a few buildings, and then the Technic element to allow the minifig to “paint” in front of the set. I really enjoy how parts are added on top to show depth and to give it a three dimensional feel. The tree especially has a more realistic look on top of the “painting” as it is built on in layers of pieces.

It was great build, you get a lot of great pieces, and I think it looks amazing. This won’t go on sale anytime soon so wait for double VIP points or a cool GWP to snag this set. I highly recommend this one.

Happy building!

Just so you don't think I'm slacking off...

I try to put out a blog post once a week. Someday I’ll work to put out more, but for now with all of the other life commitments, we’ll stick to one. This one will be short as I’m busy with some new arrivals.

The first one is #21333-1: Vincent Van Gogh - The Starry Night. I was excited to see this one come out and I really liked the final design they came up with. I’m mid-build right now so no spoilers before the final review, but so far so good. I managed to pick it up with some VIP points and when #40567-1: Castle Hideout was the promotional set so I can’t complain.

And then in my building backlog…. I also picked up a copy of #42143-1: Ferrari Daytona SP3. I want to say it’s a Technic Supercar, but the official branding is now “LEGO Technic Ultimate Car Concept Series” so let’s get it right. My version is way easier to say. Thanks to a whole bunch of VIP points and then the recent double VIP point period, this one wasn’t so painful to get. I’m looking forward to digging into this one and I promise to get a review out.

Have you grabbed any of the newer sets that have come out over the past month or two?

Happy building!

Set Review - #21327-1: Typewriter - Ideas

#21327-1: Typewriter is the 35th Ideas set to come out to date. This one was released on 17 June 2021. I’ve actually had this one for a few months, but my NLS wanted to build it with me. It took us longer to put it together since she doesn’t dedicate as much of her time to building as I do.

If you’ve been looking for this on Shop @ Home, it’s been sold out since Christmas time 2021 (as of the time of this post). The retail price is $199.99 in the US and with 2,079 pieces it works out to $0.096 per piece.

The box is pretty stylish. The front shows the full set with the 18+ branding. The back shows some of the features of the set along with dimensions. If you do a quick look, it looks pretty realistic. A relative came to visit, saw the finished set, and asked my NLS where we got the typewriter from. My NLS responded “from LEGO.”

The box contains 19 parts bags. 18 of the bags are numbered while one has some larger parts. The instructions come wrapped along with the booklet of paper with a letter to attach to the typewriter available in multiple languages.

The instruction booklet includes some information about the fan designer and LEGO designers.

The set comes with only two stickers. They are chrome so I guess it would be hard to print them on bricks like this. Two isn’t bad so I can’t complain too much.

The letter you can add to your typewriter comes in a booklet where you can tear out the letter you want. It comes in more languages than I was expecting.

The first set of bags builds some Technic hardware. A word of warning for this set, if you don’t like Technic builds, you won’t like this set. It has a lot of Technic pieces to build the mechanical functionality. My NLS was not familiar with Technic builds and found it very challenging. Often she passed those sections off to me. If you are used to System builds, then Technic builds can get challenging, but I didn’t think it was too bad. You just have to pay attention to where various pins go.

For the second set of bags, you attach all of those Technic builds from bag 1 together using long Technic axles that are similar to the long axles from #10280-1: Flower Bouquet. This part isn’t too challenging, but you really need to focus on the build and where you are putting each part.

The third bag adds the keys to make the keyboard. Thankfully, these are all printed and they look great since I didn’t have to put stickers on each one. Also, here’s your chance to set up the keyboard the way you want to. I used the standard QWERTY keyboard from the instructions, but you can use what you want and change it fairly easily.

The fourth set of bags adds some of the sand green bricks around the keyboard to build up the outer covering.

Next up you build more of the back of the typewriter and more of the Technic functionality. I made a mistake somewhere in here. I’m not sure if it shows on this picture or not. Thankfully it was an easy fix, but I didn’t realize it until I hit a key and the typewriter didn’t function as it should.

The sixth bag adds in more of the back along with the main hammer that moves when you press a key. Some of the fan media postings I have seen on this set mentions that the same hammer moves no matter what key you press and how they didn’t like that. I say, that would be hard to do with LEGO and the scale of the set so I can’t complain. I’m good with the one hammer moving. If you don’t like it, figure out how to re-mechanize it given the space constraints on your own.

The seventh bag adds more of the sand green case and then starts to build the section that will end up holding the paper. This part got a bit complicated with all the gears you need to add.

Onto bag eight… You cover up all that hard work you did connecting Technic pieces together. The more I look at it, the more I like the choice of color. The brick work on the top looks good with with the curved pieces in front of the spot where the type hammer piece is located. Also a few studs are showing so you still know it’s LEGO, but not a ton where it doesn’t look like a typewriter.

You also add in the switch that allows you to switch from black to red ink. The functionality doesn’t actually work, but the detail is there.

The ninth bag starts to assemble the section that holds the paper. The shiny chrome sticker really pops here and looks good on the sand green.

Bag 10 finishes the paper holder up and you attach it to the typewriter. The tires are an awesome touch and then the barrel half on the end is cool. There are a bunch of silver pieces and tiles for those of you who build MOCs who weren’t excited about all the sand green pieces.

In case you haven’t seen any other reviews, this section will move when you “type.” Once you hit the end, you can then push it back so you can type another row. It’s impressive that they were able to figure out how to make the typewriter function using Technic and System pieces.

#11 wraps everything up. You add in a handle for the paper holder. The instructions warn you that it is not strong enough to actually function like the real thing. You need to push it at the base of the handle and not at the top edge where it will just snap off. You also add in the ink ribbon and the rolls where the ink goes. Finally, you add in some additional hammers which help to make the typewriter look realistic, but don’t actually function.

Wow! This set is impressive. I enjoyed the build. The mix of Technic pieces to add functionality along with System pieces for detail make this set a winner. There are a lot of great pieces if you intend to tear this down for a MOC and not a ton of stickers. The set is on the expensive end at $200, but I thought it was worth it. Definitely look for sales at some of the retailers or use VIP points through LEGO stores or Shop @ Home if you want a discount. I highly recommend this one and hope we get more in the Ideas line or other lines similar to this one.

Happy building!

Bricking at the Library

I’m in the process of moving (again) so it has been a while since I have posted anything. Sorry for the delay. Just a quick one here…

I was at a local library recently and they had some LEGO sets on display. The library had a building club/group for kids to show up and free build. The area set up for this group had a large number of base plates attached to a wall. I counted 7 base plates high by 14 base plates long. That’s an impressive space. You can build long/tall builds that hang off the base plates, but you can make some cool 2-D pictures. Or maybe the challenge is to see how far off the base plates you can build until your build falls off the wall.

IMG_2638.JPG

Nearby to the building area were some glass display cases with built sets inside. There were two with mainly Architecture themed sets. Most were skyline sets as you can see, but there were a few others as well. I think it was a simple, yet great display. The sets are smaller so you can put the numbers in that you see which I think helps. It also gives people the opportunity to try and identify the buildings and which cities they are from. I know my kiddo tried to pick out which ones she knew.

library_display1.jpg
IMG_2640.JPG

Next to the two smaller display cases with Architecture sets was a larger case with a bunch of different sets. The top had #10257-1: Carousel. Below it were a mix of Super Hero sets, a Harry Potter set, some BrickHeadz, and at the very bottom it looks like part of #21311-1: Voltron. It’s an eclectic collection, but it works. Hopefully it inspires some of the builders at the club the library holds.

library_display3.jpg

The Library manager’s office had a copy of #31199: Iron Man from the Lego Art line on the wall. I wonder if that person is an AFOL? The manager wasn’t there so I didn’t get to ask.

Does your library have a Lego group? Do they have any sets on display? How did they do it?

Happy building!

Set Review - #21325-1: Medieval Blacksmith - LEGO® Ideas

I was not a big Castle theme fan as a kid, although I did have a few small sets. I recall having a few knights, a glow in the dark ghost, and some horses. I was definitely impressed when I saw #21325-1: Medieval Blacksmith be released as Ideas set #33. I was not a day one buyer when it was released on 2 February 2021, but I grabbed one when it was available with a good gift with purchase. This set retails for $149.99 in the US. With 2,164 pieces it works out to $0.069 per piece which isn’t bad.

My set box got a bit beat up in shipping, but I can’t complain. The front shows the full set with all of the minifigures. The back shows off some of the details of the set. The box is branded as 18+ as well. The back, upper left shows how the set is built like a modular in that you can remove the different levels and the roof to have access to the internal details. The back also points out that a light brick is included.

Before moving on, I’ll just say I’m not sure the light brick really adds anything to this build. I think we could have done without it and saved a few dollars on the set or added another minifigure or two in. As an 18+ set, I don’t think most adults like the play feature of being able to turn the light on and off. My preference would be to rig the set up with LED lights instead. That’s just my opinion though. Thoughts?

21325_box_front.jpg
21325_box_back.jpg

The set contains 14 numbered parts bags, a 15th bag without a number that contains some of the larger parts, and the instruction book is wrapped up. This set contains zero stickers. WHOOHOO!!!

Like most of the Ideas sets, this one contains information about the fan designer and LEGO designers in the beginning before you move onto the build.

21325_contents.jpg

I lumped bags one and two together as they both start on the base of the build. Bag one builds the base plate area. I like how LEGO has gotten away from just using a base plate and had switched to using plates of different shapes and sizes to achieve the desired design. It adds in some curves as well which is nice. Bag one comes with the blacksmith minifigure and a husky dog figure.

Bag two adds to the base. The blacksmith’s shop starts to form, the stairs to the second level are started, you get more foliage around the outside, and the area where the water well will be is built up slightly.

21325_build1.jpg
21325_build2.jpg

The third bag builds up the blacksmith’s shop. Besides the walls getting higher, the kiln is built with the light brick. A brick built blower is used to trigger the light which was a clever idea.

On the outside, there is a small garden with a few pumpkin like vegetables growing. Nearby is a bone for the dog.

The inside has a shield and some armor hanging on the wall that you can assume the blacksmith created.

21325_build3.jpg

The fourth bag mostly finishes up the blacksmith shop. On the inside, you get a bunch of tools, some extra “material” to use for tools, a completed helmet, an anvil to work on, and a brick built door with some printed wood patterned tiles. The outside has another anvil and then a barrel of swords that either need work or were finished.

I like what is done on the outside with the mixture of bricks, tiles, and textured bricks to create the medieval style of architecture. The use of brown to show wooden supports is also cool. This is especially apparent on the side with the veggie garden.

21325_build4a.jpg
21325_build4b.jpg

The fifth bag adds a female archer with bow, arrow, and quiver of arrows.

For this build, the biggest part is the apple tree. It’s a different type of tree than we have seen before and I like how they did it. At first I was confused as to where it was going, but it all came together, and I think it looks good with the lime green and green leaf pieces along with the red apples.

You also top off the water well with a small roof over the well and a bucket nearby.

21325_build5.jpg

The sixth bag starts the second floor. This starts work on the kitchen and includes a beverage barrel with tap, a table, a butter churn, and a stove. The stove is in line with the rest of the chimney area on the building and it fits together well.

21325_build6.jpg

The seventh bag continues floor two. You get some brick built chairs which are larger than most we are used to seeing, but actually fit minifigures. You also get some food on the table and there are candles on the wall. On the other side of the kitchen, you finish off the stove area and add in a pot holder attached to the wall. You also get a food preparation area where you get a few tools and a carrot with a section cut off.

On the outer section, you get a small awning with roof pieces and a sign for the blacksmith shop. The sign is printed on a tile. No stickers. YAY!

21325_build7a.jpg
21325_build7b.jpg

Bag eight wraps up the second floor. Besides finishing off the walls and adding windows, you get the brown tiles on the outside which make it look like wood boards. Having been around Europe, I have seen houses with this look and I think the designers did a great job capturing that style of build.

21325_build8a.jpg
21325_build8b.jpg

Bag nine starts the third floor which is the bedroom area. It is mostly the floor with the start of supports for the roof. There is a brick build animal rug on the floor which is a cool design. There is also an area for writing to include a quill and a tile with printing. There is also a chest with a compass and backpack. This is a reference to fan designer Clemens Fiedler and his passion for hiking and being outdoors.

21325_build9.jpg

Bags 10 and 11 add in some more supports, a small window outcrop, a bed with a fun patterned blanket, and more roof support pieces.

21325_build10.jpg
21325_build11.jpg

The 12th bag adds one side of the roof and another window outcropping. The roof pieces are blue, dark blue, and black. There is also some sand green as moss. I have seen a few complaints about the roof and how it was built in other reviews, but I am a fan. I like the coloring and use of tiles and bricks. As I’ve heard from other reviews, feel free to use your own brick stash to adjust the roof if you aren’t a fan of how it was designed.

21325_build12.jpg

The 13th bag completes the roof. On the previous side, you add in the chimney which is in line with the stove on the second floor and blacksmith area on the first floor. The other side of the roof is built in a similar way, but with a few different details. There are some missing tiles where you can see exposed “wood” and then more “moss” on the bottom edge of the roof.

At the top of the peak, there is more sand green and then some brown pieces to complete the top.

21325_build13a.jpg
21325_build13b.jpg

Bag 14 provides two knights. One is an older male with armor, a sword, and a shield. The other is a female with a battle ax and armor. They both come with hair pieces and then helmets.

Additionally you build a horse and carriage. The horse can either be attached to the carriage or you can add in a brick and tile to fill up the space so the horse doesn’t look too weird with the carriage attached.

The carriage comes with an additional shield, a plastic molded bag, and a lantern attached to the carriage. The horse can turn so the carriage turns too. The wheels remain in the same position, but the horse can pivot.

21325_build14.jpg

Here is the final build with the full assembled building. While I have to admit I like the fan design better, I can’t complain about this design. It definitely has the medieval style of architecture and would look great in a castle styled scene. It makes me want to expand to set into a scene… how many times have I said that before? I need more time for building… what is this stupid work thing I have to go to?

Overall, I highly recommend this set. It’s a great build of a great theme of LEGO past. Not sure it will ever go for a discount, but look for opportunities to get a cool gift with purchase, double VIP points, or other bonuses if you want to pick this set up.

Happy building!

21325_finala.jpg
21325_finalb.jpg

Set Review - #21323-1: Grand Piano - LEGO® Ideas

It took a while, but I was finally able to get Ideas set #31. In case you aren’t aware, LEGO now has the ability to set up email notices on Shop @ Home to let you know when an item is back in stock. I got the notice this set was back in stock and by the time I checked, it was already on backorder. I placed my order and was entered into the backorder line. I had saved up VIP points so this $349.99 priced set in the US only cost me $50. With 3,662 pieces, at the full retail price it works out to $0.096 per piece. The release date was 2 August 2020 and this set has spent a lot of time listed as out of stock on Shop @ Home in the US. As of the writing of this post, it is still out of stock. Keep an eye out for it if this is one that you’d really like to pick up.

Onto the review…

The set showed up as a box within a box. While it makes it a bit heavier, it helps to protect the set box. At $350, you definitely want your set to show up looking pristine so I’ll take the extra packaging. For reference, the sticker on my set box shows that it was made in January 2021 in the Mexico production plant.

When I opened the box up, the set was placed with the bottom facing up. After taking the set box out and finally opening it, the internals include a number of bags of parts and then another box with more parts bags inside.

21323_outer_box.JPG
21323_opening.JPG
21323_label.jpg
21323_opening2.jpg

Backing up… forgot to mention the box itself. The front shows the full set with the name in fancy lettering. It highlights that it is an Ideas set and is #31. The bottom right has the Powered Up logo. It definitely gives the set a classier look as opposed to most sets. This set also as the 18+ branding on it.

The back shows the piano in a theater or concert hall. It also shows the piano with the top closed and highlights the Powered Up functions.

21323_box_front.jpg
21323_box_back.jpg

Onto the contents. There are 19 bags once you open the set. It is bags 10 through 21 and then 5. Opening up the other box reveals 33 numbered bags, three un-numbered parts bags, a long Technic axle, three 6x16 tan plates, and then the instruction book which is wrapped.

The instruction book contains some information about the model, about the fan designer (Donny Chen), and some information about the LEGO Designers Woon Tze Chee and Steen Sig Andersen. Throughout the instructions, there are numerous quotes about music scattered throughout. There are 563 pages in the instruction book if you count the back cover. So get ready!

21323_contents1.JPG
21323_full_contents.JPG

There are 21 sets of numbered bags. Instead of going through them all one by one, I’m going to try and group them together to get you through the set quicker. Builds 1 and 2 assemble the main base of the piano and then add in the Powered Up battery box, motor, and sensor. It also adds the gears that will eventually make the keys move in self-play mode.

Seeing the size of this section of the build makes it clear how big the piano is going to be when you’re done.

Of note, one of my bags numbered one was opened when I opened the box and the pieces were all over the place. I ended up not having one piece. Not sure where it was lost, but I was able to account for it from my parts stash. I wrote LEGO about it, but never heard back. Hopefully my issue was a one off and not a repeat for multiple people.

21323_build1.jpg
21323_build2.jpg

Builds 3 and 4 add in the Technic elements that will connect to the hammers that hit the strings. Adding them became a bit repetitive, but it wasn’t too bad. After that, you add a top layer which covers the Powered Up elements. Thankfully, you can still access them very easily so don’t worry about them being stuck in there and having to take the model apart to get to them.

21323_build3.JPG
21323_build4.jpg

Build 5 adds more to the top section and then expands on the outer black cover of the piano.

21323_build5.jpg

Build 6 and 7 step away from the first section of the build. You move onto the front of the piano which is added to the rest of the piano next.

21323_build6.jpg
21323_build7.jpg

Build 8 adds the section built in 6 and 7 and adds some pieces to round out the front. Additionally, it adds the “strings” to the piano. Definitely a lot of gold colored pieces in this build.

21323_build8.JPG

Build 9 finishes up the outer shell/covering of the piano. I’m impressed how they captured all of the angles without making large gaps. You’ll notice from the picture that you add a door to the shell. This allows you to easily access the battery box to turn it on/off or switch out batteries as needed. Smart thinking!

21323_build9a.jpg
21323_build9b.jpg

Build 10 adds the legs to the piano which are all on wheels that can change direction as you need to roll your piano into the appropriate space. It also adds the pedals to the piano. Only one of the pedals actually has a function which is the far right “damper” pedal. Pressing the pedal will eventually lift up the dampers so that your note or notes continue to vibrate instead of stopping when the damper hits it (or at least mimicking the function of what a real damper pedal would do).

21323_build10.jpg

Builds 11, 12, 13, and 14 build the keyboard. There are 10 black keys and 15 white keys. They all move independently. This section of the build is a bit repetitive, but not too bad. Just make sure you follow the directions carefully or you may build the keys incorrectly and they won’t fit together. You also have to make sure all of the pieces line up evenly. Otherwise, if a 1x1 is slightly angled, it will rub against one of the adjacent keys and cause it to not work as freely.

Build 11

Build 11

Build 13

Build 13

Build 12

Build 12

Build 14

Build 14


Build 15 has you install the keyboard. The instructions just show you placing the keys in and really there are no attachments. It is fairly easy to remove the keyboard if required. You build a sub assembly, if you want to call it that, which is attached via Technic axles. You remove the axles, slide the sub assembly out, and then you can pull the keyboard out.

21323_build15.jpg

Build 16 is the cover for the keys. Like a real keyboard, you can raise or lower it. Of note, one of the pieces on the inside of the cover has the word “LEGO” printed in gold on it. A nice touch as this is where the piano logo would be located.

21323_build16.jpg
21323_build16a.jpg

Build 17 adds the music stand. The stand can be raised or lowered and can hold the sheet music provided or your phone. You can also completely remove the stand fairly easily if you’d prefer it to not be there. Finally, you install some Technic pieces which will end up as the arm to hold up the top cover to the piano.

21323_build17a.JPG
21323_build17b.JPG

Build 18 and 19 build the cover. It is a bit bigger than I expected and uses all black pieces.

21323_build18.jpg
21323_build19.jpg

Build 20 finalizes the cover and then you can install it on the piano. You can completely close it, just open the front, or open up the whole thing. Definitely cool how they re-created the actual function of a real Grand Piano.

21323_build20a.jpg
21323_build20b.jpg

Build 21 finishes up the build. You build an adjustable seat. This build was pretty impressive in my opinion. At first, I couldn’t understand where the build was going, but it made sense and works in a cool way. I’m a big fan. You also get a large tile which has the song the fan designer wrote to go along with his original Ideas submission.

Overall, this was a great build. It uses some great techniques, it was pretty challenging, and has some great piece usage. I hooked up the Powered Up, but my batteries died. I need to get some new ones to test both of those functions. Even without Powered up, it’s a cool build. I highly recommend it. VIP points definitely helped to soften the blow of the cost. Not sure if this one will ever go on sale so save your pennies.

Of note, my Non-Lego Spouse (NLS) said this might be a set she is willing to display in our house outside of my bricking space so I’ll take it. It looks good!

What are your thoughts on this one?

Happy building!

21323_build21a.JPG
 
21323_build21b.jpg
 
21323_build21c.jpg

Set Review - #21324-1: 123 Sesame Street - LEGO® Ideas

Can you tell me how to get to Sesame Street? If not, don’t worry because LEGO can. Ideas set #32 is #21324-1: 123 Sesame Street. Released on 1 November 2020 in the US, it contains 1,368 pieces and 6 minifigures. At $119.99 this set works out to $0.088/piece. This took a while to arrive after I ordered it and then it took me even longer to find time to build it. I’m finally finished so here’s the review.

The box shows the full set on the front and then the back side of the set on the back. It has all of the Ideas logos on it, but the bottom also shows the 18+ packaging. So interesting how it falls into two product categories that LEGO has. The back of the box as well as one of the sides have pictures of some of the actual characters too. I posted a picture of the minifigures on the box as well.

21324_box_front.jpg
21324_box_back.jpg
21324_box_side1.jpg

This set contains 12 parts bags. The bags are numbered one through six with two each number except for bag four. There is one unnumbered parts bag that contains some of the larger plates.

The instructions and stickers are packaged in a bag as well.

21324_contents.jpg

The instruction book is similar to other Ideas sets. It has some info on Sesame Street, info on the LEGO designers, and info on the fan designer.

There are a number of stickers. I’m not a fan of stickers, but there aren’t too many here and they do help add some fun details.

21324_instructions.jpg
21324_stickers.jpg

The first two bags assemble the base and start on the main part of 123 Sesame Street. The base is similar to Architecture themes or some of the recent Ideas themes. Instead of a big base plate, a number of plates are attached together. This makes sense for this set as it allows you to create the corner of the street.

You don’t build much of the base of the first building. It is mainly the foundation with a start to a few details on the outside to include Big Bird’s nest area, the front stairs, and the area where Oscar lives. There’s a spider and web that you bury in the foundation area. I’m not sure of the reference to Sesame Street or if it is just included for fun, but it’s there. You also get some fun colored pieces in the bottom that you can substitute out for other uses if you want.

The minifigure is Big Bird. Big bird is taller than the rest as expected, but the torso and head is rubbery versus the ABS plastic. Not really a complaint in my mind. Just an observation.

21324_build1a.jpg

The second set of bags builds up the first floor of 123 Sesame Street. You get a bedroom which we can assume belongs to Elmo (the minifigure included in these bags). It includes some pictures of Elmo and his Dad and Rosita and Zoe. There’s a lamp and the standard 2x2 printed tile with a picture of a bridge on it that appears in a lot of sets. There’s an old fashioned phone on the wall. The floor includes a large 6x6 tile piece as a rug. There are some additional details which are completed later.

21324 build 2a.JPG
21324_build_2b.JPG

The third set of bags builds up the second floor which is where Ernie and Bert live. On the outside, the window pattern is the same as the first floor. It adds in the doors to the first floor, the lights on the sides of the door, and an architectural design above the door.

Inside the second floor, you build up the tub along with Rubber Duckie. Additionally, there is a book shelf along the wall and a rug on the floor. More details will be built later.

Ernie comes in this set of bags and he is smaller than Elmo. I think the show portrays Elmo as smaller, but I’m not sure. I realize LEGO has limitations when designing and probably not a huge deal, but I would think Ernie would be larger. Although you have to watch proportions as then you’d have to make Big Bird even bigger.

21324_build_3a.JPG
21324_build_3b.JPG

The fourth bag finishes up the second floor. Included are beds for Ernie and Bert, a picture of Ernie and Bert, some toys on shelves to include a dinosaur and ball, and Bert’s paper clip collection. You also add in the chair Bert usually sits in. The roof is not a complete cover, but two triangular plates. I’m not sure why this is, but it can easily be fixed if you have your own parts stash. You add in a chimney, a TV antenna, some birds, and a cage area. Maybe the cage is for Bert’s pigeons?

The Bert minifigure comes in this bag. He is taller than Ernie so that is good and they accurately portray the outfit he is always found in.

21324_build_4a.JPG
21324_build_4b.JPG

The fifth set of bags builds Hooper’s Store. The first floor is the small store area with a few food items to buy, and a counter to sell from. Outside is a box with some veggies and the recipe to Bert’s oatmeal. The second floor has a small sitting area with a chair, an old fashioned TV showing Guy Smiley, a portrait of The Count, a bus picture on the wall, and a gold frog and minfigure statue on the shelf. There is a bat on the roof for The Count. The roof here also has a triangular section like 123 Sesame Street. It has a small air conditioning unit/ventilation unit. Lots of details here… very fun and nostalgic. I like the VCR and 1x2 tiles used as video tapes.

Cookie Monster comes in this build. He has 2 cookies in his hand to go with another one you can attach to the floor.

21324_build_5a.JPG
21324_build_5b.JPG
21324_build_5c.JPG

The sixth set of bags wraps this set up. The final minifigure is added which is Oscar the Grouch. Oscar is really just a head that is added into some pieces with the trash can. It’s not a full minifigure which I’m okay with as usually you only saw his head and hands anyways.

Details are added in the corner to include a seating area for Hooper’s Store and a lamp post. On the side of 123 Sesame Street is a fire escape, a small garden near the sticker of Abby Cadabby (this was added earlier), and a sticker advertising Biff and Sully’s Construction company.

21324_build6b.JPG
21324_build6c.jpg

At this point the build goes in a few directions. Additional details are added on the first floor to include some toys for Elmo. Big Bird’s nest is built up and Radar, his bear is added in. Trash is added near Oscar’s can. A UFO is placed on the roof for the aliens that say “yep, yep, yup,” and the mailbox that can walk around is placed on the street.

The famous 123 Sesame Street sign is added with the green lamp post. Thankfully this is not a sticker. I failed to pay attention to the clear minifigure head used inside of the light. Take note that there are two and one has Elmo’s fish Dorothy on it.

I’m probably missing a bunch of details here. There are a lot in the set and the designers definitely tried to capture as many as they could to truly make it Sesame Street.

Overall, I think this is a great set, but then again I grew up watching Sesame Street and I’m sure that’s why. It might not be a big hit for non-Sesame Street fans. Pricewise, it’s not too bad at just under 9 cents per piece. I doubt you will find this one on sale in the future, but you can get it on a future double VIP point day or with a cool gift with purchase deal in the future. I definitely recommend this set for current or past Sesame Street fans. For MOC builders, there are some cool parts to use elsewhere too. If you aren’t into Sesame Street, then I would skip this one as you probably won’t enjoy all of the details.

One final note… I saw this on another review… the edges of the buildings have holes for Technic pins. One thought is just so you can attach this to other buildings you create or have as desired. The other is that potentially there will be more coming from Sesame Street in the future. You never know if they will have more of a licensed theme, but I like the idea of being able to attach it to City themed buildings, MOCed buildings, or even modulars.

What did you think of this one? Did they capture the aspects of Sesame Street? Did they get the minifigures right or should they have included others?

Happy building!

21324_build6a.jpg
21324_build6d.jpg

The LEGO® Gift with Purchase Rush - January 2021

The LEGO® Company has been having trouble keeping up with stock on the Shop @ Home site for a few months now. The situation was exacerbated in the lead up to Christmas as numerous items went out of stock. At the current time, you can click through the themes on the US Shop @ Home page and see the “out of stock” messages for entire product lines. As of the writing of this post, you cannot purchase any of the Ideas sets. There is one Speed Champion product available. The Creator Expert/18+ section only has a few products available. The list continues as you have to go search elsewhere if you really want a set or you have to wait.

I thought the situation might improve as sets remained out of stock through December and LEGO would use the time to catch up. The only problem… not only did they need to catch up, they also needed to produce the soon to be released 2021 sets. So what do you do as a company with a supply and demand problem like this?

It all came up again over the past few days on Shop @ Home as fans, resellers, parents, collectors, and anyone else looking to spend funds on LEGO sets dove into the inventory that appeared online on 1 January 2021. Midnight hit and the orders started pouring in. There were two gift with purchase sets available. The first was #30628-1: Monster Book of Monsters. This set was available for purchases of $85 or more on Harry Potter sets.

©2020 LEGO Group

©2020 LEGO Group

The second set was #40448-1: Vintage Car. This set was based off of a fan design as part of the Ideas line and was much anticipated. It was available for all purchases over $85.

©2021 LEGO Group.

©2021 LEGO Group.

So what happened?

Midnight on the east coast of the US is 6 AM here in Germany so I got up a bit early to see if it was worth it to place an order. I’d like to know how many people were trying to order at that time because the site couldn’t handle it. I tried to add items to my cart and I kept getting error messages. None of the Harry Potter sets would add to my cart. I gave up. I checked LEGO.de (German site) and it worked okay. I try not to shop there as the exchange rate is getting worse and it is becoming more expensive for me to buy sets in Euros by the day.

I logged in later in the day… around 2 PM in Germany. #30628-1 was completely sold out on both the US and German sites. It was #44048-1 only. Some of the new 2021 sets were at backorder or sold out too like the new modular building.

The US site showed #44048-1 available as a gift with purchase through 3 January.

On 4 January, #44048-1 was not an option anymore. However, #30628-1 showed up again as available. I’m not sure how long that will last. It still shows available on 6 January so we’ll see what happens.

The big question from all of this… how will LEGO® break out of this downward spiral. It seems as though their supply chain cannot keep up with demand. My guess is it would take too long to stand up another factory. Should they decrease the new sets they release and focus on producing the existing ones in large quantity to keep up with demand? Should they place more limits on the numbers of sets you can buy per account? Do you think the shift will happen naturally as fans find other things to occupy their time or the pandemic eventually ends? Should they cut back on the number of retailers selling products? I’m curious to hear your thoughts. Feel free to post them in the comments or email me at store@bricksforbricks.com.

Happy building!

Return of the Bricklink AFOL Designer Program

bricklink.jpg

In 2018, LEGO and Bricklink teamed up for the AFOL Designer Program. They crowd funded 13 sets that were designed by fans and released them for purchase in 2019. I ended up buying two of them. One was #BL19003: Skyline Express and the other was #BL19012: Bikes!. I was a big fan of both of them and probably would have purchased all 13 of them if I had unlimited funds.

LEGO announced their purchase of Bricklink at the end of 2019 and there was much consternation in the fan community as to what would happen. A number of fans, including me, hoped the AFOL Designer Program would return. We heard nothing for a while, but we finally got something a few weeks ago.

Bricklink announced on 17 December 2020 that they were going to re-open the program, but it would be slightly different in 2021. Instead of soliciting new projects and crowd sourcing them, they are going to use designs from the Ideas platform and produce some of them. While not exactly what we wanted, I can’t complain about this effort. The rules are the project must not have an IP tied to it and it must have achieved the 10,000 votes. My search revealed 44 sets in this category. If my link doesn’t work, go to the Ideas site and when you search, select Product Phase - Not Approved and IP - Original Ideas. There are a lot of great designs and then some that it looks like LEGO has produced in a different form already.

If LEGO/Bricklink reads this post, here are the three designs I would like to see made in the 2021 AFOL Designer Program.

1. The Train Station: Studgate

I’m a big train fan and a modular building fan and this set would look fantastic mixed with the two themes. Designed by Bricky_Brick, the same designer as #21322-1 - Pirates of Barracuda Bay, I think this set would add some elegance to some of the more boring train stations that exist in the current LEGO set realm. Plus you get a small passenger train so win, win all around here.

studgate.jpg

2. Food Stand Diners

How awesome would this set look in a City scene or a park scene or mixed in with your Fairground sets? Designed by builder FrostBricks, this set would be a great add and could be produced at a lower price point considering some of the other larger sets listed.

Food Stand Diners.jpg

3. Chemical Plant

If you like Trains, City, or the Octan theme, this one would be great to see. Designed by fan Ymari, this set has a lot of playability (although not meant for kiddos), lots of great details, and connections to train with the tank car and roads with the Octan themed tank truck.

chemical plant.png

We’ll see if any of these even make it, but those are my votes. What are yours?

For those of you disappointed that we don’t have an AFOL Designer Program where you can submit your project, don’t worry. It appears LEGO and Bricklink are planning on launching this effort in 2022.

Happy Building!