Set Review - #10266-1: NASA Apollo 11 Lunar Lander - Creator Expert

It’s the 50th anniversary of the first moon landing and LEGO decided to put out a set to recognize the event. This one has received a lot of press on the fan media so there probably isn’t a whole lot I can say about this set that people haven’t heard so I’ll focus on the review. The basics are that it was released 12 June 2019 in the US. The price is $99.99 for 1087 pieces. This works out to $0.092 per piece. You can see the official LEGO Designer video here. You can see my review of #21309-1: NASA Apollo 11 Saturn V Ideas set here.

Onto the review…

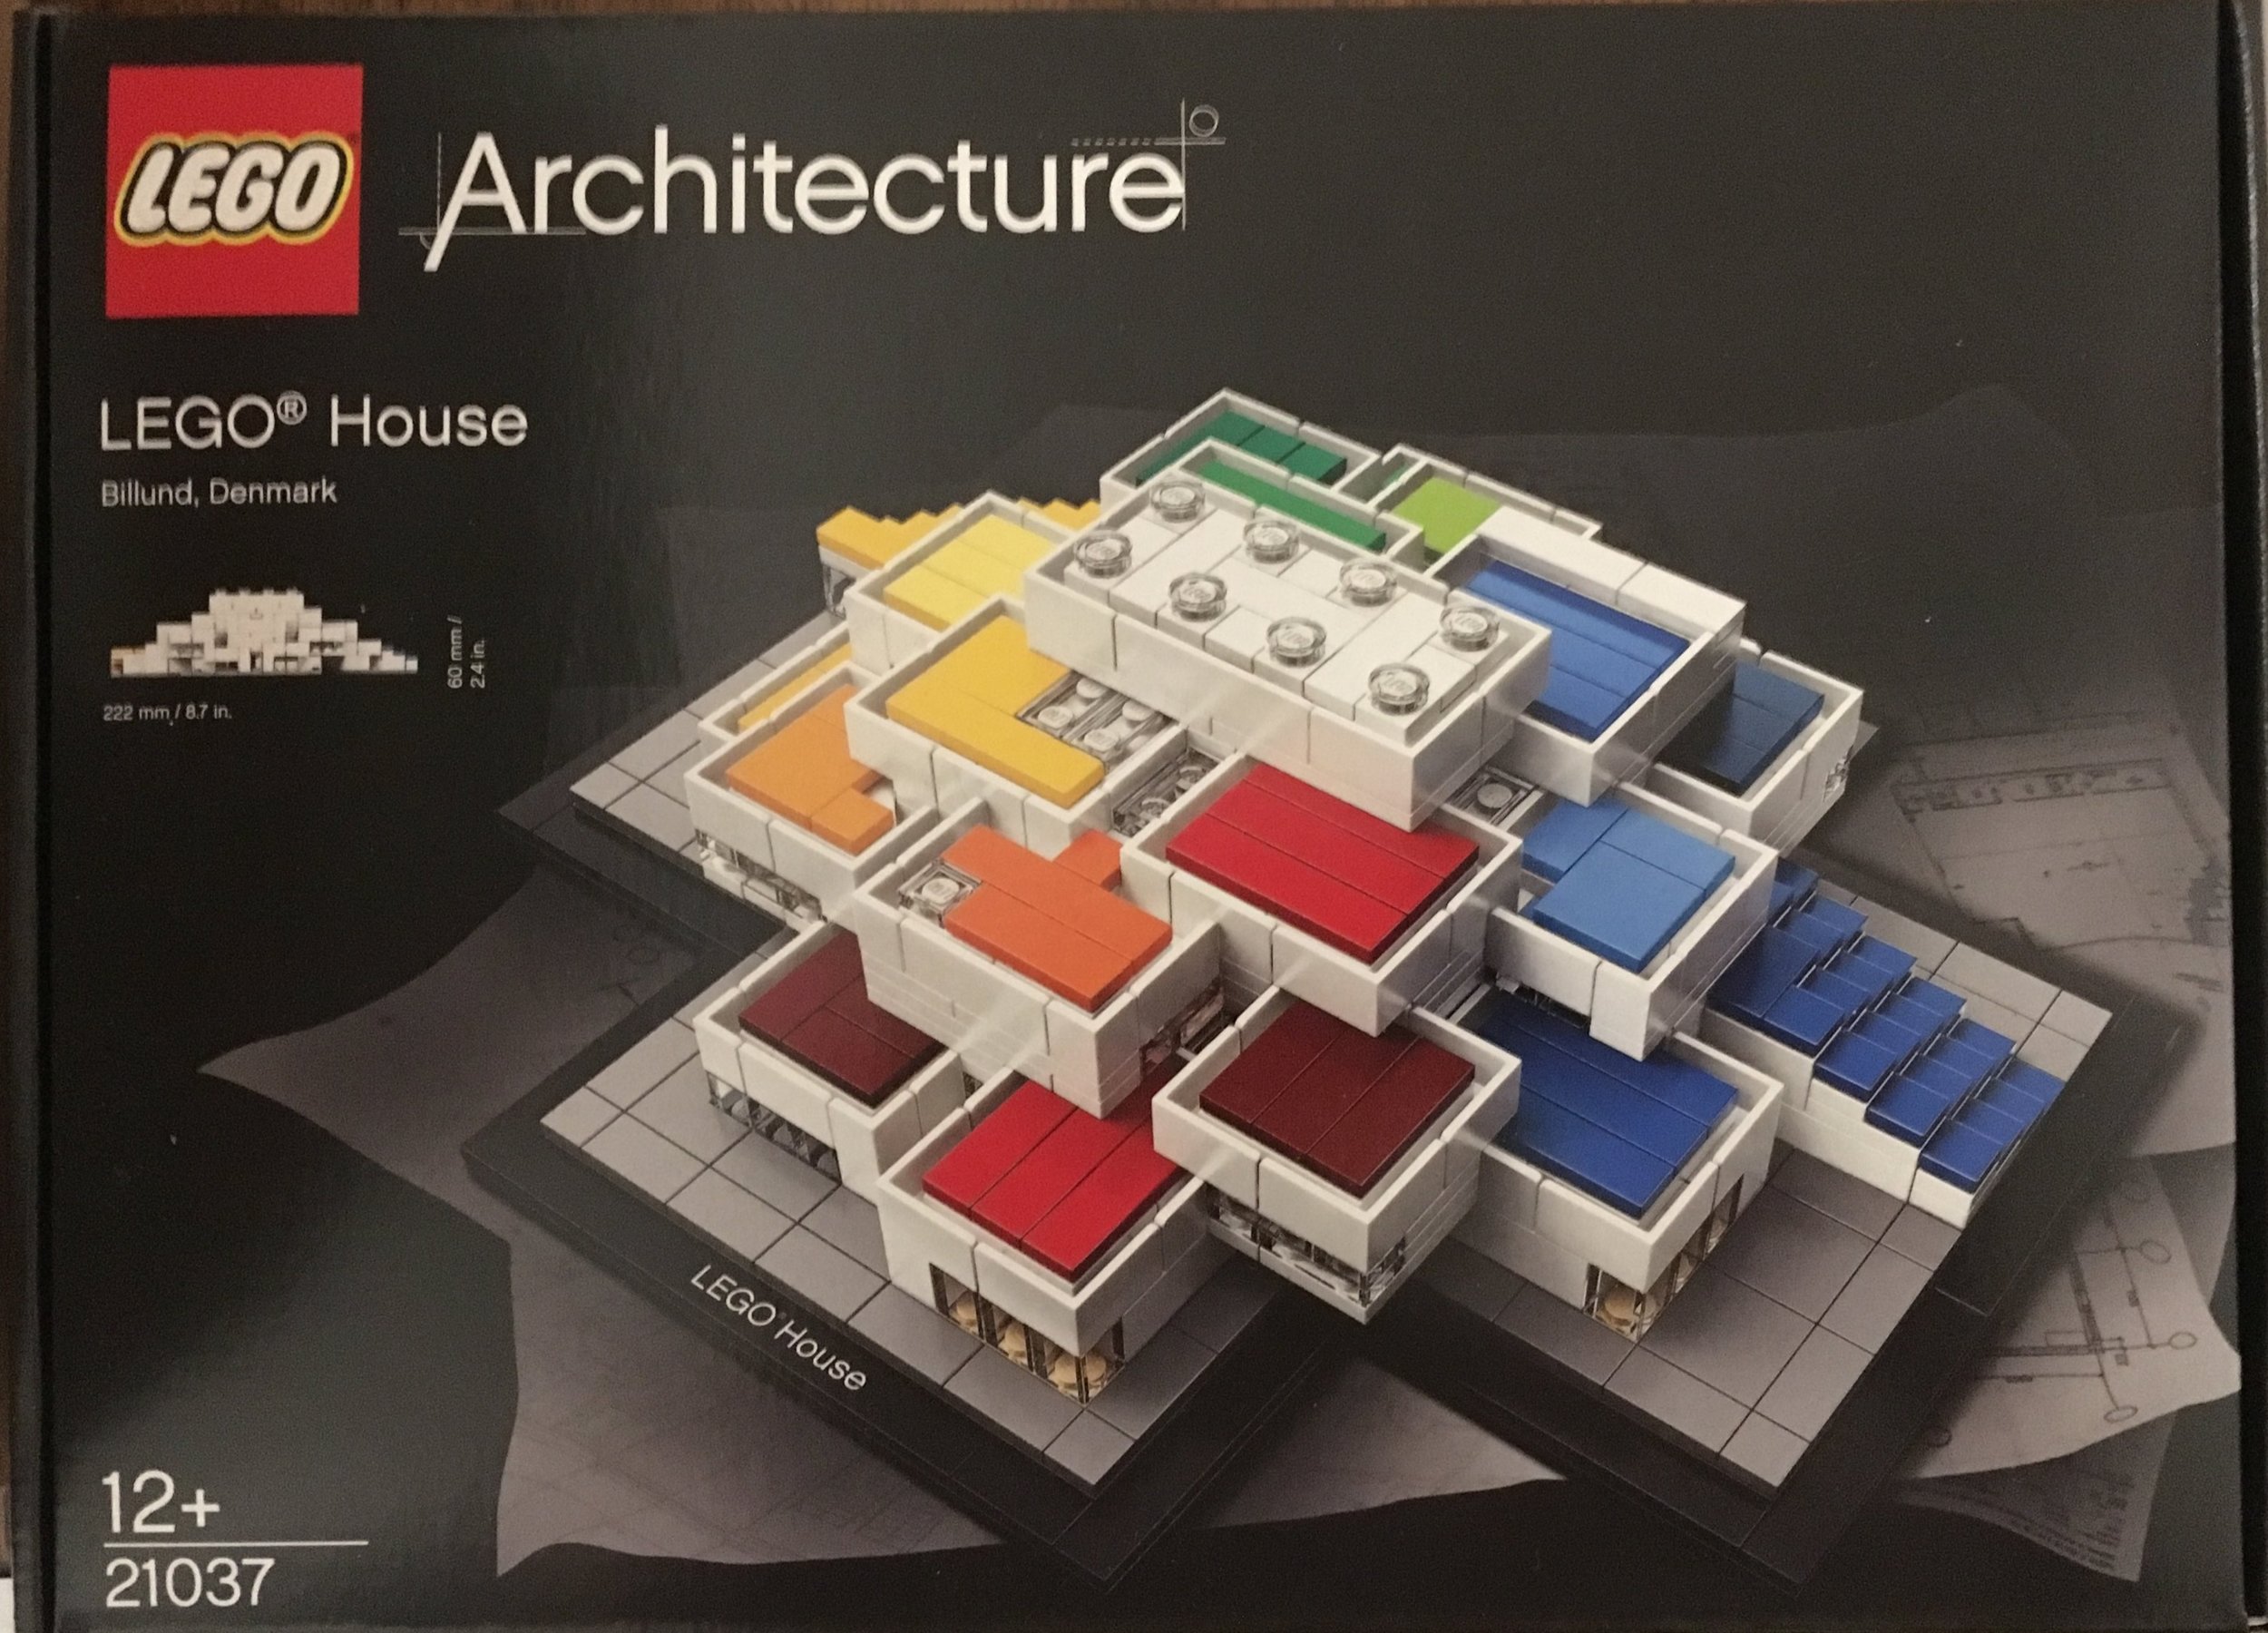
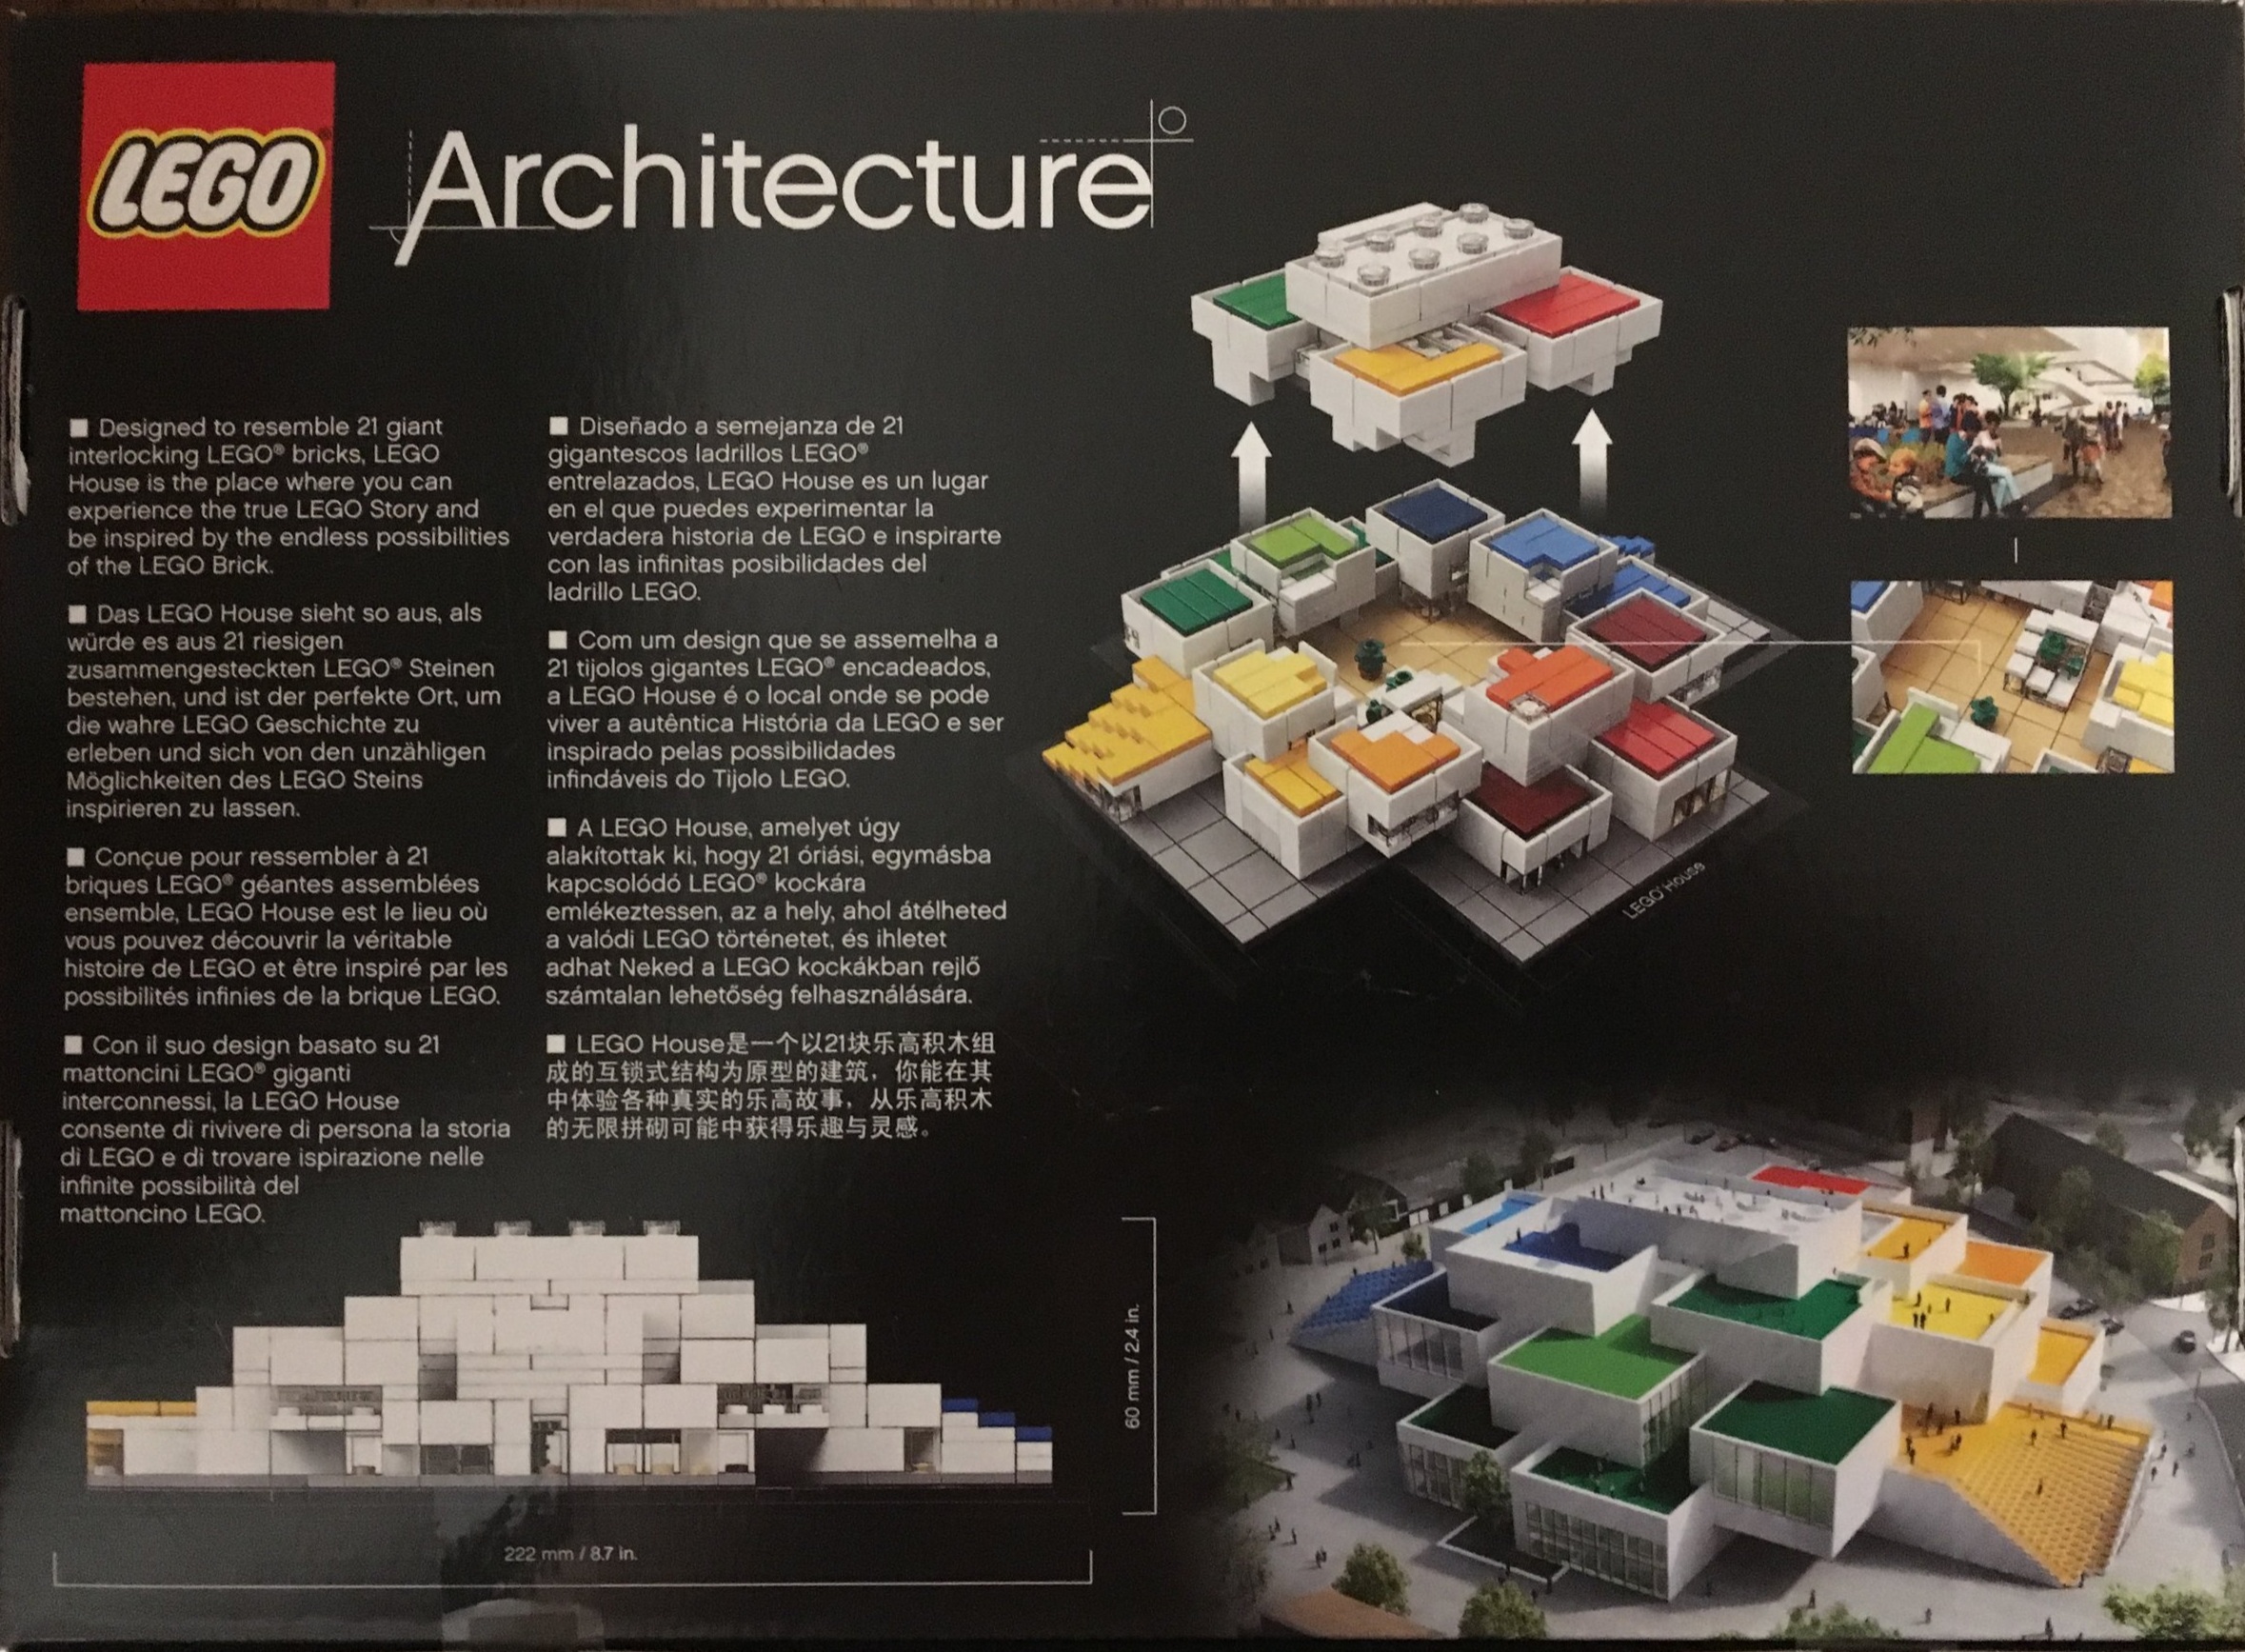
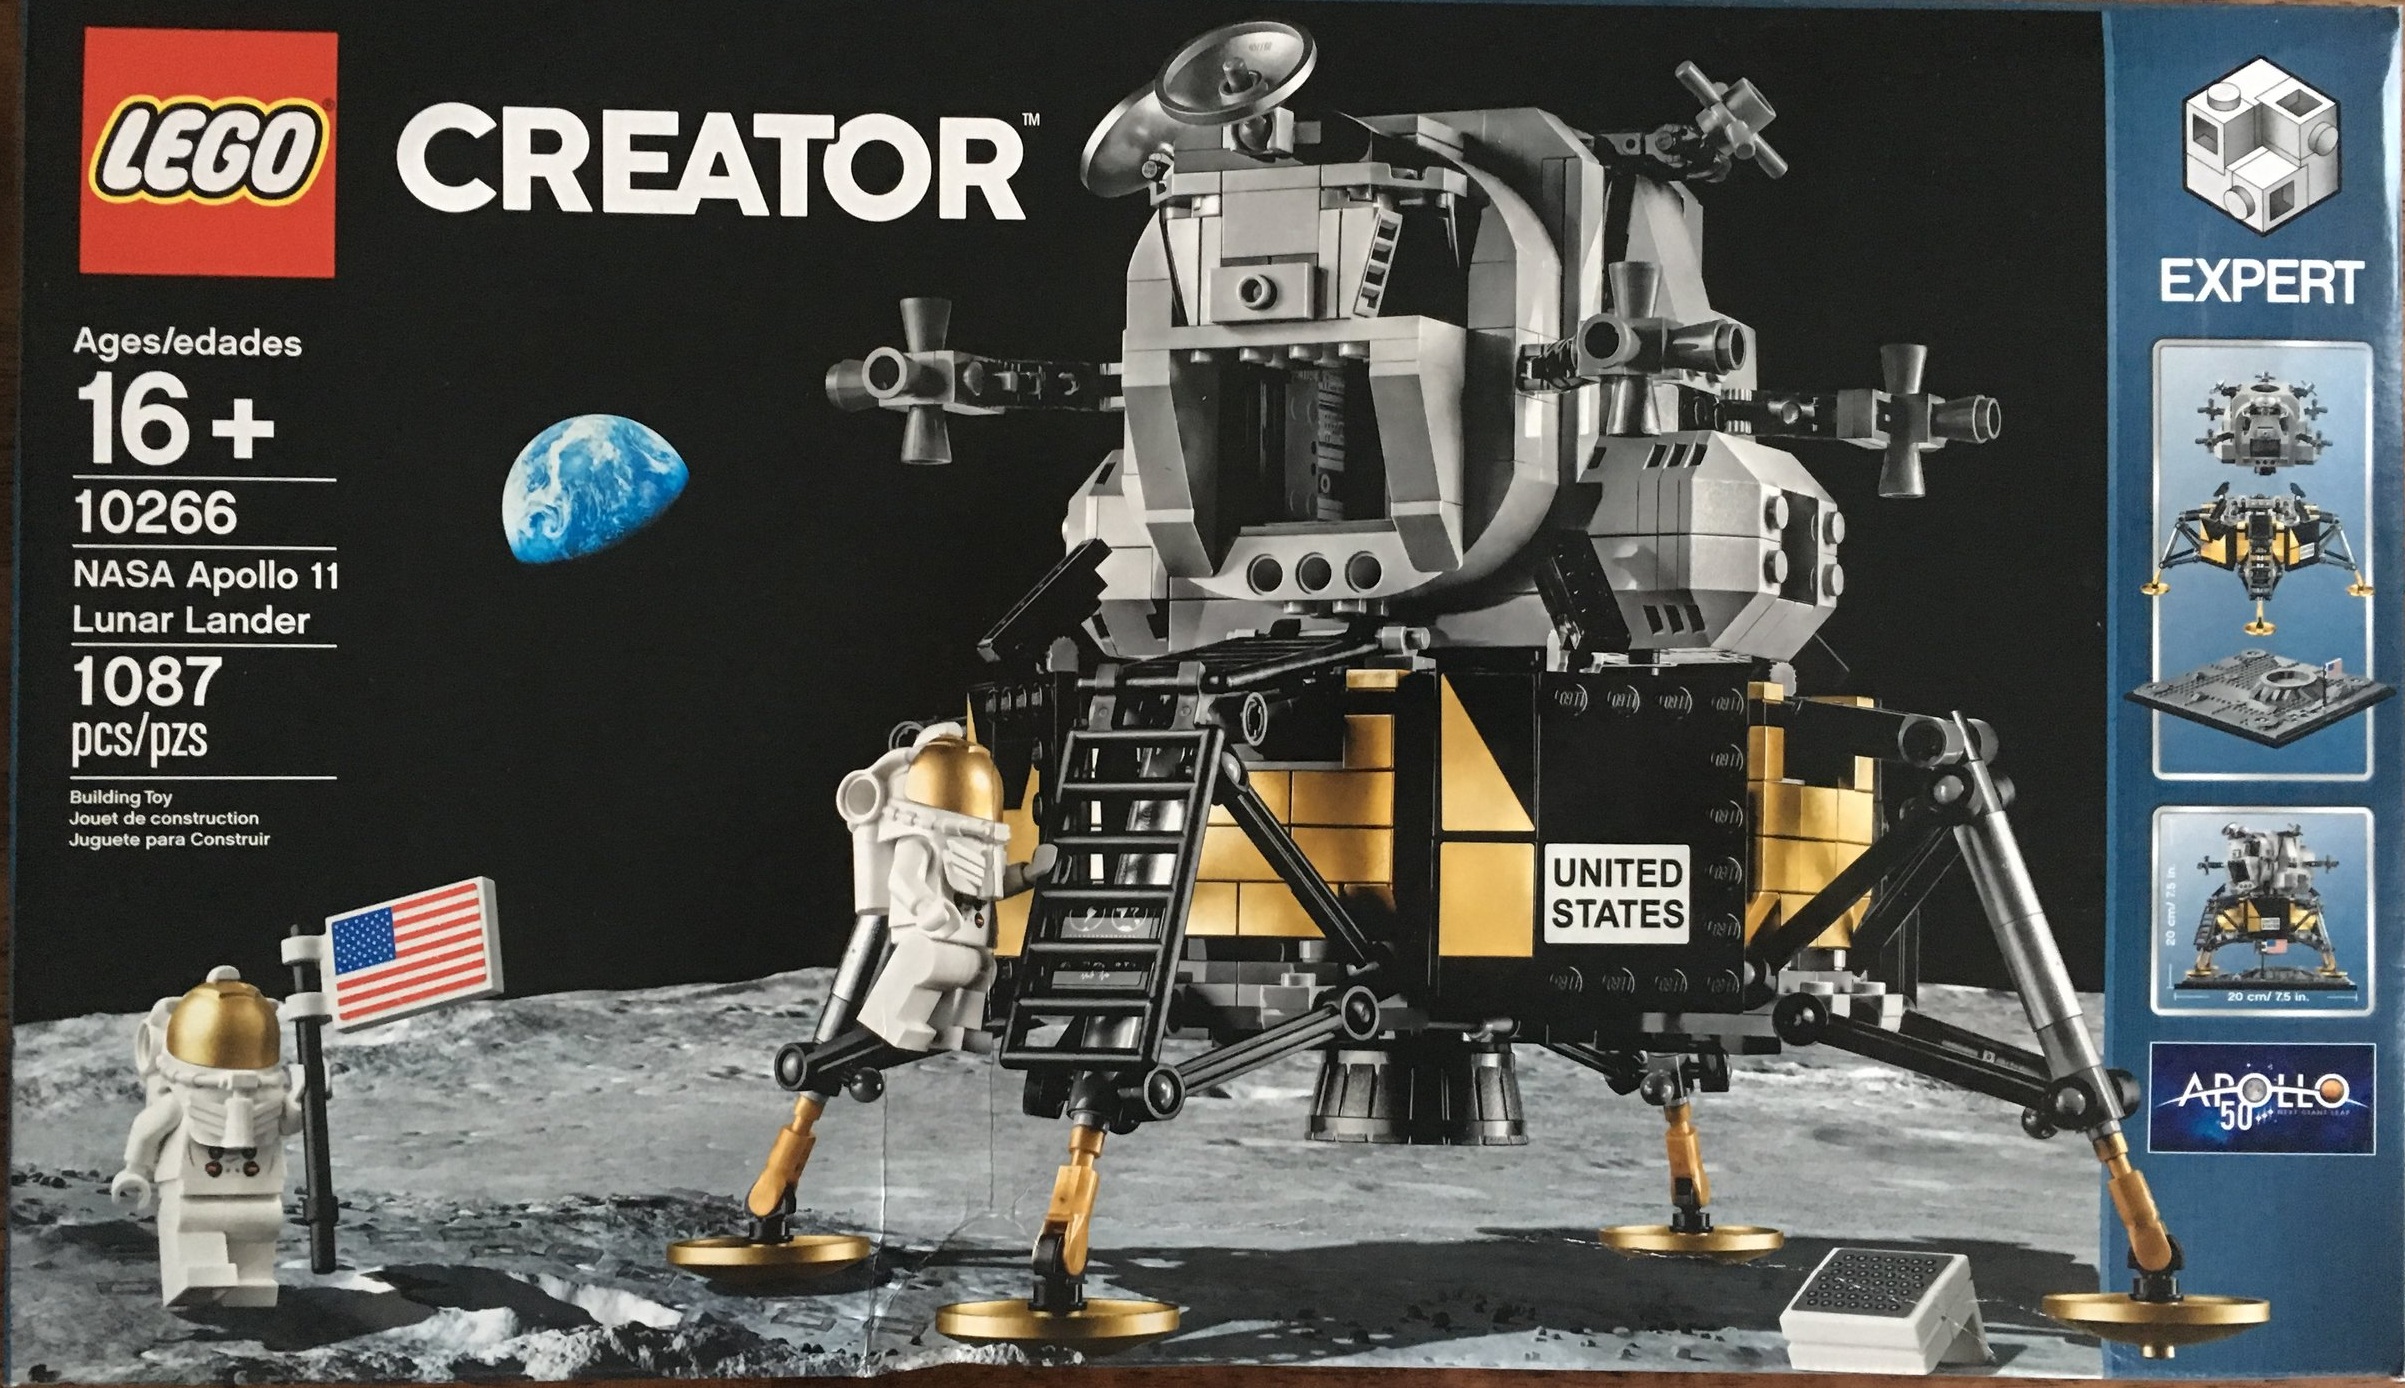
The front of the box shows the set on a lunar surface with the Earth in the background. The back shows the assembled set with close ups on some of the details.

10266_box_front.jpg
10266_box_back.jpg

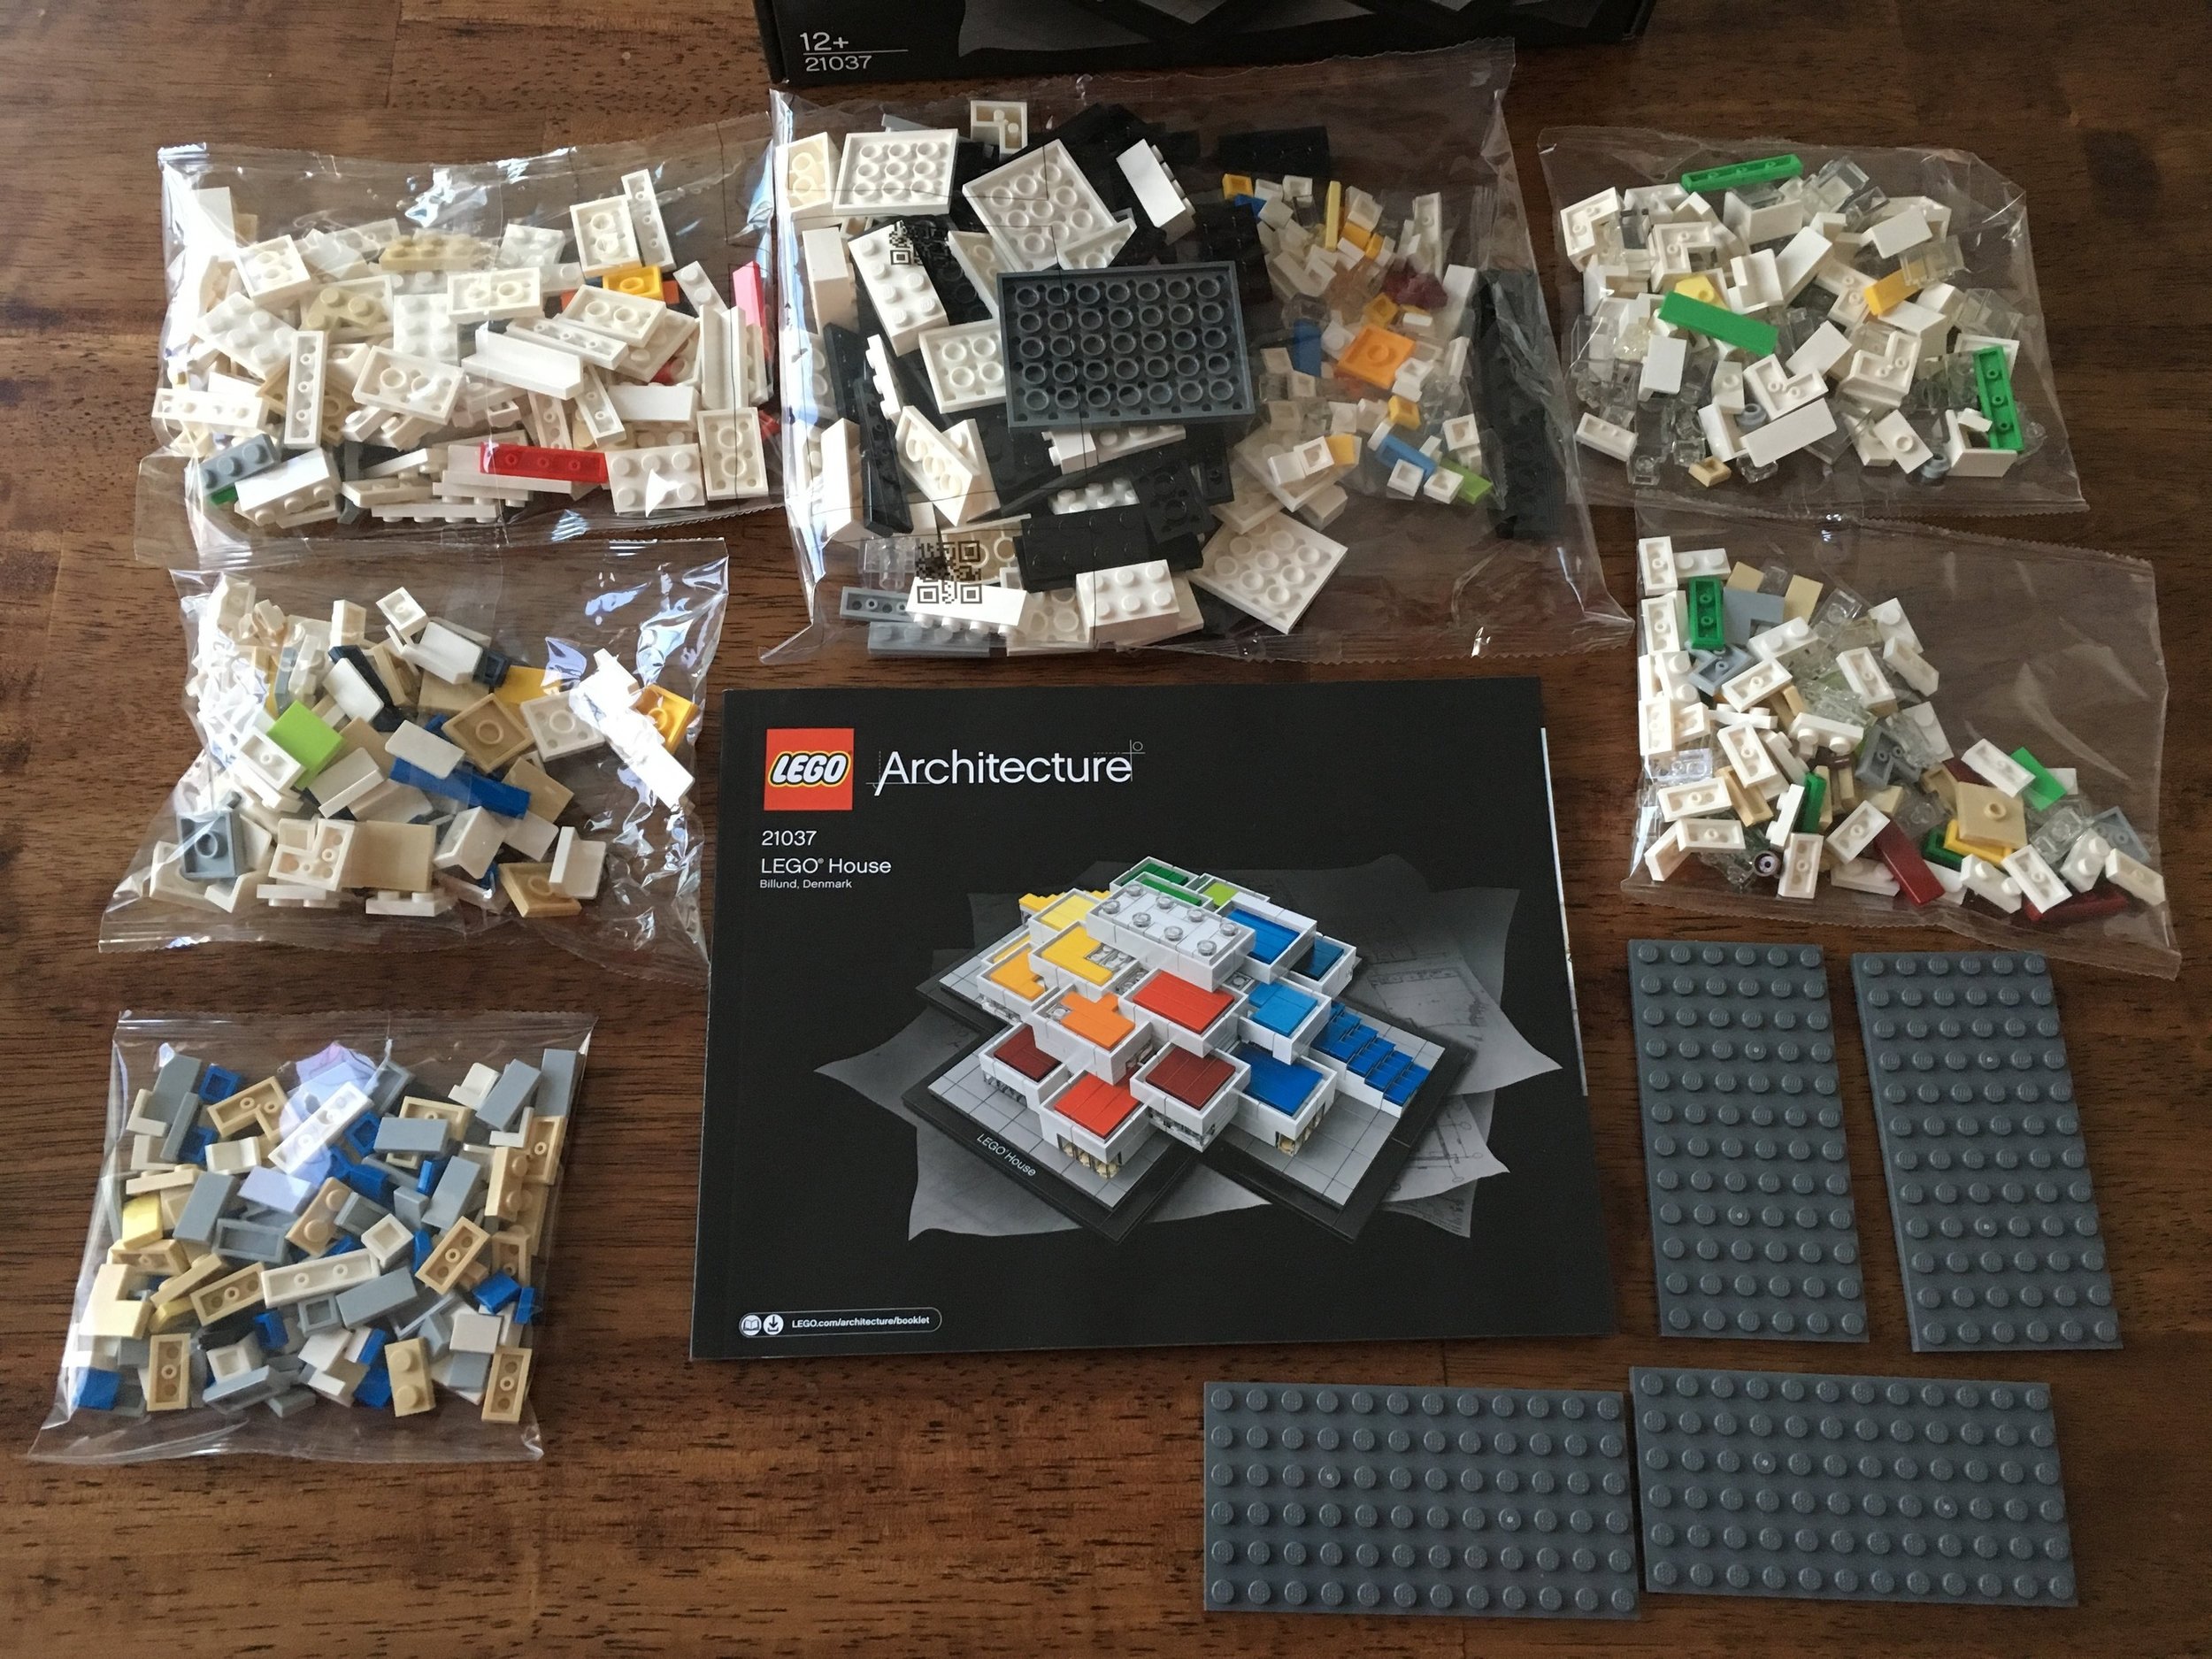
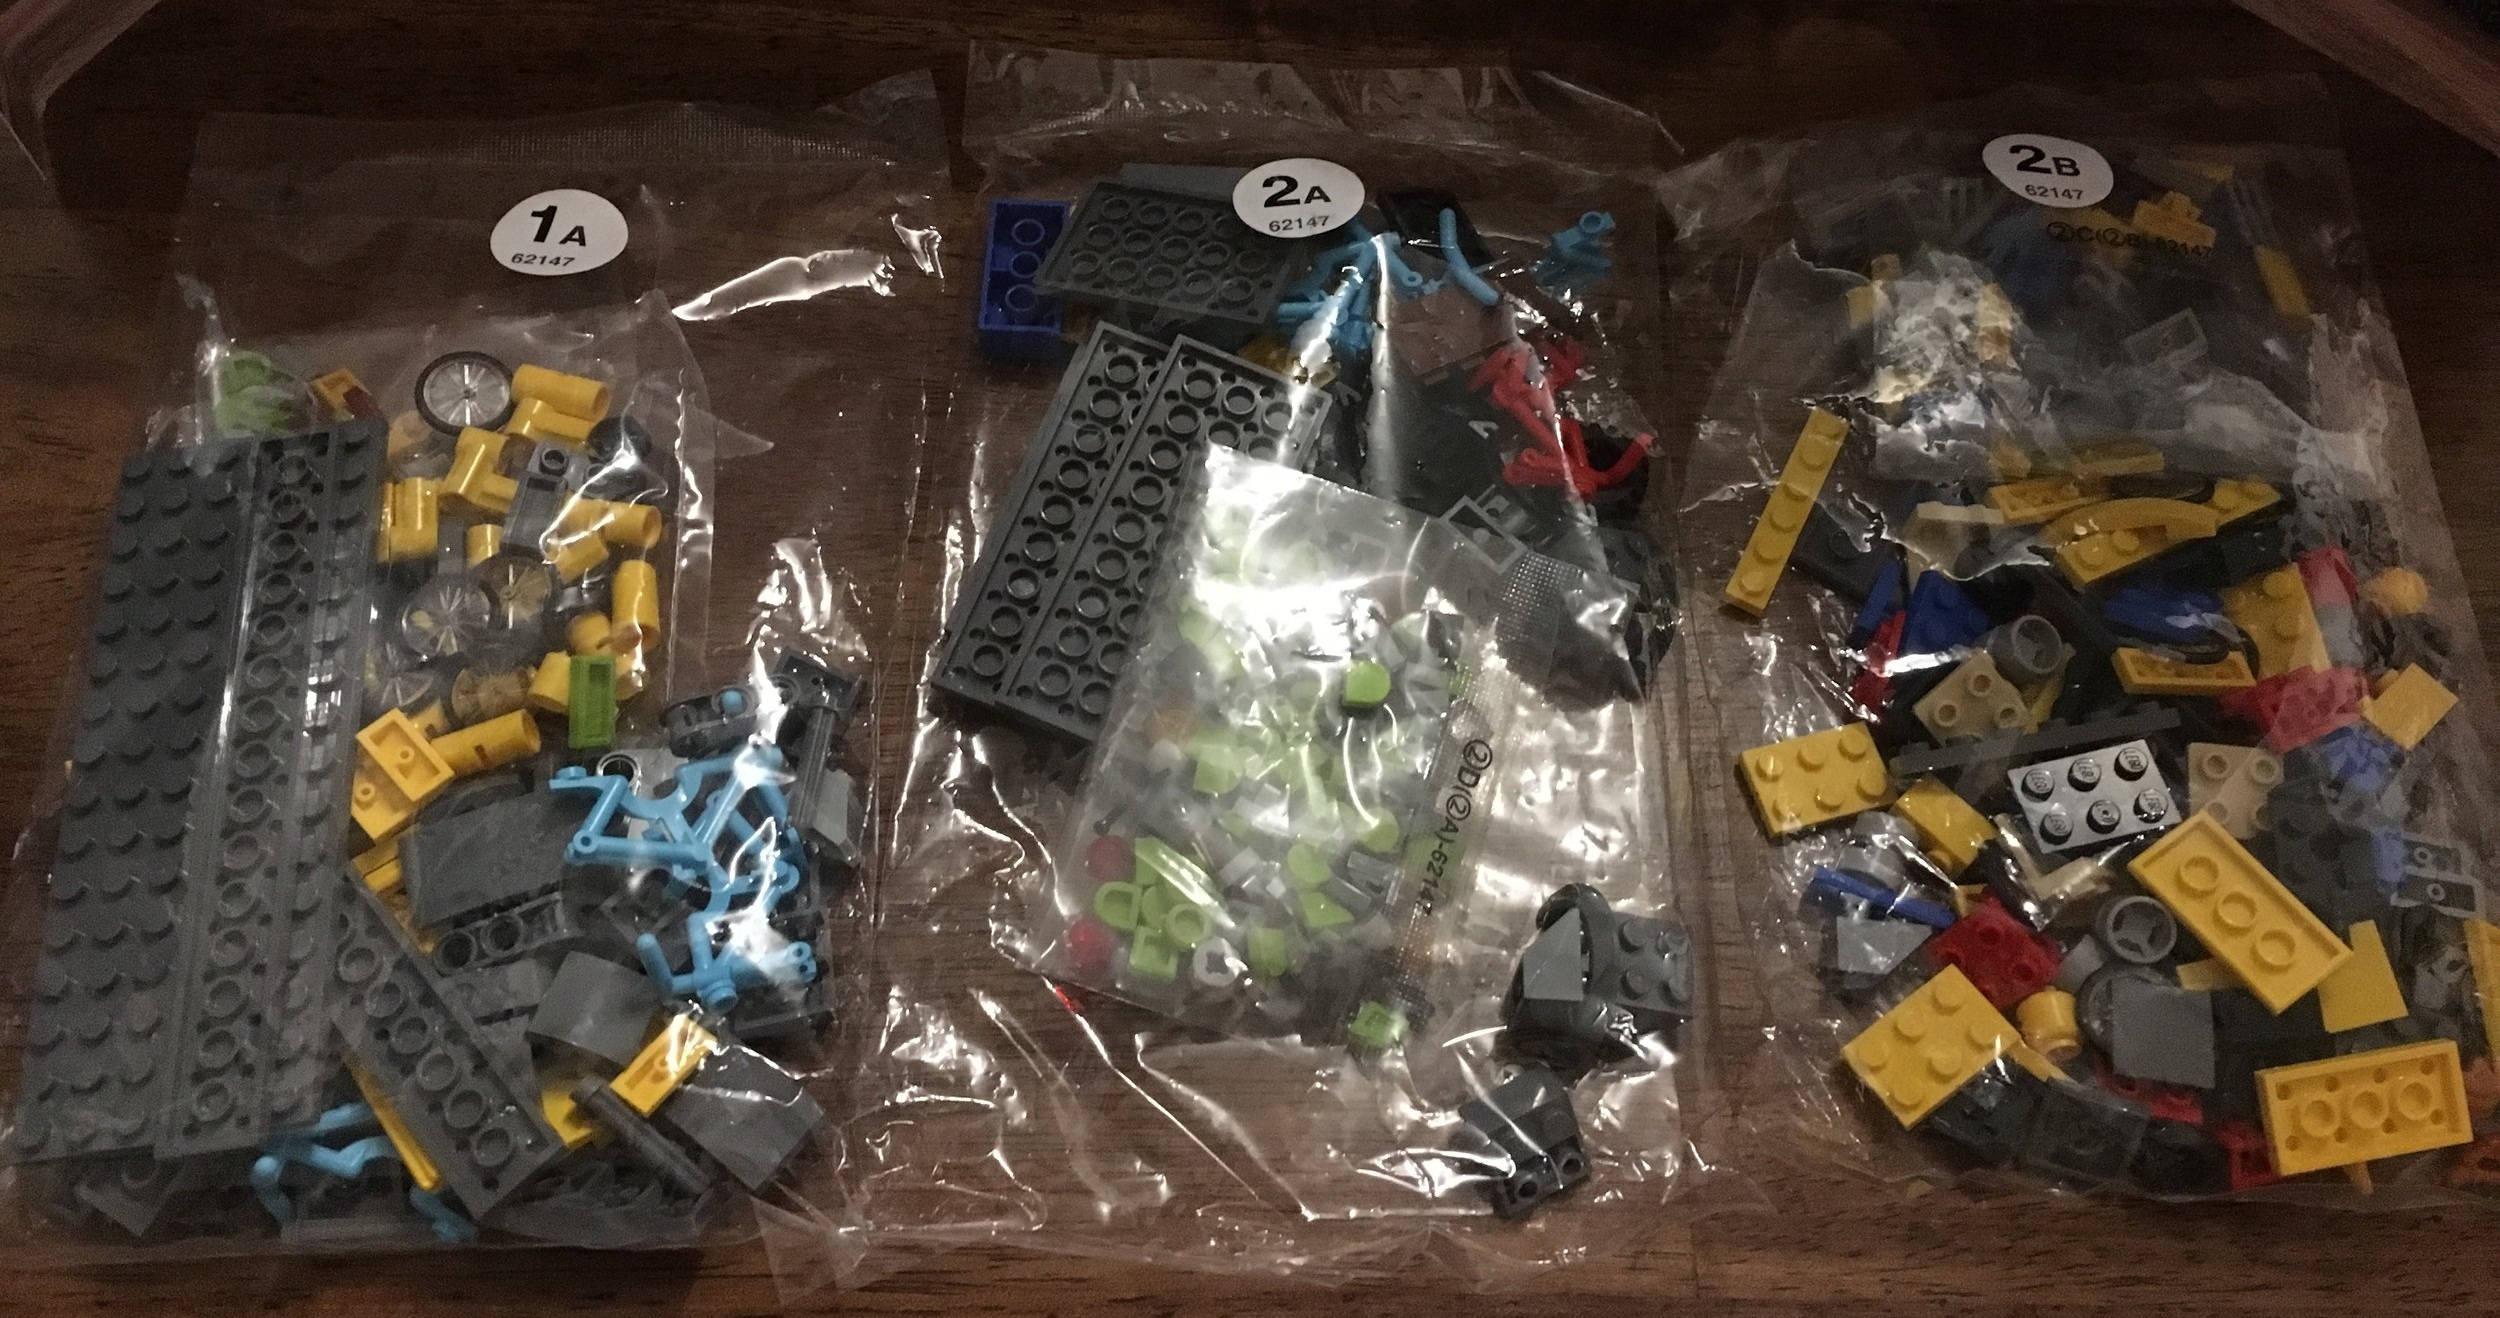
The contents are 8 parts bags with 7 of them being numbered and one of them containing larger pieces. The instruction book is in a plastic sleeve and the stickers are there as well to make sure they are protected. Bag 1 includes a part separator.

While I am not a big fan of stickers, I like how these stickers provide a chrome look to the set to re-create the heat shield. So maybe they’re not all that bad. I still hate applying them though. I never seem to be able to line them up right.

The instruction book starts off with an interesting introduction that repeats in Spanish and French. Throughout the book, there are various references to the design and what part of the actual lunar lander it relates to.

10266_contents.jpg
10266_stickers.jpg
10266_instructions.jpg

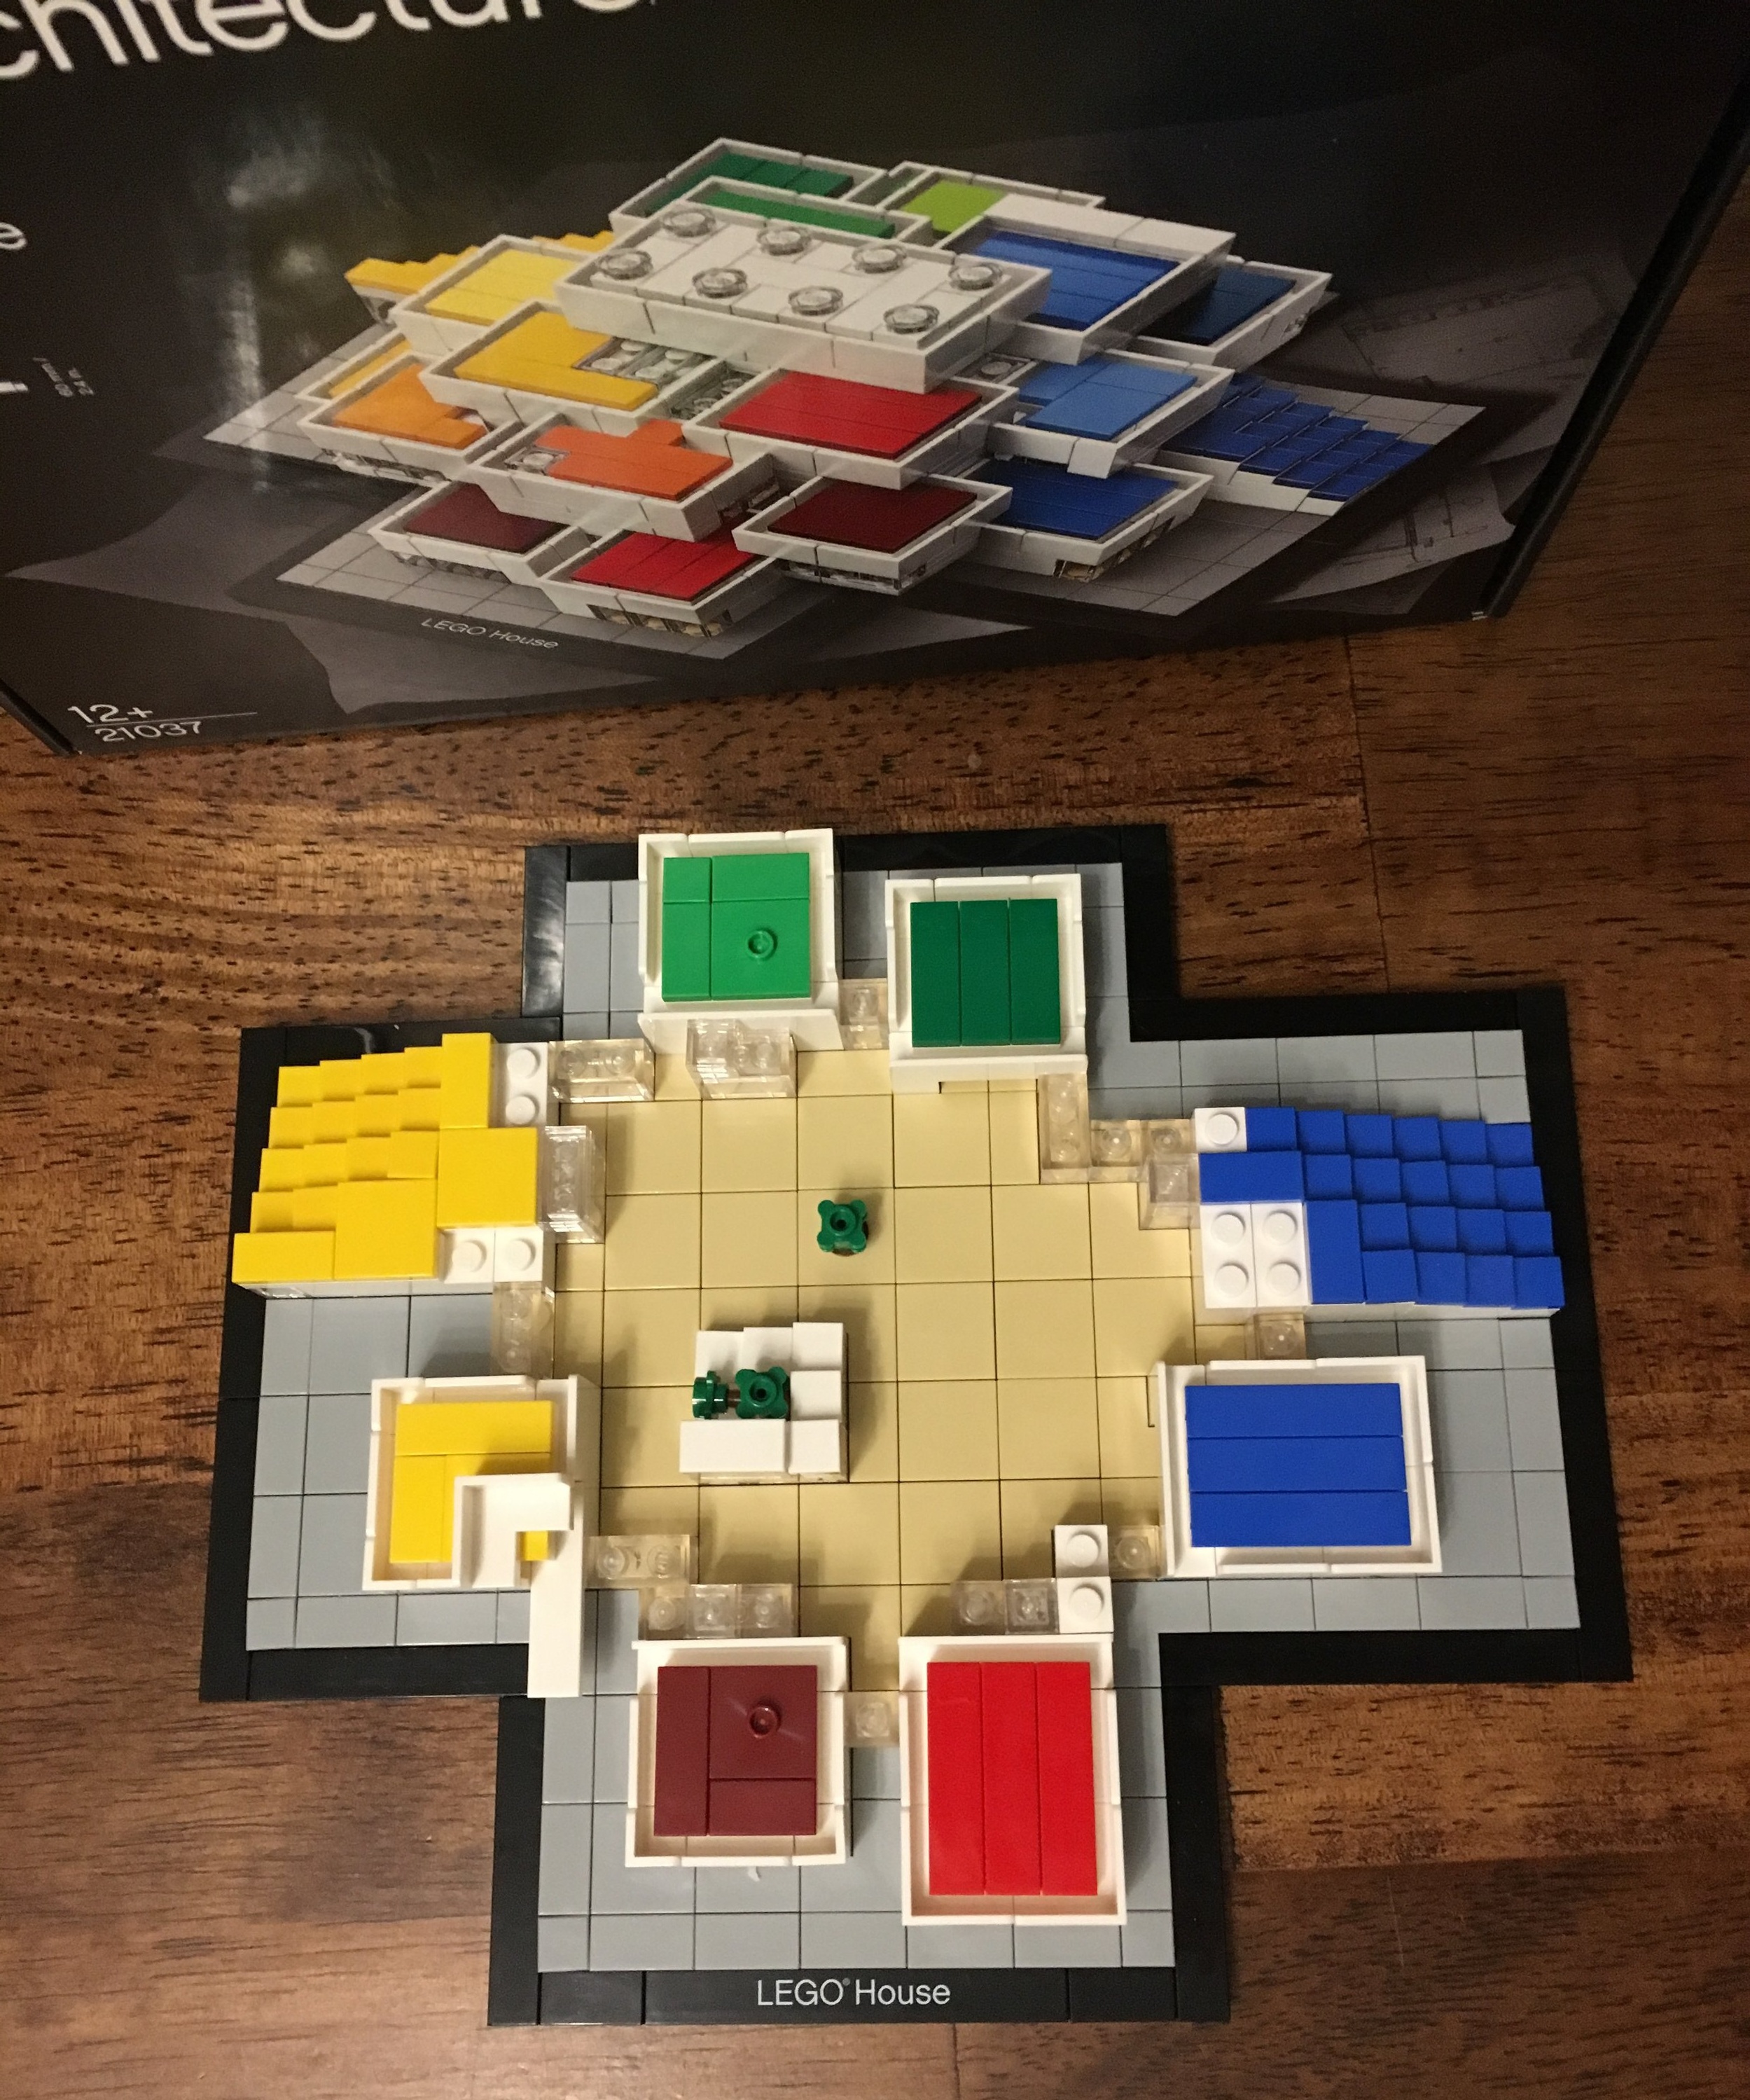
Bag 1 completes the base of the model. It is very similar to an Architecture theme build with the black tiles around the outside and the printed tile with the name of the set. While Apollo 11 actually landed on a much smoother surface, the designer tried to replicate his version of the lunar surface. The minifigure footprints are a nice touch.

Along the corners are where the landing gear of the model sit which helps you to display the model itself.

Bag 1 includes one of the minifigures. Not sure which astronaut it is, but that’s okay. There’s also a US flag (sticker) to attach to the surface of the moon.

10266_bag1.jpg

The second bag starts the construction of the actual lunar module. The initial build includes some of the main structure to include the start of the heat shield. It also includes the oxidizer (white) and fuel (red) tanks. The first 2 pictures I posted show the one heat shield folding down to reveal a camera. As I understand it, this is the camera that recorded the astronauts as they reached the surface of the moon and walked around.

10266_bag2a.jpg
10266_bag2b.jpg

The next 2 pictures show the other side. This includes one of the shields that folds down to reveal one of the laser reflectors. The “laser reflector” is a separate assembly that you can remove and place on your lunar surface if you want. Fun fact… they still use the laser reflectors to this day for experiments.

10266_bag2c.jpg
10266_bag2d.jpg

Here is a top view of the build after bag 2. The build is not your normal build of stacking bricks as you would expect from a Creator Expert set and includes some good building techniques.

10266_bag2e.jpg

Bag 3 adds on the landing gear and finishes the heat shield. When initially building the landing gear, they seemed pretty flimsy to me. Once they were finished, they are actually pretty sturdy. In looking at pictures, the designer did a good job recreating the actual gear. I have said this before, but I’m a fan of mixing System and Technic parts into a model. This set is no exception to that statement.

The gold colored pieces help to match the coloring of the heat shield. Even if you don’t like the model when you are done, getting so many of this color in a set is pretty rare so there are lots of opportunities to use the gold color in MOCs elsewhere.

10266_bag3a.jpg
10266_bag3b.jpg

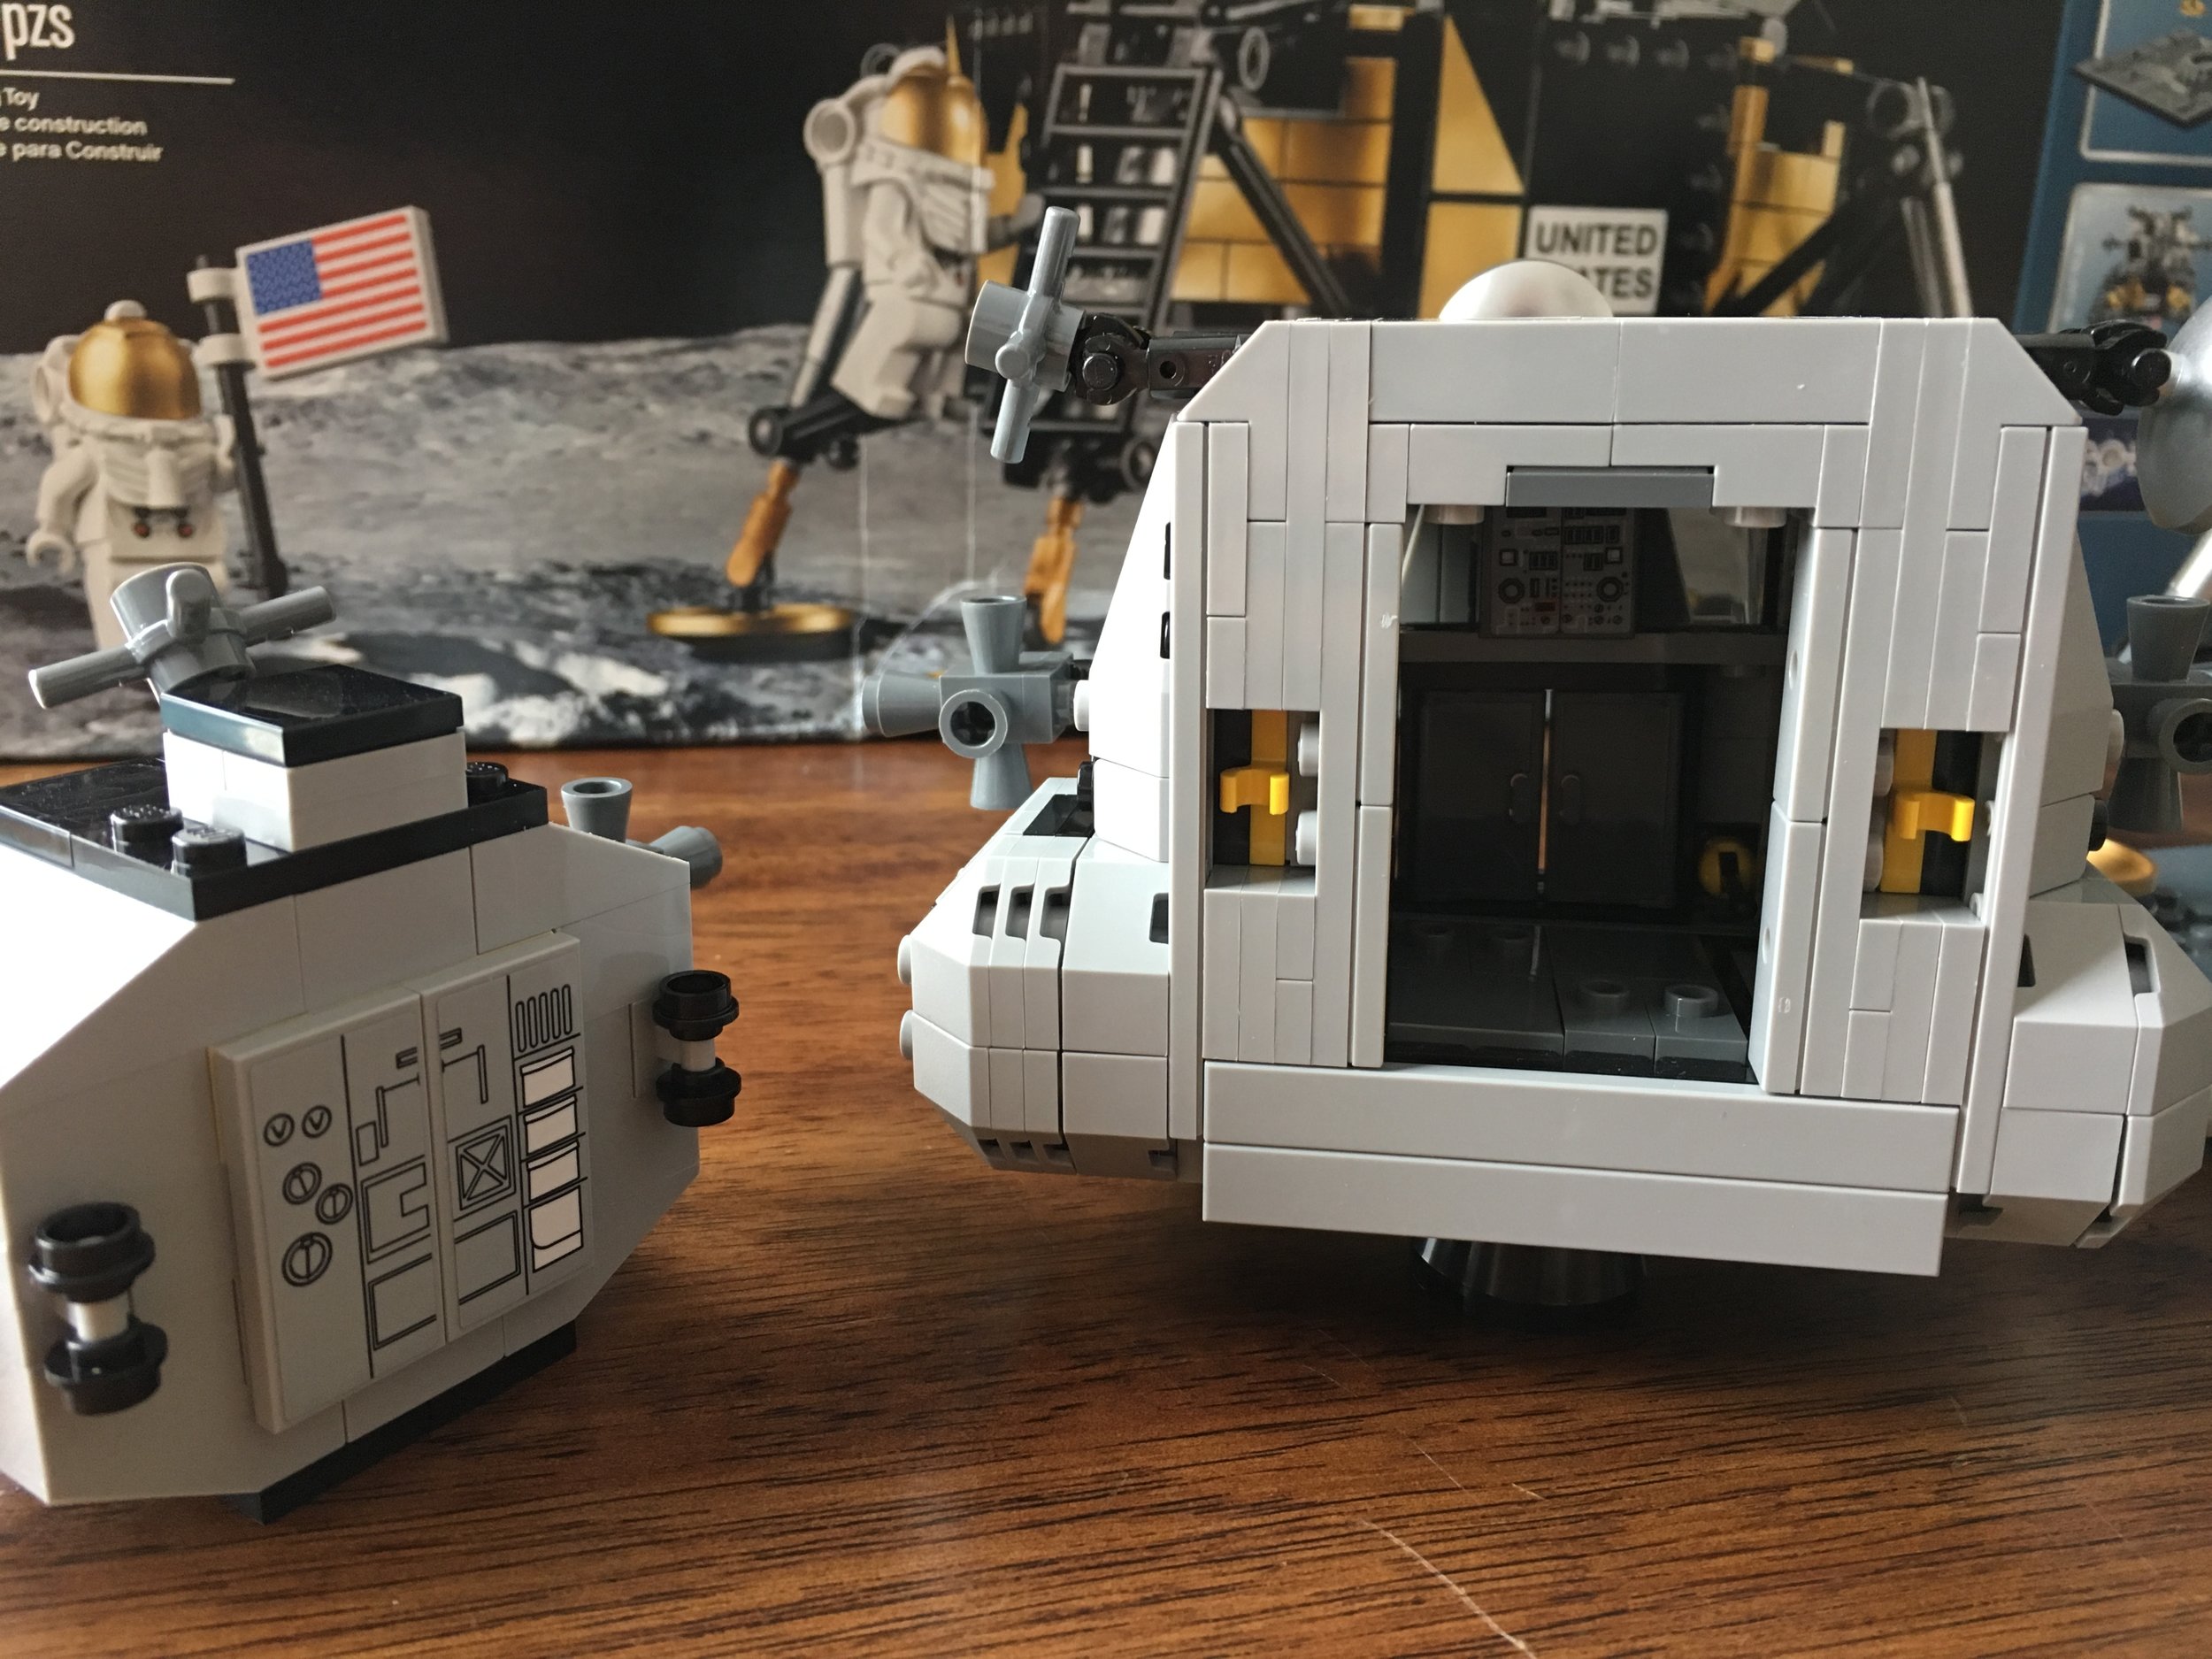
Bag 4 completes the crew compartment or Ascent Stage. The outside contains various antennas as well as some of the thrusters for maneuvering. The inside doesn’t have a lot of space for minifigures, but then again I don’t think it was designed for play. There are some details inside to include some stickers that I assume are the various control panels, but the 2 minifigures with their gear on will definitely have to squeeze in here. As you can see from my pictures, the designer built it so you can take a side off to see inside or put a minifigure in.

There’s a lot of SNOT use on this section and it is a pretty fun part to build in my opinion. I like the techniques used to capture the design of the actual section of the craft.

This section snaps into place onto the Decent Stage of the lander. Thankfully it snaps in easily and you don’t have to force it in or yank it out. I didn’t break the set while attaching or removing these parts.

10266_bag4a.jpg
10266_bag4b.jpg

Here’s the final model. Overall it was a fun build with some challenging techniques, but it went pretty quickly. I believe the designer captured the design of the original system well and still added some features that you would expect in a LEGO set like being able to disconnect the stages and being able to see inside the crew compartment. Someday when I have a nerd cave, this set will definitely go on display next to my Saturn V rocket.

The price isn’t too bad. I bought when the patch and #40335-1: Space Rocket Ride were being offered so that helped. If you’re looking for a better price, wait for double VIP points or maybe towards the end of its life we’ll see discounts on Amazon or at Walmart. Have fun building this one if you buy it!

10266_final1.jpg
10266_final2.jpg

Set Review - #71024-1: Disney Minifigures, Series 2 - Collectible Minifigures

The Disney Series 2 minifigures were released back on 1 May 2019. While most the the big fan sites have covered these a long time ago, I am a normal fan and it took a while to get all 18. I finally got them all and here is my review. So sorry it’s late, but I don’t get a free shipment from LEGO or go out and buy them right away to have the first review out there.

As mentioned previously, LEGO has limited the purchases you can make from Shop @ Home to 18. With that being said, you can go to a LEGO Brand Store and buy as many as they have in stock. The retail price is $3.99 per bag. I purchased mine from Amazon and they were $3.92 at a time. In checking today, they are listed at $2.99 each. I’m not sure if it’s an ongoing sale or a permanent drop in price, but sweet! Walmart shows the same $2.99 price as well. Hopefully this will become a trend and you can take advantage of waiting to get the minifigures by getting them at lower prices.

The bag size matches the larger size used for #71023-1: LEGO Movie 2 Minifigures.

Onto the review…

71024_1.jpg

Next up is Hercules and Hades from the cartoon movie “Hercules.” Unlike Ursula from series 1, Hades has a bottom half and top half versus a larger bottom piece that the torso fits in. Another change is that Hades hair piece is permanently attached to the head piece. I initially was shocked that the hair was attached and thought it somehow became assembled during shipment. Then I realized it was permanent. Odd… Hades was one of the lease popular in the orders I made.

71024_3.jpg

I had to make sure I got it right. Chip has a brown nose and Dale has the red nose. These weren’t as popular in my purchases. I think I got one extra of Dale only.

71024_5.jpg

Series 1 Disney had Genie and Aladdin. This series includes Jafar and Jasmine.

71024_7.jpg

The last bunch are Scrooge McDuck, Dewey (blue), Huey (red), and Louie (green). I had to look them up to verify I got them all right. These were the least popular in the orders I made and I was concerned I wouldn’t get any. It did bring back some good memories of watching “Duck Tales” as a kid. Anyone else remember that cartoon?

I have never seen “The Nightmare Before Christmas,” but this series includes Sally and
Jack Skellington. Sally comes with two black flowers and Jack comes with a gift with 1x1 round tile snowflakes inside. In my purchases, these were not hard to find, but I did not get a lot of extras.

71024_2.jpg

The LEGO Ideas set has some that are slightly different than Vintage Mickey and Vintage Minnie. I think the steering wheel is a bit too big and the life raft looks more like how I see it used regularly… as a toilet seat. There were a lot of extras of both of these minifigures in my purchases.

71024_4.jpg

I don’t think they could get away without doing Anna and Elsa from “Frozen.” They already appear in the Disney sets, but these are the first in true minifigure form. These minifigures were very popular in the purchases that I made and I got a lot of extras.

71024_6.jpg

The last series had Mr. Incredible and Syndrome. This one includes Edna Mode and Frozone. Edna is my favorite in this series. I like how they did the giant glasses that make her eyes look bigger. It’s a great representation of the movie character in my opinion.

71024_8.jpg

Overall this is a decent series. The representations of the actual characters in minifigure form were done well. In my opinion, it’s a good mix of characters from the Disney universe and I’m sure in a year or two we’ll see Series 3 with even more if the license with Disney continues.

If you’re a sucker for collecting these sets like me, the lesson learned here is to have patience and wait for better pricing. Hopefully this will become the trend and companies like Amazon and Walmart will cut the price to $2.99 or lower after a while. If you are going to buy them, you might as well wait for them to be at a better price than go through LEGO and their higher pricing. When the LEGO Movie 2 minifigures were discounted on Shop @ Home, they were only $3.19 so still a better deal to get them elsewhere.

Should there be a Series 3 or should they just move on? I’m hoping we can have more original minifigures versus licensed ones, but the licensed ones probably sell better. What are your thoughts on this series?

Summer 2019 Update - LUG Display - Gartenschau Kaiserslautern, Germany

The good news is that I have a lot of content to share. The bad news is that I don’t have the time to post it all like I want so this post is delayed by about a month. I went to the Gartenschau in Kaiserslautern, Germany back in April 2019 (Initial post here) and got to go back in June 2019. I am finally getting around to posting about my trip there. Sorry for the delay. I hope my pictures do the display justice.

First off is Notre Dame Cathedral and a model of the famous church in Paris, France. The card by the model roughly translates to:

“The Notre Dame, one of the most beautiful churches in France. This beautiful church was built by Ingo Bramigke in Wuppertal. It is partially expanded inside. This beautiful model is made of many rare colors that are hard to find today.
The model was built in 2004-2006 and was built in many hundreds of hours.”

It says the model has around 100,000 pieces. I like how Santa Claus is hanging out on the outside of the church.

Notre_Dame_sheet.jpg
notre_dame2.jpg
notre_dame1.jpg
notre_dame3.jpg

Next is a modification of set #21310-1: Old Fishing Store from the Ideas line. You can see my review for the original model here. This was built in 2018 by Klaus Krämer. He did a great job bringing this set further to life. The tree is a nice touch.

old_fishing_store_moc.jpg
old_fishing_store_sign.jpg

Here are some aircraft ranging from jet fighters to biplanes. I didn’t get a picture of a card so I’m not sure who made them or of the specifics behind them.

aircraft1.JPG
aircraft2.jpg

Aragog’s Lair is from Harry Potter and is a set. You can see my review of #75950-1 here. This MOC is substantially built up and looks more realistic than the small set from LEGO. I like all of the plant pieces in different colors that add to the realism. The builder’s name is Benjamin Kolb and this MOC was made in 2018.

harry_potter.jpg

Here we have Ancient Rome right near Notre Dame. You can see the Colosseum and some other ancient looking buildings. There are a ton of minifigures involved too. I only got one picture so you can’t see all of the details… sorry.

ancient_rome.jpg

I’m not really sure what these are… looks like a giant totem pole type house and maybe everyone was given a set and told to build something and those are what they built. I don’t know…

tall_house.JPG
IMG_8613.JPG

No label on this one and I’m sorry the glass in front made the picture a little blurry. This looks like a manor or small castle in Germany or France somewhere.

castle.JPG

Here are some birds by builder Felix Jaensch. His Flickr stream is here. He has some impressive brick art work on his page and it looks like he sells some of his builds too.

bird1.jpg
bird3.jpg
bird2.jpg
bird4.jpg

The top is a penguin, a Minion, and a dragon. The penguin and dragon are probably from something, but I’m not sure what.

The bottom build is titled Sperrmüll which Google Translate says is “Bulky Waste.” The card lists the builder’s name as Brixe and says the build was from 2017.

bulky_waste.jpg

This is a train station in Reichelsheim Odenwald. There wasn’t a card nearby so I’m not sure what time period the build is from. Reichelsheim is about an hour’s drive south of Frankfurt, Germany for those that were wondering.

german_train_station.jpg

The display has a huge city scene and I have posted numerous pictures before so I didn’t add a ton of the ones that have been seen before. A few points of interest that I caught this time:

-The bridge with the lime green arch is made up of 2x4 plates. They are all slightly disconnected at an angle to develop the arch. A clever idea that was probably pretty challenging to keep together.

-It’s hard to see in the lighting, but I thought the glass bridge was pretty clever.

-Finally I included a picture of a street scene that includes some of the modular sets and some MOCs. The White Lion is a pub in the UK (I think). You can see a few of the modular sets next to it.

bridge.jpg
city.jpg
glass_bridge.jpg

This was not there the last time I was at the display. The U.S. Capitol in Washington D. C. The builder was Gerlach Dominik and it was build between 2004 and 2007 with an estimated 1,236,000 bricks. Wow! Very impressive with a lot of fun details between a class trip from Hogwarts to a car accident. Take a look at some of the details if you zoom in on the pictures.

white_house_front.jpg
white_house_back.jpg
white_house_sign.jpg
white_house2.jpg
white_house4.jpg
white_house1.jpg
white_house3.jpg
“This model is private property”

“This model is private property”

SWK E-Werk was built in 2019. It took 3 months to put together and is made up of 225,000 pieces. The card translates to (using Google Translate):

“Electricity plant of the city of Kaiserslautern in 1894.

On the 25th of February 1894, the city council of Kaiserslautern agrees to build an e-factory based on the plans of Oscar von Miller. Just two months later, the construction of the Karcherstrasse building (near the railway viaduct) began.

The e-werk went into operation on 1 September 1894 for the first time. It was the 4th Electricity Plant in the Palatinate and one of the first 140 works in the former German Reich.

Initially, the power plant only supplied the electricity for the lighting of the station forecourt. Later, even simple citizens could buy electricity, but at the time they had hardly any electric appliances.”

Swk_ewerk.jpg
swk_ewerk2.jpg

Here is a MOC of the Kaiserslautern Rathaus or City Hall building. Next to the large MOC is an instruction booklet for a smaller MOC with 719 pieces.

rathaus1.jpg
rathaus2.jpg

Last 2 pictures. First is 42055-1 Lego Technic Bucket Wheel Excavator and next is the Empire State building.

Hope you enjoyed my brief photo tour!

42055.jpg
empire_state_building.jpg

Set Review - #21037-1: LEGO® House - Architecture

Onto the second of the three LEGO® House exclusive sets I picked up while in Billund. This one is #21037-1: LEGO® House from the Architecture theme. It was released in 2017 and is still available today. The brief history behind this set is that #4000010-1: LEGO® House - Architecture available back in March 2014 was the first round. It was in all white and was released prior to the opening of the LEGO® House in Billund. This set was released after the LEGO® House opened.

This set has 774 pieces and retails for 449 DKK. I was at the LEGO® House for two days and I bought sets on each of the days (2 and then 1). I paid $67.19 and $67.27 when translated. I don’t think the US Dollar to Danish Kroner exchange rate fluctuates a great deal so my guess is you can expect to pay about the same amount. The sign at the store says you are limited to three sets per family. I bought three and didn’t try to scam the Brand Store there over by having my NLS buy some or buying without my VIP account.

Onto the review…

The box looks like a standard architecture set. The biggest difference is that this one is very colorful while most of the sets are usually full of grays, tans, and whites. It’s a nice change to have some color.

21037_box_front.JPG
21037_box_back.jpg

The contents are 6 parts bags, an instruction booklet, and four 6x12 dark gray plates. Like most architecture sets, the bags are not numbered. The instructions have a section about the LEGO® House, its development, information on the architecture firm, and some facts throughout the instructions.

21037_contents.jpg

Like most architecture sets, the bags aren’t numbered so there aren’t good break points for a review. I just picked a few points I thought to be useful to discuss the build.

The base of the building is completed at step 15. It’s just the dark gray plates with black plates underneath to hold them together. The edge is completed with black tiles to include one that is printed with the “LEGO® House” name on it.

21037_base.jpg

Step 33 of the instructions completes the first layer of plates on the base. It is made up of light gray for the sidewalks and tan for the floor inside the LEGO® House. There are a few spots where there are no plates and then a few colored tiles for where the stepped portions of the house begin.

21037_a.jpg

My next stopping point is the completion of the first floor or layer. The first floor includes some windows along with the yellow and blue steps on the two opposite ends of the building. The inside of the house includes a plant to represent one of the plants in the house and then the steps leading up into the house along with the tree of creativity. They don’t include all of the detail, but given the limited space, I can understand why.

21037_level1.jpg

Onto the second level… each of the sections fit in just so to create the various upper sections of the house. So far I’m impressed with the build and how it is arranged.

IMG_8760.jpg

The top level with the masterpiece gallery is easily removable and does not attach with clutch to the other layers of the house. This feature is nice as you can view the “inside” of the house. The very top includes the 8 clear windows that look like the studs of a 2x4 brick.

21037_top.jpg

Here’s the final build. I think they did a great job representing the LEGO® House given the scale of the architecture theme. I’m a big fan of this set and recommend picking it up if you are able to visit the LEGO® House. To be fair, I might be biased since I was actually there. I wonder if I would have the same opinions if I hadn’t actually been there.

Does anyone else have this one? What are your thoughts?

In the meantime, happy building!

21037_final

Set Review - #BL19012: Bikes! - BrickLink AFOL Designer Program

I did a few posts on the BrickLink AFOL designer back in March and April 2019. You can see the first one here and the update here. As mentioned, I ordered two sets and the first one arrived a few weeks back. I finally got done with my LEGO® House and Billund, Denmark posts so this post is next in the cue.

The first one to arrive was #BL19012: Bikes! by designer MDT.Maikel from the Netherlands. The cost was $49.99 for 519 pieces or $0.096 per piece. I bought it during the pre-order period so it was free shipping. I don’t live in California so no sales tax either. Woohoo!!

Onto the review…

When you buy from LEGO® Shop at Home, the boxes that arrive are very plain and do not have a LEGO logo on them anywhere. The shipping label says LRI I believe. BrickLink wants you to be sure you know what’s in the box when you get it. As you can see, the logo is proudly displayed on the box.

BL_outer_box.jpg

The box inside has a printed covering on it. The front of the set has the BrickLink logo, the 60th anniversary logo, and the printed numbering (my set was #617). The back shows another view of the set. The side of the box has the designer info, the total pieces, and the total unique pieces.

box1.jpg
box2.jpg
box3.jpg

The inside of the box cover can be set up as a backdrop for the set. I didn’t straighten it out or hang it up so it still has the folds, but it’s a cool idea. I didn’t see anywhere that said where exactly the picture was taken, but I would guess in the Netherlands somewhere. Does anyone know?

inner_picture.jpg

Inside the covering is the box with the goods. The top has the BrickLink logo and the bottom has some information about the AFOL Designer Program. I took a picture of the BrickLink logo on the side just because and then the box has a seal for when you open it. Once you pull the sticker away, it says “void” and you can’t try and re-sell or scam someone into saying it’s a new build for purchase.

inner_box1.jpg
inner_box_side.jpg
inner_box2.jpg
box_seal.jpg

The box was actually a bit big considering the contents. The contents are 3 parts bags, the instructions, and 2 cards. This is what it looked like when I opened the box. Everything was well organized and you can tell it was hand packed versus machine stuffed.

inside.jpg

The first card as you open the set has a note from BrickLink and from LEGO. Happy reading!

thank_you_card.jpg

The second card has pictures of all of the sets that were selected as finalists in the program.

card2.jpg

Inside the instruction booklet is a note from the AFOL designer. His name is Maikel de Vries and it’s cool that they let him plug some of his other work.

designer_note.jpg

The instructions are similar to what you would find in an official LEGO set other than they skip a lot of steps and details. They get that adults are building these and they don’t need to get into every little detail. If you want to follow the instructions, then it’s on you.

instructions.jpg

The contents were 3 parts bags labeled 1A, 2A, and 2B. The instructions are set up so that you open bag 1 and then bags 2A and 2B at the same time. My guess is that BrickLink did a lot of this by hand versus using LEGO’s giant automated systems so the 2A and 2B helped people realize that they were separate. Don’t quote me on this one… does anyone have any insight into this?

Additionally, you get an Exclusive Element. It is the Technic, Brick 2x4 with 3 axle holes. I didn’t grab a picture of it, but the side of the brick has the 60 Year logo on it.

contents1.jpg
unique_brick.jpg

Onto the build…

The first bag completes the stand where you pick up your bike. It comes with 3 bikes and 6 slots for bikes. There are 6 light blue bikes that come with the set in total so that makes sense. The one side of the stand has a register for renting the bike and the other has an air pump (I think). The base has the “Bikes!” logo on it made out of lime green tiles. The roof is held on by a Technic parts design that is pretty cool. Unlike an official LEGO set, this stand is not very solidly constructed. If you’re used to just picking up an official set and moving it, don’t try it with this one. The roof part disconnects very easily. It’s not a bad thing… just a difference to be aware of in my opinion.

BL19012_bag1.jpg

The second set of bags builds the truck, 2 minifigures, and a bike with a cart in front that carries some brick food. The truck isn’t too detailed other than the design in the back uses some SNOT techniques to have the mirror image “Bikes!” sign on both sides. The bike with cart is a cool idea… definitely something I saw a lot when I went to Amsterdam. It’s not a very stable build with the basket being held on by one small stud, but as it’s not meant for a kid to play with, They can get away with it for this set.

The minifigures are rather plain and come with the 2 dots and a smiley face. If BrickLink repeats this effort, I’d work with LEGO to expand the available minifigures. If I were to have a complain about anything from this set, I think the minifigures would be it.

BL19012_bag2.jpg

Here’s the final build with the 3 extra bike wheels. There were a few small extra parts too.

Overall, I like how BrickLink and LEGO handled this and the finished product. The packaging was high quality and the set build was on par with what I’d expect from an AFOL build. Having ordered back in late March, they thankfully didn’t charge me until the set shipped in June. I have one other set on the way and have not been charged for it yet which is good. I think that’s a reasonable way to run the program. BrickLink has done a good job getting me updates on the status of my orders. Not charging me until it ships is good. I have done a brick related gofundme type program before. I paid up front and ended up not getting the final product as the effort was delayed substantially. I contacted the folks running the effort and still didn’t get anything.

Back on track though… this was well executed and the final product is great. I’m on board with BrickLink doing this again. It would be great to see more AFOL models come through the pipeline. Maybe some of the rejected IDEAS sets?

Well done BrickLink!

BL19012_final.jpg

We'd be Silly to Not Make this the Next Train Based LEGO Set - LEGO® IDEAS

The Train Station: Studgate

So if you don’t regularly follow this blog or if you’re new to it, here’s the deal. I’m a huge LEGO train fan and I’ve been disappointed since the Creator Expert line ended train sets with #10233-1: Horizon Express all the way back in 2014. I posted a few times suggesting a few sets to vote for with LEGO Ideas. I was really excited when Ymarilego’s Chemical Plant achieved 10,000 votes and was disappointed when it was not selected (or the fast food stands for that matter).

If you didn’t see my post about it, there’s a video by the You Tube channel “Assembled” of an interview with Jamie Berard (my post with all the details and links is here). In the interview, Jamie says the Creator Expert line of trains ended as it was not as popular (I read profitable) for the company. They instead have tried to squeeze trains into other lines (read Harry Potter or the new Hidden Side theme).

With the odds not in my favor between one LEGO Ideas project with 10,000 votes not making it and Jamie saying LEGO is not interested, I haven’t given up hope. There is a new project out there and it is moving fast on LEGO Ideas. If you have yet to see it, then feast your eyes on this project:

The Train Station - Studgate.jpg

This project was submitted by user Bricky_brick around May 2019. It is a 19th century train station with 2 track lines running through, a 2 car electric train (that can be motorized), 7 minifigures, and awesome use of some clear pieces that I didn’t even know existed in the collection. It looks incredible! If you go to the LEGO Ideas site, you can find it pretty easily as it is one of the top supported items. At the time of this post there are over 3,600 votes and climbing. The site for this set has some other great photos and shows what the set looks like in a pretty cool looking city scene.

So what are you waiting for… let’s make this one get to 10,000. Let’s show the LEGO Company that we are willing to put our money where our votes are to get some amazing Creator Expert-like train sets.

Thanks for your support in this matter!

Set Review - #40366-1: LEGO House Dinosaurs

If you’ve been reading my blog, you’ve seen my posts about my trip to the LEGO® House in Billund, Denmark. I hinted that I would be reviewing the exclusive sets and now here I am with the the first of three. Starting with the newest one first, #40366-1: LEGO House Dinosaurs was released on 1 May 2019 (I believe… someone correct me if that is wrong). It is only available at the LEGO® House in the Brand Store there. There is a sign by the set along with the other exclusive sets saying that you are limited to three per family. I assume they track by your VIP points and I didn’t try to scam them by buying more on the second day without my VIP points number. The joy of driving to Billund was that I had a car and didn’t have to cram my haul into suit cases. So I got 3. The set has 864 pieces and retails for 599 DKK. I bought 2 sets on day one and 1 on day 2. The first day I paid around $89.63 and the second day was around $89.73 with the exchange rate. That works about to about $0.104 per piece. So right around the average for a set if you assume 10 cents per piece is the going rate.

Keep in mind that this includes VAT or Value Added Tax. In the US, you pay sales tax which is factored in above the listed price. In Europe, VAT is already in there. So really, on day 1 I paid $22.41 in tax and the set was only $67.22. The Brand Store at the LEGO® House says you can do VAT free shopping. It means you get a form and take your receipt and form to a stand that is usually at the airport. They process it and then magically you get a refund on your credit card a few months later. Since I live in Germany right now, that wasn’t an option for me, but had I flown back to the US, I could have done that. So something to consider if you fly from the US to Billund.

Onto the review… The front shows the set build in a digital recreation of the Masterpiece Gallery. It also shows the LEGO® House logo. The back provides some background on the LEGO® House Dinosaurs and shows a picture of the actual models. It also had a small write up about the LEGO® House itself.

40366_box_front..JPG
40366_box_back.jpg

The box contains 9 parts bags, a bag of white flex rods, and 3 instruction books packaged up with a sticker sheet. Bag one contains a teal colored piece separator.

40366_contents.jpg

The first bag begins the DUPLO® T-Rex. You start by building the arms, tail, and body. There are a few stickers on this one, but nothing too major.

Without the legs it almost looks like it could be a sea monster…

40366_bag2.jpg

The third bag adds the display stand found at the LEGO® House. The stand includes 2 eggs, which as of this year, one has hatched. This model is of the original design when the LEGO® House first opened. The stand has a spot for you to attach the feet so it doesn’t fall over.


40366_bag4.jpg

Bag 5 wraps up the System brick dinosaur. The head is built in a somewhat similar method with the teeth and eyes looking similar to the DUPLO® version. The legs are built differently. It still stands up on its own well once you balance it.

40366_bag6.jpg

The seventh bag starts the Technic parts built dinosaur. Like bags 1 and 4, this one builds the body, arms, and tail. As to be expected, it is heavy on the use of Technic parts.


40366_bag8.jpg

And the ninth bag is a stand that is similar to the other 2.


40633_bag1.jpg

The second bag finishes the DUPLO® dinosaur. The head and legs are finished. I like how they did the teeth and it includes a tongue too. The use of the ball joints for eyes is also a nice touch. The brick flower pieces do a good job replicating the flowers found on the actual build.

With the weight being distributed around, it is easy to get the dinosaur to stand up on its own without falling over.


40366_bag3.jpg

The fourth bag starts the System bricks dinosaur. Like bag one, this bag builds the tail, arms, and body of the dinosaur with some slight changes. There are fewer stickers here to apply which is good in my opinion.

40366_bag5.jpg

The sixth bag builds the stand for this dino. Like the DUPLO® version, this one has a spot for you to attach the feet. This allows you to change the position and not worry about it falling over if it isn’t balanced.

40366_bag7.jpg

The eighth bag finishes up the Technic T-Rex. It uses a lot of Technic pieces, but the main construction is with system bricks and the Technic pieces are strapped on the outside. Only 2 stickers on this one so not bad. The head is built slightly different than the other 2, but it still has similar eyes and teeth.

40366_bag9.jpg

Here are all three together as a completed set. Overall, I’m a big fan. I think they did a great job capturing the big models at a smaller scale. The builds are somewhat similar, but each have small changes that make the build more interesting. They are a good display set and they have some play features too.

The price is a bit high, but that’s what you get for an exclusive set sold at one place only. Maybe when I re-open my Bricklink store, I will sell the other 2 I bought to help make up for the cost.

40366_final.jpg

Here’s the set next to a picture I took during my visit in May 2019. Obviously not exactly alike, but I think they are close considering it’s only a few hundred pieces for 3 versus many hundreds of thousands of bricks for the real ones.

Has anyone else built this set yet? What are your thoughts?

40366row.jpg
lego_house_dinos.jpg

LEGO® House: LEGO® Star Wars™ exhibition

Throughout 2019, the LEGO® House will be celebrating 20 Years of the Star Wars™ line. The special display is located in the History Collection in the basement. If you look at my post on the History Collection, I mention that there is a walk way that you take in a square (or maybe rectangle) to see the history. In the center of that shape is a space with a lot of the old and current sets on display. Well on either side of the room is the Star Wars™ display. I had seen some pictures online and you could see the display clearly. The owners of that site obviously took their camera right up to the glass because you can’t see it clearly in person. Here’s what you see on either side of the room (below). Really? So you have to peer through the slots to see everything.

This is the only picture I have of the sets on display. I didn’t take any close up pictures as it’s just some of the sets as selected by various LEGO® Designers. Each set has a card by it explaining why the designer thought the particular set was their favorite.

star_wars.JPG

On the opposing wall is this sign with a similar glass pattern. LEGO® borrowed a collection and put them on display. I wonder if he got anything in return? Anyways, I did take a few pictures of the minifigures.

sign.jpg

The display is set up by year. At the top of each column is the year the minifigures came out. The initial years have only a few and as the years go on, more minifigures appear until you get closer to today and it’s jam packed with various minifigures. I didn’t count them and the sign just says more than 1,000. Where does he put them all?

Anyways, if you get to the LEGO® House in 2019, it’s worth a few minutes of your time to go check out the Star Wars™ display for the minifigures alone. There are quite a few there and it’s pretty cool to see… if you can find the right slot in the glass to peek through.

Happy building!

Any only 1 minifigure in 2001?

Any only 1 minifigure in 2001?

minifigures3.jpg
minifigs2.jpg
minifigures4.jpg

LEGO® House: History Collection

The LEGO® House has some fun stairs that you can take up or down. I like how the walls look like they could be made of large size plastic bricks. If you go down, you go to the History Collection. In this post I hope to take you through my experience there. I took a lot of pictures, but still did not capture the whole thing. With 2 kiddos, I wasn’t able to stay and read everything, but I still had a good amount of time to see it all. So let’s go!

(Note: you can take an elevator too. This is especially good if you have a stroller or a little person who is slow on stairs.)

stairs.jpg

The History Collection is not as bright and colorful as the rest of the House. The walls are black as if you are underground. When you get downstairs, there is a glass covered area in the floor. The area is full of gray 2x4 bricks and some old brick molds. A sign explains how they used to put the old molds underneath new buildings so they couldn’t be used by a competitor. You can read the sign that explains it in the picture. We also thought it was fun that there was a brick built mole digging around in the basement.

bricks_molds.JPG

From the room with the molds in the floor, you can see a brightly lit LEGO® logo. I took a few pictures so you can see it as you get up close. It’s pretty awesome.

And another mole hanging out…

hallway.jpg
close_up_sign.jpg
moles.jpg
closer_sign.jpg

The tour goes through a hallway in a square. You turn left and you start to learn about the very initial states of the LEGO® Company. It talks about the founding family and you can see some of the early non-plastic toys. It’s impressive that they still have some of the very old toys and first brick sets around.

early.jpg
original_bricks.jpg
bricks_sets.JPG
duck.jpg
vehicles.JPG

As you continue to make your way around the History Collection, there are more modern bricks to include some sets or sets mixed in with MOCs.

#10184-1: Town Plan - This was the 50th anniversary set from LEGO®

#10184-1: Town Plan - This was the 50th anniversary set from LEGO®

The factories don’t look like this anymore.

The factories don’t look like this anymore.

Is this an official set?

Is this an official set?

The origins of the train line

The origins of the train line

I’m not sure if the train is an official set or a MOC.

I’m not sure if the train is an official set or a MOC.

As you continue on, you see more of the modern sets that we’re used to seeing. It was definitely a walk down memory lane to see some of the older items that I still have. And some of the things I always wanted as a kid… like the whole Classic Space line.

bricks.JPG
The Classic Space monorail

The Classic Space monorail

The origins of the minifigure

The origins of the minifigure

The castle theme and 9V town sets (I have the police car and fire engine and they still work)

The castle theme and 9V town sets (I have the police car and fire engine and they still work)

bricks.jpg

Throughout the LEGO® House are benches. Many of the benches have parts to build with, minifigure parts, or in this picture, DUPLO®. My youngest kiddo enjoyed the History Collection because there were tons of cars, trains, and planes, but it was good to know we had another distraction if needed to occupy him in the “boring” museum portion.

After you finish walking around the square, you can enter into the space inside the square. This area has a collection of many of the old sets by time period. I failed to get a picture or write it down, but I think it is by decade (please correct me if I’m wrong). Definitely a walk down memory lane for me. “I have that one!” “I always wanted that one!” “Wow! I’ve never actually seen that one.”

Sorry for the reflections on the glass covering the windows in my pictures.

Some of the very first sets.

Some of the very first sets.

More castle and Classic Space in there.

More castle and Classic Space in there.

Duplo®, Pirates, Blacktron, and more!

Duplo®, Pirates, Blacktron, and more!

Here’s a shot of what the wall looks like with the various sets.

Here’s a shot of what the wall looks like with the various sets.

Classic space, early CITY/Town, Castle

Classic space, early CITY/Town, Castle

Technic, Space Police, Pirates, and more!

Technic, Space Police, Pirates, and more!

Can they bring back Classic Space and Castle please?

Can they bring back Classic Space and Castle please?

Some Technic sets in the center of the room.

Some Technic sets in the center of the room.

The center of the room had the Technic display that I showed and then these trains. Please re-release the Super Chief and the BNSF diesel!

Also in the center of the room was a computer screen where you could go through each of the sets from every year and add them to your digital collection. When you are finished, the collection is loaded into your file that is attached to the wrist band. We did not build our digital collection. I’m not sure I could even remember it all. A cool idea though.

trains1.jpg
trains2.jpg

If you are an AFOL, definitely make some time to check out the History Collection. I regret that I didn’t get to read everything about the company, but I was glad that I got to see what I did. It’s not the best place for kids. My 5-year old got bored pretty quick and wanted to go back upstairs to do all of the fun stuff.

It will be curious to see how the History Collection changes over the years. How will they add another decade of sets in?

My next post will be about the Star Wars™ 20th anniversary display which was located with the History Collection.

LEGO® House: The MINI CHEF Restaurant

If you plan to spend the whole day at the LEGO® House, you’re going to need to eat at some point. Bringing a lunch is an option or you can go out to one of the local eateries. The other option is to eat at one of the 3 locations within the LEGO® House itself. First off is BRICKACCINO. This is a quick cafe for grab and go food. They have beverages, smoothies, panninis, and some pre-made items ranging from baked goods to sandwiches. As you can see, the menu is brick built and the prices are in DKK so it is roughly 6.6 DKK to $1. So around $4.25 for an espresso. Is that any worse than Starbucks?

Then there is LE GORMET which is the classier, reservations required restaurant. It’s upstairs from the MINI CHEF and tucked away. I did not go there and I have not seen any reviews of the place. They offer a three course menu for 398 DKK (~$60) or a 6 course menu for 598 DKK (~$90).

Here’s BRICKACCINO and the brick built selection. Take note of the LEGO Movie reference with the $37 overpriced coffee. I’m not sure if you can actually order it or not.

Here’s BRICKACCINO and the brick built selection. Take note of the LEGO Movie reference with the $37 overpriced coffee. I’m not sure if you can actually order it or not.

Our goal was to hit the MINI CHEF restaurant on one of the days we were at the LEGO® House. We pulled our kiddos away from the Experience Zones and while they weren’t happy to go, they quickly changed their minds when they saw the place. I had watched a few reviews from the early days by Beyond the Brick and others and it seems like the draw is the experience, but not the food. So we went into it with that attitude. We went to the MINI CHEF right around noon and there was no line. We were seated right away which was a bonus for us.

The entrance to the restaurant.

The entrance to the restaurant.

The menu cover

The menu cover

Like the rest of the LEGO® House, the decorations are brick based. The light fixtures are covered in DUPLO® and the walls have some sets and MOCs on display.

DUPLO® light fixture

DUPLO® light fixture

Sets on display

Sets on display

So here’s the rundown… we sat down and our server came over. She got down to my 5-year old’s level and gave this story about how the minifigures work in the kitchen to make the food and they only read brick so you have to translate the menu for them. She also made sure to say that kids get to use a special yellow piece while adults just got more food (although as an adult, there is nothing stopping you from using the yellow piece). She also brought my almost 2-year old some DUPLO® to play with which made his day because Mom and Dad never give him toys at the table before a meal.

Each table has a screen. You open your bag of bricks, build what you want, and then insert your brick tray into the screen for it to be scanned. There is some animation on the screen that shows you the minifigures figuring out what you want. You get to verify your order is right (it didn’t always scan right the first time) and then after you say it is good to go, you order drinks.

After you finalize your order, you watch a short animation where the minifigures get your order and they start to put it all together. Then you get to watch and wait.

The screen and system where you get to place your order. My kiddo’s order is on the screen.

The screen and system where you get to place your order. My kiddo’s order is on the screen.

A few of part of the restaurant.

A few of part of the restaurant.

Here is the menu. Adult meals are just over $25 and kids meals are just under $15. We had a good mix of just about everything and I can honestly say that it was all pretty good. It had a good taste and seemed well prepared. My kiddos ate it which was also a bonus.

The drinks weren’t bad. For those of you who are American who have never been to Europe, ordering water is not an option unless you want to pay for mineral water. In the States, we’re used to ordering a free glass of tap water. In Europe, if you want water, you pay for mineral water (sparkling or not). We’ve found it’s often cheaper to just order something else. I got hot chocolate!

We had 4 people, 2 adults, 2 kids. $25 + $25 + $15 +$15 + drinks… do you see where this is going? It was a pretty pricey meal…

Here’s a picture of the menu.

Here’s a picture of the menu.

When your food is ready, your screen starts to play some animation. It shows the minifigures scrambling to get the food together and out the door on the conveyor belt. There is a slight delay and then you see your food come out in containers. It’s a rather slow travel, but it gets there.

Your food is pushed to you by Robert and Roberta or is it Robot and Robota… whatever. Either way, we got 4 containers and the robots pushed us the containers down each of the 4 rollers to you. We stacked them up and walked back to our tables.

In the meantime, the Robots do dances, high-five, and look around while waiting to push food out. They are fun to watch.

Your robot friends

Your robot friends

The food was way better than I expected, the experience was pretty cool, the service was great, kids get an exclusive MINI CHEF minifigure (that’s what the special yellow piece is), and you’re going to spend a lot on lunch. My family went to the LEGO® House for two days. We only hit the restaurant on one of the days. The second day we brought lunch and ate in the Square to save some money. It was definitely something I’m glad we got to do once, but now that I’ve experienced it, I don’t think I’ll go back to spend the money on food. I’d rather save the money to buy bricks.

Any other thoughts on the MINI CHEF restaurant?