Return of the Bricklink AFOL Designer Program

bricklink.jpg

In 2018, LEGO and Bricklink teamed up for the AFOL Designer Program. They crowd funded 13 sets that were designed by fans and released them for purchase in 2019. I ended up buying two of them. One was #BL19003: Skyline Express and the other was #BL19012: Bikes!. I was a big fan of both of them and probably would have purchased all 13 of them if I had unlimited funds.

LEGO announced their purchase of Bricklink at the end of 2019 and there was much consternation in the fan community as to what would happen. A number of fans, including me, hoped the AFOL Designer Program would return. We heard nothing for a while, but we finally got something a few weeks ago.

Bricklink announced on 17 December 2020 that they were going to re-open the program, but it would be slightly different in 2021. Instead of soliciting new projects and crowd sourcing them, they are going to use designs from the Ideas platform and produce some of them. While not exactly what we wanted, I can’t complain about this effort. The rules are the project must not have an IP tied to it and it must have achieved the 10,000 votes. My search revealed 44 sets in this category. If my link doesn’t work, go to the Ideas site and when you search, select Product Phase - Not Approved and IP - Original Ideas. There are a lot of great designs and then some that it looks like LEGO has produced in a different form already.

If LEGO/Bricklink reads this post, here are the three designs I would like to see made in the 2021 AFOL Designer Program.

1. The Train Station: Studgate

I’m a big train fan and a modular building fan and this set would look fantastic mixed with the two themes. Designed by Bricky_Brick, the same designer as #21322-1 - Pirates of Barracuda Bay, I think this set would add some elegance to some of the more boring train stations that exist in the current LEGO set realm. Plus you get a small passenger train so win, win all around here.

studgate.jpg

2. Food Stand Diners

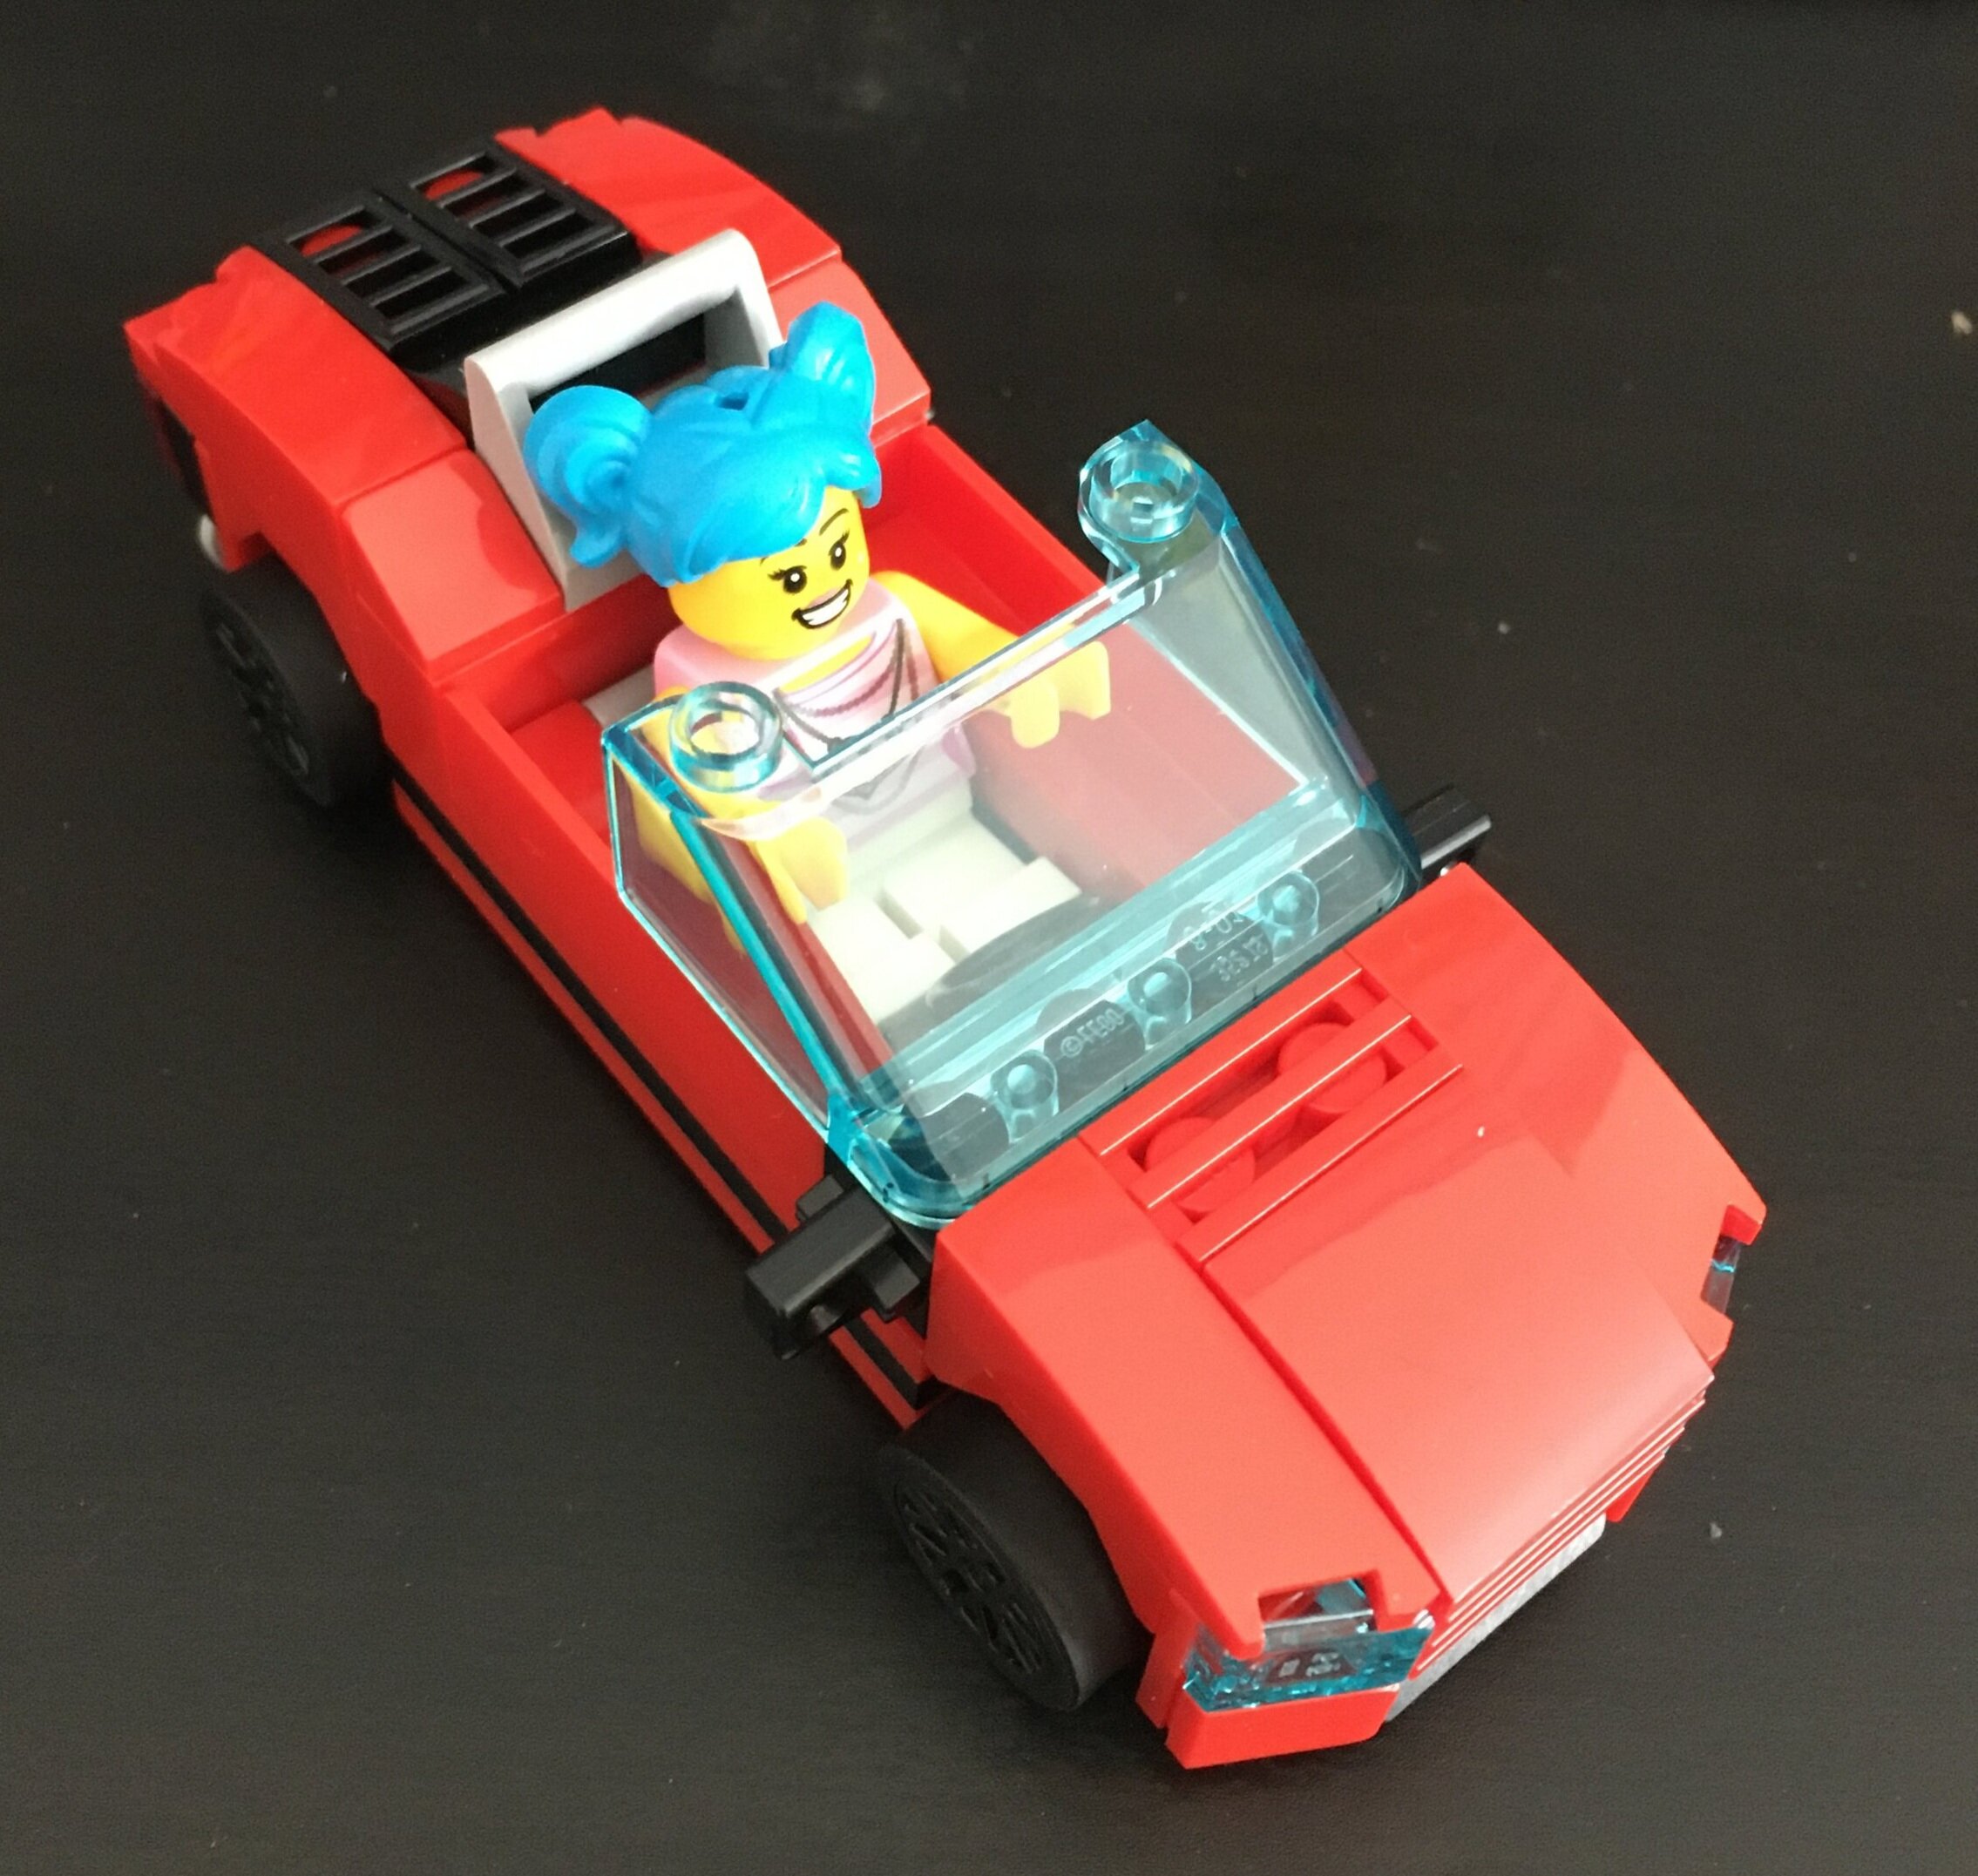
How awesome would this set look in a City scene or a park scene or mixed in with your Fairground sets? Designed by builder FrostBricks, this set would be a great add and could be produced at a lower price point considering some of the other larger sets listed.

Food Stand Diners.jpg

3. Chemical Plant

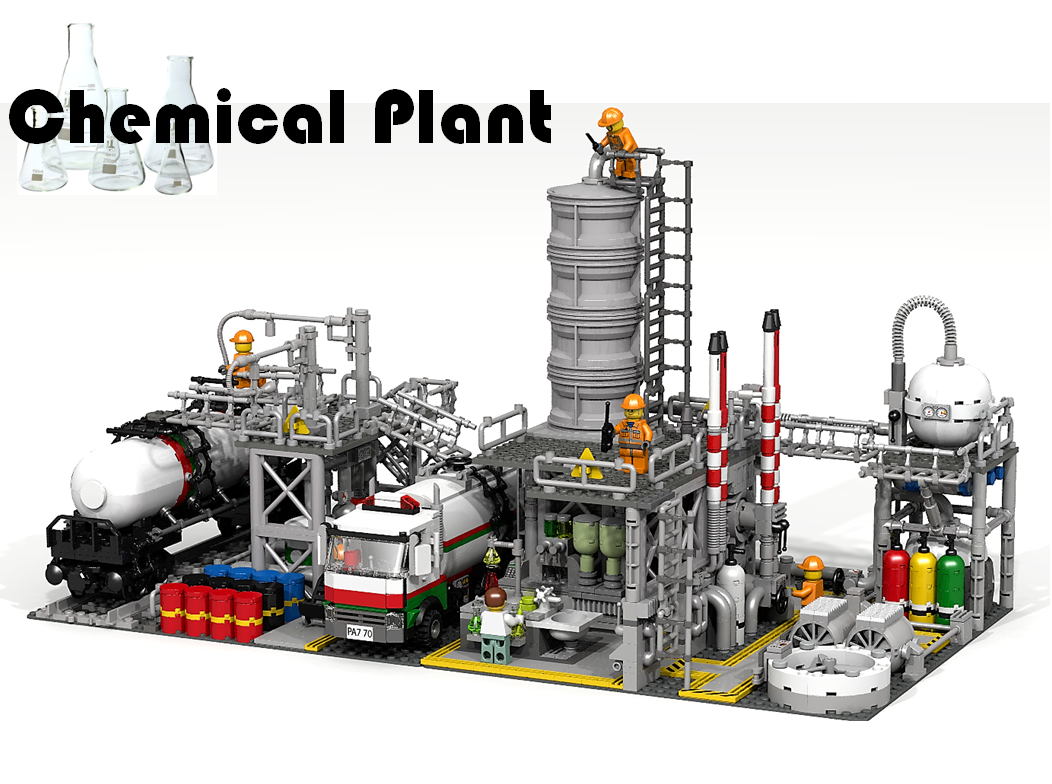
If you like Trains, City, or the Octan theme, this one would be great to see. Designed by fan Ymari, this set has a lot of playability (although not meant for kiddos), lots of great details, and connections to train with the tank car and roads with the Octan themed tank truck.

chemical plant.png

We’ll see if any of these even make it, but those are my votes. What are yours?

For those of you disappointed that we don’t have an AFOL Designer Program where you can submit your project, don’t worry. It appears LEGO and Bricklink are planning on launching this effort in 2022.

Happy Building!

Set Review - #75551-1 Brick-Built Minions and Their Lair - Minions: The Rise of Gru

We had the original “Despicable Me” movie, then the sequels, then spin offs, and now that we have brick built Minions, we’re all set, right? Released on 27 April 2020 in the US, this set contains 876 pieces and 3 minifigures. It retails for $49.99 in the US which works out to $0.057 per piece. I found it for 20% off on Amazon.com so $10 off which helped although five cents a piece is pretty good.

This set contains minifigures for the three main Minions who are Kevin, Stuart, and Bob. Then you can build larger versions of all three. Unfortunately you can’t build all three at once. You can build Stuart and then Kevin or Bob. You need another version of the set or some of your own bricks to have all three at once. Is it worth it? Onto the review…

Here is the front and then the back of the box. The front shows the larger Stuart and Kevin with all three minifigures. It also shows how the larger Minions open up in the back to show their lairs. The back shows the internals of all three, it shows you how the eyes spin, and then shows that you can switch Kevin to be Bob.

75552_box_front.jpg
75551_box_back.jpg

The set contains five parts bags. Two are labeled with a 1 and three are labeled with a 2. One of the first bags contains a piece separator. There is a sticker sheet with a bunch of stickers and then two instruction booklets. The first booklet builds Stuart and the second builds Kevin and Bob.

75551_contents.jpg

The first two bags build Stuart. He is distinguishable by his sole eye. The outer body is a similar build for all three minions except for some minor differences (height, eye color, hair, and the mouth piece. The eye and mouth are all printed pieces so if you just wanted the Minions without all of the internals, you could get away with out using any of the stickers.

One thing that doesn’t quite work with this build is the torso and head of the Minion is not even with the top part of the head. There is a slight break where the curves are not quite even. Considering it’s built with LEGO bricks, we can’t complain, but it does make me wonder if there’s another way to make the head seem a bit more smooth.

Stuart has a cool pad to hang out in with a sound system, dart board, boomerang, and a fold down bed. Above his bed and connected to his eye is a 2x2 round brick to spin his eye around

75551_build1a.jpg
75551_build1b.jpg

The second set of bag builds Kevin (listed first in the instructions). Kevin is built similar to Stuart only he is a few studs taller. Additionally, he has two eyes versus the one. There are gears in place so both eyes can spin. He has a small smile compared to Stuart’s open mouth. Additionally, he has a small sprig of hair versus Stuart’s hair.

Inside Kevin has his command center with various screens and dials. He also has his fire extinguisher and some tools along with a banana to snack on. Lots of stickers, but not too bad to assemble. The minifigure is pretty similar only smaller.

75551_build2a.jpg
75551_build2b.jpg

The second set of instructions starts from scratch again. It doesn’t give any guidance as to whether you should disassemble all of the parts of Kevin or certain parts. I kept the bottom intact and then parts of the top, but the internals are all swapped out so you are forced to make take apart most of the pieces.

The assembly of Bob is similar to that of Kevin only he is shorter. Inside he has some weapons and a few posters. Also one of his eyes is green versus two brown like Kevin.

75551_build3a.jpg
75551_build3b.jpg

Overall it’s a good build. The three Minions are built mostly the same, but they have enough differences to make it interesting. You get some decent pieces as well. The larger Minions have some good play features and while you can have all three assembled at once, you can easily switch them out. The minifigures are pretty good too and you get some hats to put on them as well. With a 20% discount, I couldn’t complain with the price. Definitely a must buy for any brick and Minion fans.

What are your thoughts on this one? We saw a larger character with #75979-1: Hedwig. We also have the larger sized Minions. Will there be more? Should they have put all three larger Minions into the set? Will it force people to buy two sets so they can get all three?

Happy building!

LEGO® Shop @ Home Shows Sold Out. Where Else Can I Look?

For the US buyers scrambling to get new sets, going onto LEGO Shop @ Home has been depressing. Sets are sold out to the max and any inventory that pops up of anything remotely good gets sold out immediately (or so it seems). Although I did see you can now sign up for email updates to be alerted when a product is back in stock. I have not ventured to my local LEGO Store so I don’t know if they have the same inventory issues or not.

I don’t know about Amazon’s inventory, but their deals seem to have dried up fairly quickly. It’s a bit over a week before Christmas and most of their sales on sets are over.

I haven’t done a good scrub of the Walmart or Target websites. Since I live in Germany, I can’t stop by a local store to see what the shelves look like.

It got me to thinking… where else can you look to find your bricks while sticking to name brand type stores. You can obviously go to EBay, Bricklink, and some of the small business toy and LEGO brick stores, but not everyone has a physical presence nearby and we’ve maxed out our shipping capacity in the US so good luck ordering something and hoping it’ll be in your hands by Christmas..

And no… I’m not getting paid by any of these businesses to talk about them…

Barnes and Noble:
Everyone thought Amazon.com would kill it, but it’s still around. The last time I was in a store, there was a small LEGO section. Looking online, they have a fairly sizeable selection with a lot in stock that is not in stock on LEGO Shop @ Home. You can get #21322-1: Pirates of Barracuda Bay, #21323-1: Grand Piano, and many of the other harder to find sets.

If you have a store nearby, you can order to pick up in store at no additional charge. Otherwise, they charge for shipping unless you pay to be a part of their membership program. While I don’t shop there, I have seen elsewhere that you can use the paid membership program to get some decent deals. Does anyone have any experience getting sets there?

Kohl’s:
Don’t they sell clothes? Apparently they sell LEGO sets too. In looking online, they have a smaller selection of sets available (a little over 100 as of today). Most of the sets are geared towards kids and they don’t have many of the 18+ type sets. A quick scan only showed #31197-1: Andy Warhol’s Marylin Monroe. Like Barnes and Noble, they have free in store pickup. There also ways to get deals too, but I won’t go into them there. It might be worth keeping them on your list as you go out to find your favorite plastic bricks.

Michael’s:
Okay so I didn’t know they sold LEGO sets. They don’t have a large selection, but they sell them and you can get in-store pick up. Definitely pay attention to pricing if you plan to shop there. A quick scan of the website shows many of their sets are priced above LEGO’s retail price. So definitely look for the opportunity to get a sale or some other deal if you plan to shop there.

Christian Bookstore:
Didn’t see this one coming. Not a huge selection and I can’t say I’ve ever shopped there before, but they have sets in stock. I found #10277-1: Crocodile Locomotive and #42115-1: Lamborghini Sian FKP 37. I’m not sure if they have good deals or ways to save. Anyone?

Best Buy:
I admit I haven’t been to Best Buy in a while, but I didn’t know they sold LEGO sets. I have never seen them in the store. Maybe this is a newer thing? I looked online and they have a decent selection. Some sets are sold out, but there are a lot still in stock from across the lines. This includes smaller sets and spans to larger sets. There are a few sale items as well. Looks like they have free shipping on some of the bigger sets and you can pick up in stores as well.

Costco:
I’m not a Costco member so I don’t know if it’s new or not, but Costco sells LEGO sets. Online they have a few sets listed, but nothing . I’m not sure if they have more in the store or not. If you are a member, it might be worth it to check it out.

Disney Store:
LEGO has licenses for a number of Disney lines such as Star Wars, Disney Princesses, and a few others. You can buy the Disney themed sets from the Disney store at the actual stores or get them shipped. Right now they have free shipping on orders over $75. I don’t know if that is all the time or just now.


There are a few places you can look. Are there anymore I missed? Have you bought sets at any of these places? What had your experience been?

Happy building!

How do I Find Cheaper Loose Parts?

Are you looking for parts to build your own creations? Or maybe you’re a parent like me and have kiddos who like to build and want some additional parts.

I have a parts collection back in the US in storage, but we have a big plastic bin of random parts here to free build with (as you can see below).

loose_parts.jpg

So where can you find cheaper parts?

bricks_and_minifigs.jpg

Bricks and Minifigs is an after market store in the US and Canada. It is franchise owned and more seem to pop up every year. It’s been a few years since I have been to one, but I used to live by the Albuquerque, NM store. The store had 2 large tables of loose bricks. They buy used pieces and then re-sell them at a higher price. You can pick the size container/bag you want and then sort through the parts to find what you want. I was usually able to find some great parts in great condition. Usually I could get it down to somewhere between 3 and 5 cents per piece. Definitely check them out if you live nearby.


classic.jpg

The LEGO Classic line is a great place to look. While you don’t get the exact parts you want, you can find them at a lower price and brand new. I recently got the set pictured here for 28% off. It worked out to around $0.03 per piece which is a great deal. You might not get minifigures, but they usually have a great color scheme and some cool parts. It’s definitely worth it to look for sales on the Classic line. Especially before Christmas time.


bins.jpg

Now we tread into the unknown… there are numerous ways you can buy used bulk LEGO parts and sets from garage sales and Craigslist, to EBay and Amazon. There’s a lot out there and it can be hard to know what you’re going to get. You may be getting a bin from an expert who has picked out the “good” parts and left you with items you may not want. Or you may end up with a gold mine of old disassembled sets that you can re-assemble. Prices may vary, but usually you can get a decent deal here. Just the quality may not be where you want it. So let the buyer beware…


pick_a_brick.jpg

Is it worth it to go straight to the source? You can get the quality of part and the type of part that you’ll want, but you’ll pay. Online orders can get pricy so it might not be worth it unless you are trying to get that one hard to find piece. In store may offer you some savings. Purchasing a cup full of parts can be good if you know how to pick and stack smartly. I am not an expert there by any means, but I recommend you look online for videos from people with tips on how to stack and fill your cups at the LEGO store. My last trip to the LEGO store was a while ago, but it was around $18 for the large cup. Is that still right? In the past I’ve been able to get parts for around $0.04 per piece or so, but usually the pieces are smaller so it’s hard to make a judgement there.


bricklink.jpg

The secondary market… It’s actually pretty large. You can get specific parts on numerous sites from EBay to Amazon to BrickOwl, but I will focus on Bricklink.com for now since I am most familiar with it. Bricklink is now owned by The LEGO Group so it’s the secondary market owned by the primary market. The downside is that most sellers are AFOLs or people knowledgeable with bricks so finding great deals on parts is probably tough. The plus side is if you can’t find it on Bricklink, it probably doesn’t exist. You can also work with (some) buyers to get discounts if you are buying large lots or if you become a regular customer. You can get a lot of opinions about Bricklink so I’ll stop there. Bottom line is, lots of available parts, but not always the lowest price.


There are probably a few other niche areas like if you are in a LUG and can participate in the LUGBULK program. What else am I missing? What has worked the best for you?

Please post in the comments or send me at note at store@bricksforbricks.com and I will add to the post.

Happy building!

How I Got an Orange Classic Space Minifigure

I attended BrickCon 2020 virtually back in early October 2020 and finally got to building the convention model (I was building something else). You can see my other posts here and here. If you look at the post about SWAG you can see all of the stuff I got (for a fee). The set came in this small box with a printed sticker on it. The sticker has the Convention logo and some views of the set.

One of the big highlights is the minifigure in the set. It’s an orange classic space minifigure. If you’re reading this after 2020, this was the year the orange spaceman joined the crew which could be found in the LEGO Minifigure: A Visual History. Instead of buying the book to get the minifigure, I got this set. The difference is the minifigure cranium. The one from the book is the classic yellow with two dots for eyes and the single line smile. The one in the BrickCon set is a female with some eyebrows and lipstick. Anyways, this adds to the other recent additions to include the ones found in #70841-1: Benny’s Space Squad (2019) and then the LEGO Ideas #21109-1: Exo Suit from 2014.

BrickCon_box_front.jpg
brickcon_box_side.jpg

Since it’s not an official set, it comes with some instructions and a standard plastic bag filled to the brim with parts. No piece separator here and the instructions don’t have anything about the designer. By the way, the designer was Chris Malloy. He’s the managing editor of The Brother’s Brick and designed a great set. His page is here.

brickcon_contents.jpg

Here’s the completed set. There are four 8x8 stud plates. Each one is connected to the others with Technic pins. It is designed so that you can add additional plates to the set as well. From left to right, you start with the the ladder from the space ship that the spacewoman climbed down. Then the next one is part of a castle wall with a deceased guard next to his spear and flag. There are a few pumpkin like plants with some leaves growing out of them. The final plate has part of a façade that has fallen over. There are some plants growing on them and the paint is wearing off (from white to gray).

Unlike official LEGO sets, there are some connections that wouldn’t fly. They are a bit flimsy and you have to be pretty delicate when assembling everything.

Also, the parts selection is pretty impressive. Besides the orange spacewoman, there are some less common parts. The pumpkins, the plants, the yellow and black branches, a silver curved tile, and a few others. Even if you don’t like the model, there are plenty of parts for other sets.

Did you attend Virtual BrickCon 2020 and did you get the set? Did you like it?

Happy building!

brickcon_set.jpg

Set Review - #42115-1 - Lamborghini Sian FKP 37 - Technic

There are a few themes LEGO has sucked me into. One is modular buildings. The other is the Technic "super cars.” The first one was #42056-1: Porsche 911 GT3 RS back in 2016. The second was #42083-1: Bugatti Chiron released in 2018. The third car was released on 2 June 2020 in the US. It’s #42115-1: Lamborghini Sian FKP 37. It contains 3,696 pieces and retails for $379.99 in the US. This works out to $0.103/piece. Considering a lot of those pieces are tiny Technic pins, this car is expensive! Thankfully, I found it locally for ~$286 which I think is a much more reasonable price for the set. So if you live in the US, now is the time to complain as the Europeans get some discounts that you never see.

Like the previous cars, the box is unlike your standard set. The top half of the box looks like the hood of the car with the Lamborghini logo. The bottom part is a picture of the completed set with the name logo in the upper left. Unlike the Bugatti which was labeled as 16+, this one is labeled as 18+.

42115_box_front.jpg
42115_box_back.jpg

The sides of the box continue on the car shape with the front and back of the vehicle on the box.

42115_box_sidea.jpg
42115_box_sideb.jpg

Taking the top of the box off reveals six boxes in the shape of the engine covering in the back of the car. The boxes are numbered 1 through 6. After removing the boxes, there are two instruction books on the bottom. When you put the books next to each other, you can see the completed model.

For reviews, I normally pull out all of the bags so you can how many parts bags there are in the set. I didn’t do that here as the parts bags are all contained in the numbered boxes. I didn’t count as I opened them either. Sorry…

42115_box_open.jpg
421153_box_contents.jpg

The instructions are similar to previous Technic super car models with a lot of details and extras on the actual vehicle and the model. I found the extra details interesting. You are also given some QR codes that you can scan to take you to YouTube videos about the design process. The videos were interesting with some interviews of LEGO and Lamborghini personnel. I tried to watch while building, but couldn’t focus enough on the build so I watched them separately. I think I would have rather had one longer video versus a bunch of shorter clips, but not a major issue to me.

I bought my set in Germany so the instructions came in English and German. Not the North America version in English, French, and Spanish.

42115_ins1.jpg
42115_ins2.jpg

Box 1 - Gearbox and Rear Suspension

Each box is split up in the instruction book with a write up on that section and a corresponding video. Box one builds your transmission and where the back wheels go. The transmission is a challenging thing to build. I really had to pay attention to part types, angles, sizes, and how things were linked up. I made a few small mistakes, but thankfully caught them before I went too far.

The transmission is open on the bottom of the car so you can see the movement as you cycle through gears. This is different from the previous cars. While not realistic, it is a nice touch to see what is going on I guess. Also it’s on the bottom so it’s not like you see it all the time unless you flip it over.

I didn’t time myself on the build, but I think this part took a while for me. Might have been just because I was taking my time with it to make sure I got it right.

42115_build1a.jpg
42115_build1b.jpg
42115_build1c.jpg

Box 2 - Engine and Front Suspension

With box two you can attach all the wheels now and the engine is installed. You can also shift the car into drive, neutral or reverse now. The wheels have a pretty solid suspension. One of the things from the videos is the car actually has some bounce to it. It is not much, but is way more versus the Bugatti.

42115_build2a.jpg

The engine has 12 cylinders that you can’t see working, but you get to install them all anyways. It’s not a big deal that you can’t see them in my opinion. I think it’s more about the build experience. The engine covering includes some printed tiles which add to the detail. I like the ones with the Lamborghini name on them. Super thankful there are no stickers on this one.

42115_build2b.jpg
42115_build2c.jpg

Here’s a closer shot of the front of the car at the end of box 2. I didn’t take a before step picture so you can’t see the details underneath. It’s a challenging part to assemble, but it comes together well. There were a few instances where I really had to stare at the instructions and compare it what I built to make sure it was all right. Some trial and error too. No mistakes so far…

42115_build2d.jpg

Box 3 - Interior Details and Seats

This box adds some details as mentioned, but also adds some movements. You install the initial parts of the scissor doors to come later and the mechanism to raise and lower the spoiler.

42115_build3a.jpg

The steering wheel is installed and like the previous vehicles, the wheel is functional. The other picture shown is the passenger side where you can see the Technic part used to raise and lower the spoiler. You can also see how some System pieces are added to the Technic pieces for detail purposes.

42115_build3b.jpg
42115_build3c.jpg

A quick look at the back. Not a lot of detail is added. Mostly structure to install other parts later.

42115_build3d.jpg

Box 4 - Rear Spoiler

Now the car is starting to look more like a car. We’ve got a roof over where the passengers sit, a covering over the engine in the back, coverings over the rear wheels, and the spoiler. If you’ve seen anything about this car, you know that LEGO has had some issues with parts and colors. This is the part of the build where those issues became readily apparent. The spoiler itself has multiple shades of green on it. While the design of the spoiler is cool and fairly accurate compared to the real car, the color is disappointing. With a $380 price tag, you would expect a much higher quality.

42115_build4a.jpg
42115_build4b.jpg

Here’s a closer view of the back of the car. You can see the System tiles used to create the Italian flag which is a fun detail. I’m also a big fan of the brake lights. They used more System pieces mixed in with Technic pieces. If you look closely at the spoiler, you can see the color differences. The rear also has a cool “Lamborghini” tile in the lime green with black lettering.

42115_build4c.jpg
42115_build4d.jpg

Box 5 - Scissor Doors

The fifth box finishes up the majority of the car. This includes the front hood, the lights, the front bumper, and the doors. I found a few parts a bit challenging to put together as the instructions just show the assembly next to the spot it is supposed to go.

42115_build5a.jpg
42115_build5b.jpg

Here’s another view of the front of the car. It seems like the front dash is quite large compared to the rest of the vehicle. I’m not sure if it is proportioned correctly, but perhaps there is a reason.

The scissor doors have a piece you can push in behind the “cab” of the car. The doors pop up like a real Lamborghini. No complaints here. It’s a fun detail.

42115_build5c.jpg
42115_build5d.jpg

A few close ups from this part of the build. I’m not sure how I’d re-design the light bars, but I’m not a fan of how they were built. They do look similar to those of the actual car and I understand that the geometry is tough to re-create. I’ll have to think on this one…

I like the brakes with the printed brake calipers. I’m also glad they are not stickers. It’s a small detail that you really can’t see with the vehicle completed, but I’m a fan.

42115_build5e.jpg
42115_build5f.jpg

Box 6 - Rims and Tires

The lime green color issues with this model are disappointing, but the gold rims are awesome. They really make the vehicle stand out. It’s the same wheels as the Bugatti and there’s a small 1x1 round tile with the Lamborghini tile on it.

42115_build6a.jpg
42115_build6b.jpg

This second part of the build for this box is a brief case. The previous two cars had cases as well. This one has the fewest details of the three so far and in my opinion it seemed like a last minute add. The brief case doesn’t have much to it. It’s rather plain and bland. I would have rather done without the bag.

42115_build6c.jpg
42115_build6d.jpg

The last part of the build is a display plate. It’s a 4x6 plate with some studs. Impressively it is all printed on unlike a lot of the UCS type sets where there is a large sticker. It’s a nice addition to the model and for people who want to display it. They have it mounted on some Technic pieces so it can be angled up. A nice touch in my opinion.

42115_build6e.jpg

Here are a few pictures of the final product with the wheels on . Overall, it’s an impressive model. I enjoyed the build process and getting away from System builds. I enjoyed all of the details and the mechanical connections. I didn’t enjoy the price originally posted. I was super thankful to see the price come down in Germany and to get it at a substantially lower rate, but I have yet to see it go down in the US. I’m hoping LEGO can adjust pricing in the future… either more car/build experience or lower price. We’ll have to see what LEGO does in the future. In the meantime, what do you think? Is it worth it?

Happy building!

42115_final1.jpg
42115_final3.jpg
42115_final2.jpg
42115_final4.jpg
42115_final6.jpg

I have the Porsche in storage, but here is a picture of the Lamborghini and Bugatti together. The Lamborghini is slightly longer. Any thoughts on cool ways to display them? Here’s a Beyond the Brick clip where someone shows off his LEGO room and he has two of the cars hanging on the wall.

42115_42083.jpg

Set Review - #60203-1: Ski Resort - CITY

#60203-1: Ski Resort was release on 1 September 2019 in the US. It retails for $89.99 and contains 806 pieces and 11 minifigures. This puts it at $0.112/piece. As I write this, it shows as sold out in the US on LEGO Shop @ Home so I may be too late to the game. It still shows available here in Germany. I purchased it in Germany for around $54 which was a much better price, Why are the CITY sets so expensive all of a sudden?

While not an advertised sub-theme, the CITY theme had #60222-1: Snow Groomer back in 2019 as well. We’ll see if they add more in the future or not.

Onto the review…

The box is pretty standard with the full set displayed on the front and some of the play features on the back.

60203_box_front.jpg
60203_box_back.jpg

The set contents are eight parts bags, the instructions and stickers in a sealed package, and then an 8x16 white plate. Bag one has a piece separator.

60203_contents.jpg

The first bag builds a snow mobile, a trailer to carry a stretcher, a snowman, a dog, and 4 minifigures. The snowmobile is pretty simple, but it gets the point across and has some playability. The snowman looks pretty similar to ones in the past with a top had, red scarf, and a broom as arms. The dog is the standard CITY dog figure.

The minifigures are pretty good. There are two snow patrol figures with a male and a female and then two kids with the shorter legs.

60203_build1.jpg

The second bag is a helicopter design. I seem to have accumulated a bunch of these through the years and they all look very similar. In terms of realism, LEGO CITY helicopters lack some realism, but they must be popular as LEGO keeps repeating them. There is one minifigure who is the pilot.

One difference on this chopper is the tail piece. Instead of building out a tail with bricks you get a BURP. I’m not sure if this is a new thing or not. It looks better, but takes away from the build experience as you just attach one piece.

60203_build2.jpg

Next up is bag three with this SUV and snow plow. It’s a pretty tough looking vehicle with space for gear in the back, some skis, poles, and the ability to store some equipment. The plow in front is pretty large too. The bag comes with a female minifigure in a ski patrol uniform. I like this vehicle and am pretty impressed with how it looks despite being a CITY set.

60203_build3.jpg

Bag four gives us a small snack stand with hot chocolate and goodies to eat. You also get some trick gear to include a small rail to ski/board on and then a mini-half pipe. The half pipe is rather small. You could get maybe one trick off of it if you did it right. I get the point though and that it is meant as a play feature. You get two more female adult minifigures to eat at/work at the snack stand.

60203_build4.jpg

Instead of going by bag, I decided to go by the remaining parts of the build. Next up is a winter gear shop. It’s a small store front with snow shoes, snow boards, skis, a hat, a helmet, and poles for sale. The store is only the front part, but I like the design. The front is designed to make it look like it is built as a log cabin with printed tiles to look like the ends of logs. The stickers help with detail to include the store logo and a board out front listing the sales. I like the snow board over the door as a decoration. This one comes with a store worker and then a snow boarder and skier all decked out with helmets and gear.

The inside of the store has some inventory, a check out stand, and the display areas. Not bad considering the size and easily expandable as desired.

The top of the store has a large plate with clips. It comes with a large sticker and is supposed to be a screen you can use to watch your favorite minifigures ski. I chose not to attach the sticker as I thought it was too big and looked kind of silly there. I’ll remove the large gray part before making it a part of a city scene some day.

60203_build5.jpg
60203_build5.jpg

The last part of the build is a small chalet type building used as ski patrol HQ. Like the store, it is only the front half, but I like the design of the front and think it would look fun as a full up building if you wanted to expand it. The inside has a medical area, an office area, and a work area on the upper level.

I also like the stickers on the side with the route map for skiers and then the name of the ski area “Mount Clutchmore.” Very clever.

60203_build6a.jpg
60203_sign.jpg
60203_build6b.jpg

That wraps it up. This is a fun set in a great sub-theme of CITY, but is way too expensive at its original price. I’m glad I found it at the discount I did and recommend you look for the same. Since the set is retiring, you might be able to find a good discount out there. If you find it at a discount, this is a great start a future MOC for a ski area/resort. Lots of fun details and some good play features.

What are your thoughts on this one?

Happy building!

60203_final.jpg

Set Review - #60253-1: Ice Cream Truck - CITY

I’m not sure when the first one was, but LEGO CITY has done a few food trucks over the years. The last one I can recall is #60150-1: Pizza Van. That was from 2016. #60253-1: Ice Cream truck was released on 2 January 2020 in the US. It retails for $19.99 and contains 200 pieces. That works out to roughly $0.10/piece. I purchased mine locally for just under $17.

The box is your standard set up with the full set on the front and some play features on the back. This set is meant for the 5+ age range and it shows in the build. Onto the review…

60253_box_front.jpg
60253_box_back.jpg

This set contains two parts bags (both numbered), two instruction booklets, a sticker sheet, and two 2x16 light gray plates.

60253_contents.jpg

Bag 1 starts building the truck. The back comes with a few cones and some ice cream. The back side of the truck has hinges so it can open up for playability. Not much else here… it’s a pretty simple build.

There are two minifigures. A female figure who is the truck operator and then a male minifigure who is on a skateboard. The skateboarder comes with a purple skateboard, a blue helmet which can be switched for a black hair piece. It also comes with a black hair piece.

60253_build1.jpg

Bag 2 wraps up the build. The other side of the back has a sliding window for the minifigure to serve out of. It also adds the cab and all of the decorations. There are a lot of stickers to include the menu, some signage, and the face on the ice cream bar on top. I failed on the sticker for the ice cream bar as I centered it. If you zoom in, you can see there is a gap between the brown part and the brown drip on the sticker. I should have placed it in line with the brown. Not a big deal, but lesson learned I guess.

Overall, not a bad set. It fits in well with a city scene and adds some different vehicles besides the usual fire and police activity in LEGO CITY. The build is very simple, but to be expected for the 5+ range. My little guy tried to play with it, but the ice bar on top fell off easily and the front cab does not remain on well. Not a big deal for an AFOL thought. I’m glad I found it on sale and recommend waiting for a sale if you’re looking to pick this set up.

Happy building!

60253_build2a.jpg
60253_build2b.jpg

Set Review - #60262-1: Passenger Airplane - CITY

The LEGO CITY theme is back with another passenger airplane. This one is #60262-1: Passenger Airplane. It was released on 24 August 2020 in the US for $99.99. It contains 669 pieces and has 9 minifigures. This works out to $0.149 per piece. I picked it up locally on sale for about $72.

The last CITY passenger plane came out back in 2016. You can see my review of #60104-1: Passenger Terminal here. It had 694 pieces and 6 minifigures, but retailed for the same price. Like this set, it contained an aircraft, a small terminal, some ground crew gear, and the minifigures.

Onto the review…

The front shows the full set with the minifigures in action. It also shows the length of the aircraft (54 cm/21.2 in). The back gives the play features like usual.

60262_box_front.jpg
60262_box_back.jpg

The set contains 9 parts bags. 7 of the bags are numbered and 2 are un-numbered with large pieces inside. It also includes the large wing which has been pretty standard in CITY sets. The instructions and stickers are in a plastic wrapping. There are 4 instructions booklets and a small sticker sheet.

60262_contents.jpg
60262_instructions.jpg

Bag 1 builds a 4-stud wide red sports car. It comes with the minifigure Poppy Starr. This minifigure is from a LEGO CITY TV show that I didn’t even know existed. I’m not sure if this set or car is seen on the show or not. Anyone?

The build of the car isn’t anything special, but it’s designed to fit in the aircraft as you’ll see later.

60262_build1.jpg

The second bag builds an airport vehicle. This vehicle can tow various equipment to include stairs (built later) and the lift to transport the car to the aircraft. While there’s nothing special about the vehicle, it seems to be in line with the small vehicles you see driving around any airport in the world towing various pieces of equipment or baggage trains. You can easily create your own additional pieces of equipment to tow around and attach to this vehicle.

The trailer isn’t too hard to build, but I question if a 6 year old could do it as the box states. Maybe with some help they could? The design does hold the car built in the last bag and can “lift” it up. There is no mechanism to move the car into the aircraft, but I guess that’s something you can build on your own as most 6 year olds aren’t concerned about that.

Two minifigures in this bag. One is an airport worker with a hard hat and ear protection. The other is a passenger with a Hawaiian shirt on. He has a large piece of luggage which is different from the standard LEGO briefcase I’m used to seeing. This one looks like it could be a roller bag or something… just no wheels.

60262_build2.jpg

Bag 3 builds the small terminal. I’m not sure why it is included in this set. I understand that the set is designed for playability, but to me I’d rather see the terminal as a separate set. The aircraft set could be focused on the plane itself and some ground crew. Then the terminal set could be a bit larger with some more detail. This terminal has a small baggage claim, a vending machine, and a check in desk all crammed onto an 8x16 plate.

The facility uses roller coaster track as the roof. I like the concept, but it seems like a cop out to not putting any effort into making a curved roof. Easy for a 6 year old to install I guess. There’s also a small control tower with a radar dish attached. Like many CITY sets, the minifigure has to jump or climb to the top, but it gets the job done I guess.

Four minifigures in this bag. A female with a black bag sporting a guitar shirt, a male wearing a carrier to carry a baby and holding a bottle, the baby, and then an airport worker with a coffee mug. I love the baby carrier concept. Bonus points to the designer who came up with that piece!

60262_build3a.jpg
60262_build3b.jpg

Bag 4 starts to build the fuselage. Not a lot of details yet and like past CITY passenger planes, it uses a lot of BURPs to achieve the shape. One area I appreciate is the cockpit. Besides the printed slopes for controls, they added in a steering column which moves. It is just a bucket handle on a droid arm, but still a nice detail.

This bag has two minifigures to include a female pilot with some cool shades and a male flight attendant.

60262_build4a.jpg
60262_build4b.jpg

Bag 5 adds the standard wing piece along with some seating and details on the wings to include the winglets on the tips of the wings and the farings to hold the engines on. I’ve seen a few complaints about not enough seating, but I think the inside is large enough to make changes to as required. Add in your own additional seats if you don’t like how it looks. It is just LEGO after all.

60262_build5.jpg

The sixth bag adds in the windows in the cabin, a small bathroom on board, and starts to build the cargo compartment. The horizontal elevator on the tail is also added.

60262_build6.jpg

Bag seven finishes the build with BURP pieces to complete the top of the cabin, a BURP tail with a printed logo, a cargo door that rotates up and has a small latch to hold it down, and the engines. The engines are not a single piece, but instead are multiple cylinders attached together with around piece with a sticker on it for the fan blades. I’m indifferent on the design. Not sure if it is better or worse than previous jet engines. Besides the aircraft, you get the steps to get on and off the aircraft. No hand rails though so watch out.

60262_build7.jpg

Nine minifigures in total which isn’t’ bad. It’s a good selection with some good accessories. I would have liked a co-pilot for the second seat in the cockpit, but we’ll take what we get.

60262_minifigs.jpg

Here’s the full set. If you ask me, it’s in line with all previous CITY passenger plane sets. Lots of playability, some fun details, and good minifigures. While the piece count went down slightly, the price remained the same. If you can find it on sale like I did, even better. This is probably not a great set for adults unless you want pieces or you have a CITY airport (or like me, plans to build one). A good set for kiddos. My little guy absconded the vehicles and both of my kiddos enjoyed flying the plane around.

What are your thoughts on this one? If you’re an adult and hate the CITY plane designs, I recommend you check out the YouTube channel Big Planes. The builder here makes some incredible MOCs of actual aircraft and doesn’t use BURPs.

Happy building!

60262_final.jpg

Do We Really Need this Ad Campaign?

LEGO® kicked off the “Rebuild the World” campaign in 2019 and has continued it into 2020. They recently put out a new commercial. If you’re reading this post, odds are you don’t need the commercial to be enticed to buy LEGO® products. Does the rest of the public need it?

My personal opinion… Don’t make the commercial and knock some price off a few sets with the money you saved from not making the commercial. That’s just me though. What do you think? Is this an effective ad campaign? Does this really get people to buy more LEGO® products.

Here’s the most recent ad from November 2020 if you haven’t seen it…