
#21327-1: Typewriter is the 35th Ideas set to come out to date. This one was released on 17 June 2021. I’ve actually had this one for a few months, but my NLS wanted to build it with me. It took us longer to put it together since she doesn’t dedicate as much of her time to building as I do.
If you’ve been looking for this on Shop @ Home, it’s been sold out since Christmas time 2021 (as of the time of this post). The retail price is $199.99 in the US and with 2,079 pieces it works out to $0.096 per piece.
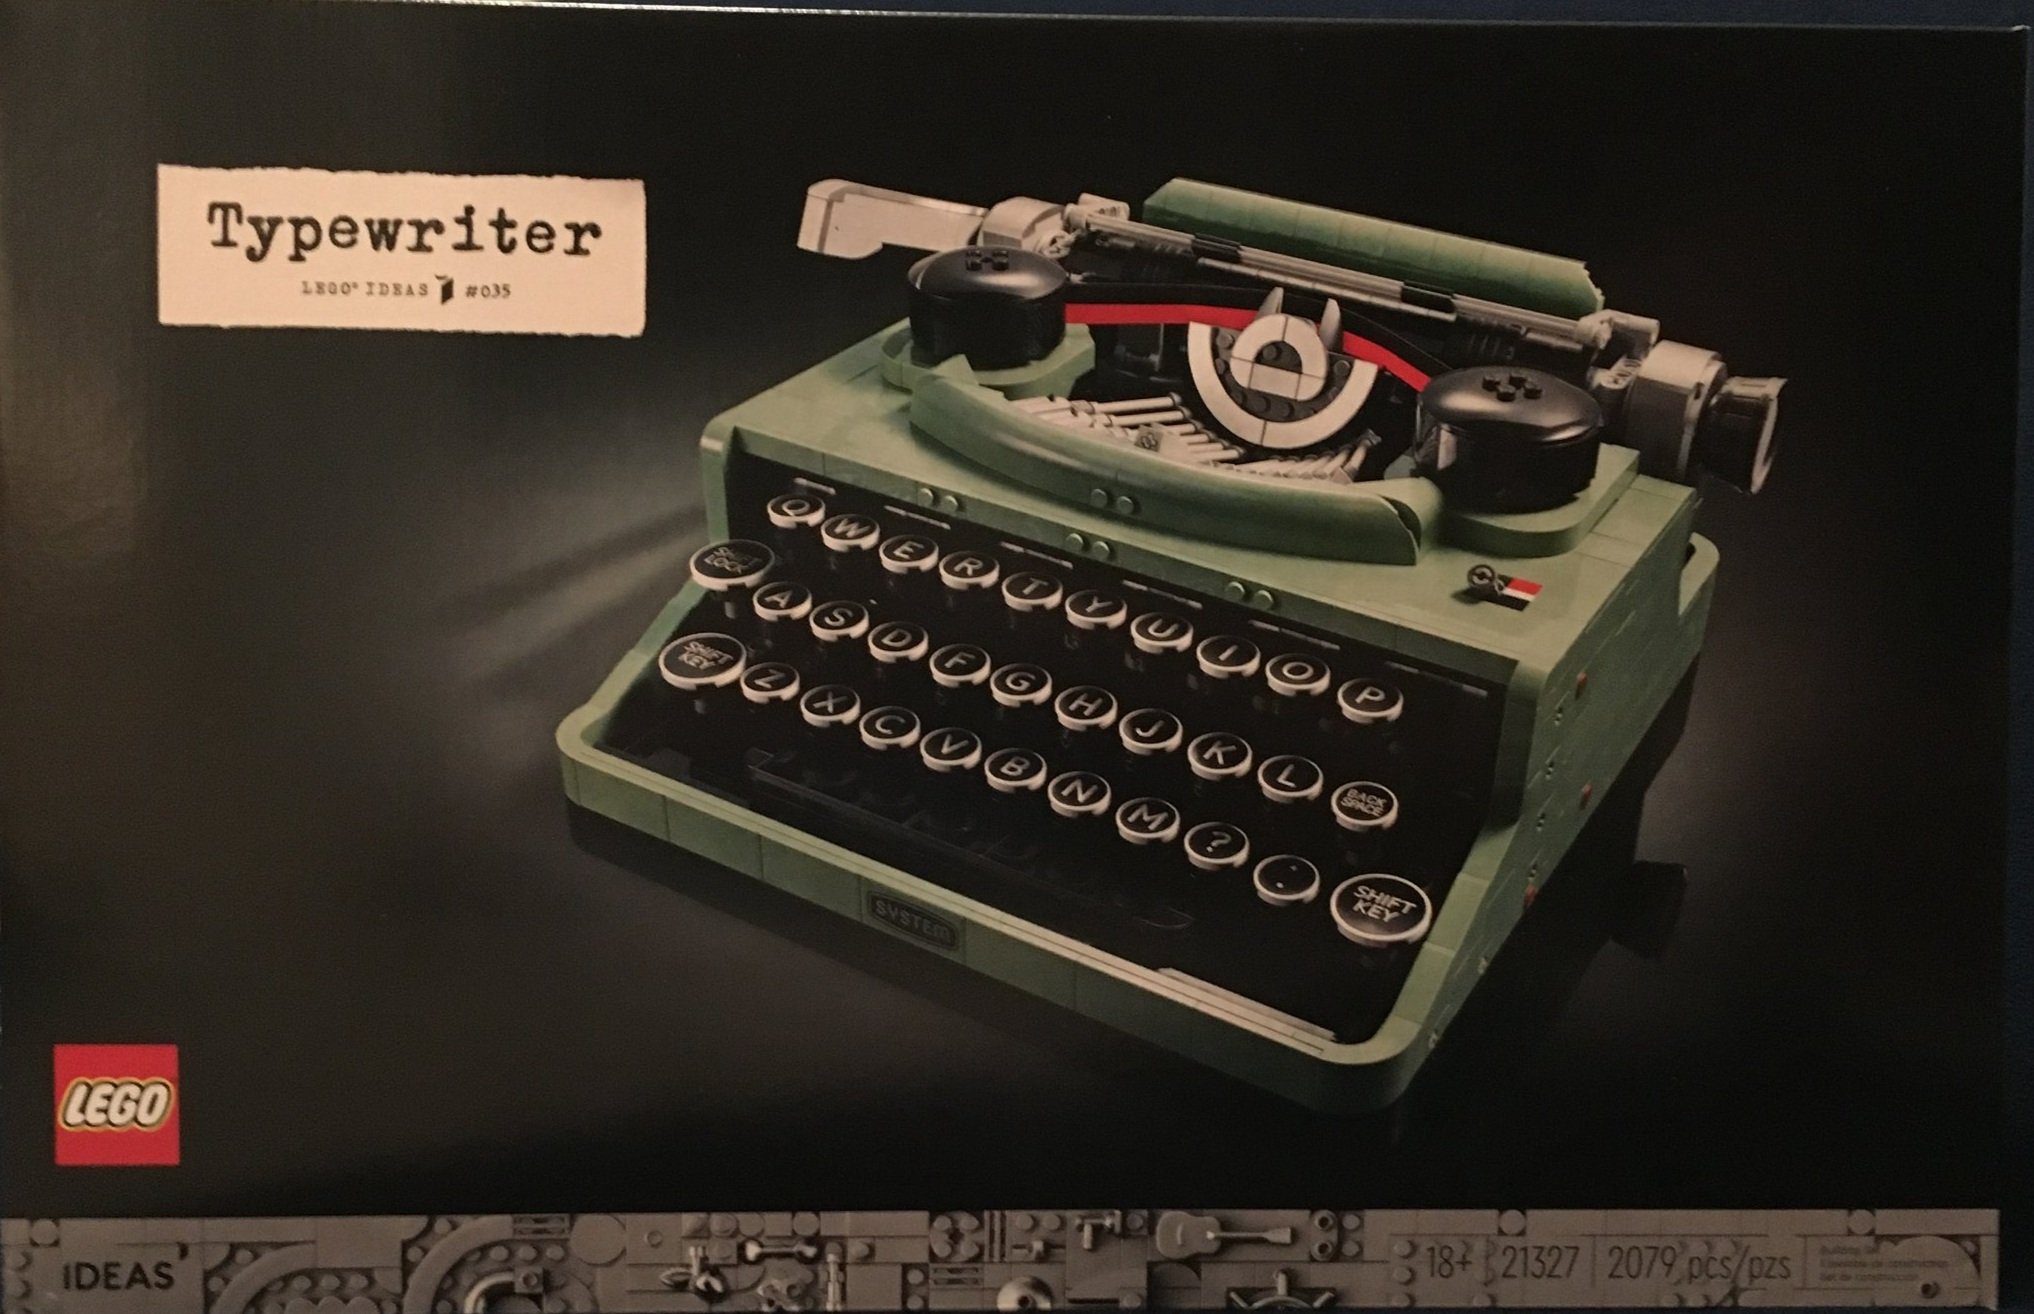
The box is pretty stylish. The front shows the full set with the 18+ branding. The back shows some of the features of the set along with dimensions. If you do a quick look, it looks pretty realistic. A relative came to visit, saw the finished set, and asked my NLS where we got the typewriter from. My NLS responded “from LEGO.”

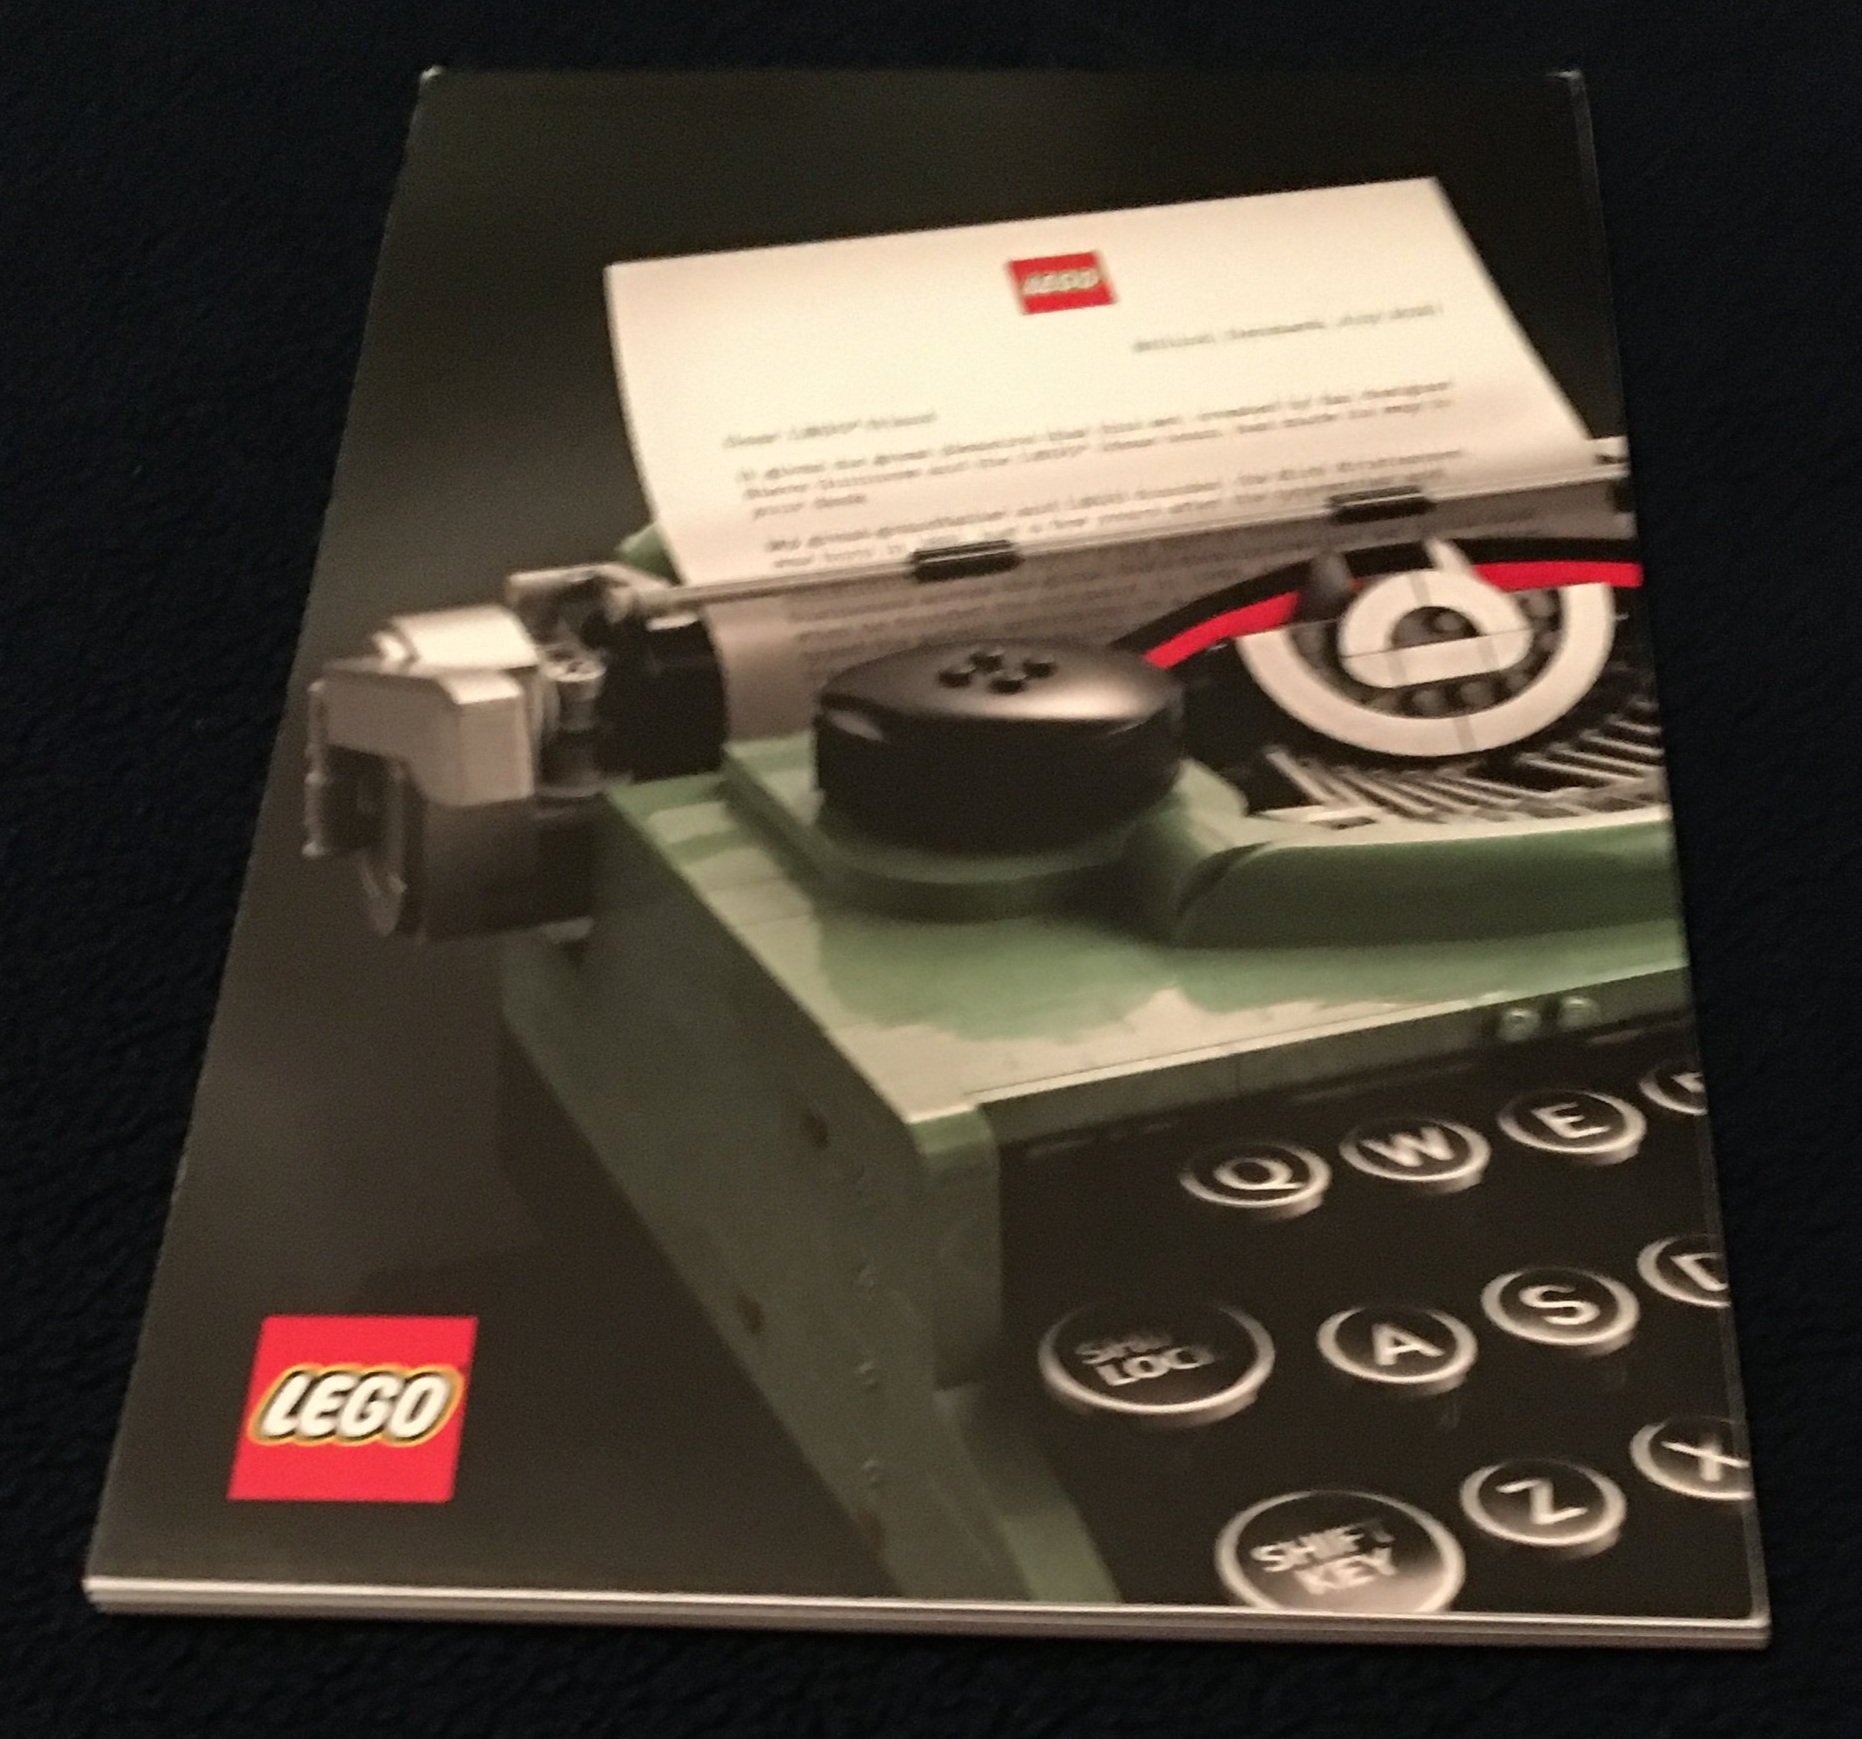
The box contains 19 parts bags. 18 of the bags are numbered while one has some larger parts. The instructions come wrapped along with the booklet of paper with a letter to attach to the typewriter available in multiple languages.

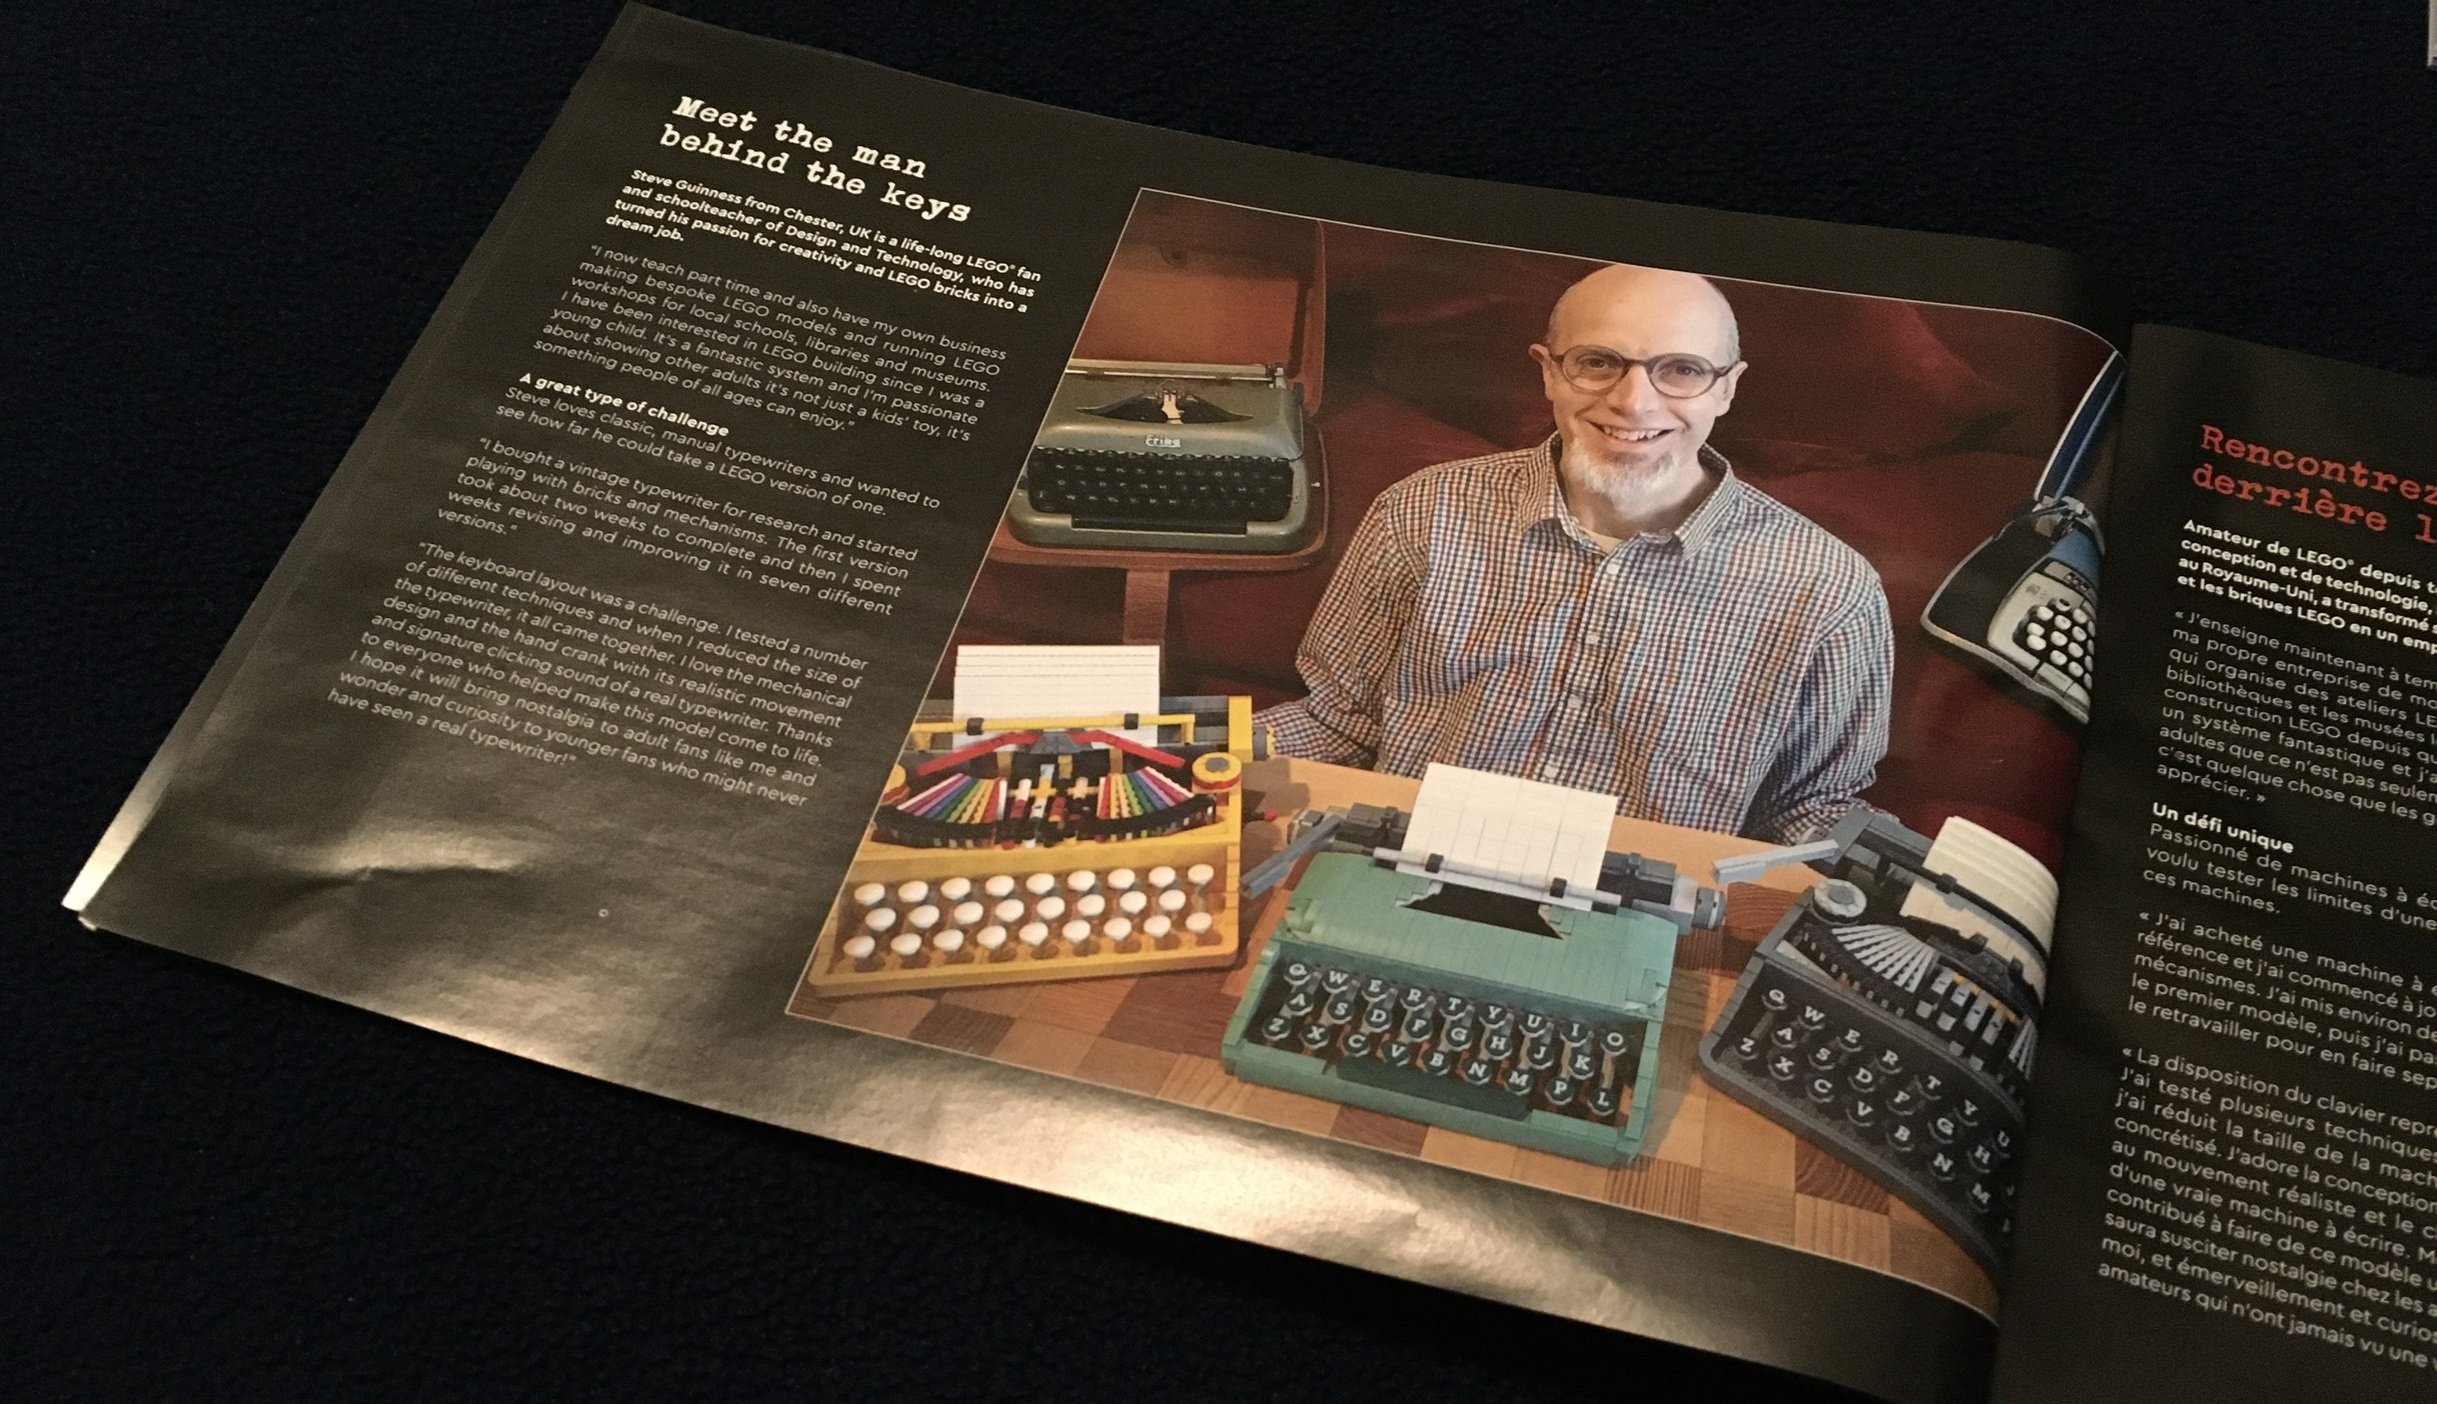
The instruction booklet includes some information about the fan designer and LEGO designers.

The set comes with only two stickers. They are chrome so I guess it would be hard to print them on bricks like this. Two isn’t bad so I can’t complain too much.
The letter you can add to your typewriter comes in a booklet where you can tear out the letter you want. It comes in more languages than I was expecting.

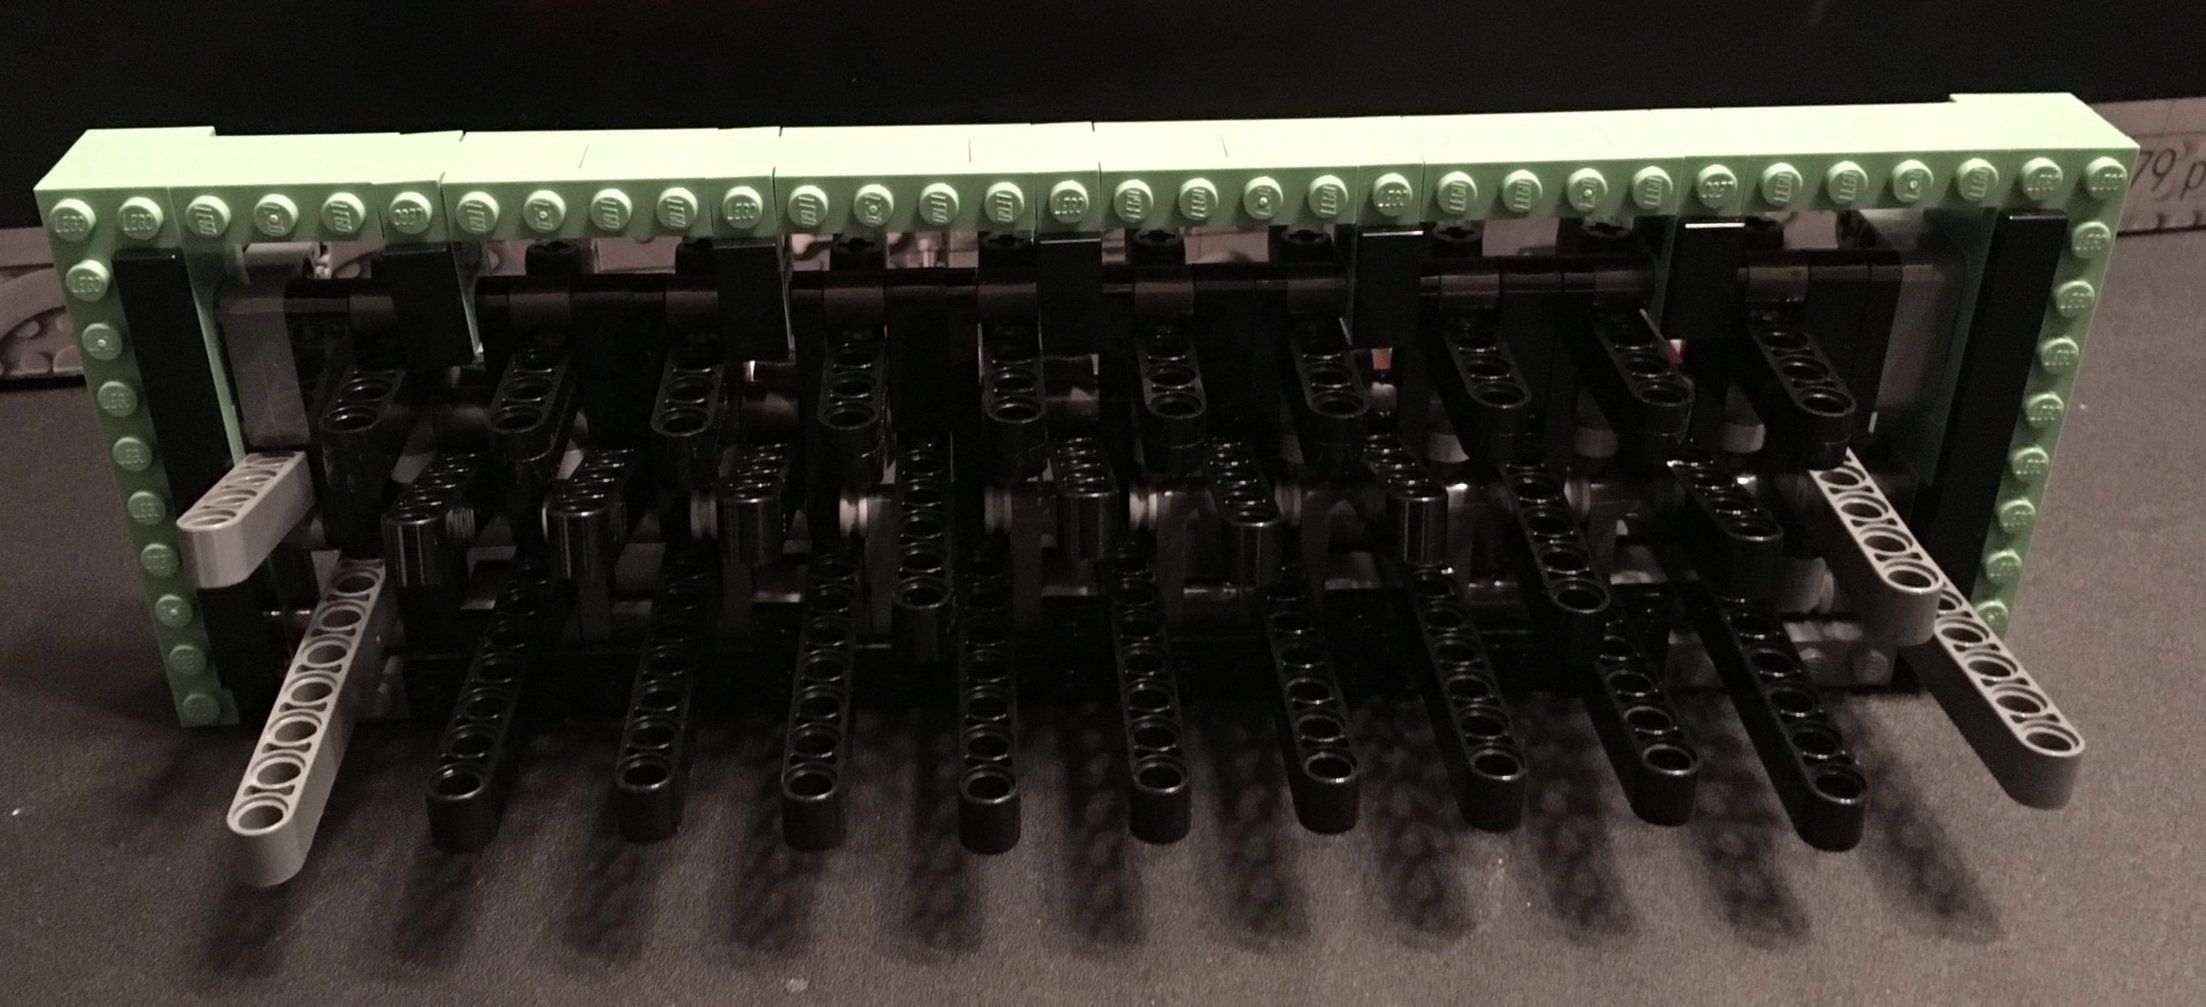
The first set of bags builds some Technic hardware. A word of warning for this set, if you don’t like Technic builds, you won’t like this set. It has a lot of Technic pieces to build the mechanical functionality. My NLS was not familiar with Technic builds and found it very challenging. Often she passed those sections off to me. If you are used to System builds, then Technic builds can get challenging, but I didn’t think it was too bad. You just have to pay attention to where various pins go.
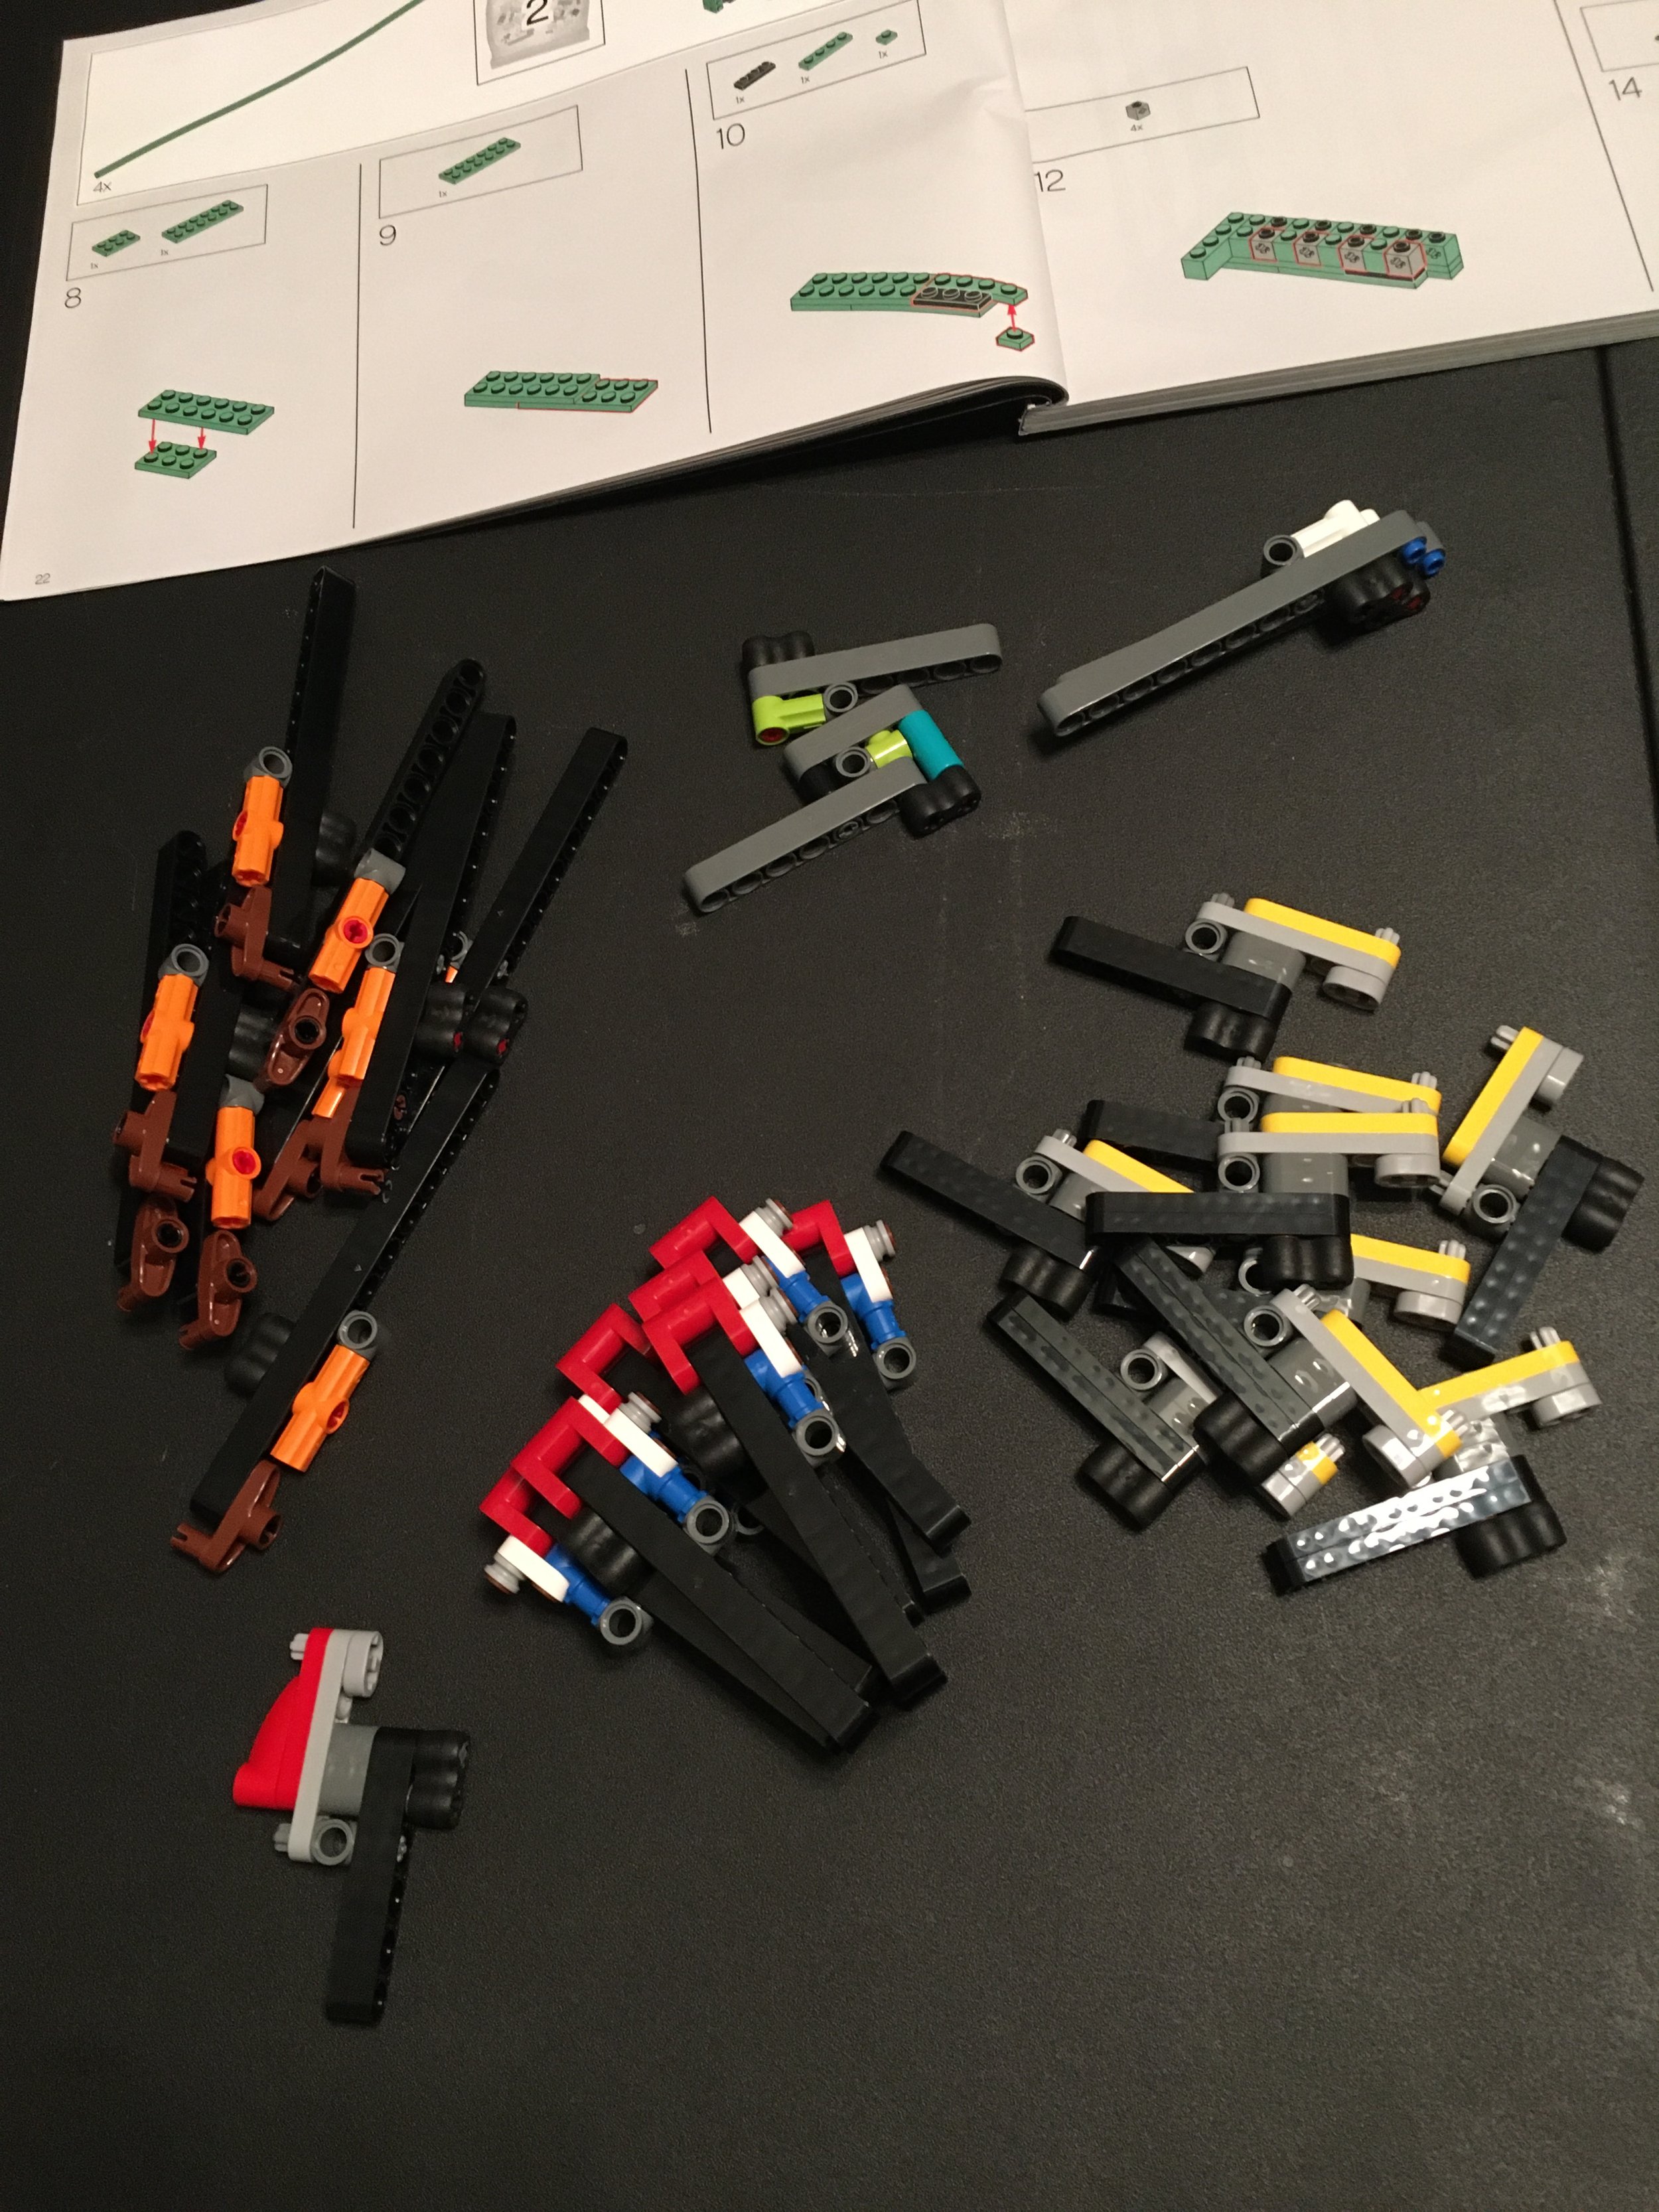
For the second set of bags, you attach all of those Technic builds from bag 1 together using long Technic axles that are similar to the long axles from #10280-1: Flower Bouquet. This part isn’t too challenging, but you really need to focus on the build and where you are putting each part.

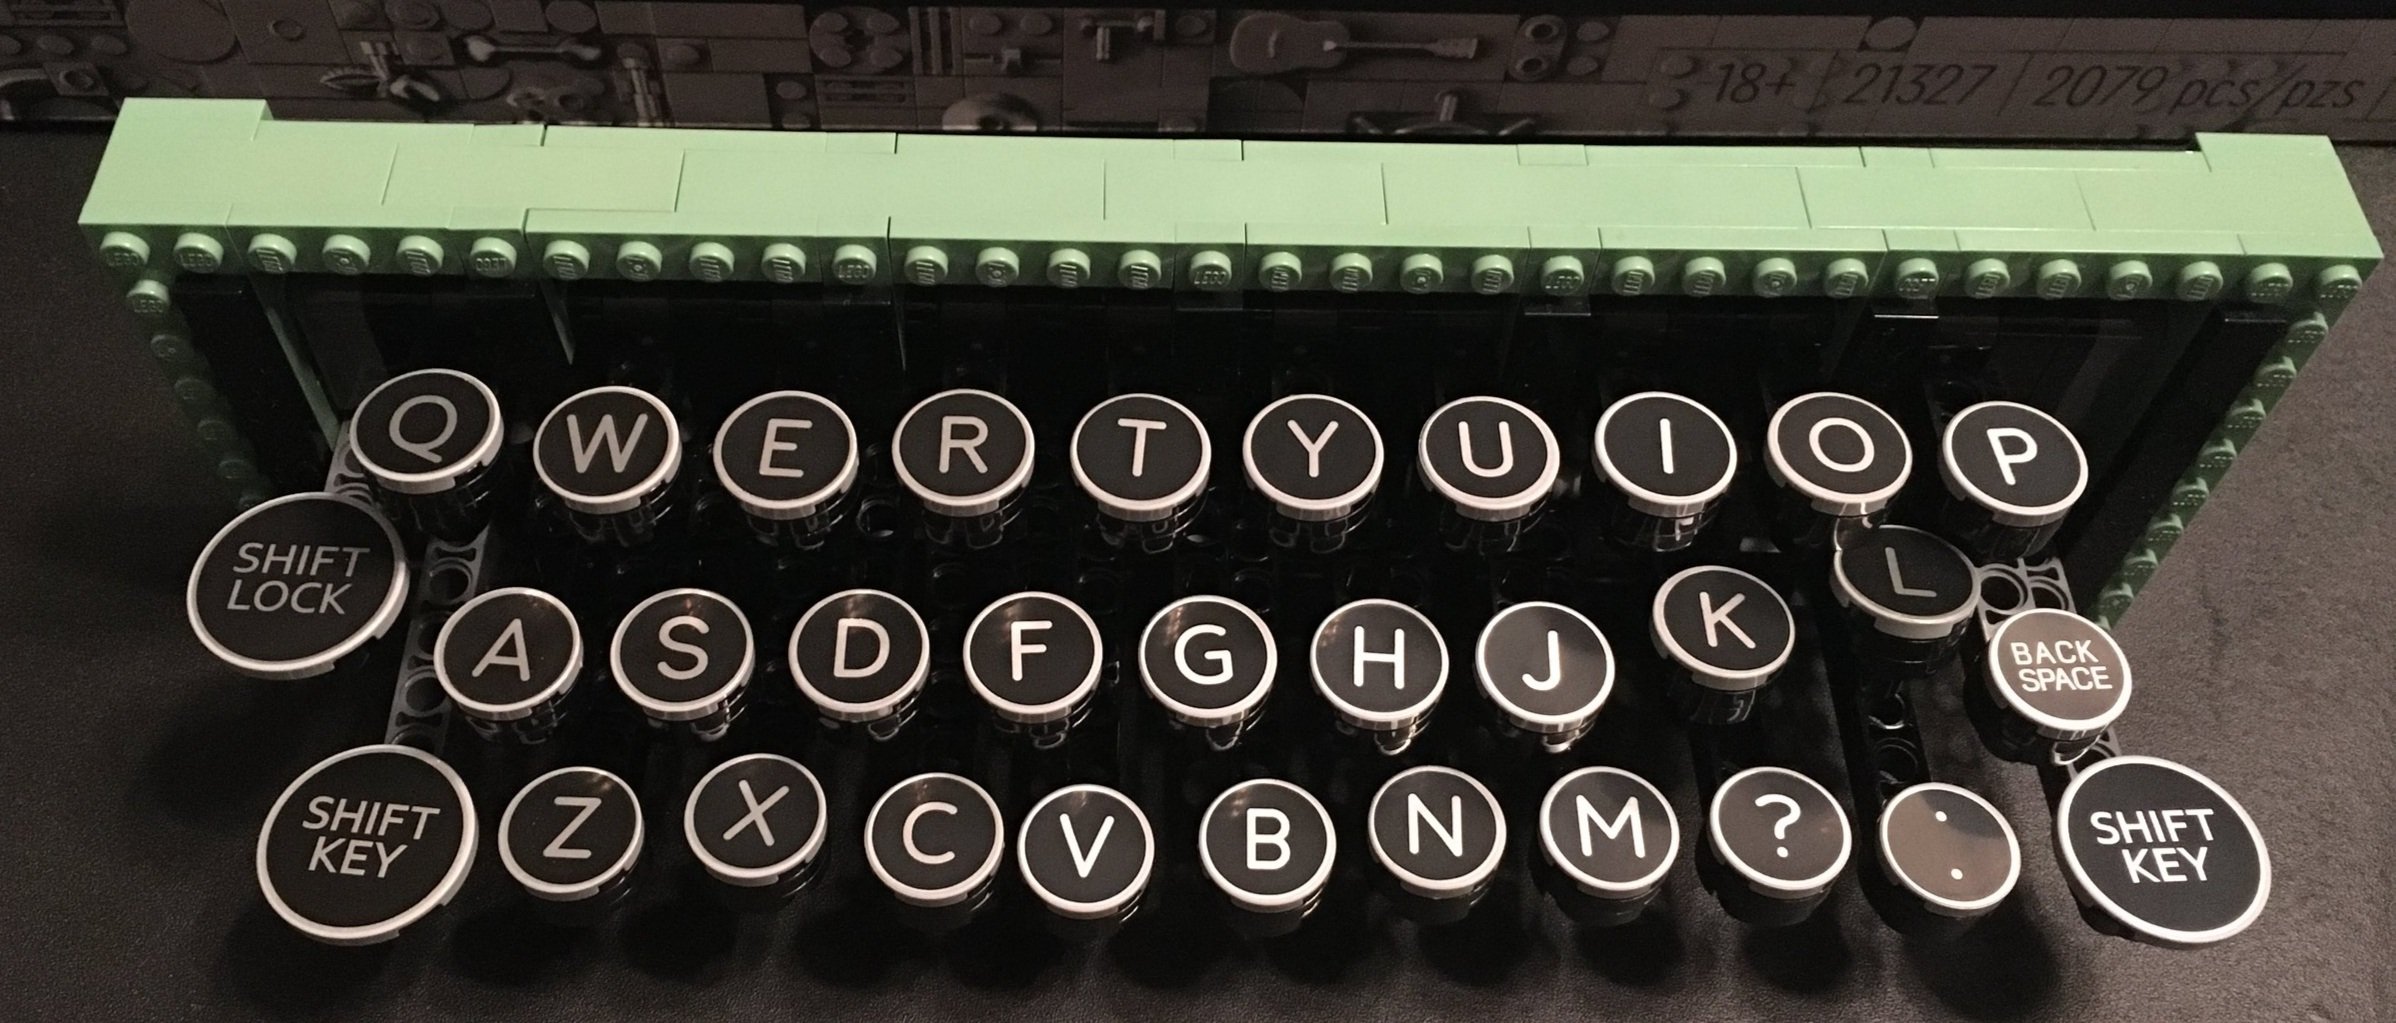
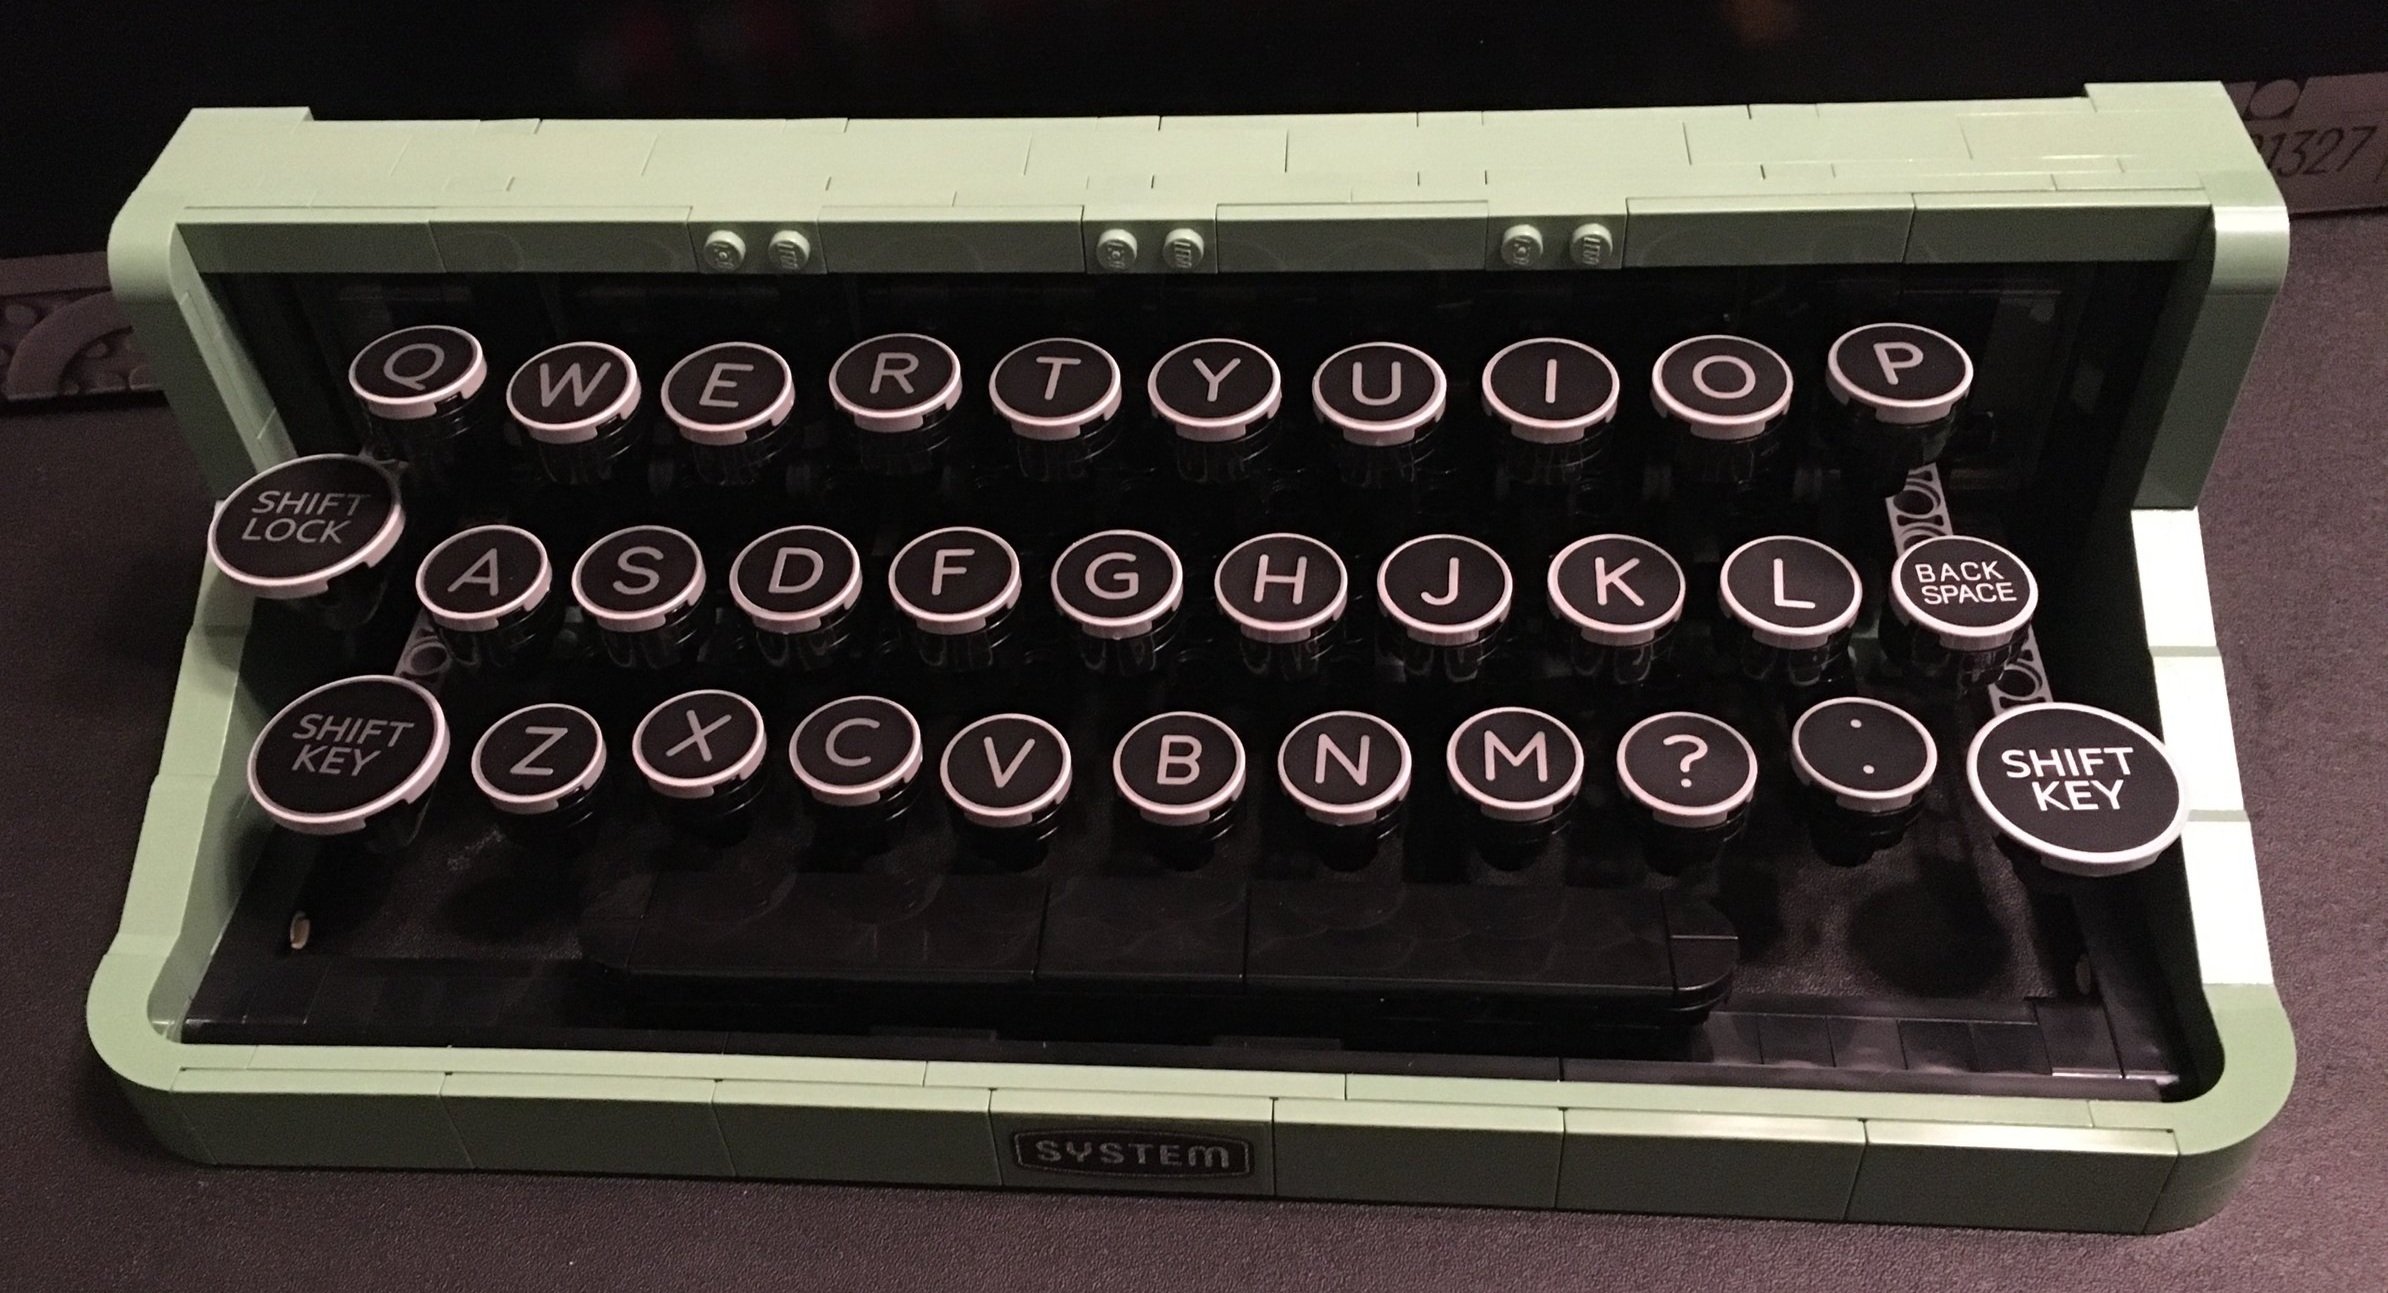
The third bag adds the keys to make the keyboard. Thankfully, these are all printed and they look great since I didn’t have to put stickers on each one. Also, here’s your chance to set up the keyboard the way you want to. I used the standard QWERTY keyboard from the instructions, but you can use what you want and change it fairly easily.
The fourth set of bags adds some of the sand green bricks around the keyboard to build up the outer covering.

Next up you build more of the back of the typewriter and more of the Technic functionality. I made a mistake somewhere in here. I’m not sure if it shows on this picture or not. Thankfully it was an easy fix, but I didn’t realize it until I hit a key and the typewriter didn’t function as it should.
The sixth bag adds in more of the back along with the main hammer that moves when you press a key. Some of the fan media postings I have seen on this set mentions that the same hammer moves no matter what key you press and how they didn’t like that. I say, that would be hard to do with LEGO and the scale of the set so I can’t complain. I’m good with the one hammer moving. If you don’t like it, figure out how to re-mechanize it given the space constraints on your own.
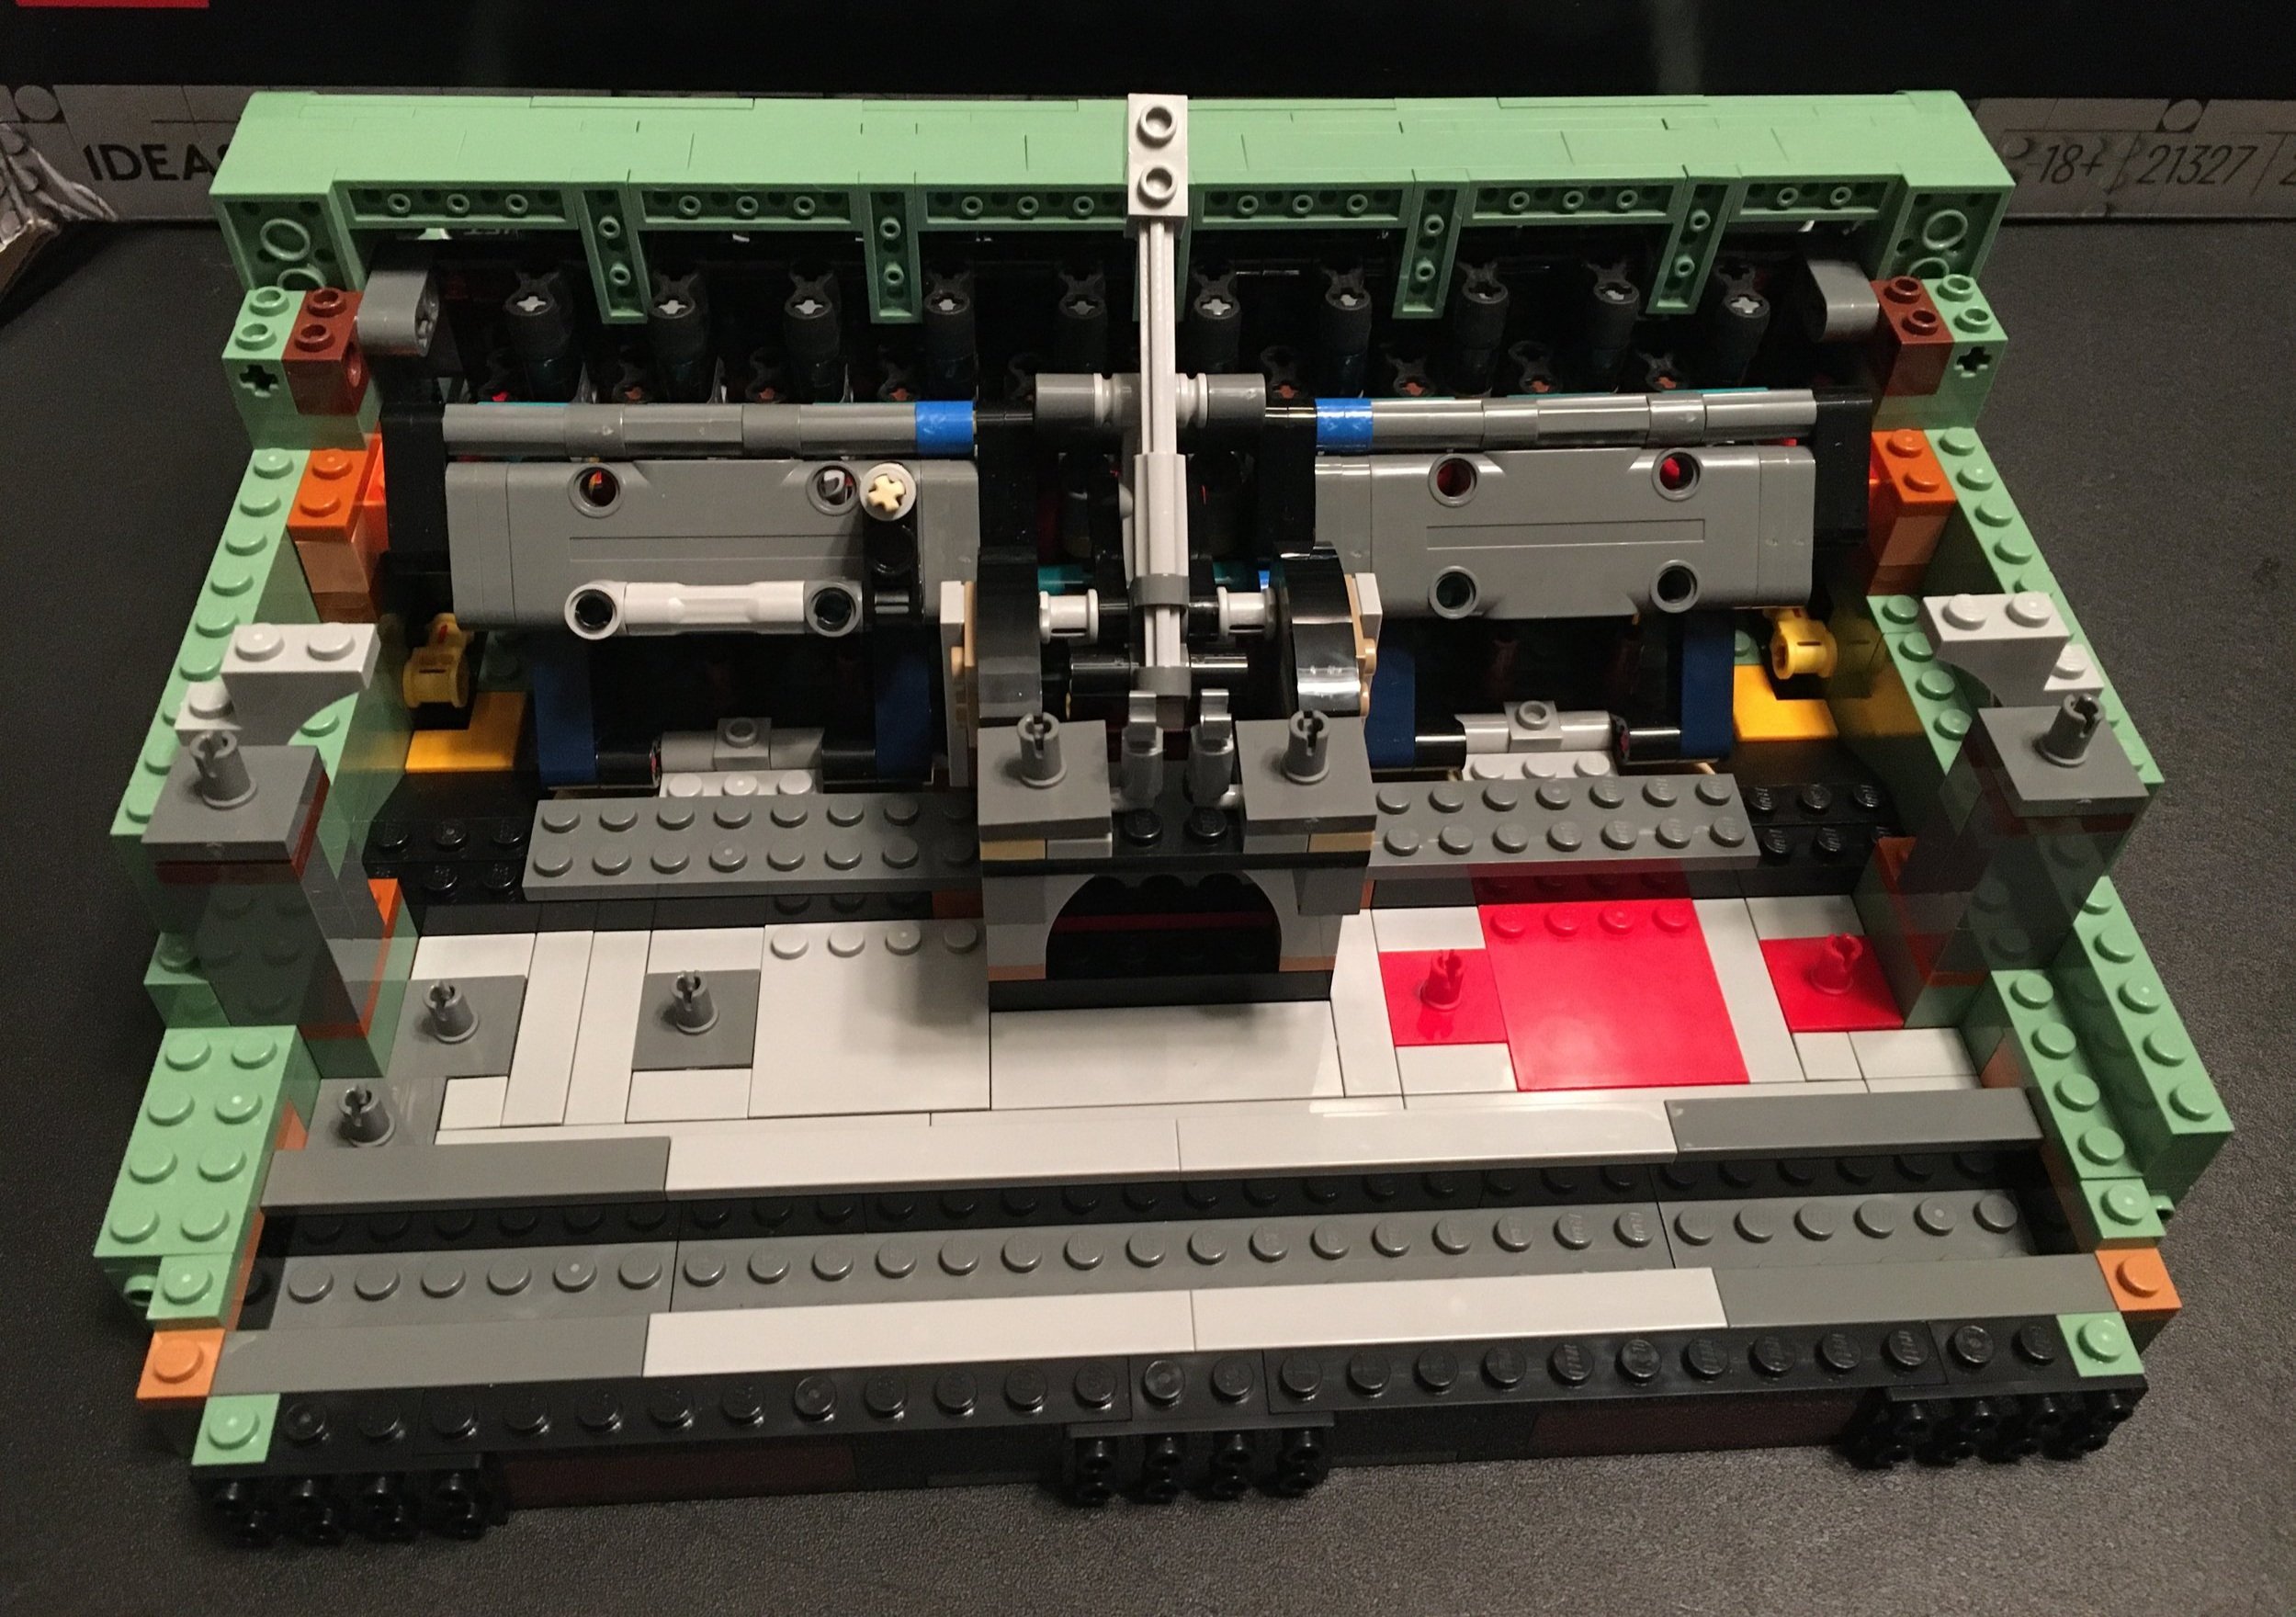
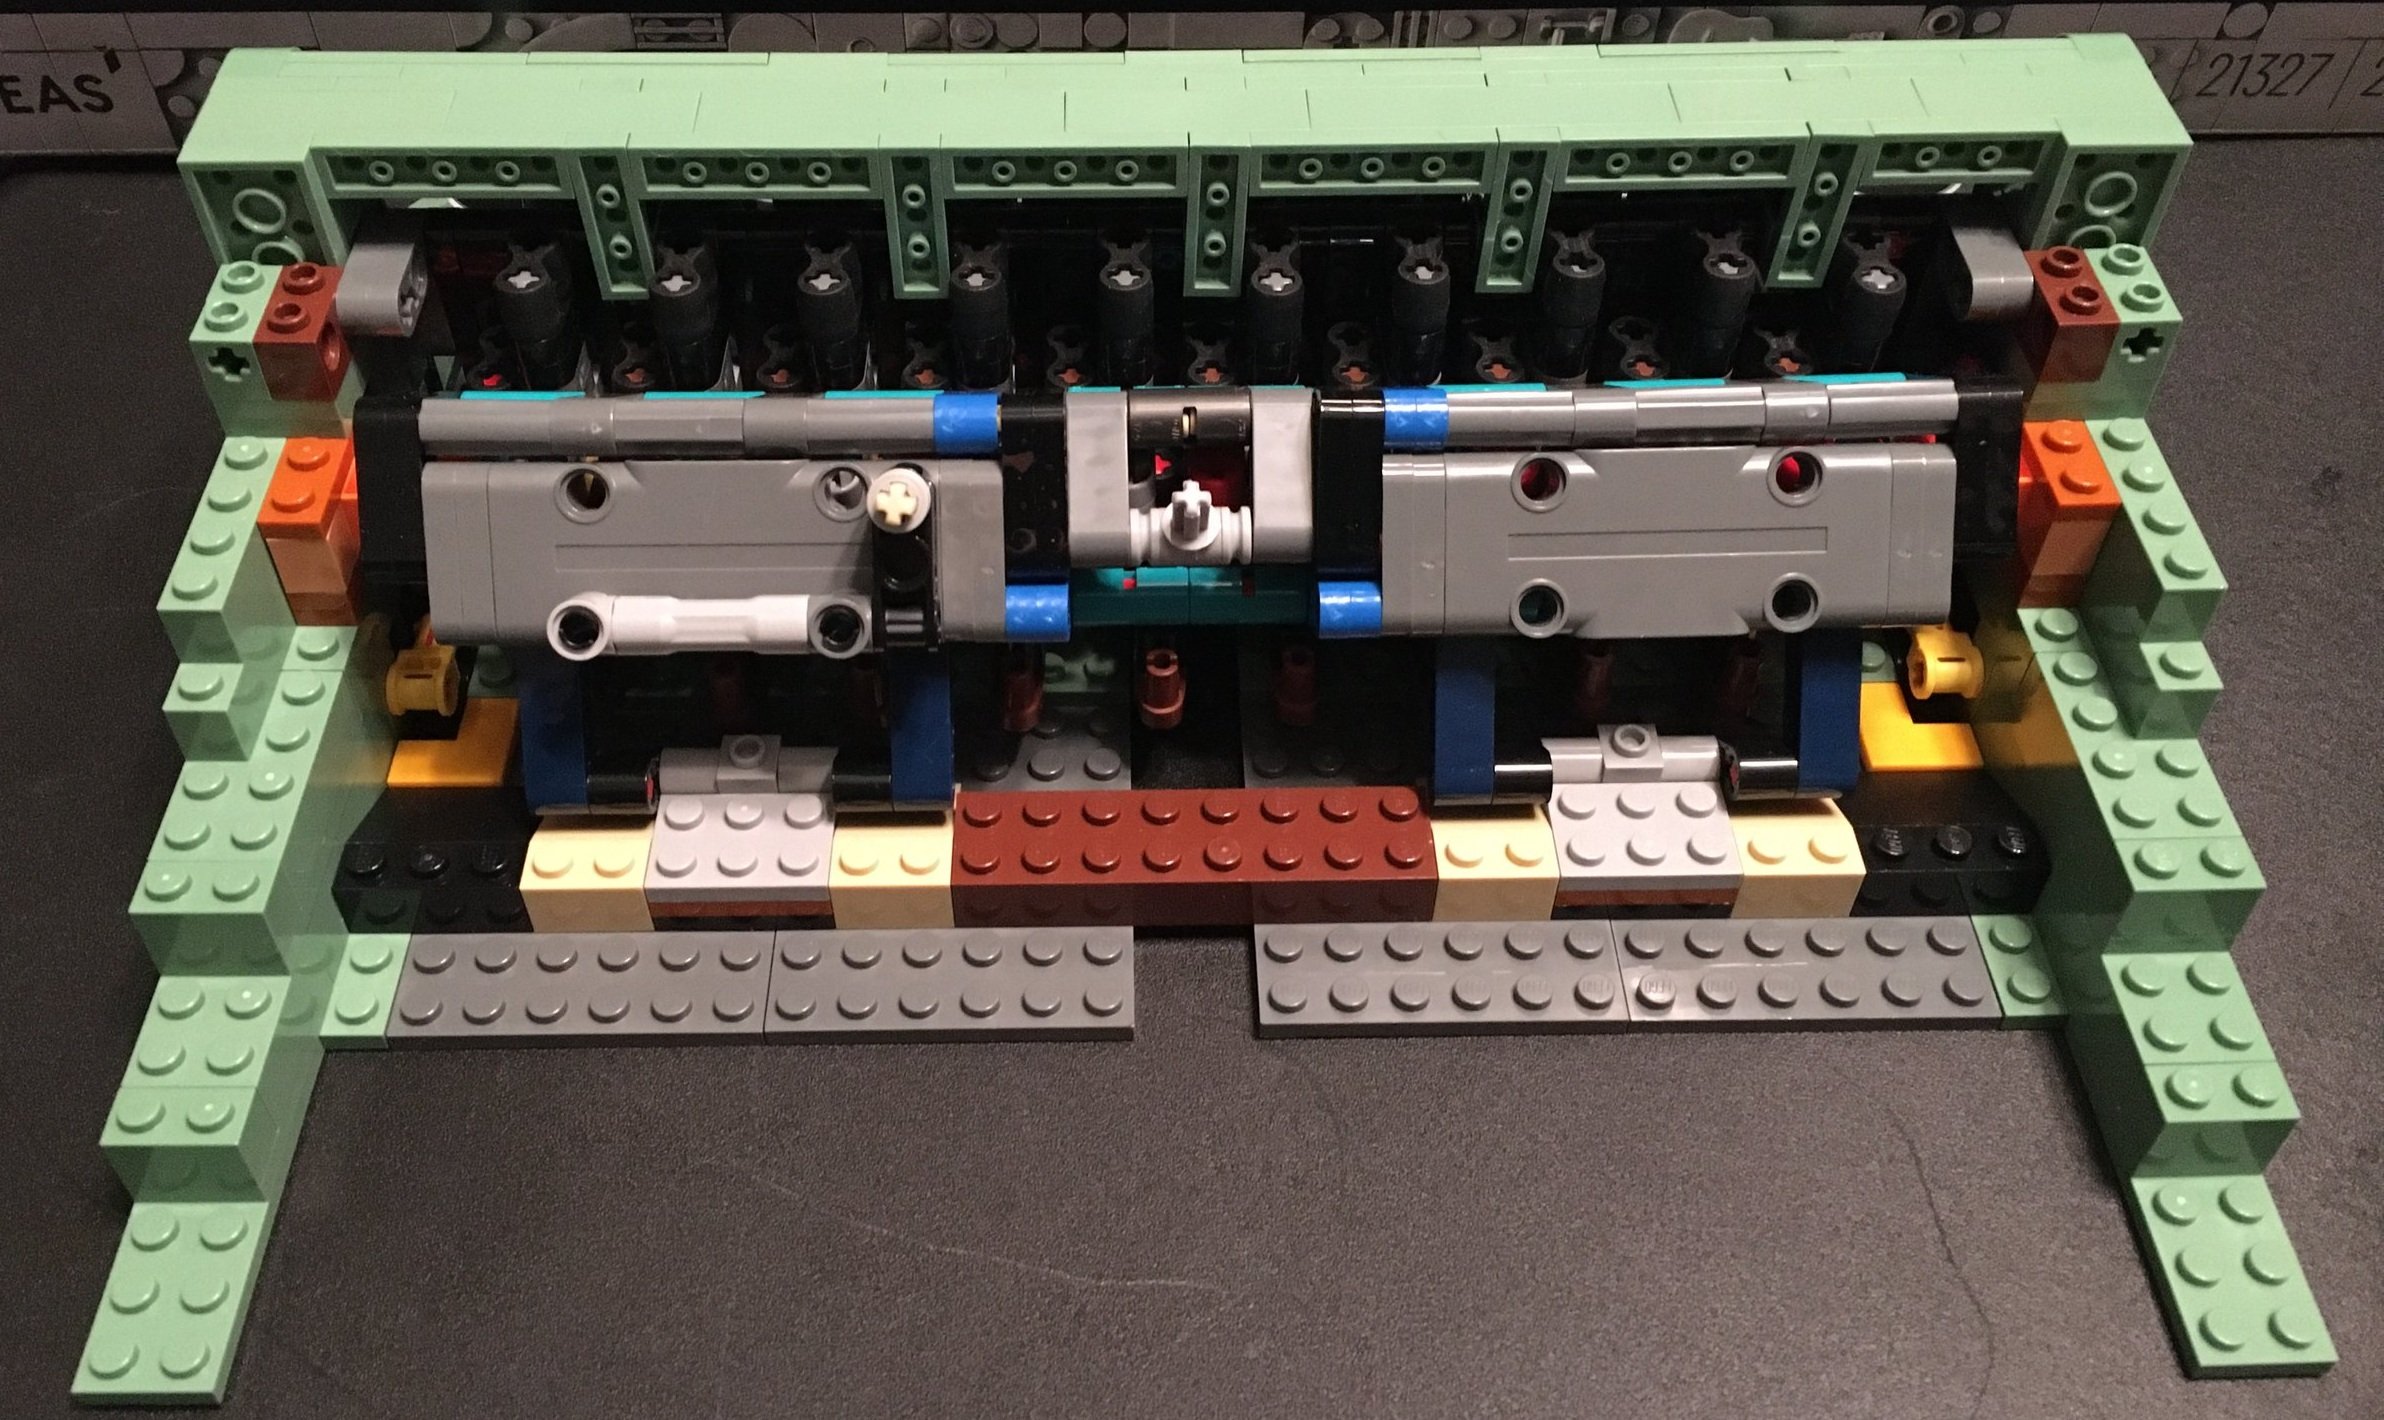
The seventh bag adds more of the sand green case and then starts to build the section that will end up holding the paper. This part got a bit complicated with all the gears you need to add.

Onto bag eight… You cover up all that hard work you did connecting Technic pieces together. The more I look at it, the more I like the choice of color. The brick work on the top looks good with with the curved pieces in front of the spot where the type hammer piece is located. Also a few studs are showing so you still know it’s LEGO, but not a ton where it doesn’t look like a typewriter.
You also add in the switch that allows you to switch from black to red ink. The functionality doesn’t actually work, but the detail is there.

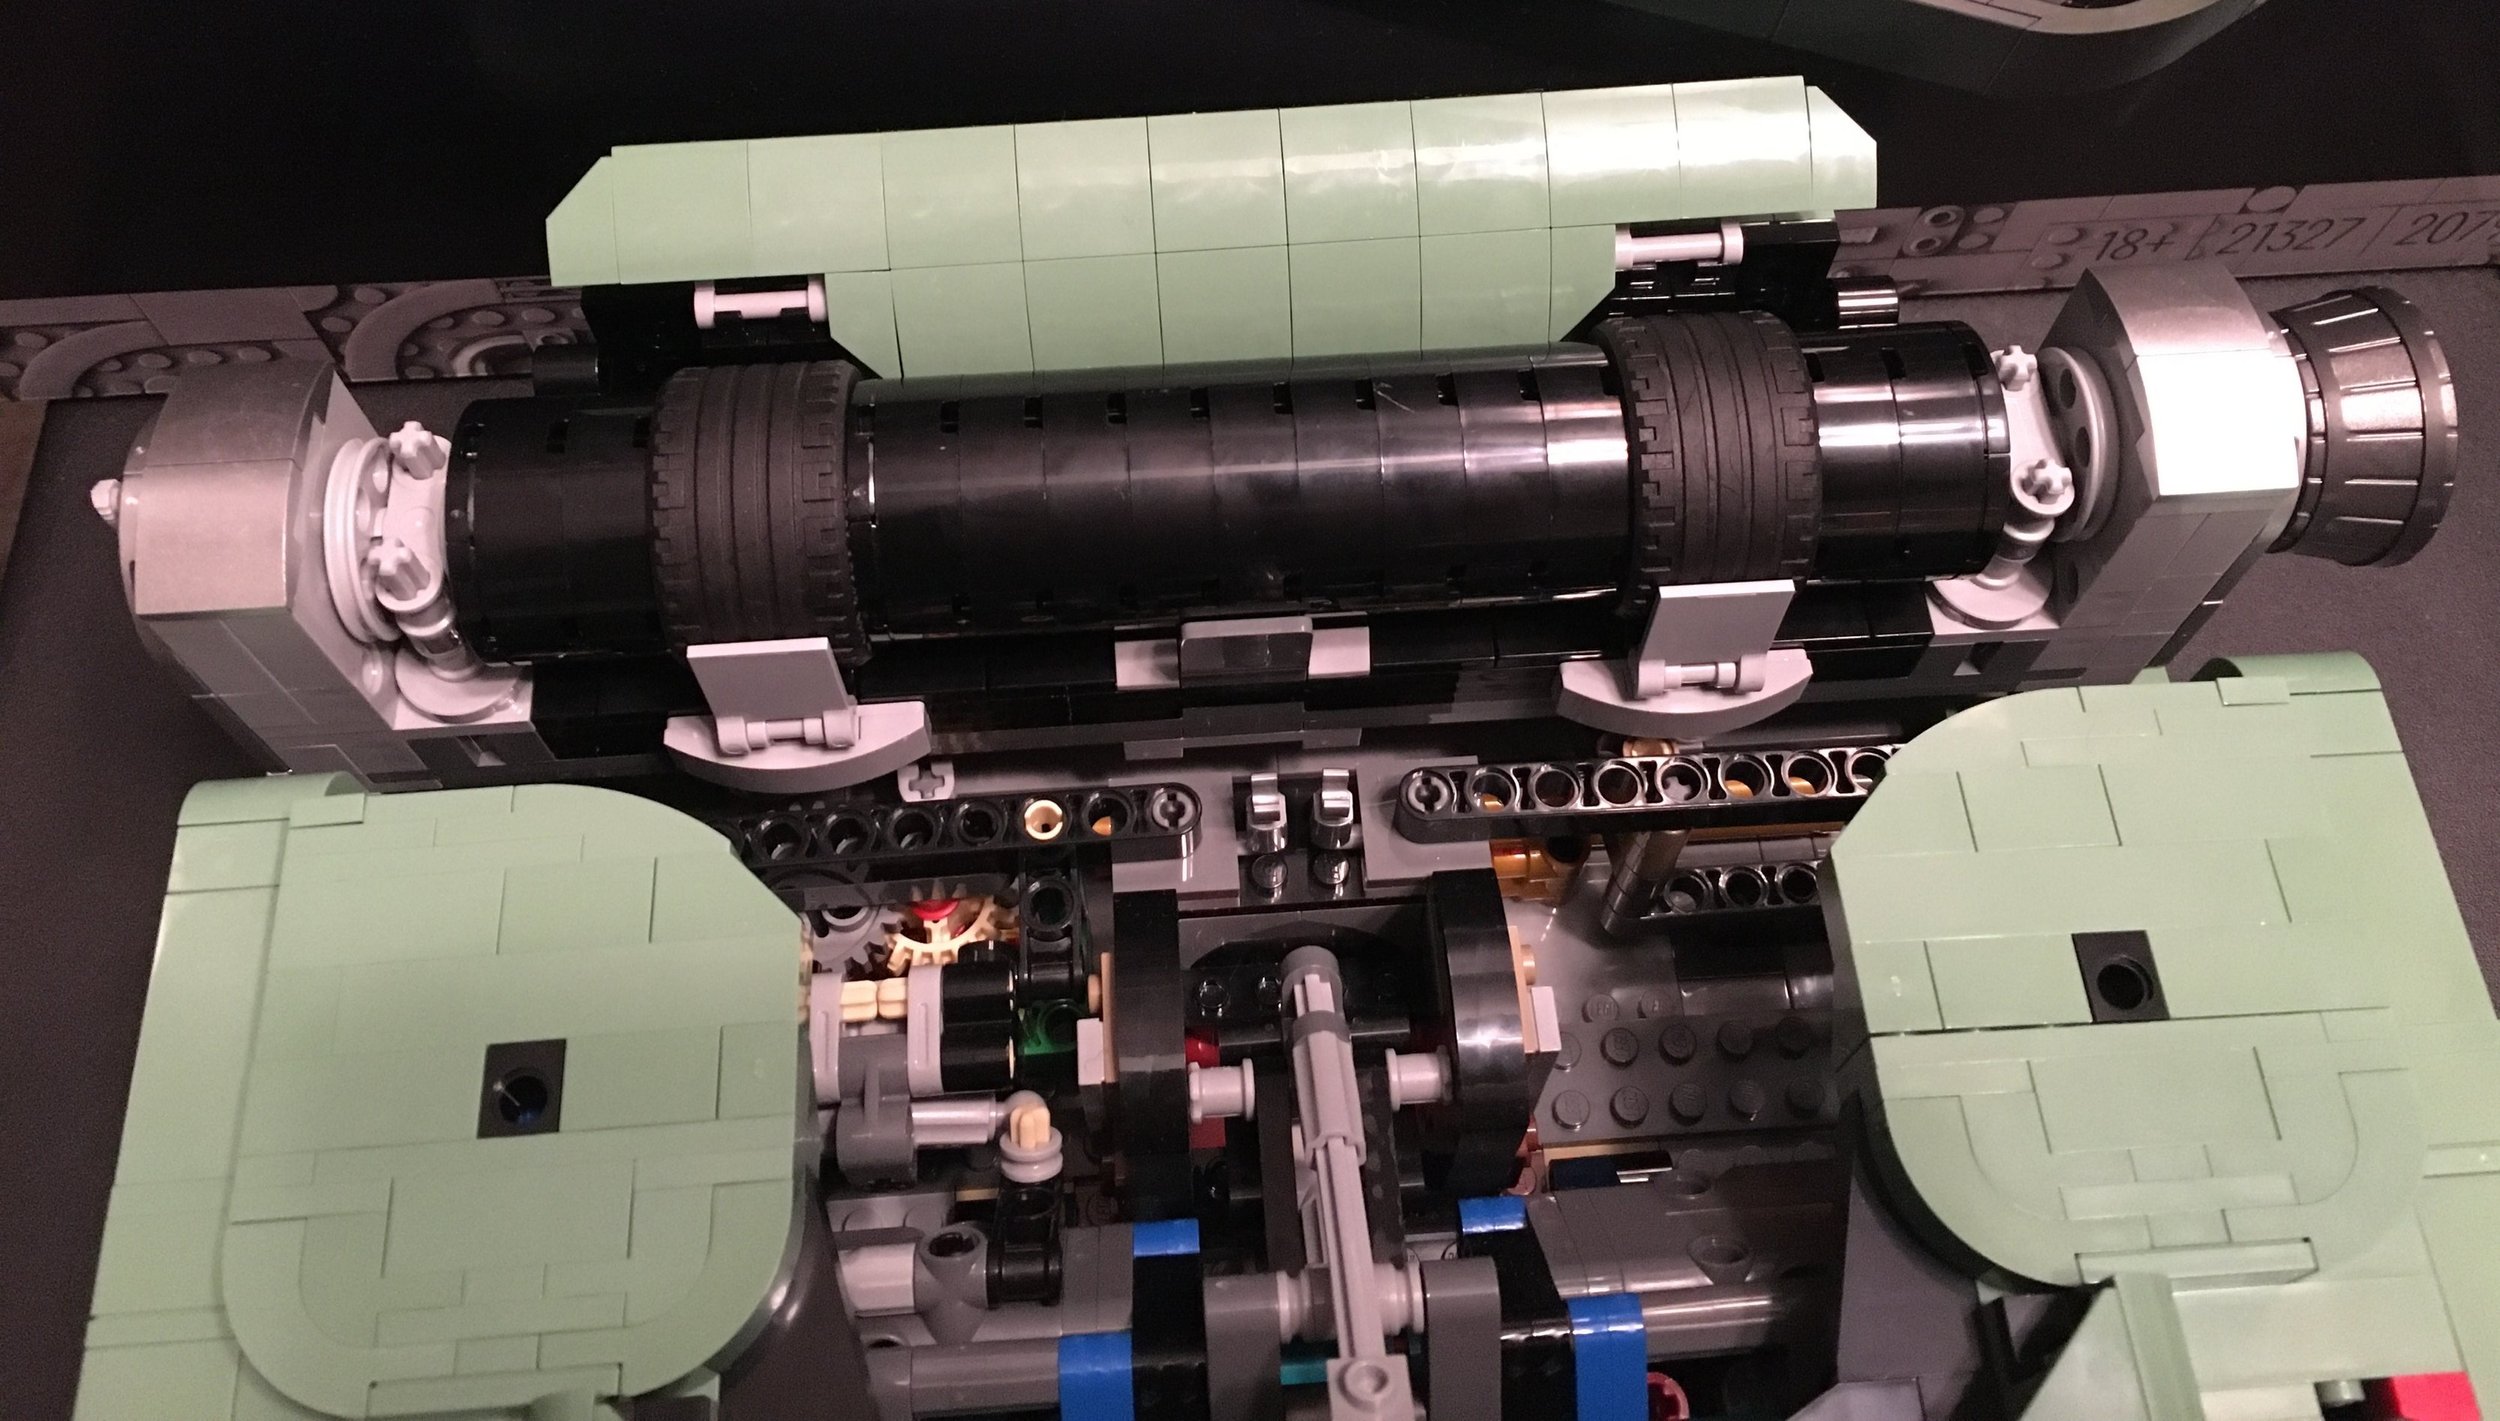
The ninth bag starts to assemble the section that holds the paper. The shiny chrome sticker really pops here and looks good on the sand green.

Bag 10 finishes the paper holder up and you attach it to the typewriter. The tires are an awesome touch and then the barrel half on the end is cool. There are a bunch of silver pieces and tiles for those of you who build MOCs who weren’t excited about all the sand green pieces.
In case you haven’t seen any other reviews, this section will move when you “type.” Once you hit the end, you can then push it back so you can type another row. It’s impressive that they were able to figure out how to make the typewriter function using Technic and System pieces.
#11 wraps everything up. You add in a handle for the paper holder. The instructions warn you that it is not strong enough to actually function like the real thing. You need to push it at the base of the handle and not at the top edge where it will just snap off. You also add in the ink ribbon and the rolls where the ink goes. Finally, you add in some additional hammers which help to make the typewriter look realistic, but don’t actually function.
Wow! This set is impressive. I enjoyed the build. The mix of Technic pieces to add functionality along with System pieces for detail make this set a winner. There are a lot of great pieces if you intend to tear this down for a MOC and not a ton of stickers. The set is on the expensive end at $200, but I thought it was worth it. Definitely look for sales at some of the retailers or use VIP points through LEGO stores or Shop @ Home if you want a discount. I highly recommend this one and hope we get more in the Ideas line or other lines similar to this one.
Happy building!


