Set Reviews

Set Review - #75950-1 - Aragog's Lair - Harry Potter - Wizarding World

You can tell I’ve been on a trend lately as here is another one from the Wizarding World of Harry Potter. This one is #75950-1 - Aragog’s Lair. It was released in the US on 24 August 2018. It has 157 pieces and 2 minifigures. This puts it at $0.095 per piece. I picked it up on Amazon.com for 14% off or $12.92. Not a huge savings, but I’ll take it. If you can be patient, I’ll bet the savings will be better closer to the end of its shelf life.

This set depicts a scene from “Harry Potter and the Chamber of Secrets.” Hagrid tells Harry and Ron that they should follow the spiders to get answers (there’s more to it, but that’s the shortened version). They follow the spiders and end up meeting Aragog and a myriad of Aragog’s offspring. If you’ve never seen the movie before and you don’t like spiders, I would advance through that scene. If you have seen it, you know what I’m talking about.

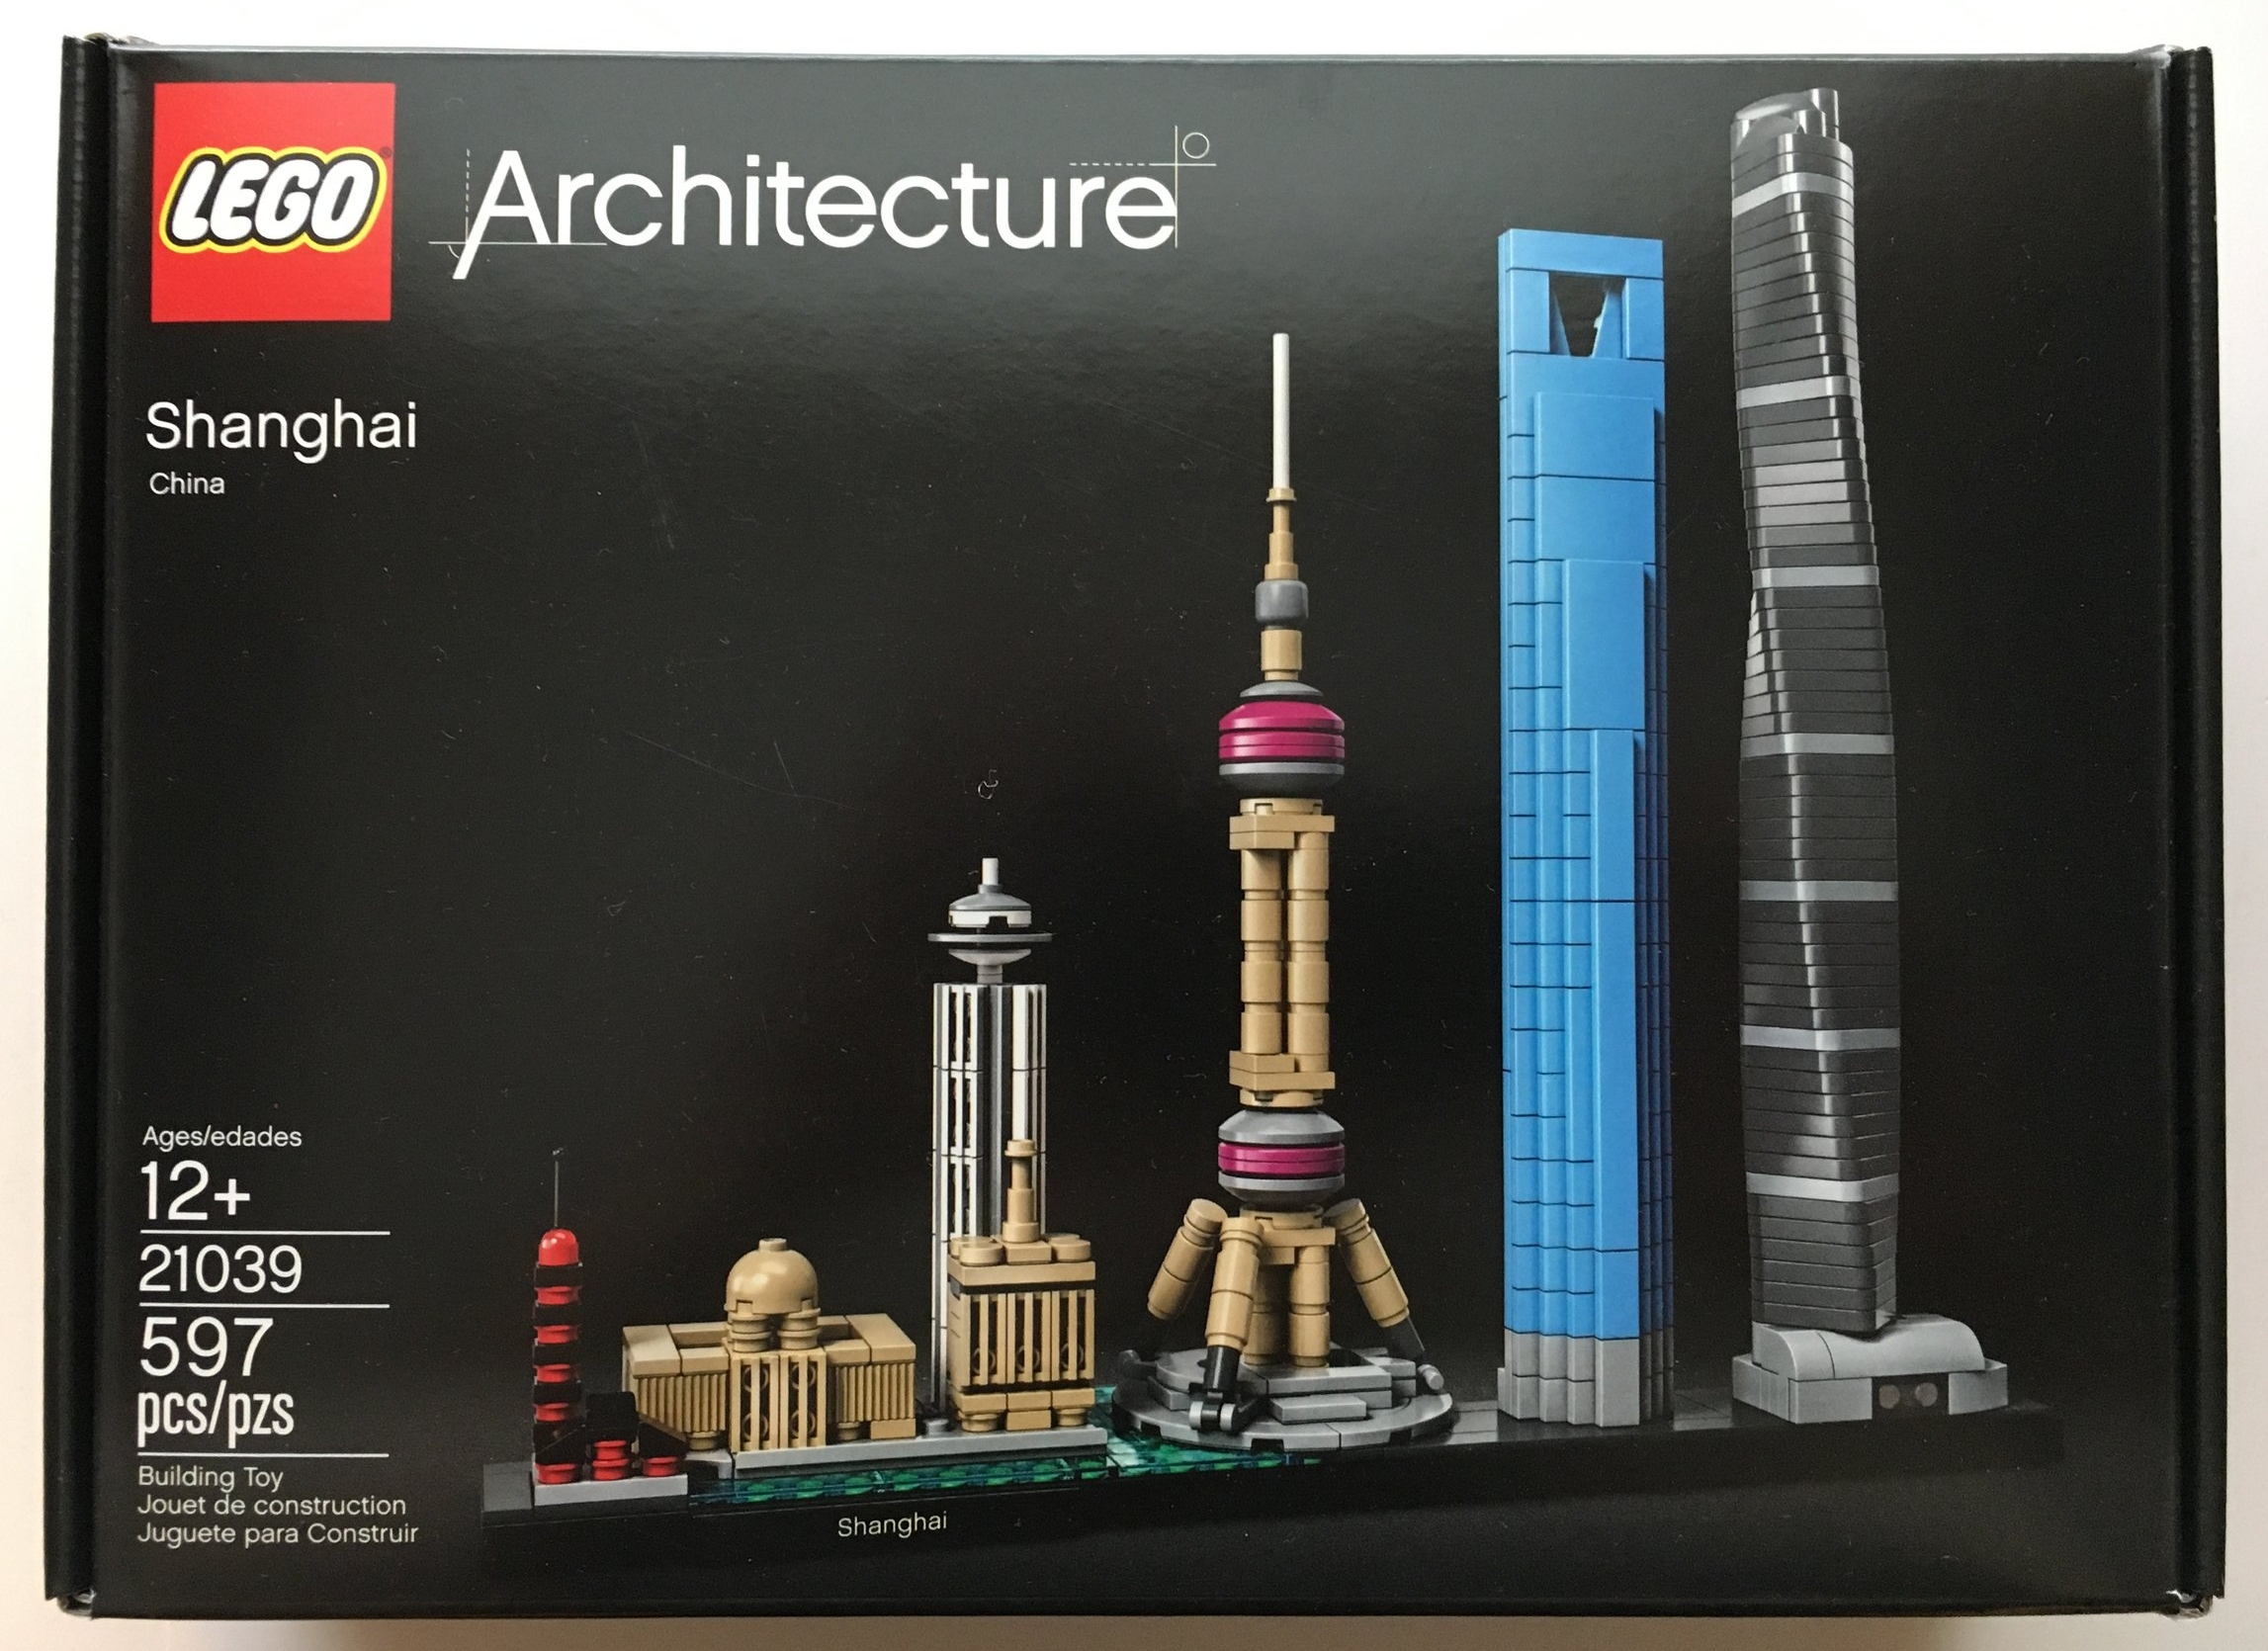
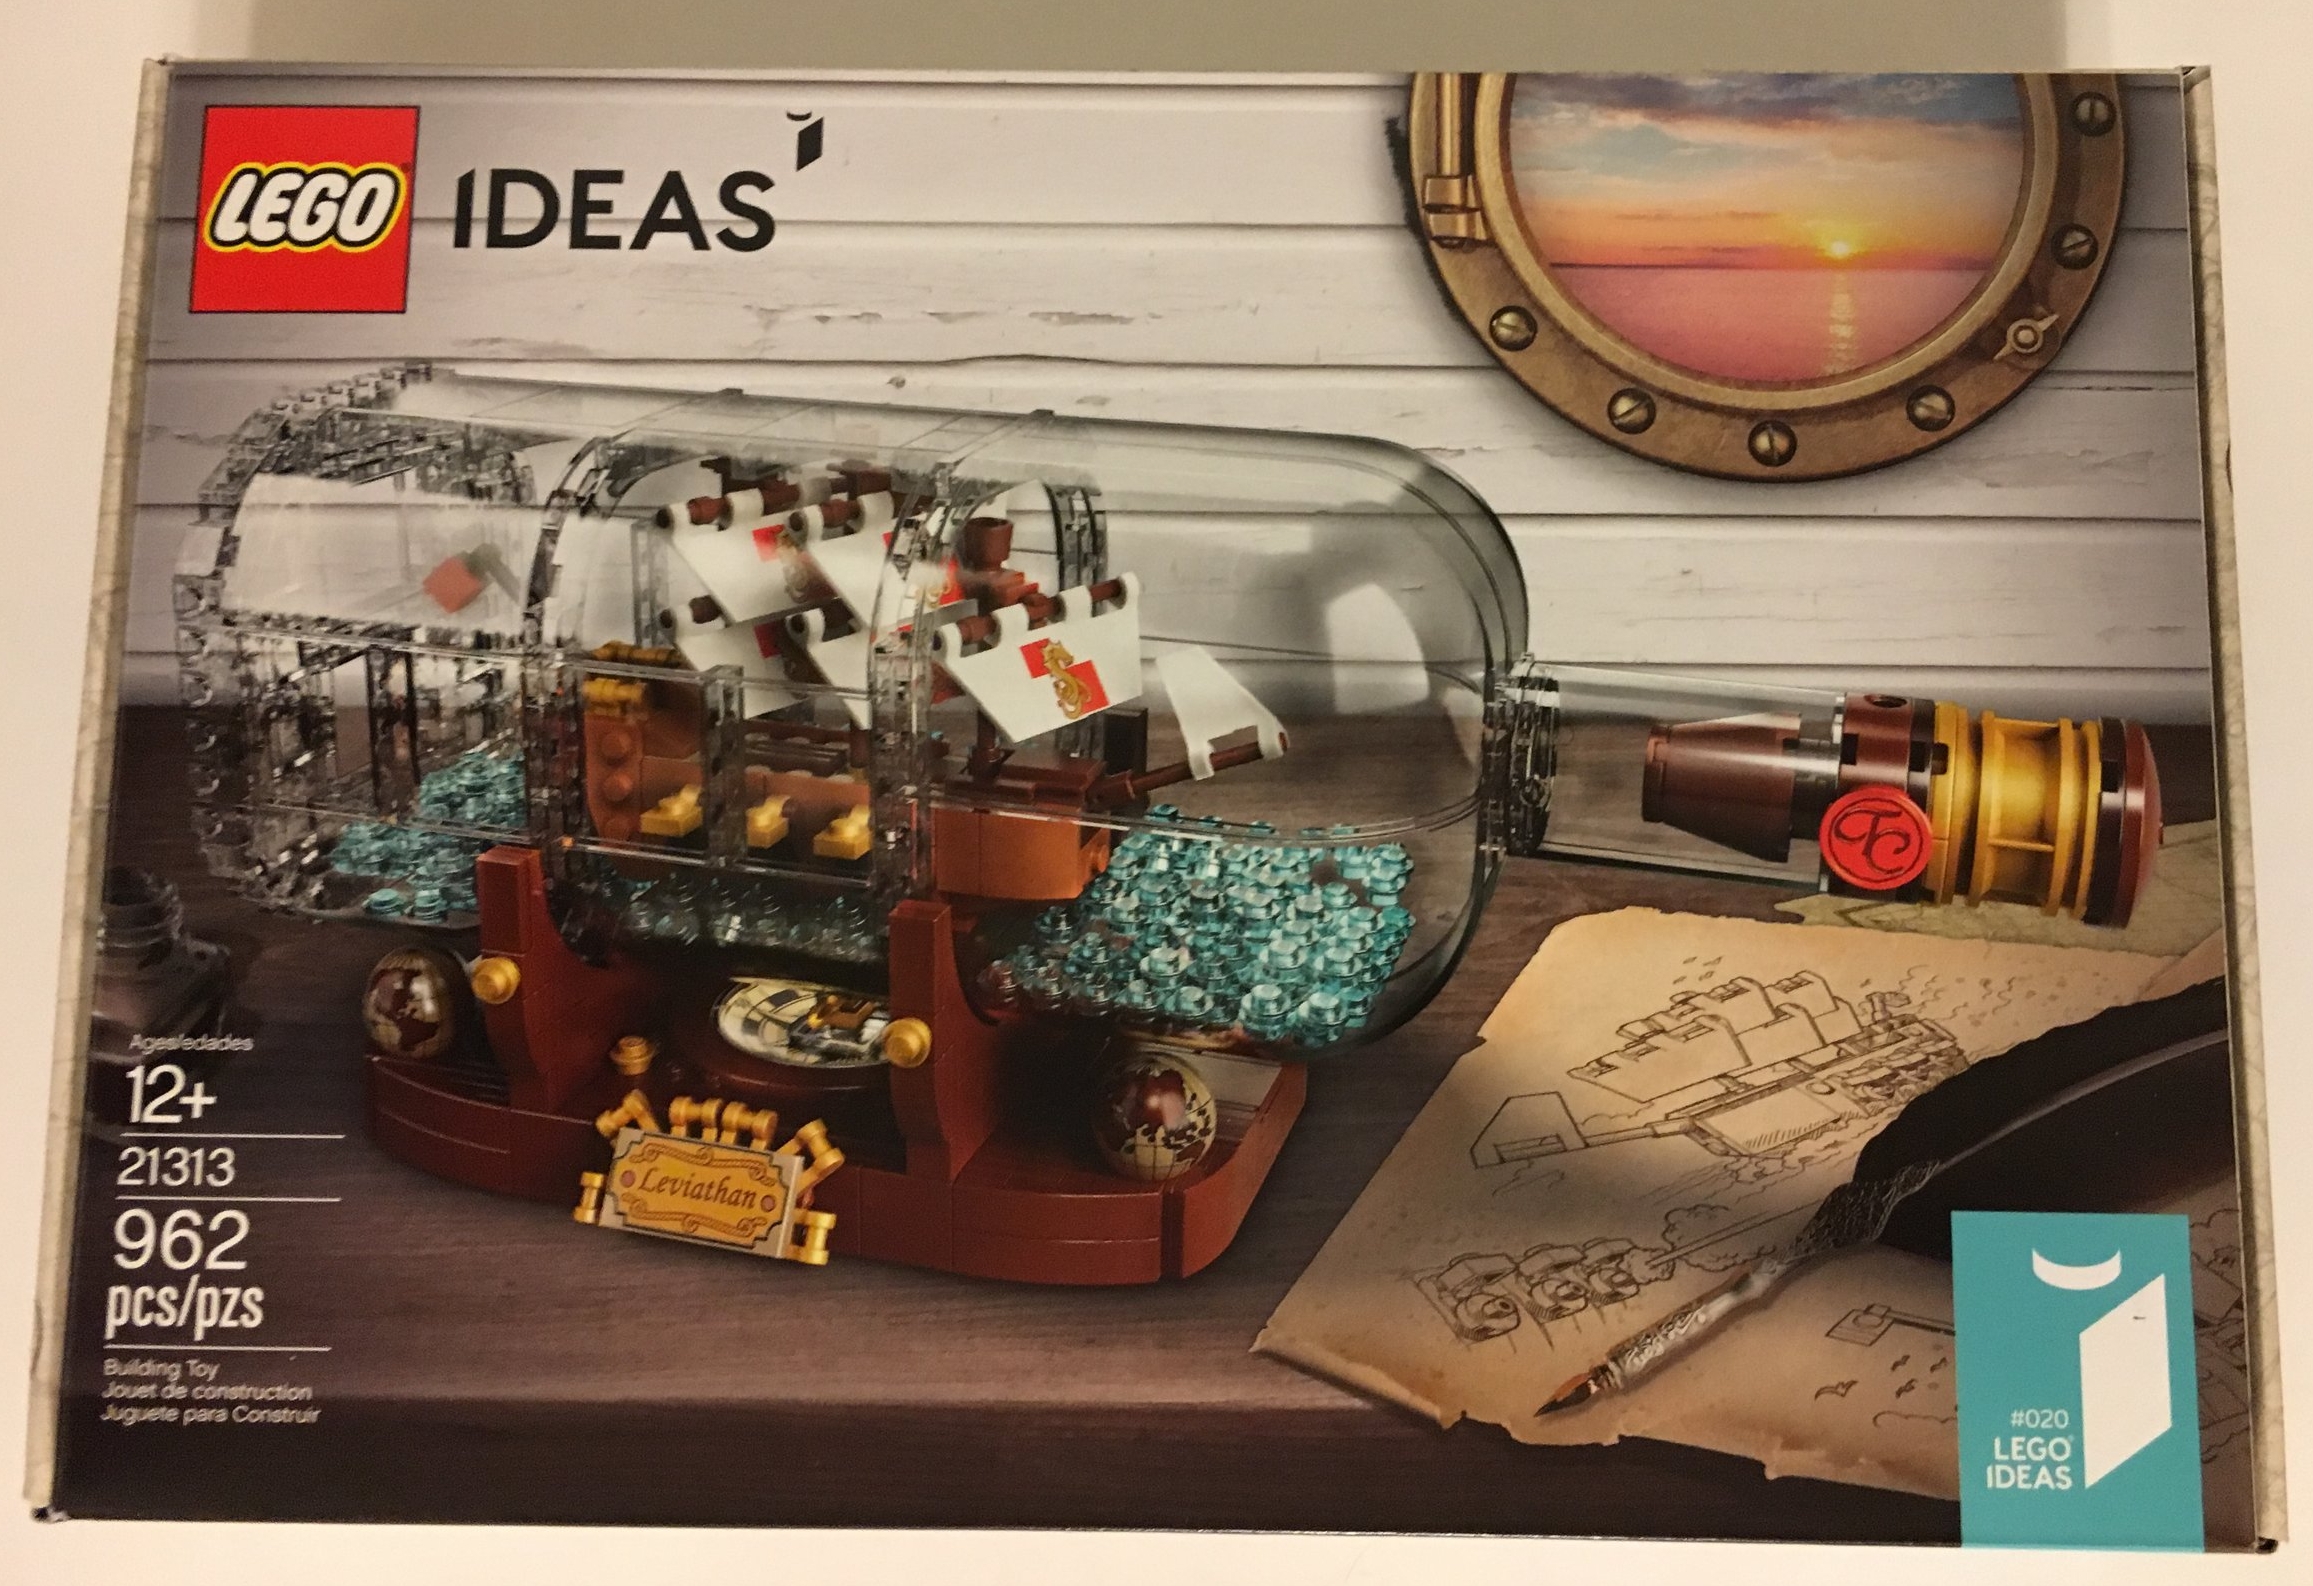
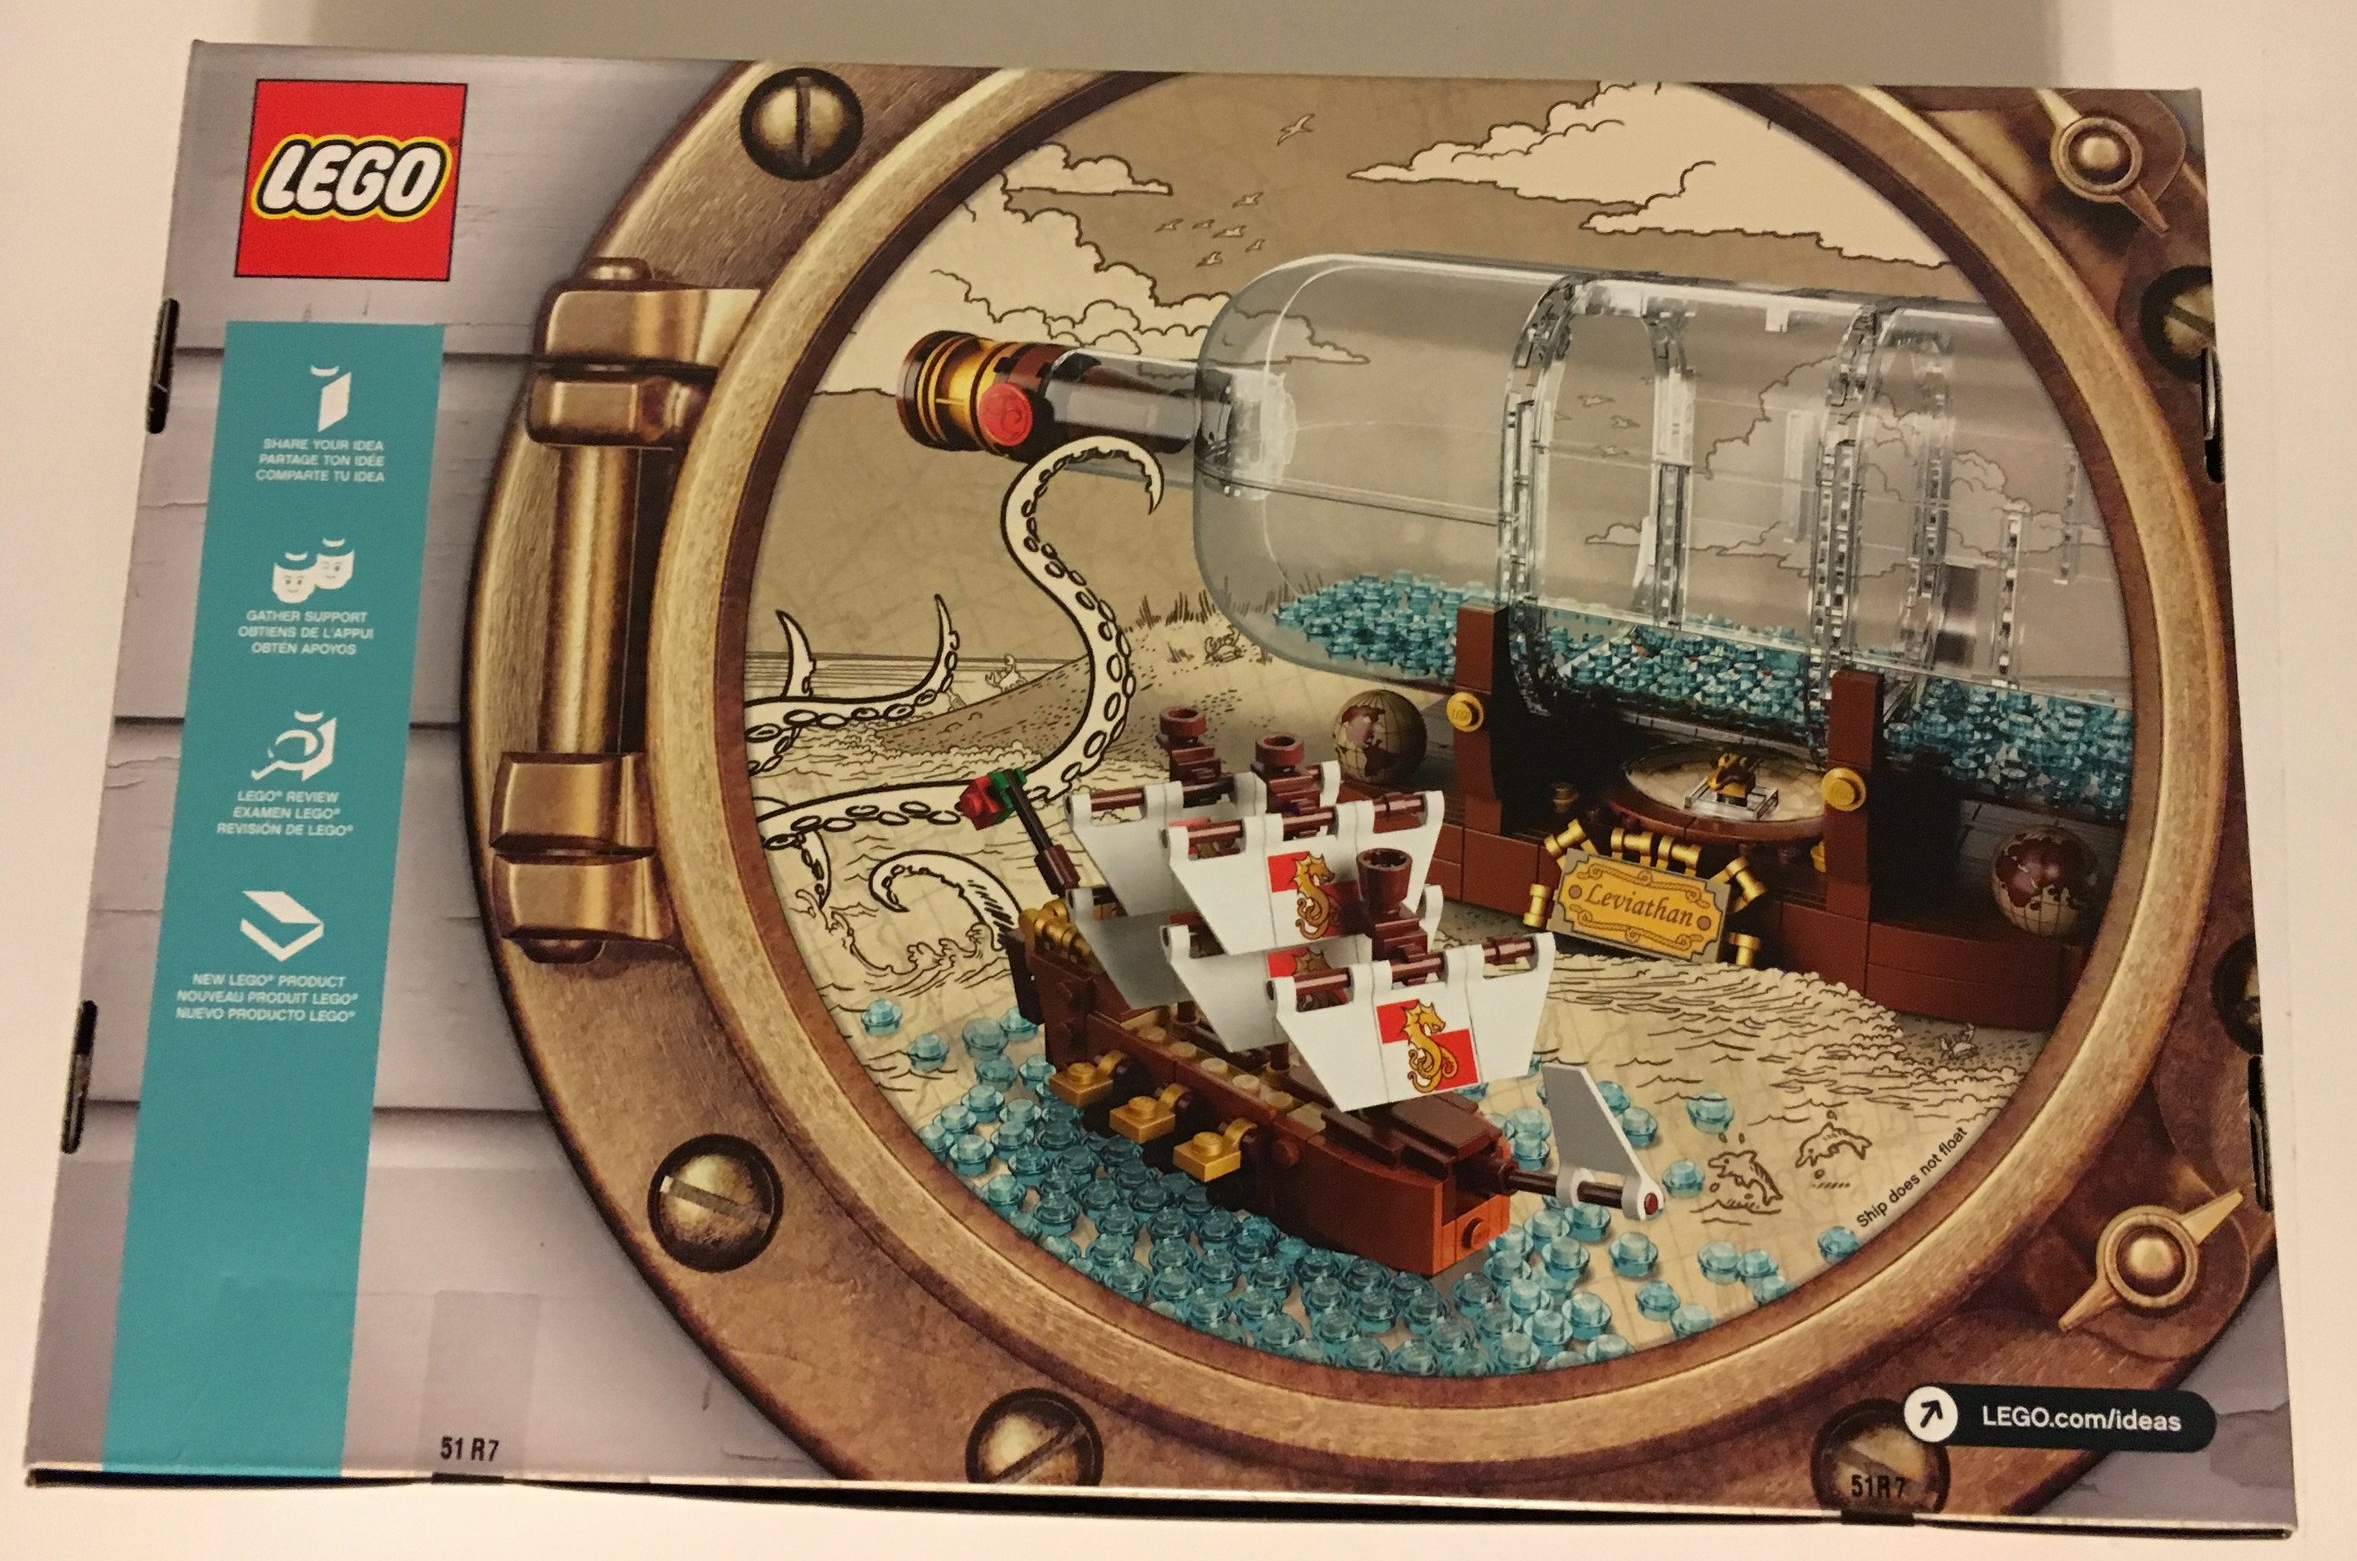
Onto the set… The box is pretty standard. The front shows what you get and the back shows some play features.

75950_front.jpg
75950_back.jpg

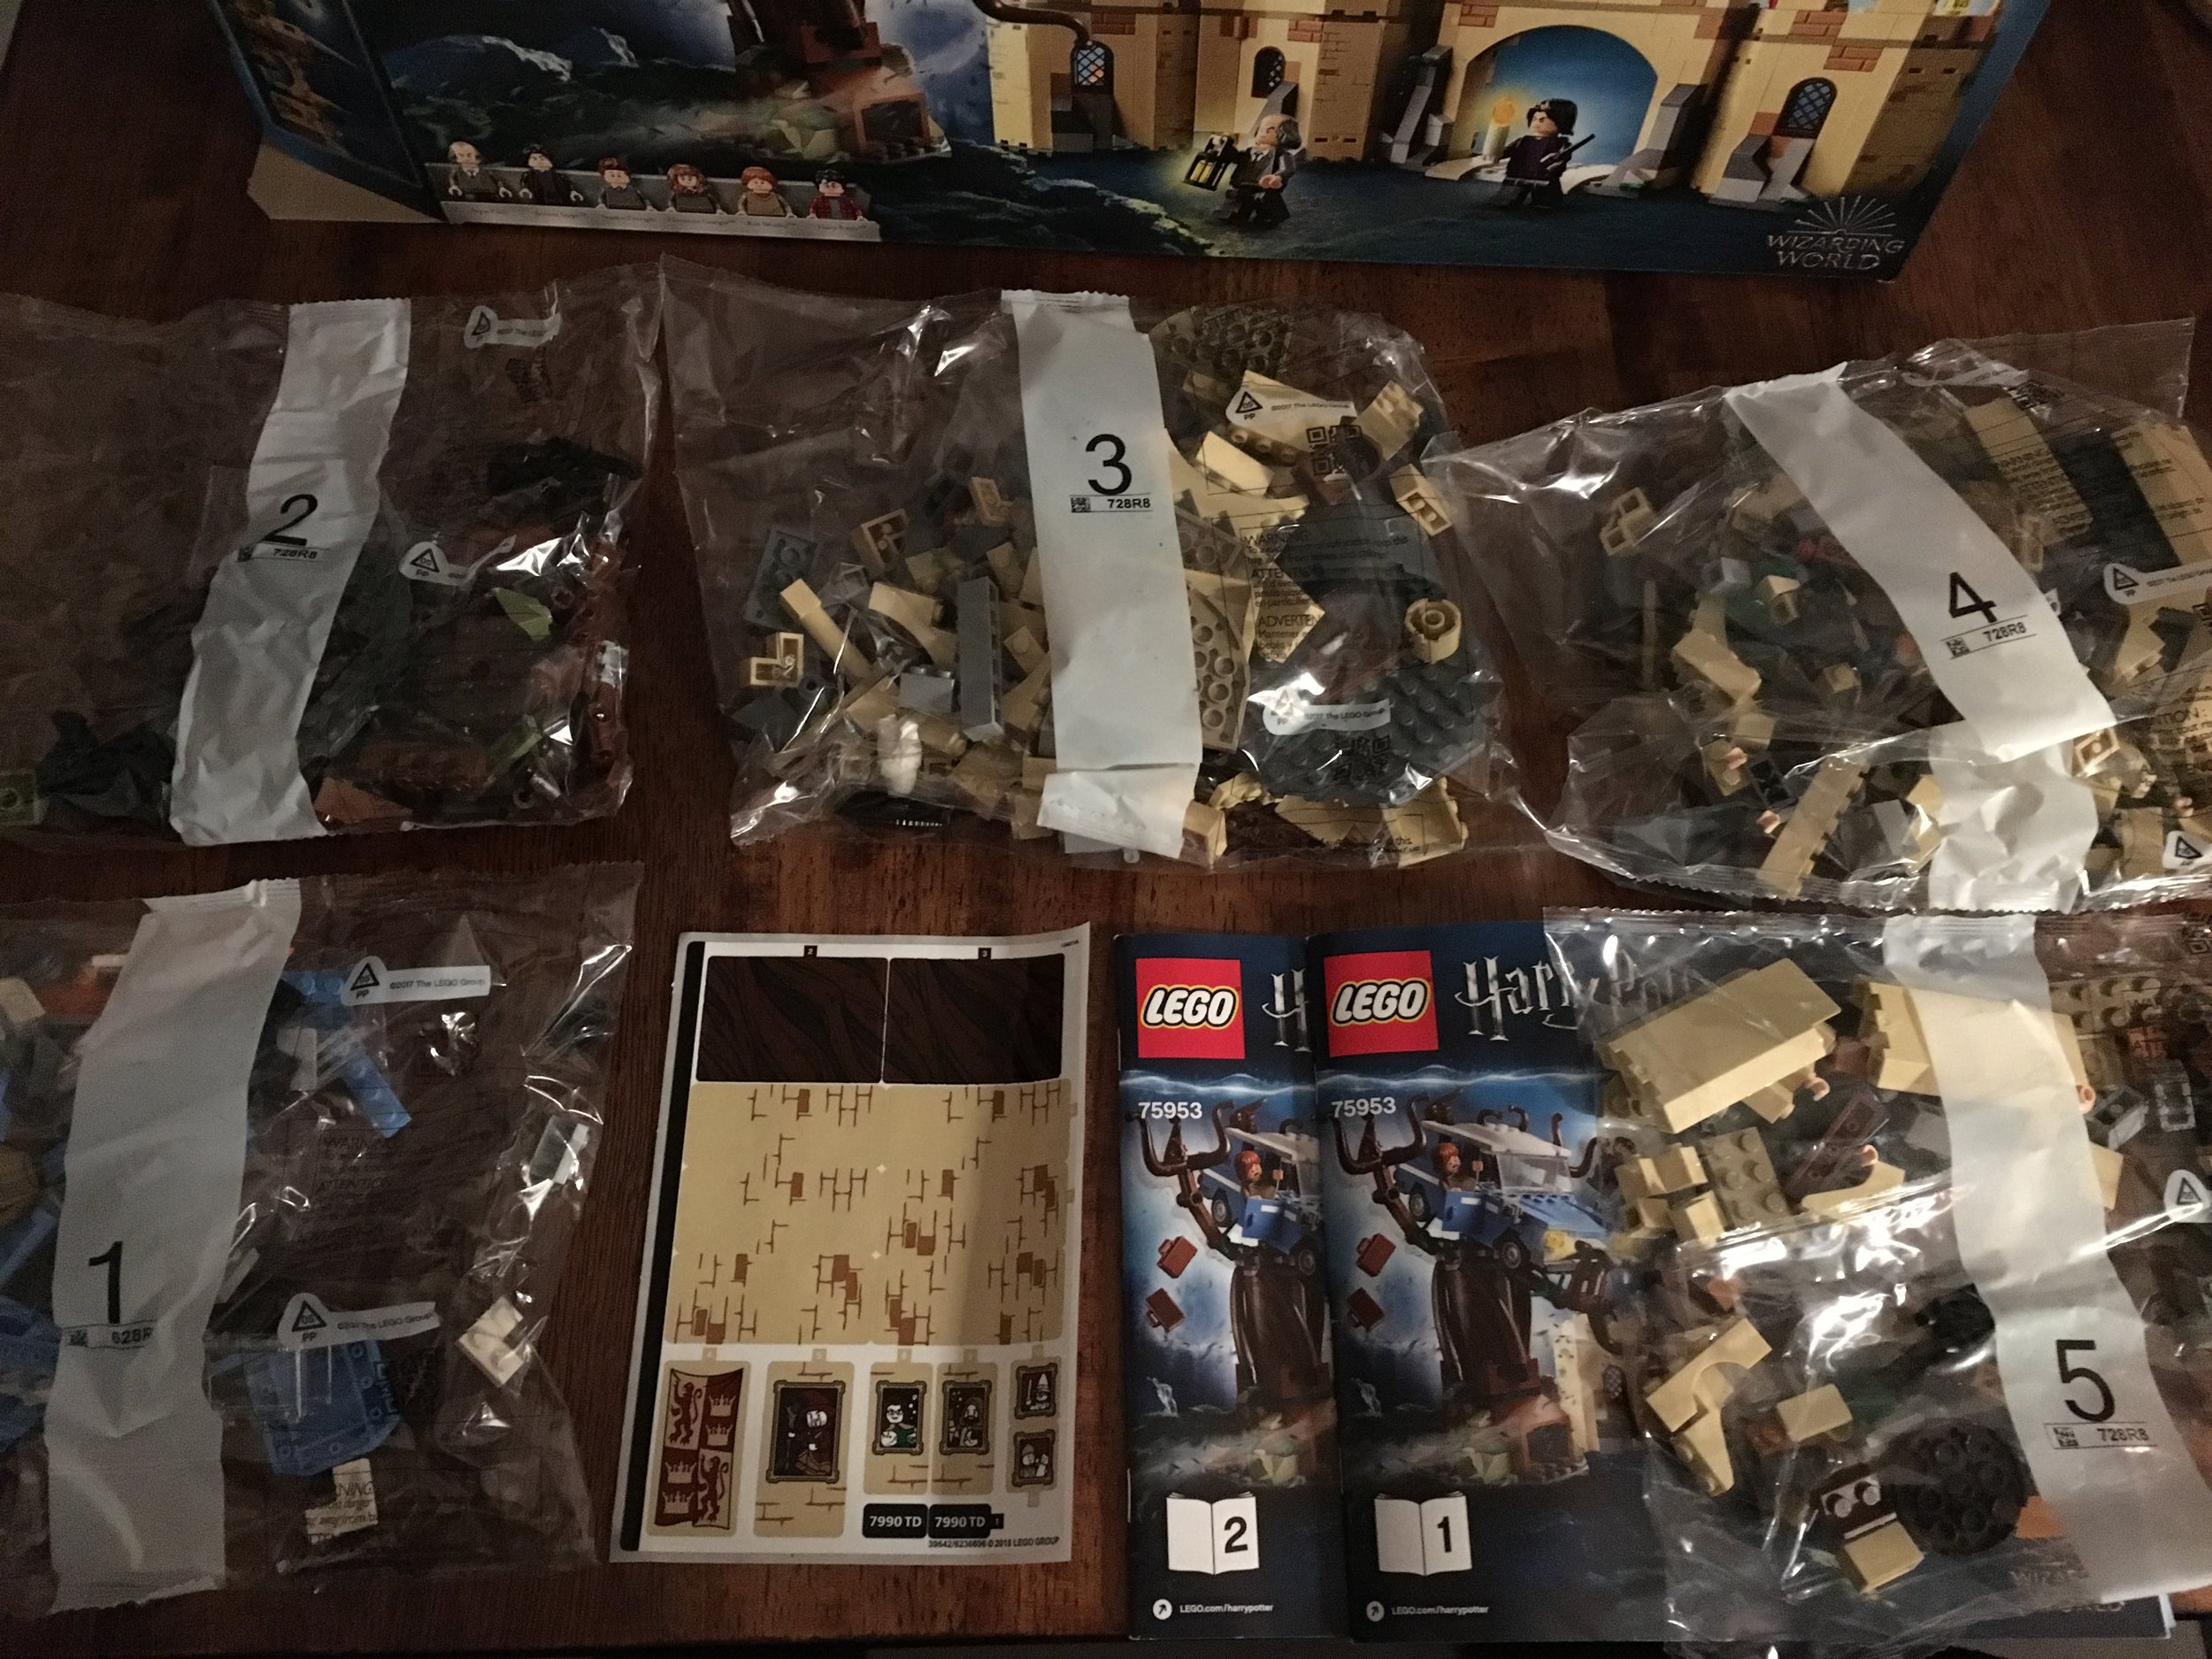
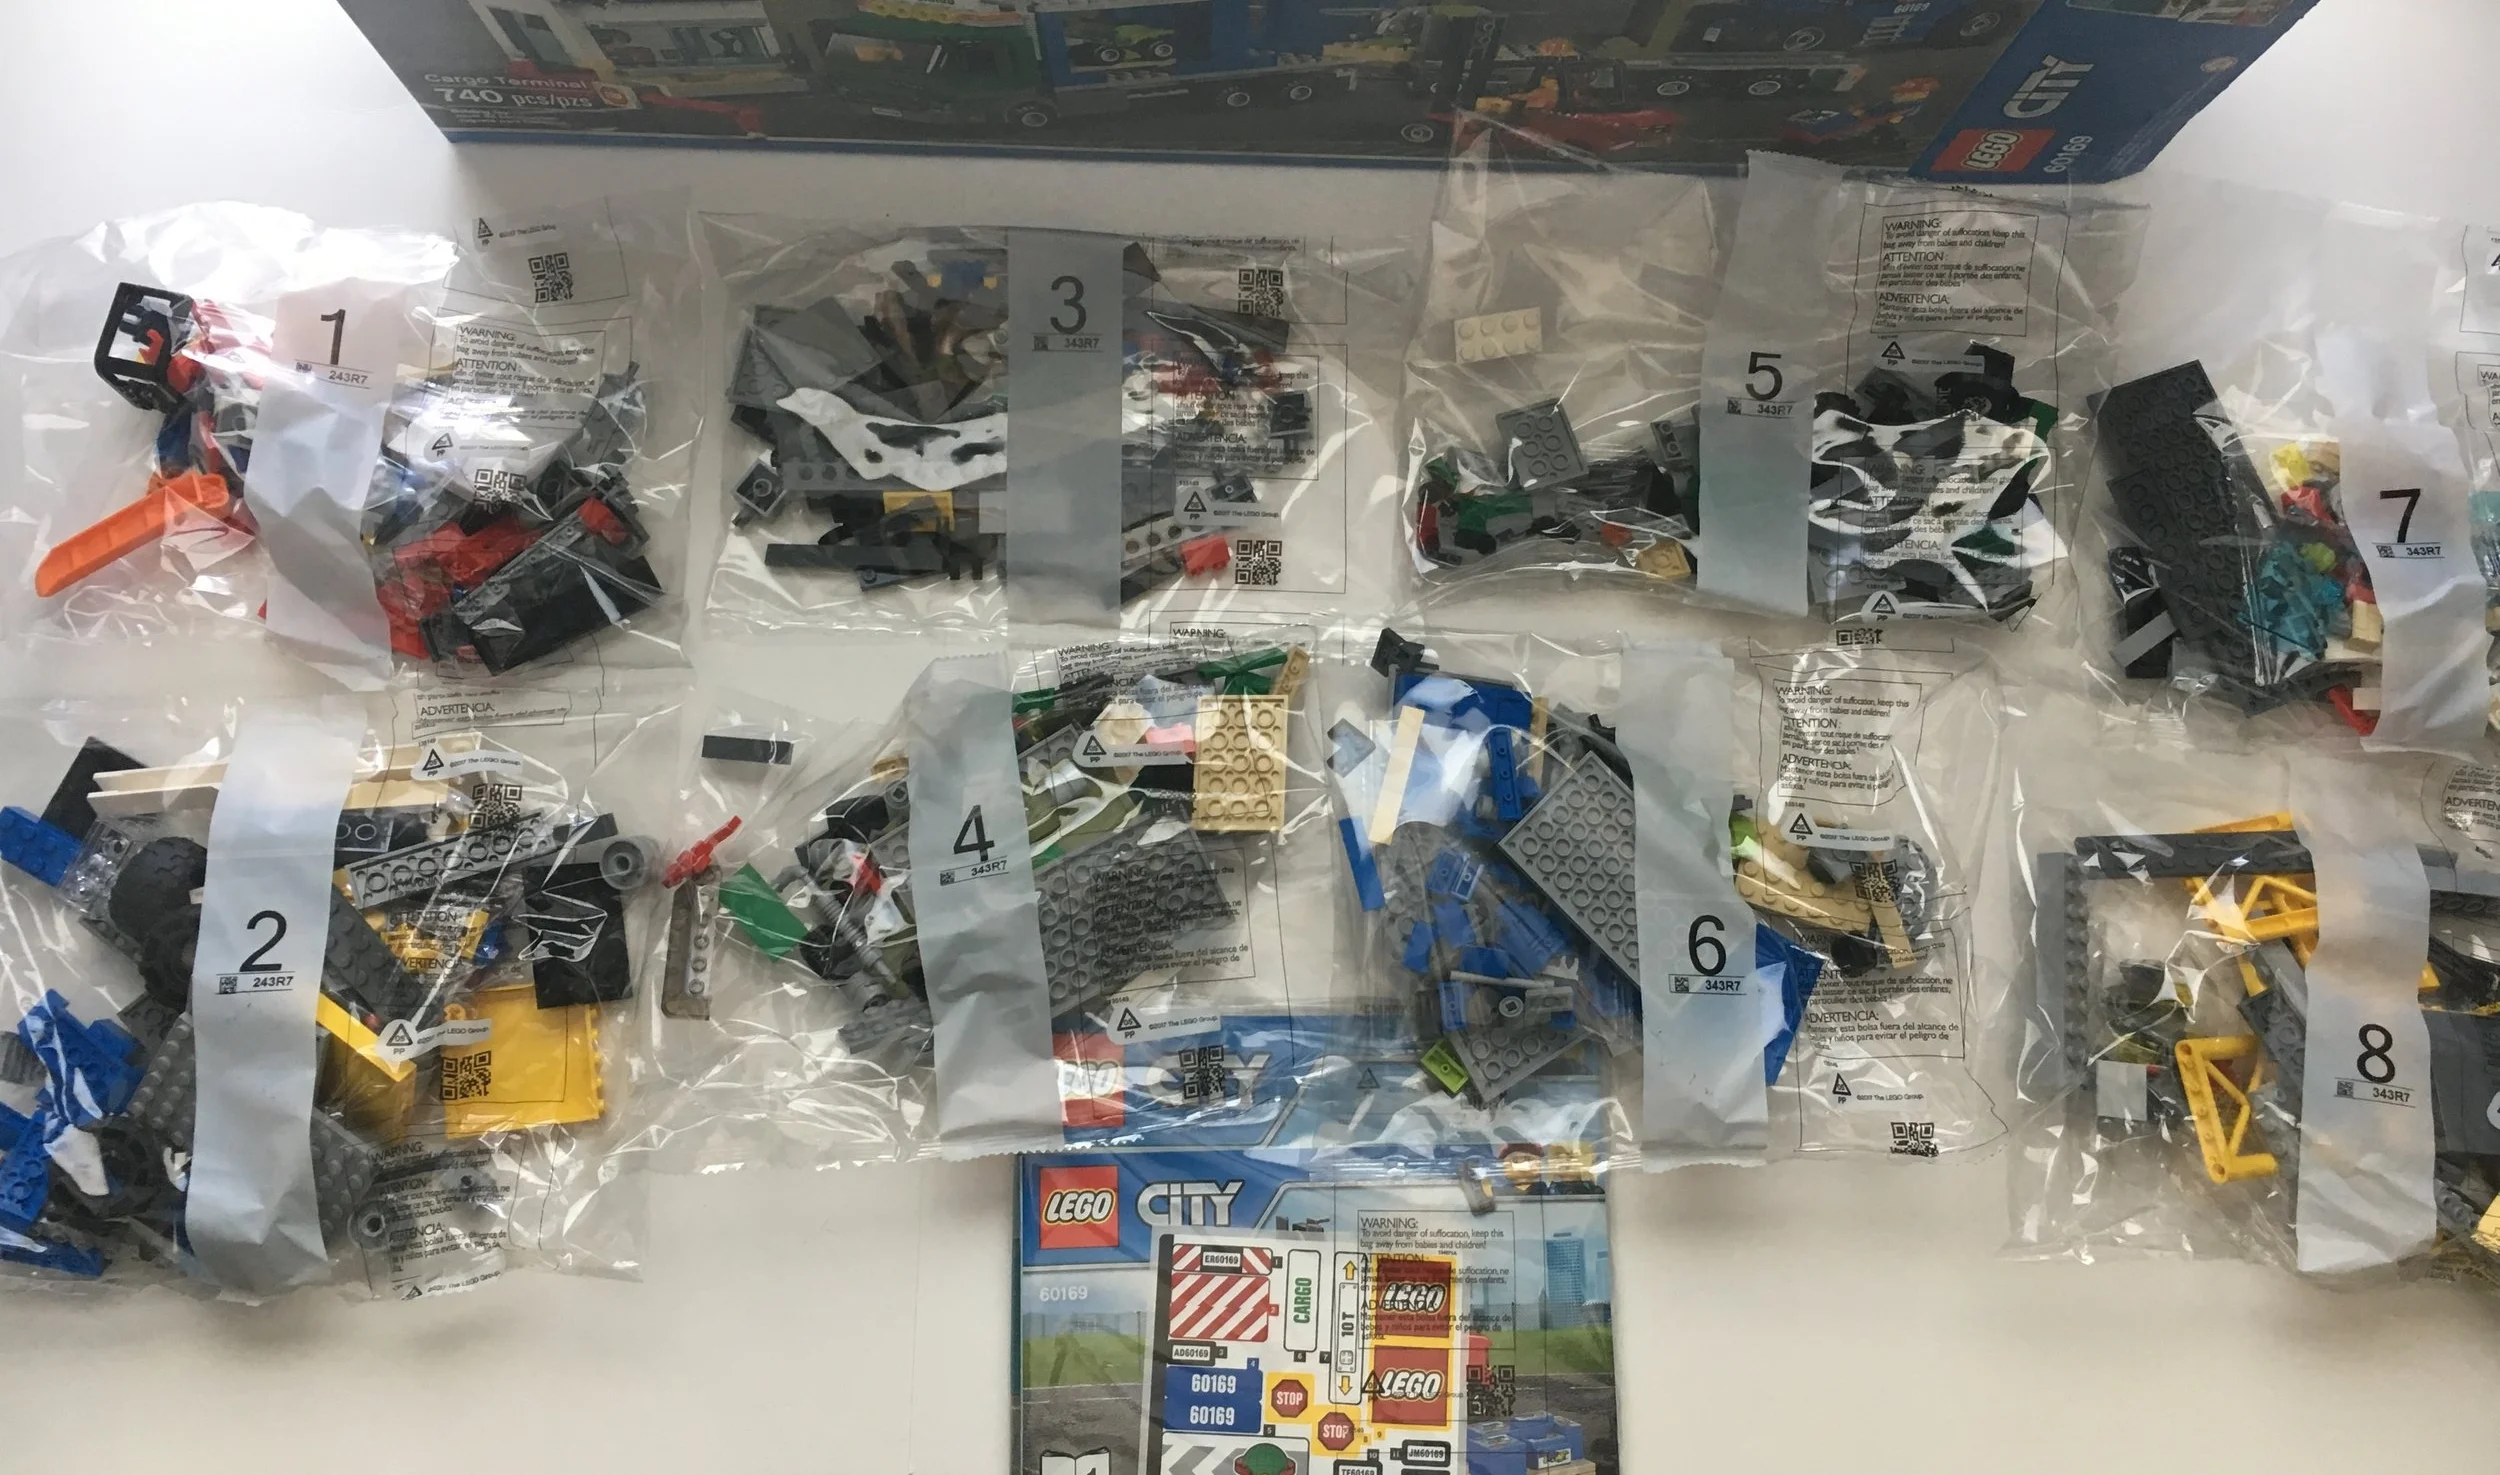
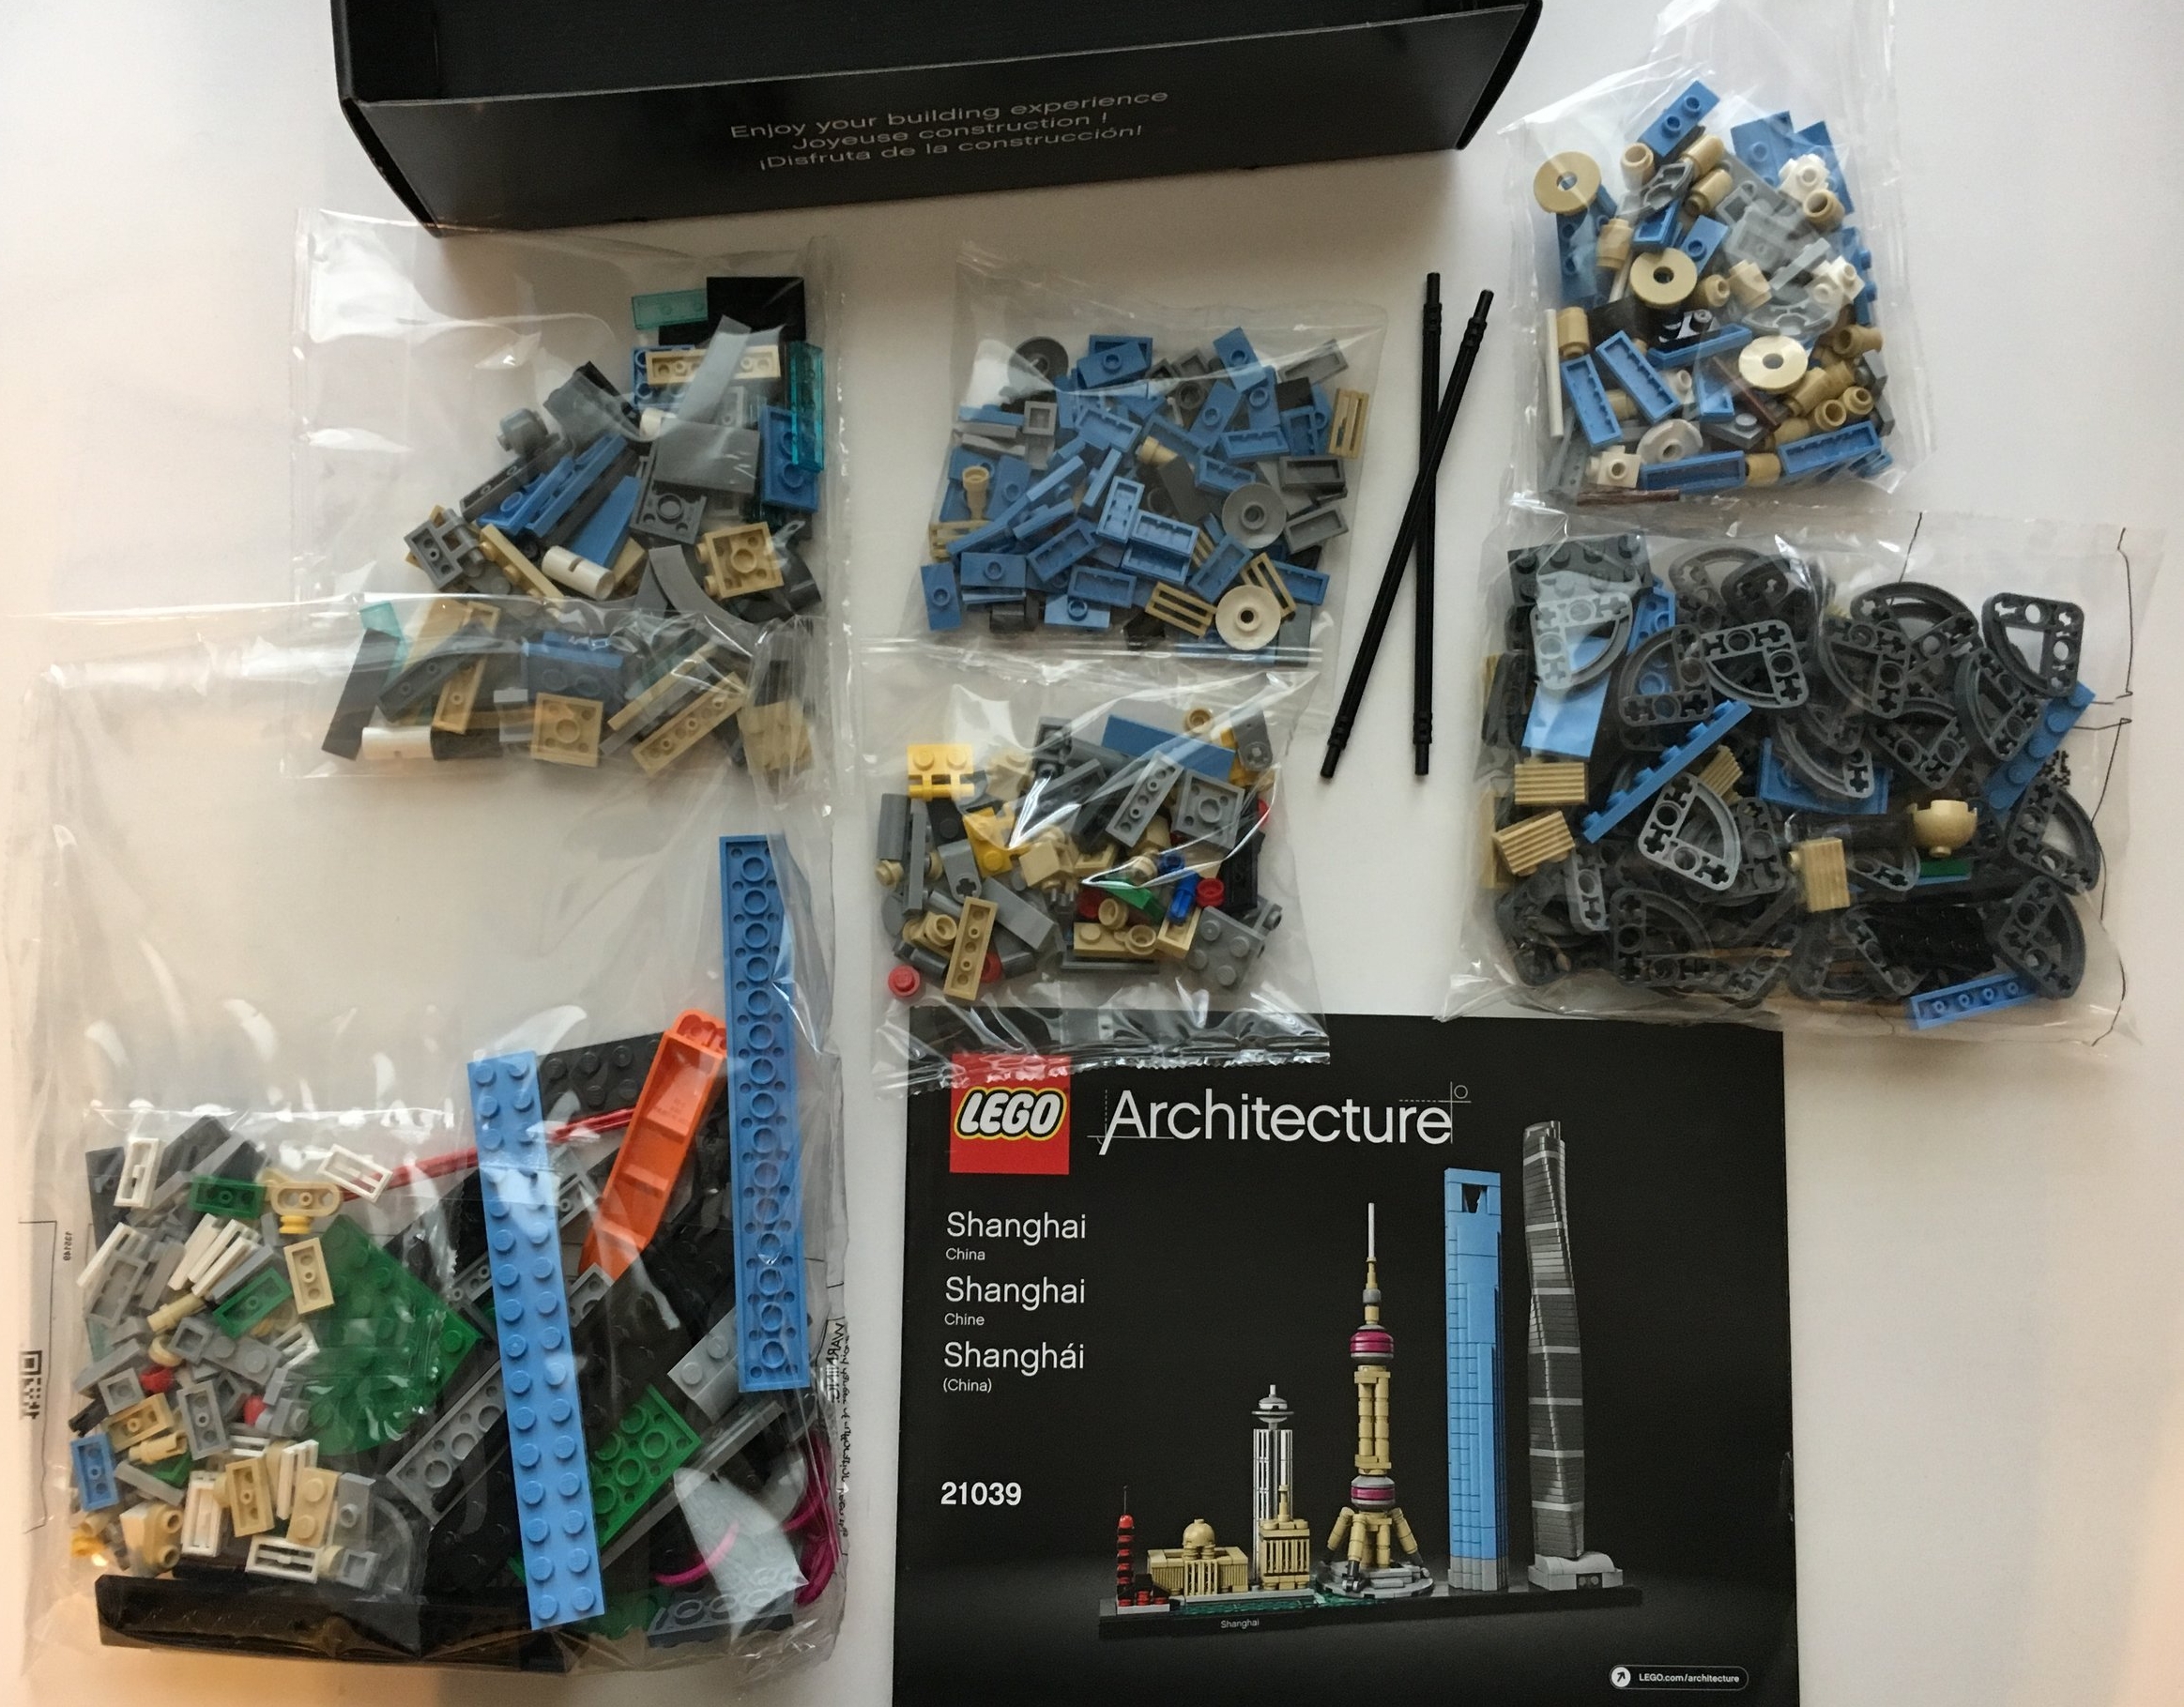
This set contains 3 parts bags that are not numbered and an instruction booklet. Best of all, there are no stickers. Yay!

75950_contents.jpg

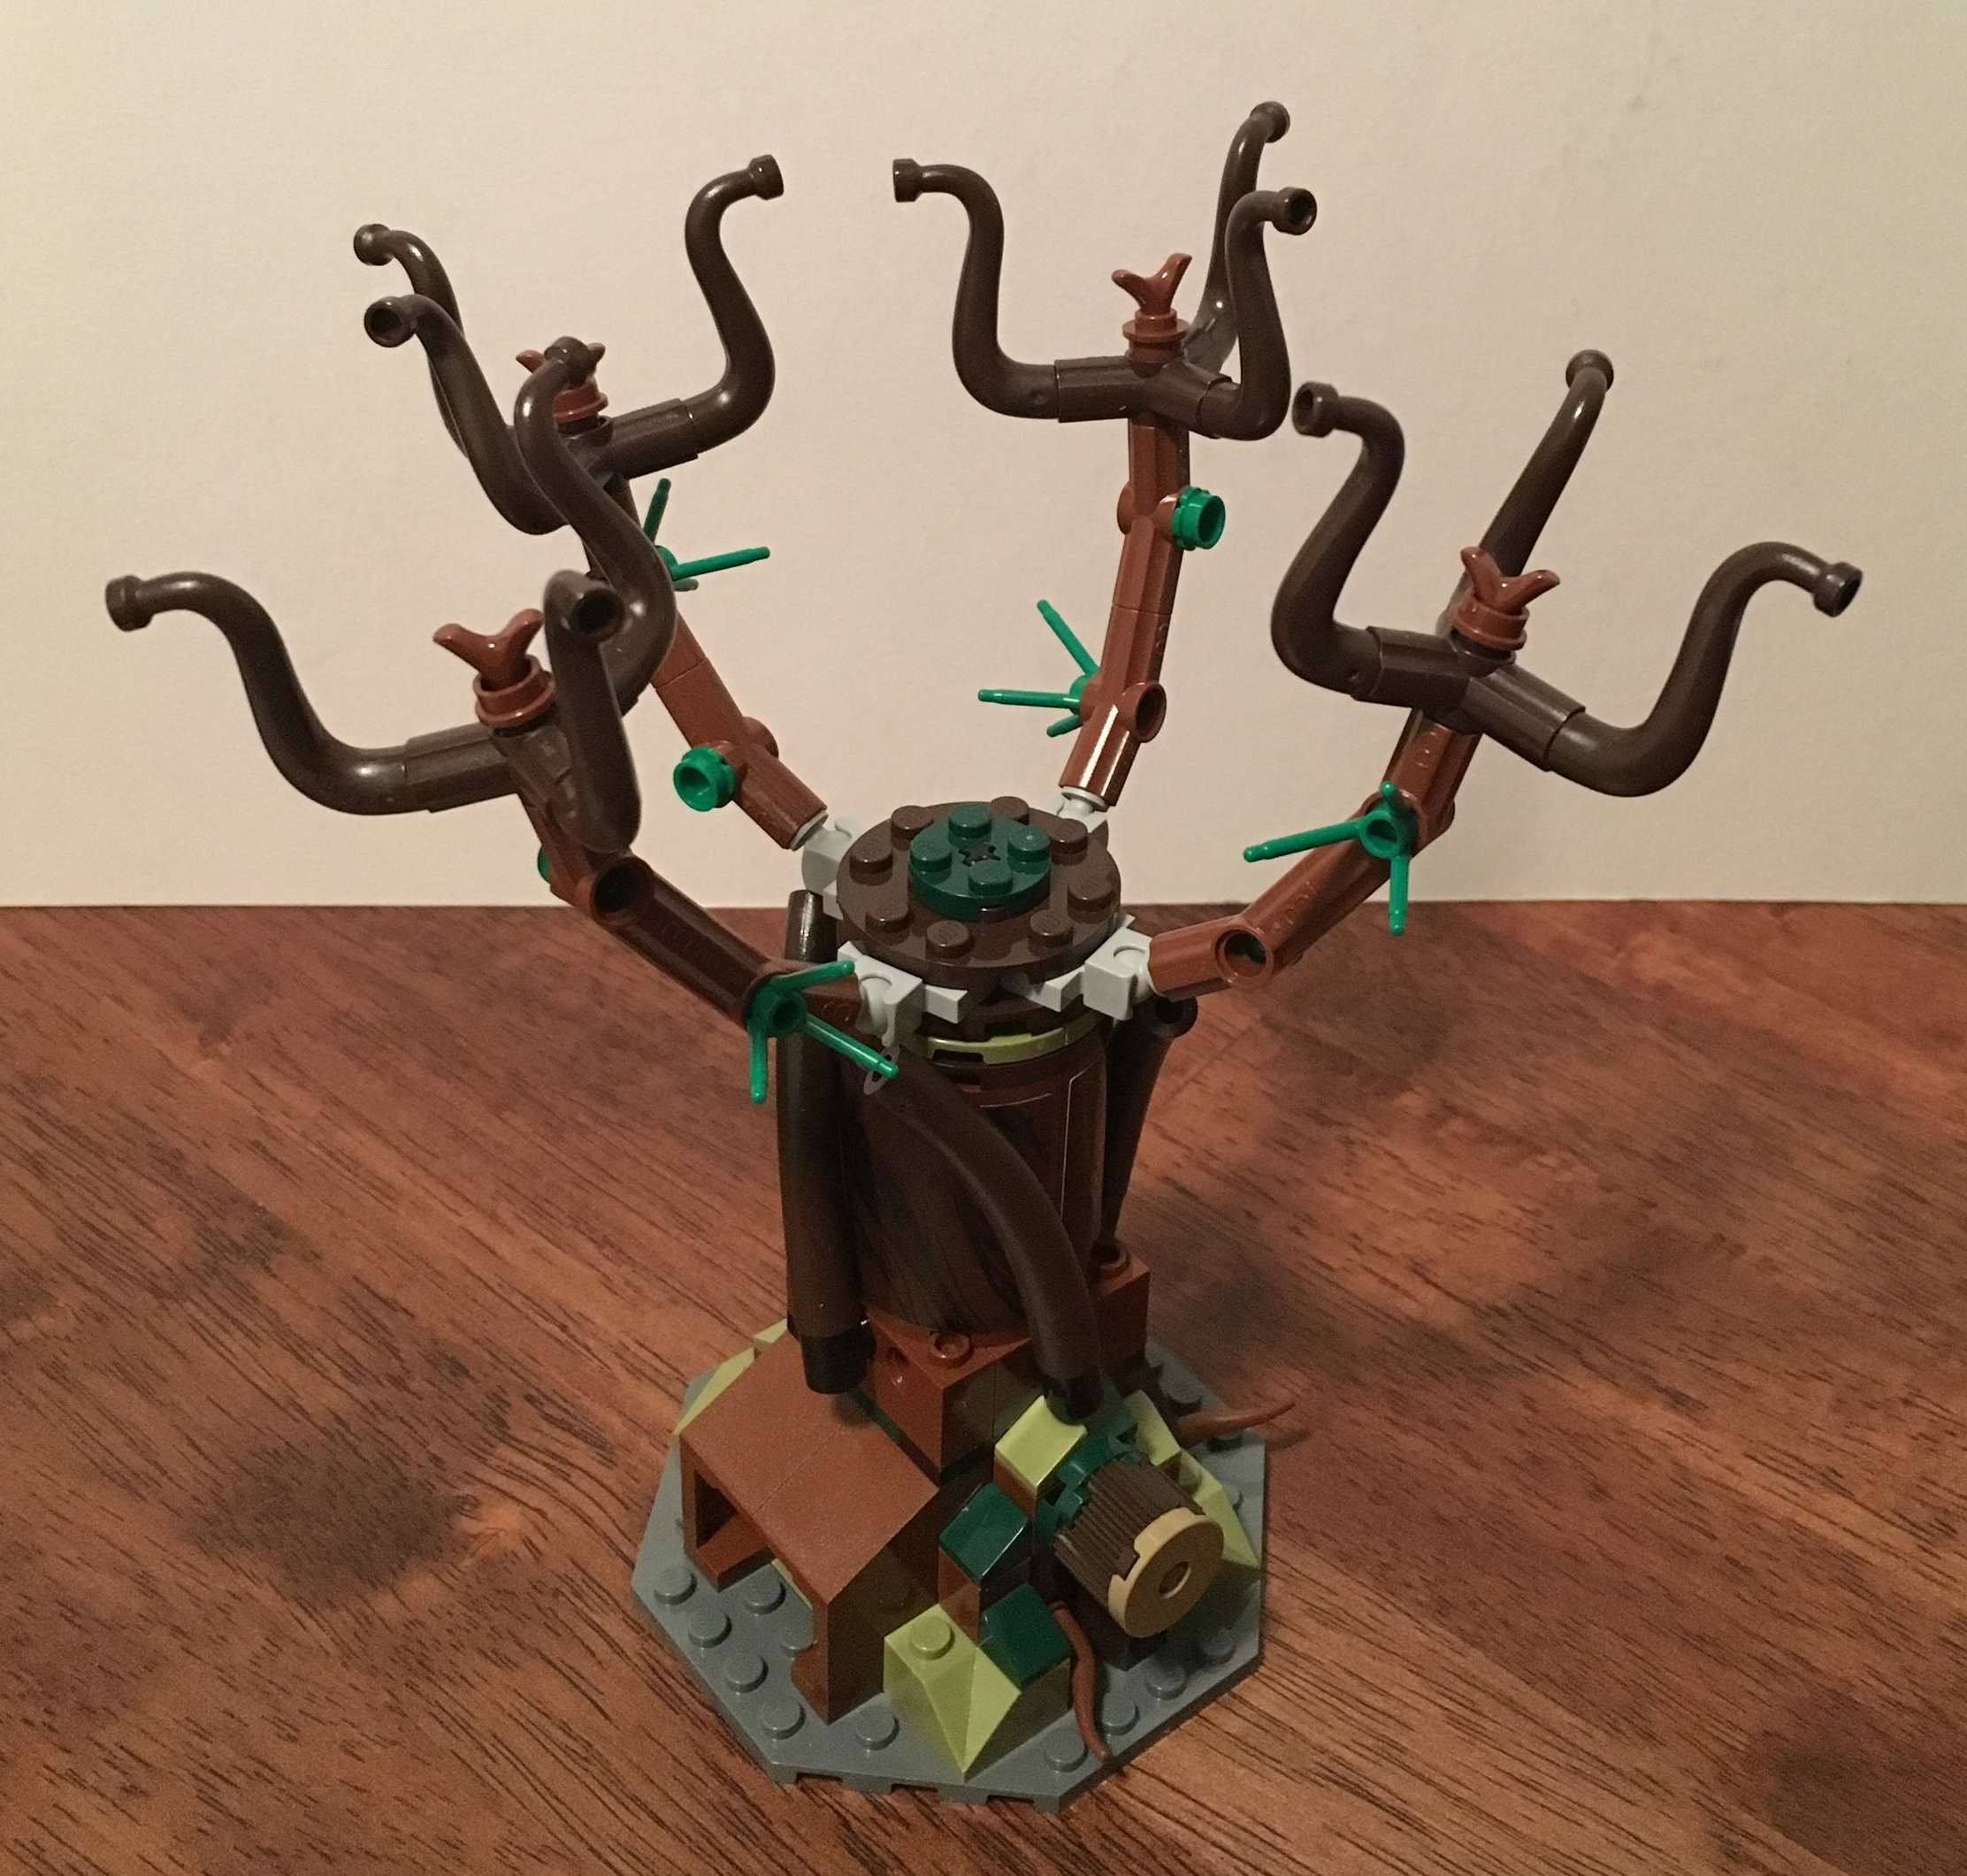
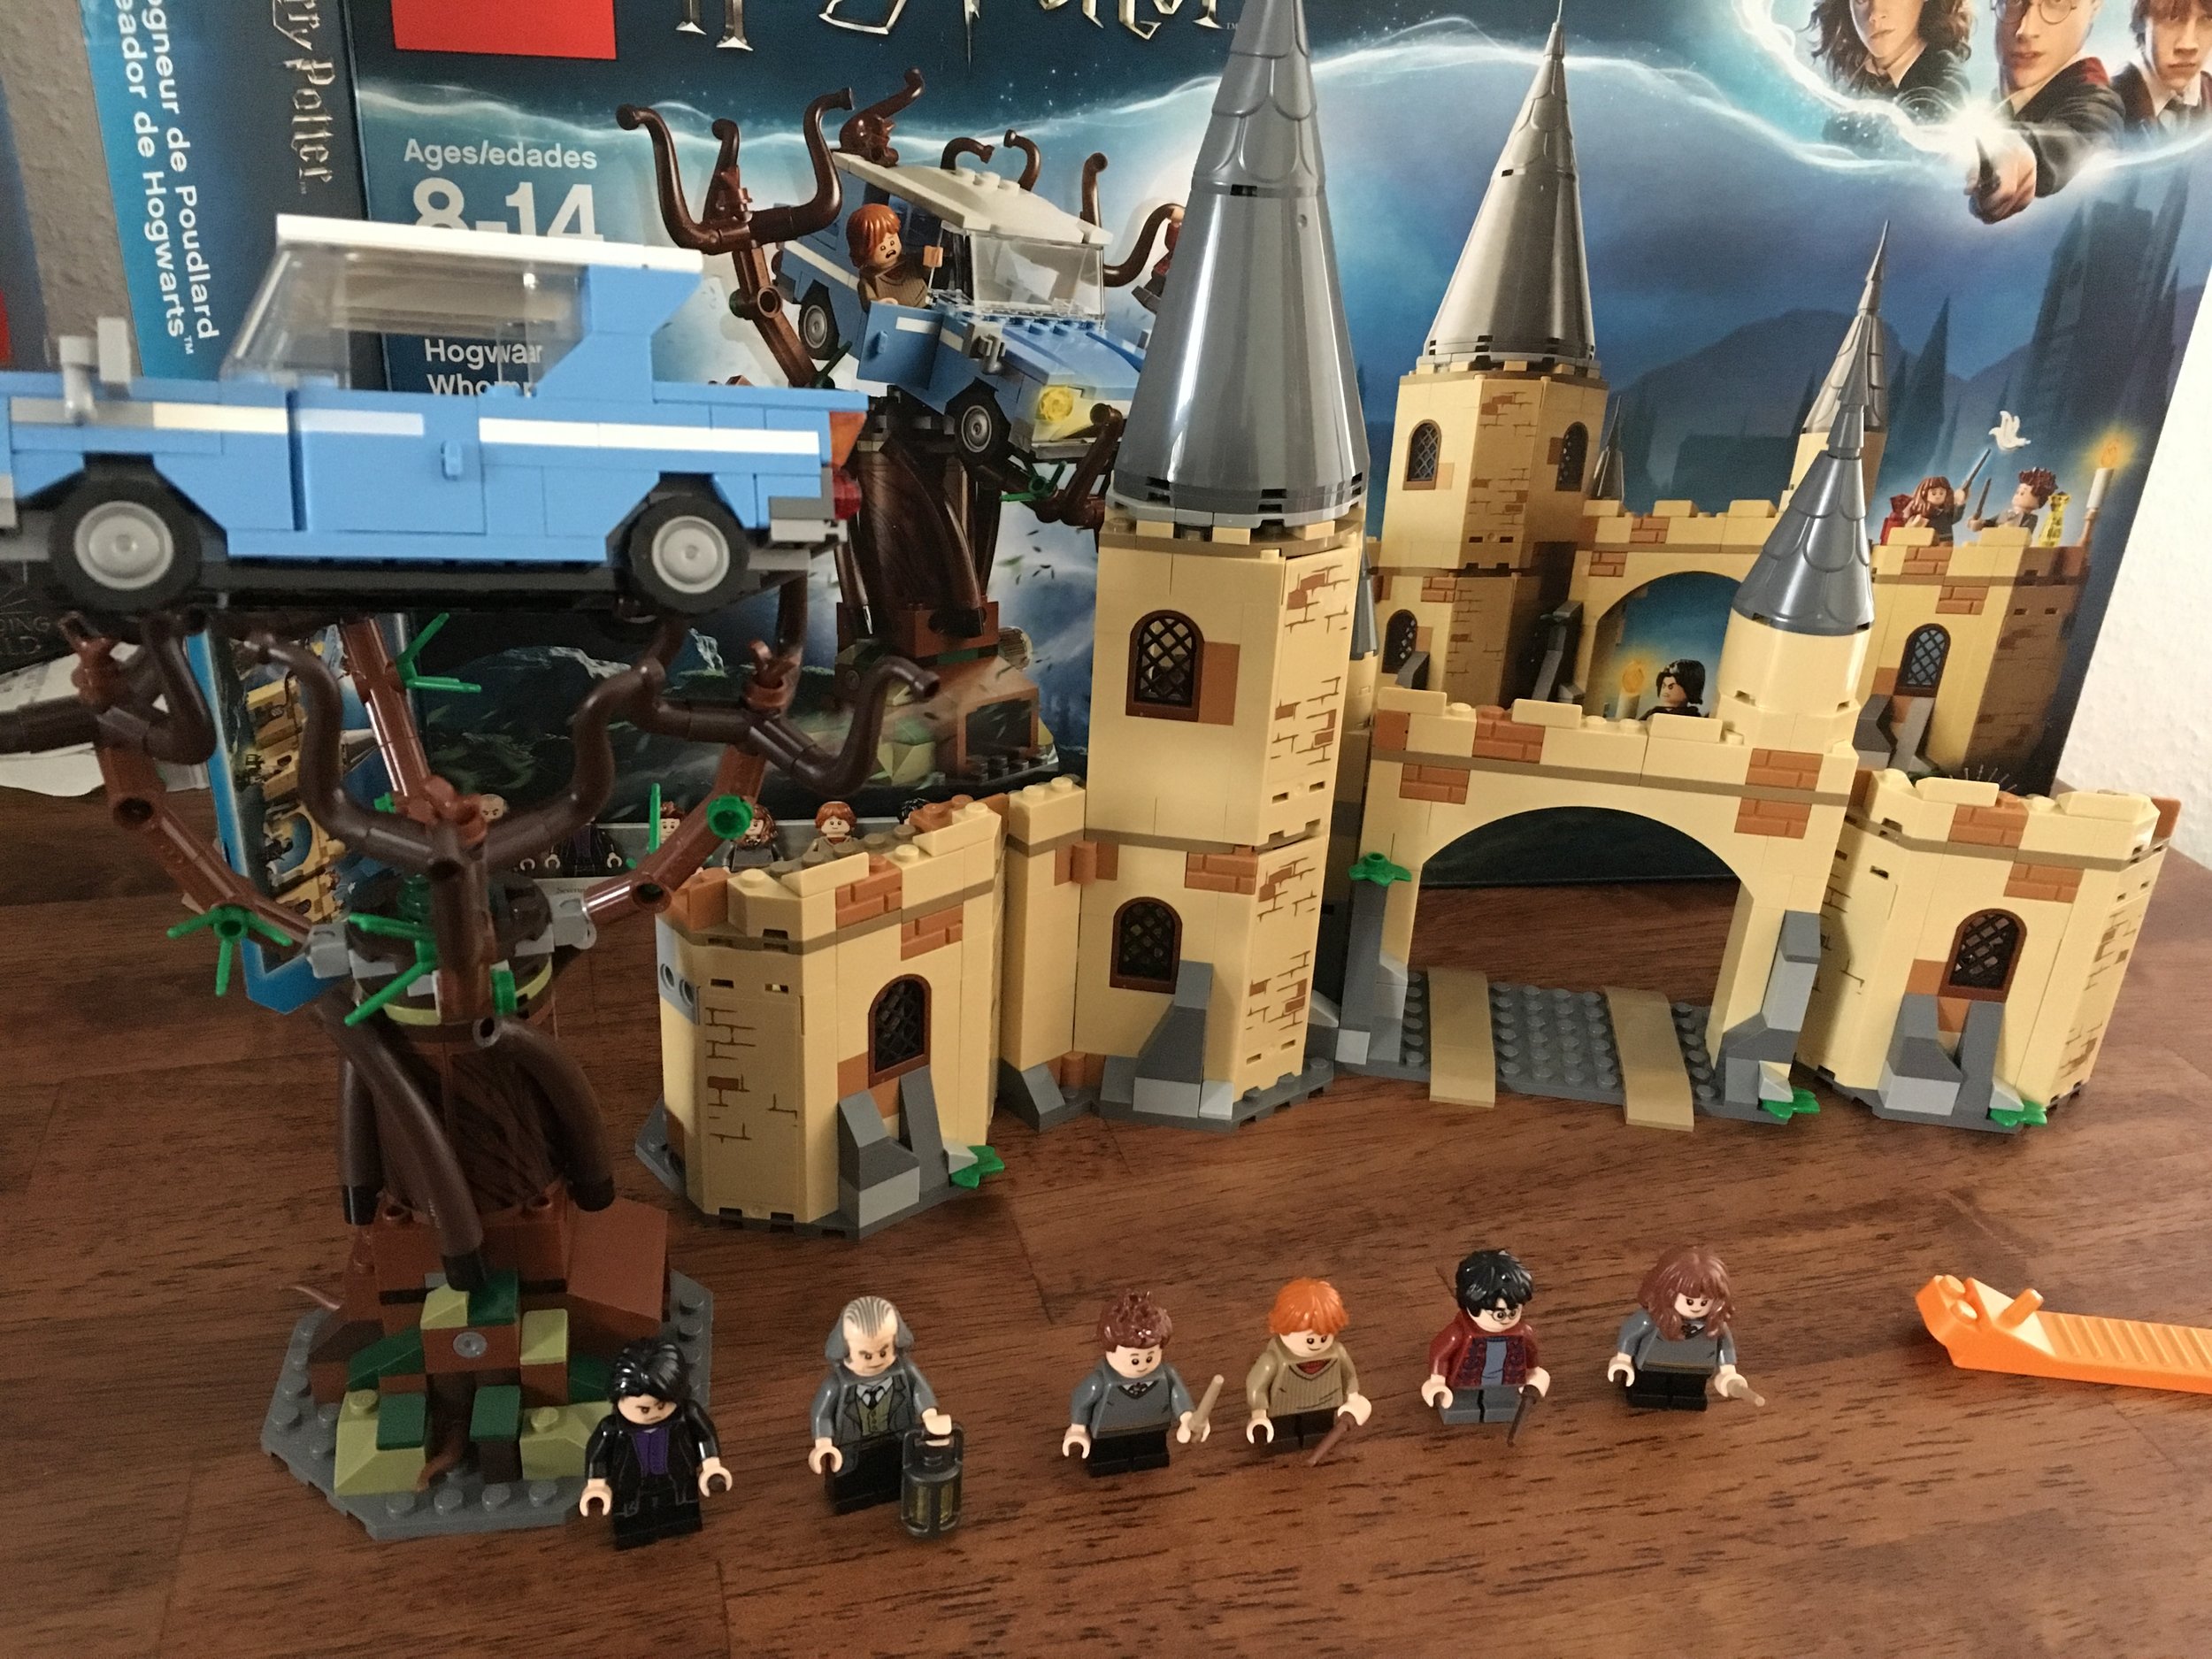
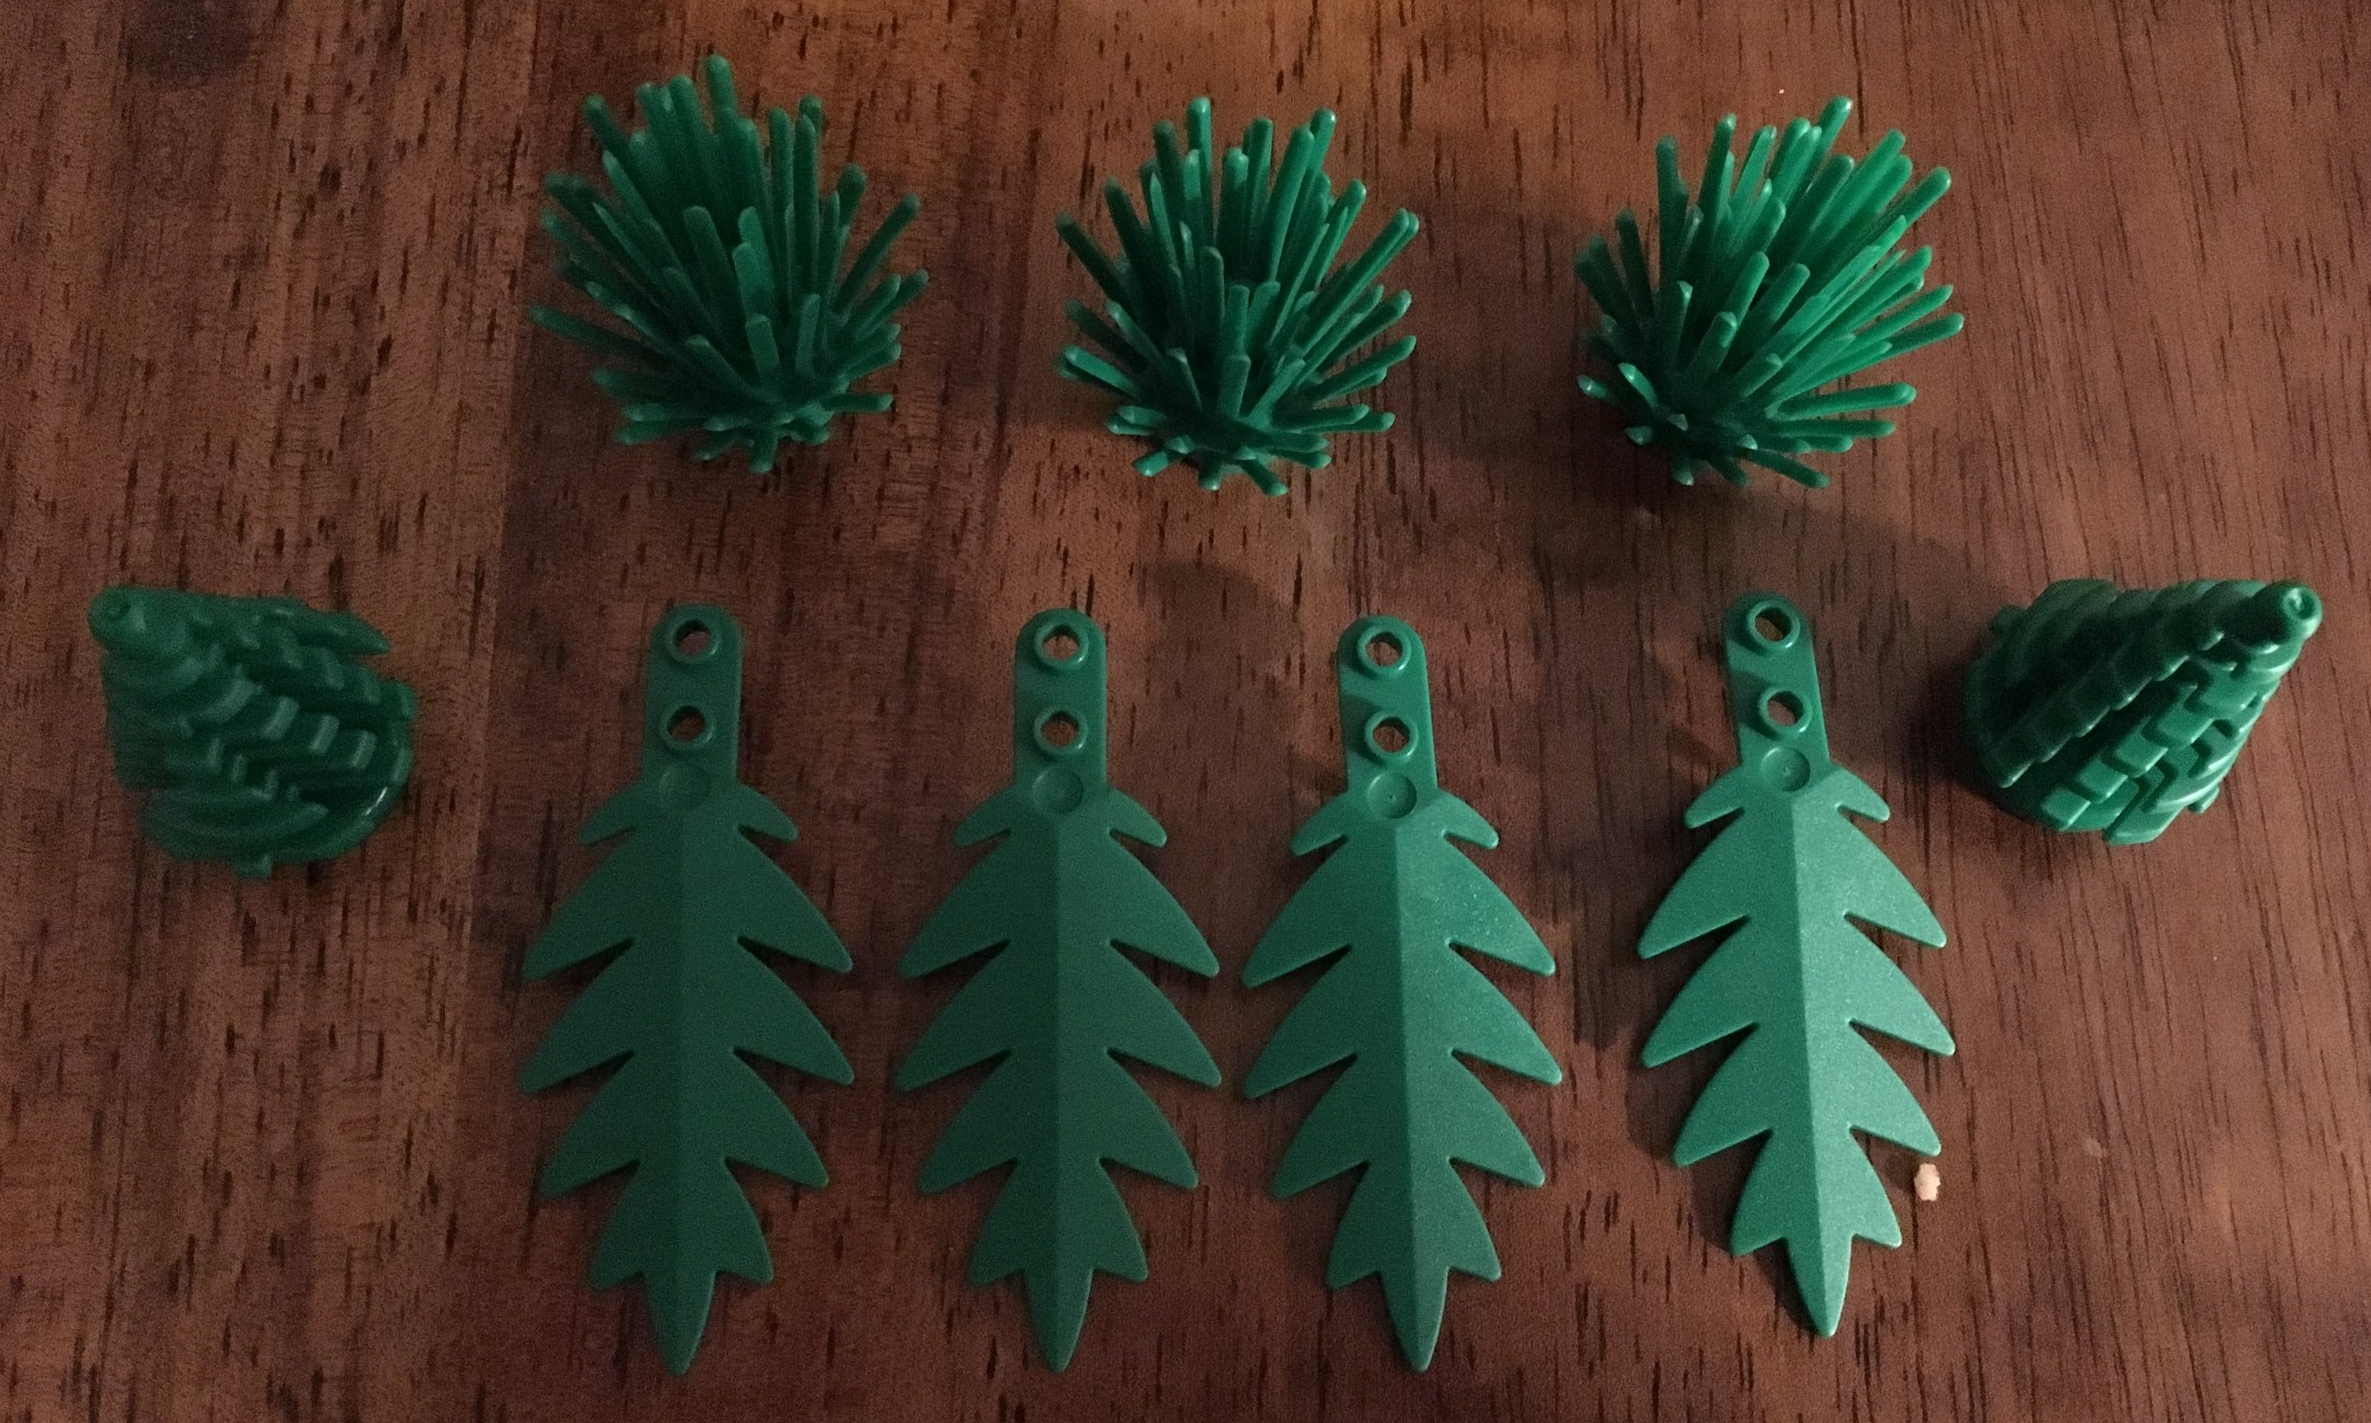
Due to the low piece count, it’s a pretty quick set to build. You start with minifigures of Harry and Ron. Both figures have 2 faces. I took the picture with the content faces and you can see the distressed faces on the box. The build starts with the tree and then finishes with Aragog. Nothing too special about the tree, but Aragog was an interesting build. I’m impressed with how realistic the builders got it to look in such a small set. Also, you can adjust the legs and abdomen to move Aragog around. The set includes 5 smaller spiders (2 black, 3 tan) and while it’s not completely accurate compared to the number of spiders from the scene in the movie, you can get the idea that there were a lot of spiders.

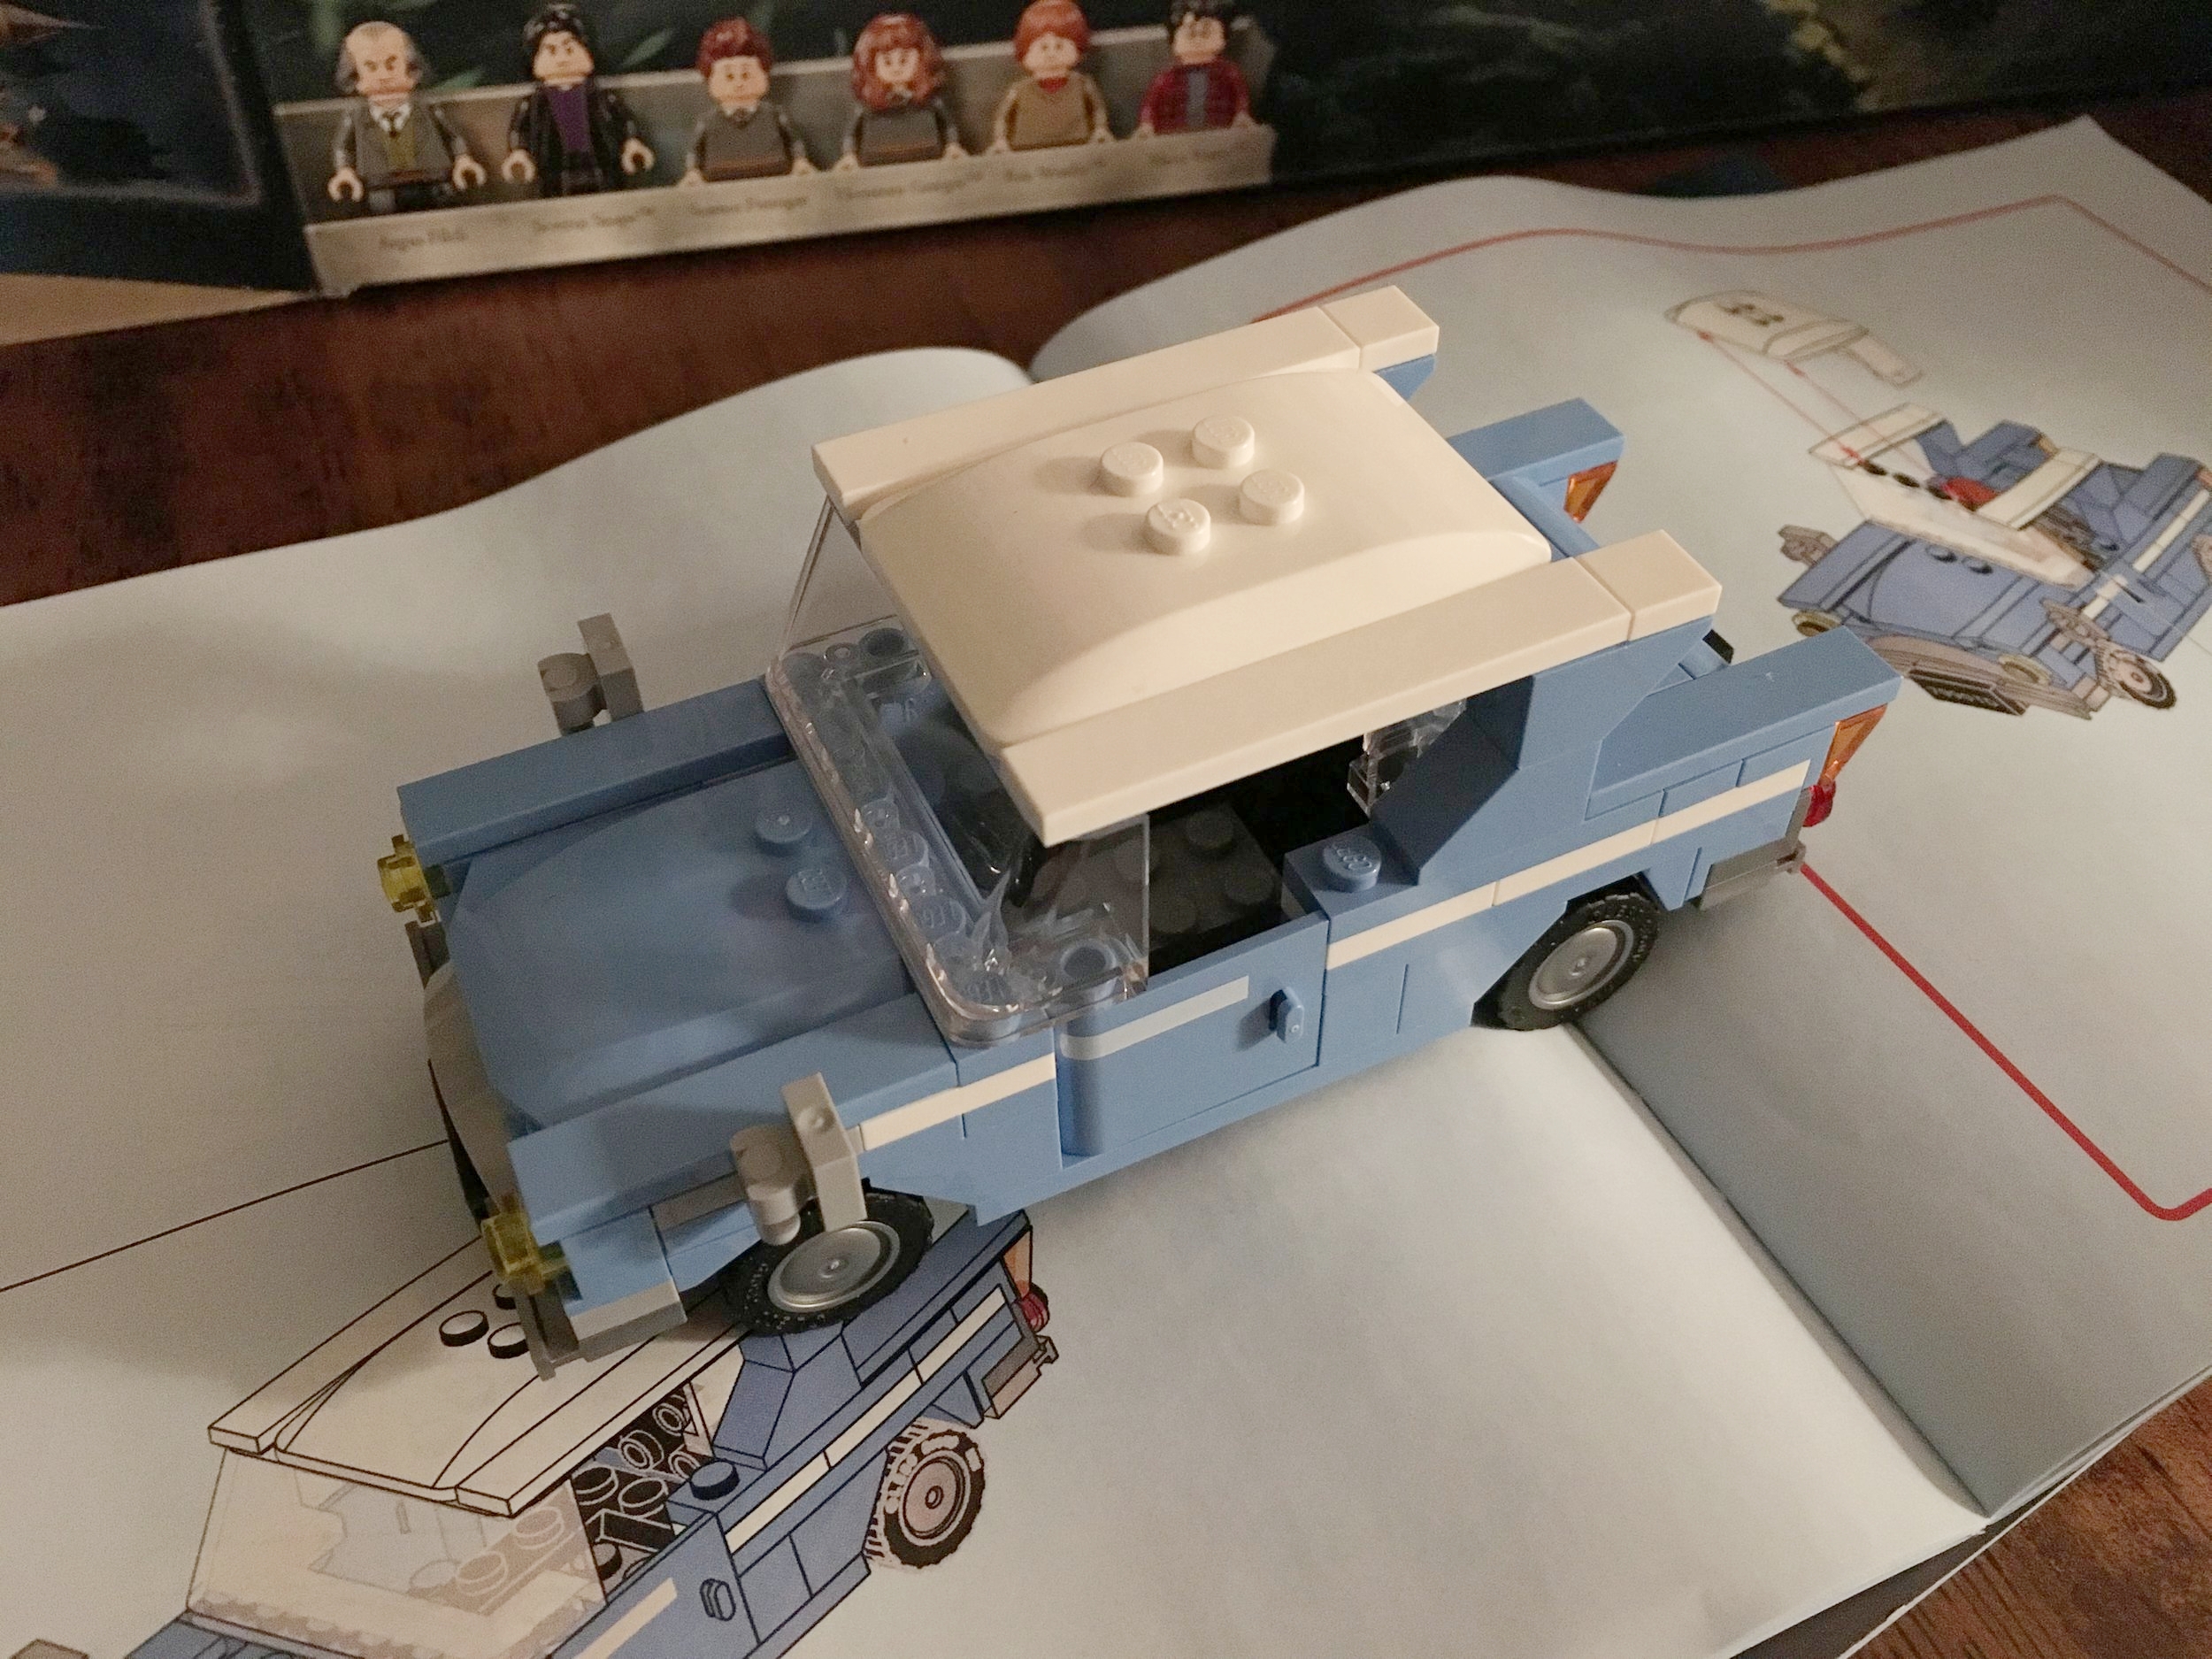
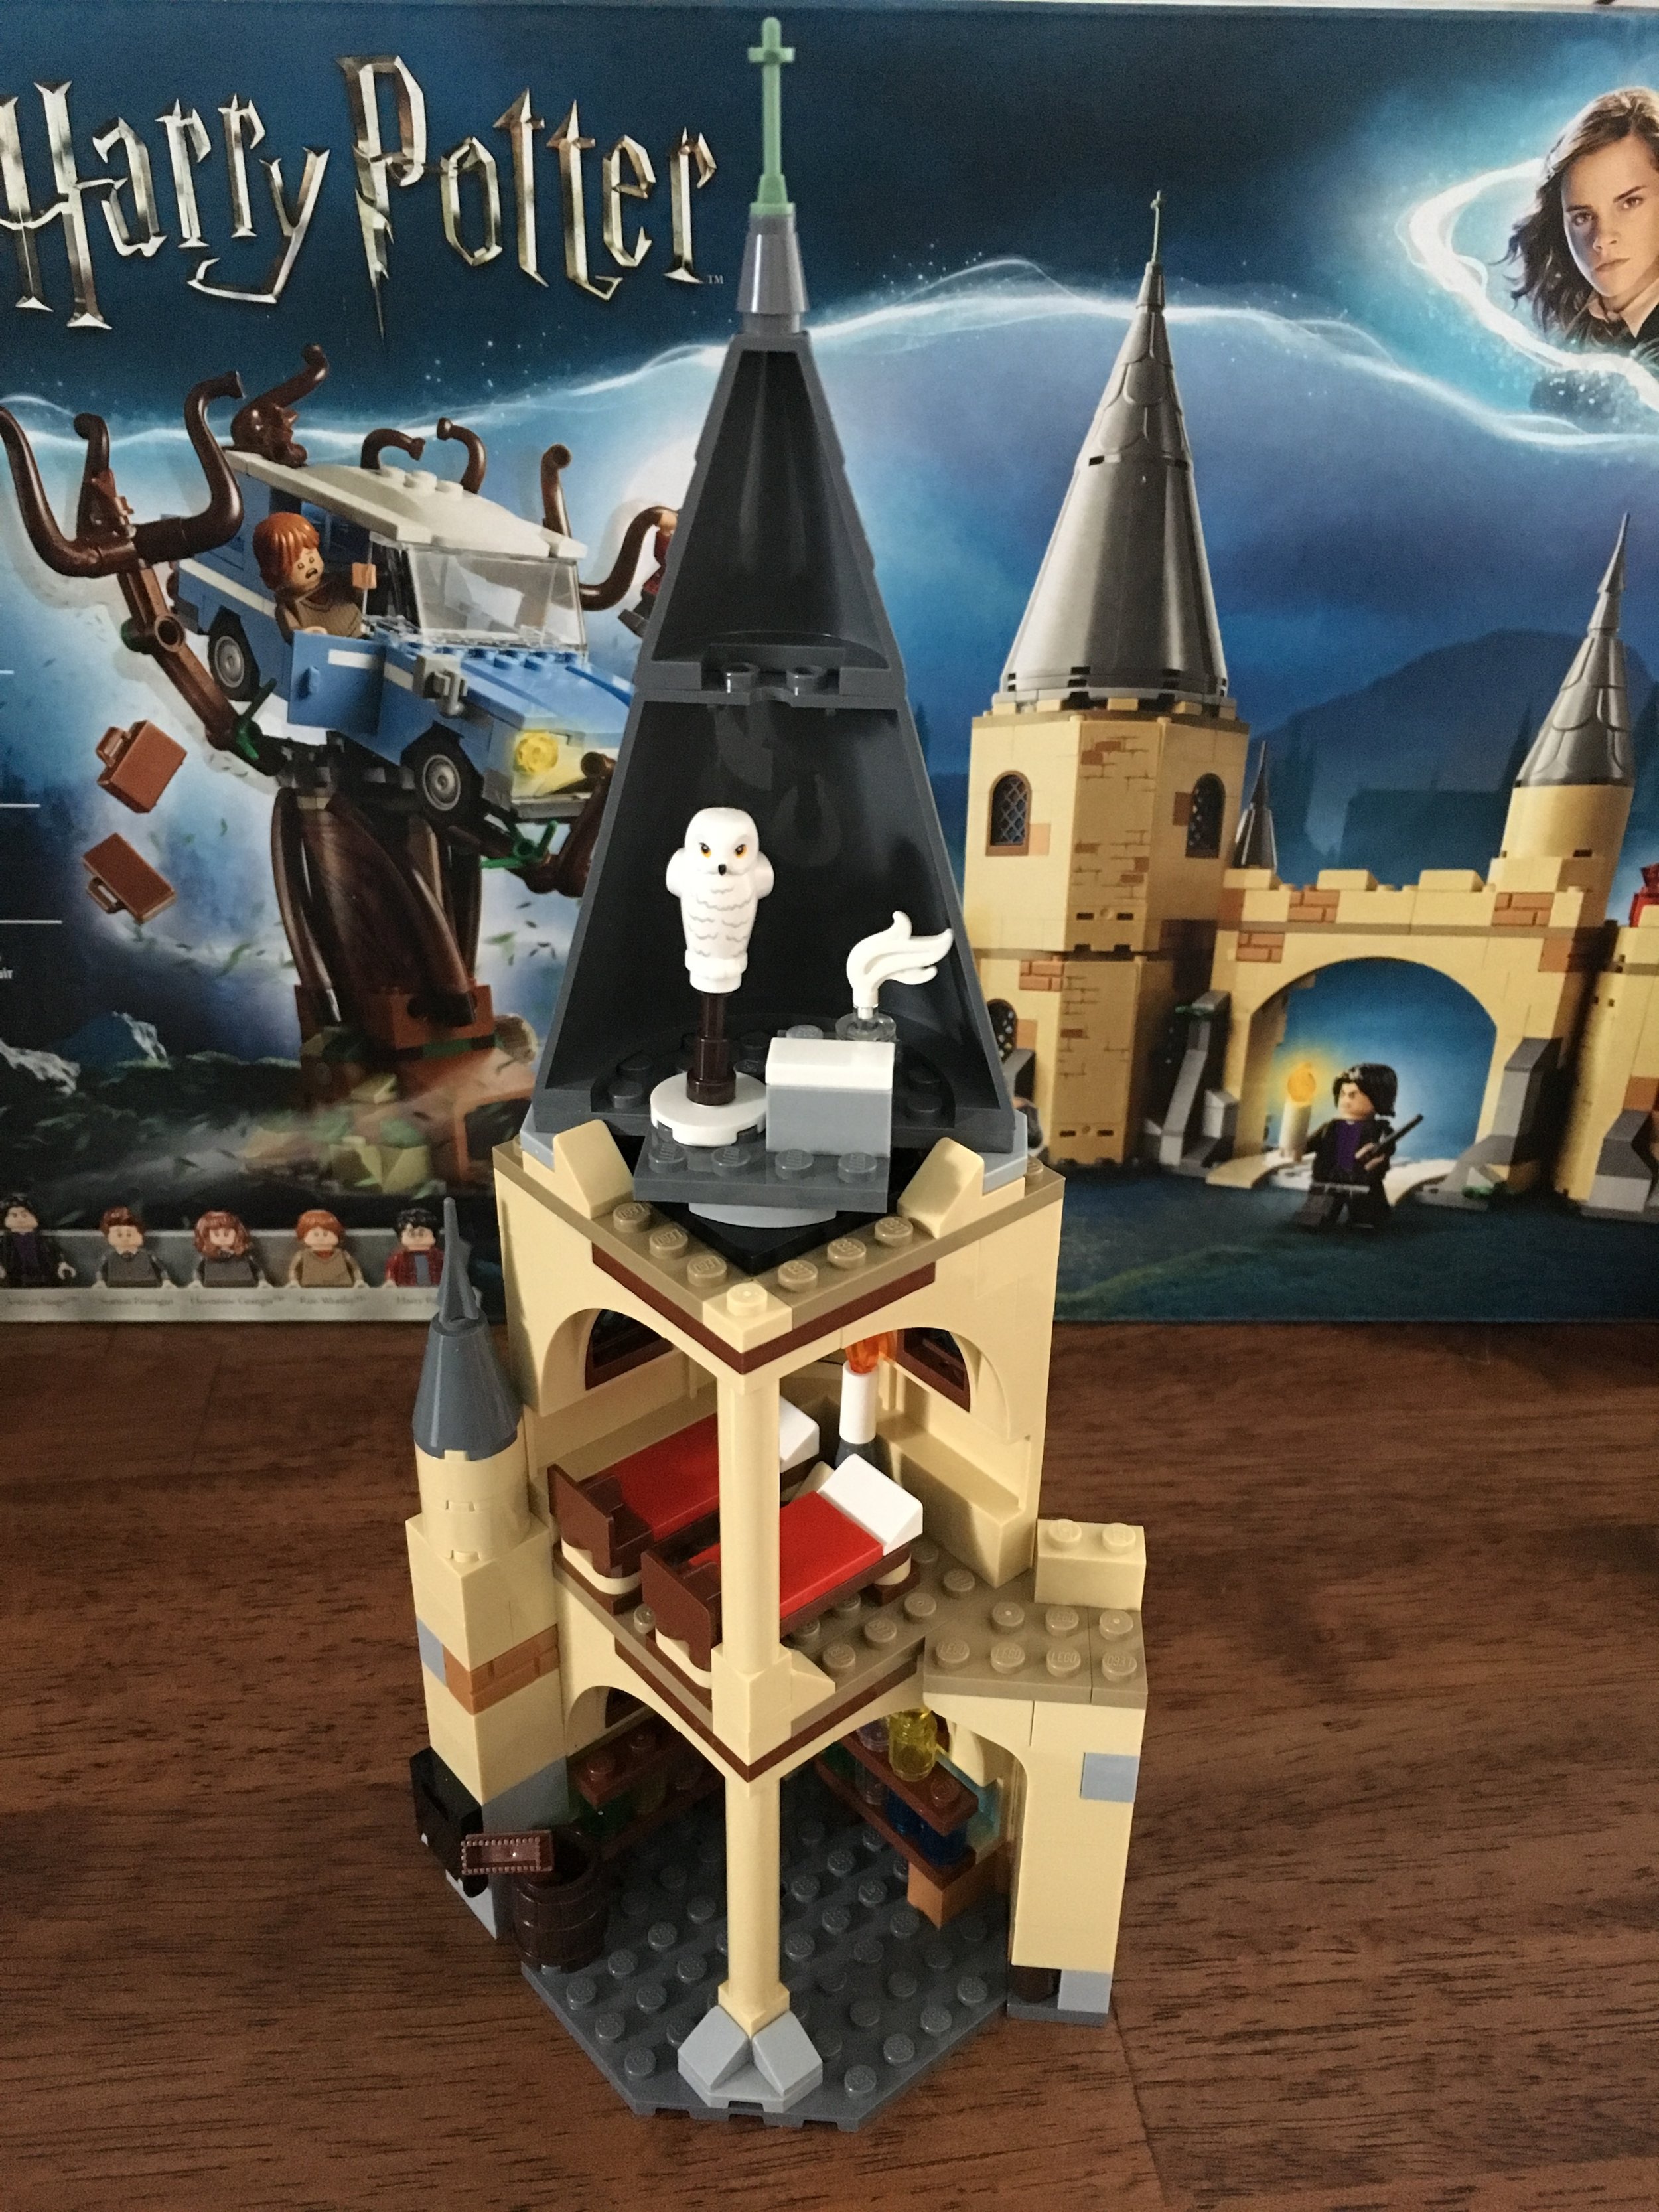
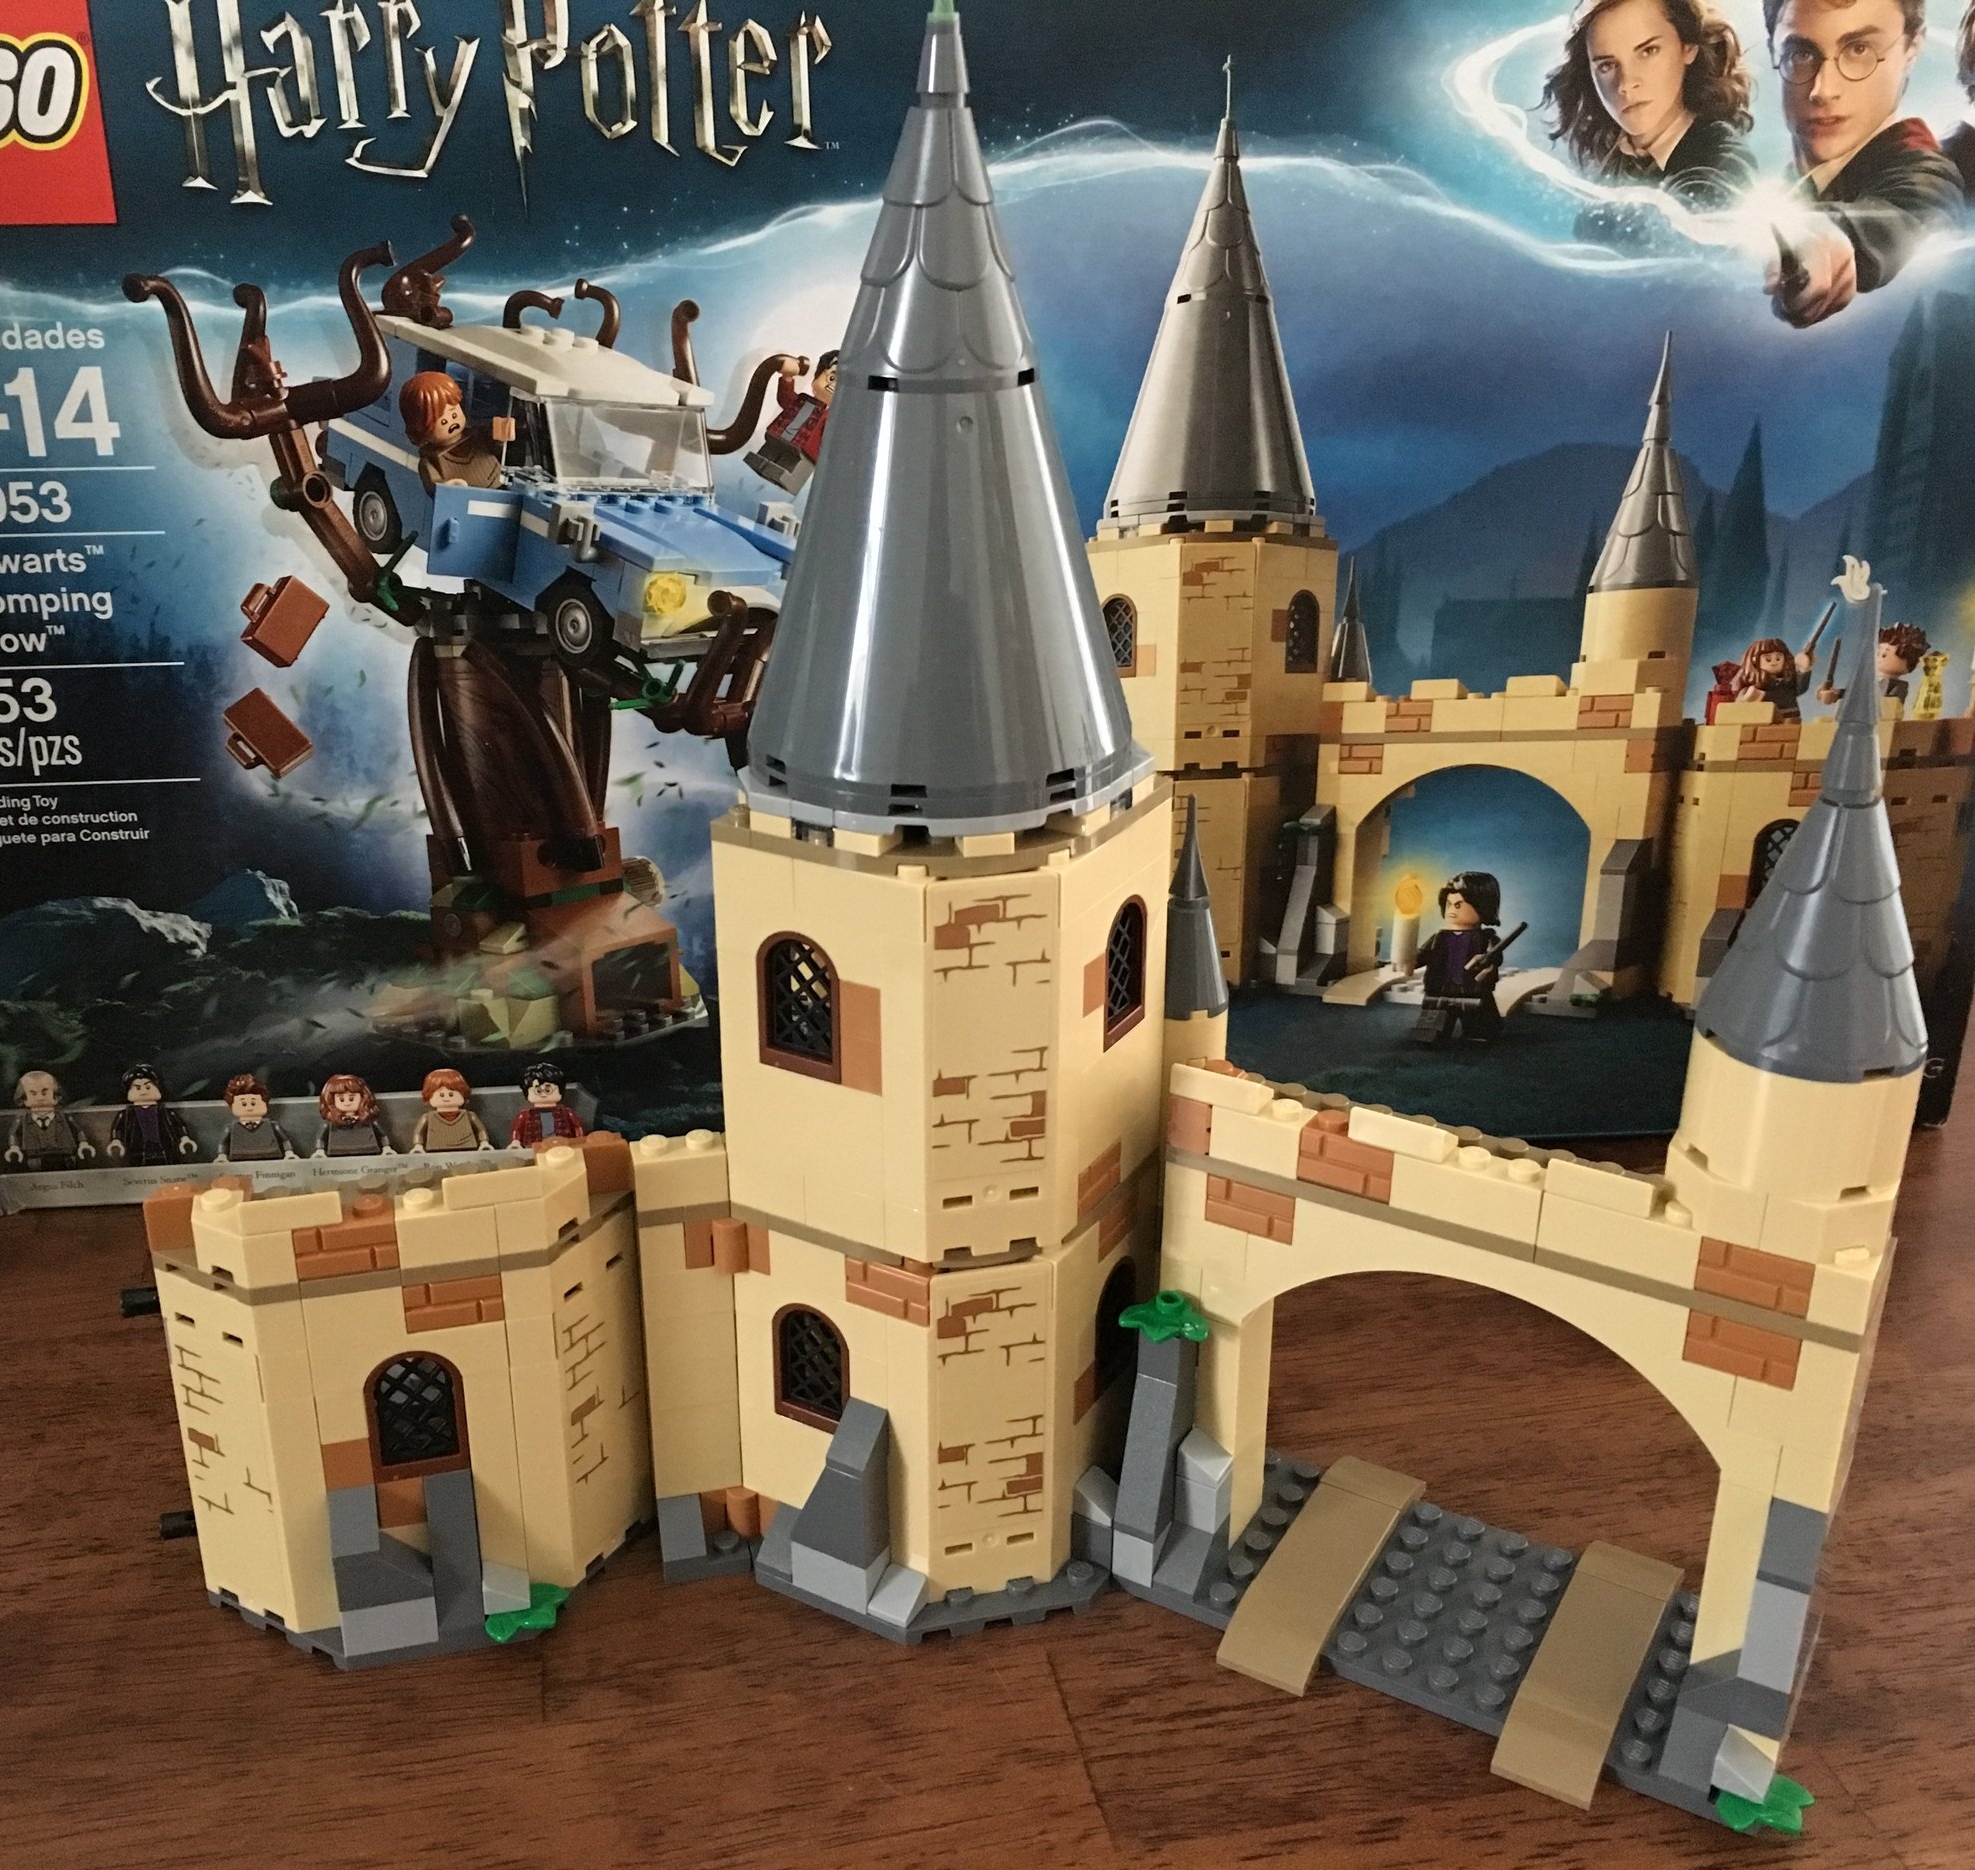
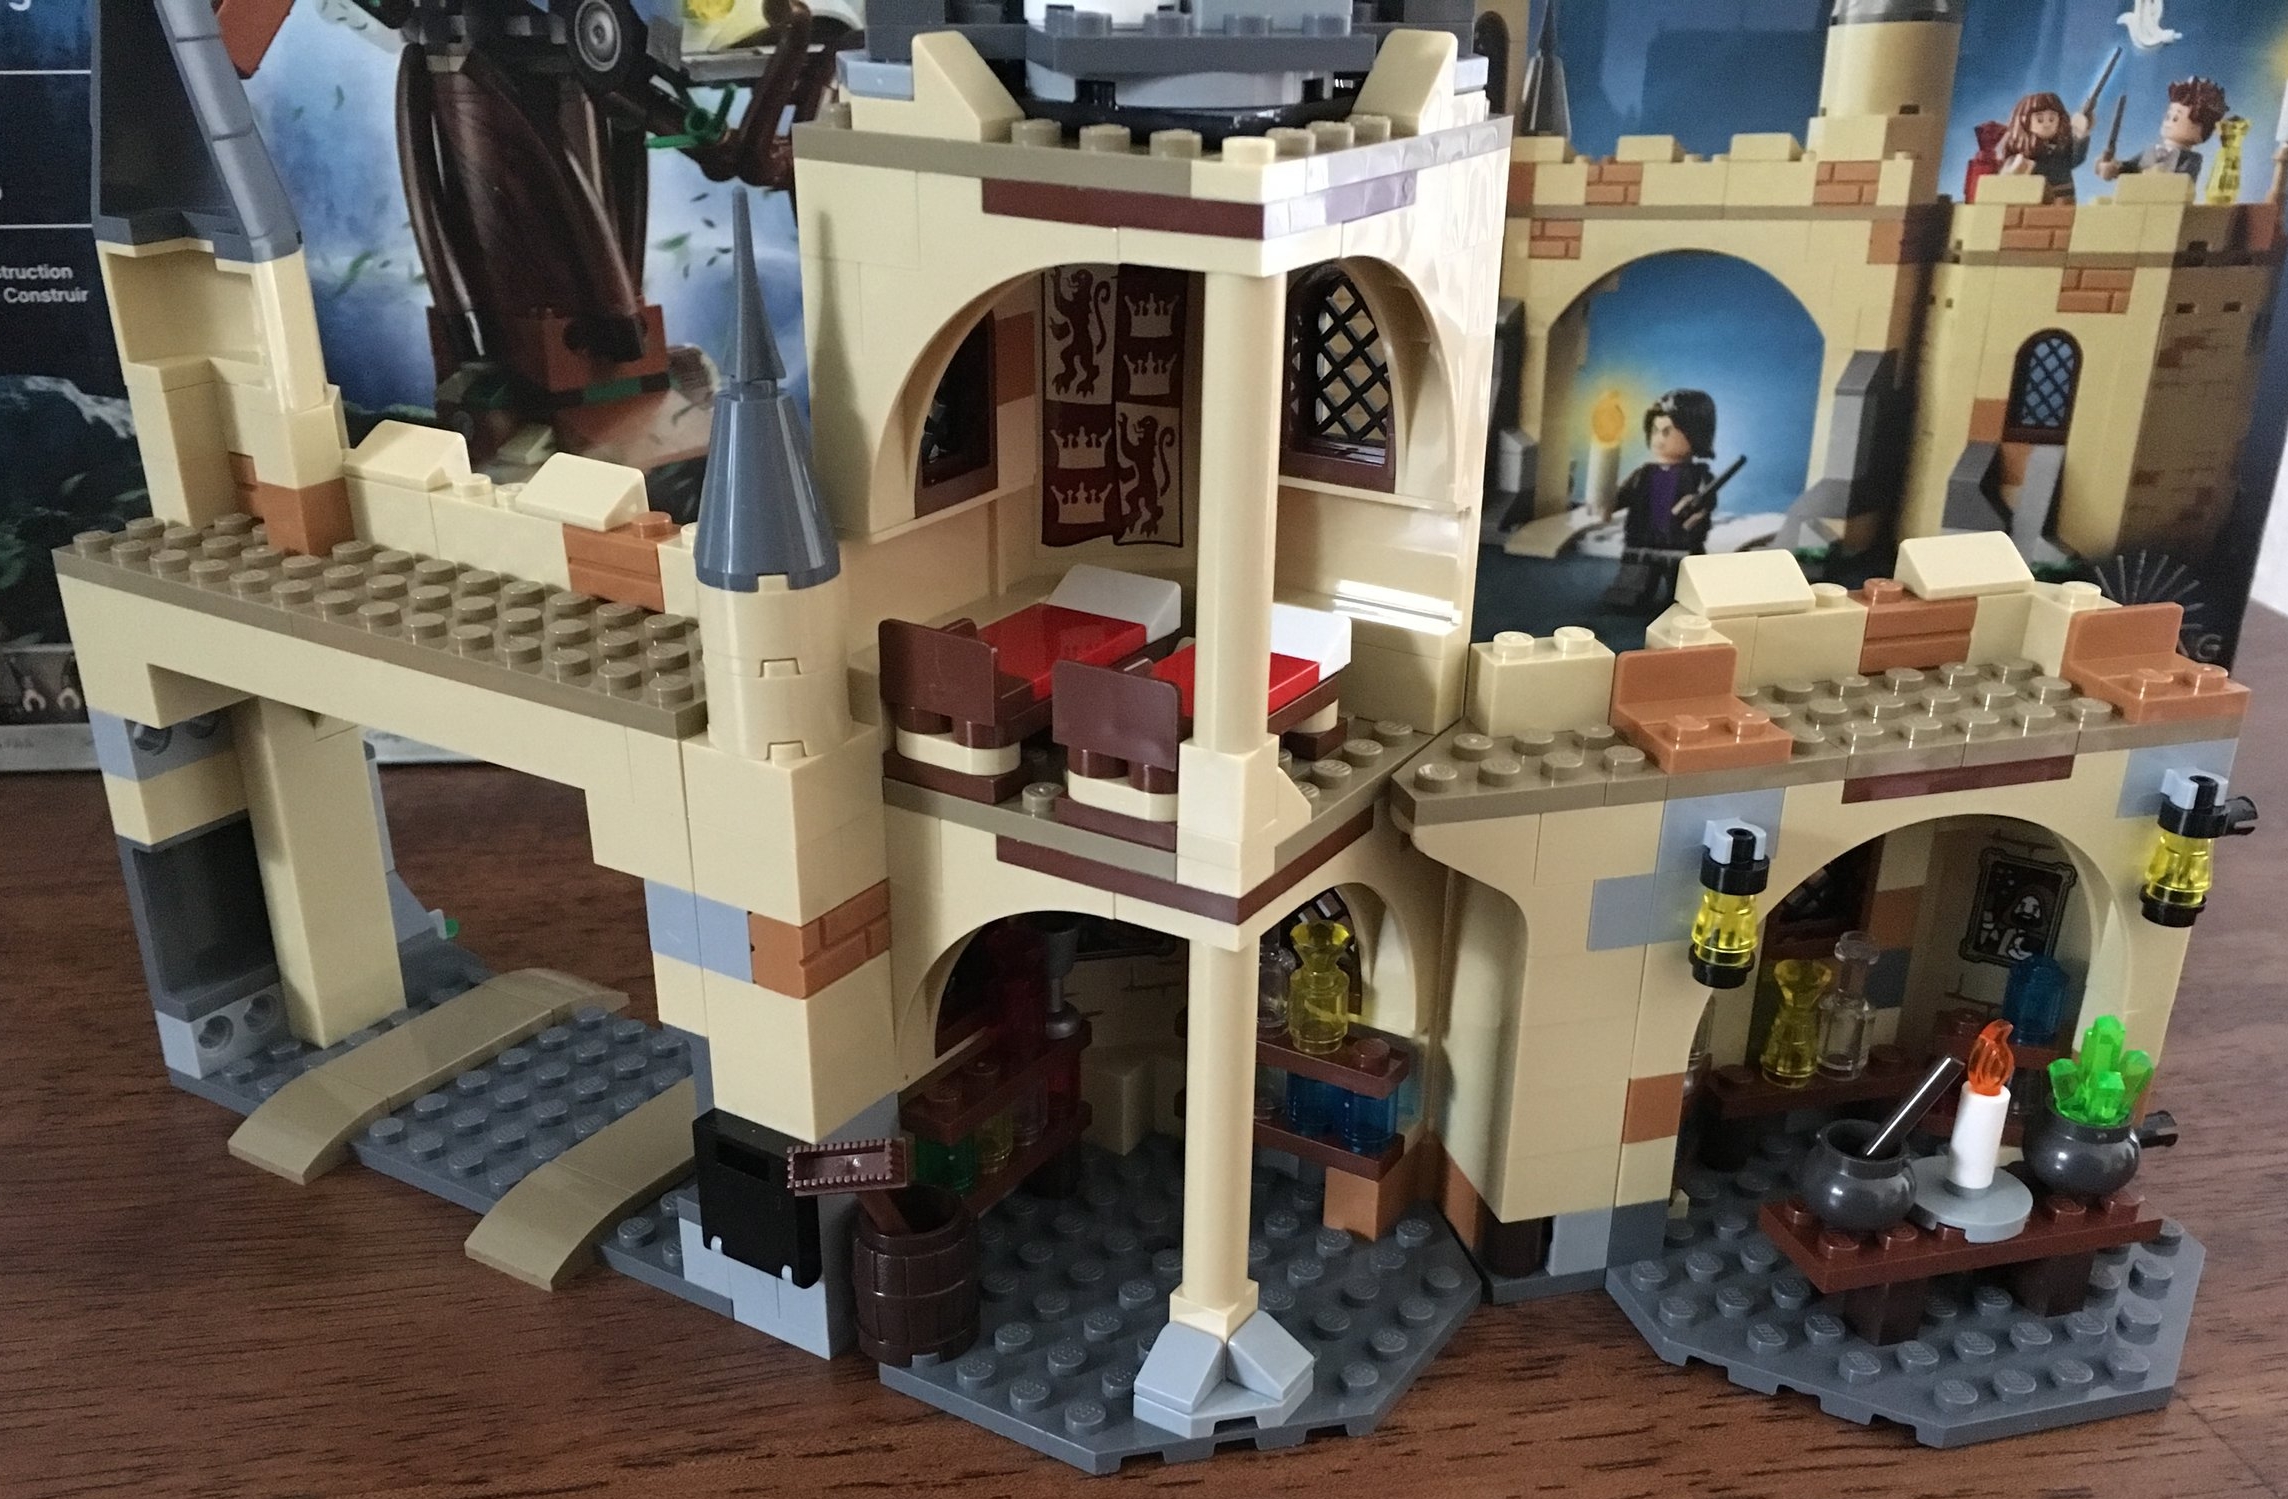
For play purposes, you can add this to #75953-1 - Whomping Willow as they are from the same movie. The Weasley family car plays a big part in the scene in the Enchanted forest with Aragog.

75950_build.jpg

Overall, it is not a bad set. Considering the piece count, you get a bunch of details and 2 minifigures. It’s under $0.10 a piece which is good considering it is a licensed set and if you pick it up on sale, even better. Definitely shop around to see where it is cheapest. If you’re a Harry Potter fan, I would look to add this one to your collection.

What are your thoughts?

Set Review - #75953-1 - Hogwarts Whomping Willow - Wizarding World - Harry Potter

I reviewed the collectible minifigure series and some Brick Headz for the Wizarding World of Harry Potter. Now it’s time to look at one of the sets that was released. #75953-1, Hogwarts Whomping Willow is a recreation of a scene from the movie “The Chamber of Secrets” where Ron and Harry are in Ron’s family’s car on their way to Hogwarts. They end up landing in the tree and the tree seems to get upset that they are there (this shouldn’t be a spoiler, the movie and book have been out for a while). Anyways, this set was released on 24 August 2018 in the US. It retails for $69.99, but Amazon.com had it on sale for 15% off or $59.68. It has 753 pieces and 6 minifigures. If you get it at full retail in the US, it works out to $0.093 per piece so not too bad for a licensed theme.

The box front is pretty standard. It shows the whole set, provides details about age, set number, title, and number of pieces, shows the minifigures in the set, and has a picture of the actors from the movie. The back shows the play features of the set and how it was made to be connected to set 75954-1 Hogwarts Great Hall.

75953_boxfront.jpg
75953_boxback.jpg

The contents of the box are 5 bags of bricks, 2 instruction booklets, and a sticker sheet. I’m not a fan of stickers, but they aren’t tiny so while the sheet is bigger, it’s not a lot of stickers.

75953_contents.jpg

Bag one is the Weasley family car and minifigures for Ron and Harry. The build is pretty simple. The doors swing open and so does the trunk. The trunk fits 2 minifigure suitcases. Since the minifigs have the shorter legs, they can’t actually sit in the car. So Ron has to stand to drive and if you position them correctly, you can fit the 2 minifigures in the car at once. And just for reference, bag 1 includes a piece separator.

75953_bag1.jpg

Bag 2 builds the Whomping Willow itself. The build starts with the base that has Technic elements. I wasn’t expecting that, but it made sense as it went on. The Technic elements allow you to rotate the tree similar to how it moves around in the movie. The branches of the tree can be re-positioned as well. I’m not a huge Harry Potter fan, so I can’t tell you the significance of the door underneath the tree, but I do recall it being used in one of the movies to go somewhere. I think the tree itself lacks detail, but the LEGO designers probably had to do a cost-benefit analysis to determine if it was really worth it to put more effort into making the tree look more realistic versus increasing the price with more pieces. The tree does hold the car for play purposes although there are some green flower stem pieces that do not stay in real well.

IMG_6284.JPG

The third bag builds what I think is Gryffindor tower. Maybe… It includes a sleeping area, an area on the bottom floor that is (I’m not sure), and then space in the tower at the top where Hedwig is placed in the instructions.

75953_bag3_front.jpg
75953_bag3_back.jpg

The next bag adds a potions mixing room and an outdoor walkway area. These areas attach to the main area with Technic pins. While I’m not a huge fan of this part of the build, I realize that this set is meant for play and not detail. For a detailed set, I should probably buy Hogwarts Castle (#71043). For play features, I think this set is fine.

75953_bag2_front.jpg
75953_bag3_back.jpg

Bag 5 completes the build. It adds Professor Snape and his office. Considering the size of the set, I think the designers packed some good details into this area along with some fun pieces to include potion containers, a lamp, and a copy of the Daily Prophet.

75953_bag5.jpg
75953_office.jpg

Here is the final set with all of the minifigures. It has some great play features, a lot of great pieces, and I like how the set can connect to 75954. If you’re a Harry Potter fan, I would pick this set up if you can find it at a discount like I did. As Christmas approaches, it might come down even more so watch for it.

75953_final.jpg

The minifigs are (top to bottom, left to right) Professor Snape, Filch, Seamus Finnigan, Ron Weasley, Harry, and Hermione. They all have dual faces, but I am only showing one side on this review. Except for Filch, everyone has a wand. Filch has a lantern which is cool looking, but about half as tall as he is. The 4 students are all shorter minifigs. Hermione and Seamus have on their uniforms, but Harry and Ron are in their street clothes. I don’t own any of the old Harry Potter sets so I don’t have much to compare these to, but I’m impressed. In my opinion, they resemble the characters from the movie pretty well.

75953_minifigs.jpg

I have never read the Harry Potter books, but I have seen all of the movies. I enjoy the plot line and while I’m not a super fan, I find it entertaining. I never purchased any of the older releases, but this release impresses me so far. While it is not the most detailed build, it lines up fairly well with the movie. If anything, I think the pieces included are good and can be used for other builds if you want to take this one apart. The minifig selection is good for this set with 6 included and the stickers aren’t too daunting. Overall, I call this one a buy if you are a Harry Potter fan.

Sustainable Bricks

LEGO bricks are made out of plastic which comes from oil that is removed from the ground after it is refined. And that’s about as technical as I’m going to get… I applaud the LEGO Group and their efforts to move away from oil. When your main product is derived from oil, it puts a lot of pressure on to make changes and LEGO has done it. Set 40320, Plants from Plants was released as a promotional set back in August.

40320boxfront.jpg
40320box_back.jpg

It included 29 pieces of foliage made from sugarcane. I realize I’m a bit late in reviewing this set, but I had to do it because I was a bit skeptical. LEGO has high standards on quality and I wasn’t sure if they’d hold up to those standards.

40320_pieces1.jpg
40320_pieces2.jpg

LEGO proved me wrong. I am impressed that the pieces feel the same and look the same. I am unable to see any major differences and I don’t see any issues with quality. I guess the real test will be to see whether they hold up over the years like the plastic pieces do.

It looks like LEGO is going to start rolling this material out into sets too. The Vestas Wind Turbine (#10268) being re-released this November (2018) is reported to have some plant based plants too. I’m guessing we’ll see more appear as TLG continues to produce them.

Bravo to The LEGO Group for following through this this initiative!

Set Review - #75192 - LEGO Millennium Falcon - Star Wars - Ultimate Collector Series

You can see part 1 HERE.

Part 2 - Assembling the Ship

Time to put it together.  As mentioned in part 1, there are 17 sets of bags.  Normally, I take pictures after each step, but this time I did not as if you want a really detailed review, you can go to some of the sites where they analyze by pieces, build techniques, and differences between other LEGO Millennium Falcon sets.  My plan is to cover the high points and then give my opinion at the end.

The set starts with construction of the internal substructure.  There are many Technic pieces and pins put together to form a pretty solid skeleton for the ship.

75192_bag2.jpg

Next up was the addition of the... okay, I'm not an official Star Wars fan... are they legs?  Feet?  Stands?  Whatever they are called, you build a bunch of the same assembly over and over to make the legs.  

75192_bag3.jpg

I skipped a few pics to show the assembly of the skeleton with the legs and the internal rooms.  The rooms themselves were all attached via Technic pins.  This was a bit challenging as there are a ton of holes where you could insert pins, but we ended up getting them right.  Once you find the right positioning, they are easy to install.

75192_bag4.jpg

I'm not going to spend a ton of time here, but here are the 4 rooms up close for your viewing pleasure.

75192_room1.jpg
75192_room2.jpg
75192_room3.jpg
75192_room4.jpg

Next up, the back gets it's shape.  The Falcon does not have a standard shape so I was curious how the designers made all of the curves.  The next bag helps to get the unique shape started.  It also adds the engines in the back with the use of some light blue colored tubes.  You probably could have done the engines with translucent blue pieces too, but the tubes work just fine.

75192_bag5.jpg

The shape of the front comes out next.  What I found most interesting about this part of the build was attaching all of the random nick-knack pieces to create the detail on the outside of the Falcon.  A lot of this portion of the build was attaching these pieces to the outer frame.

75192_bag9.jpg

Next up is attaching the bottom of the ship.  I didn't flip it over to take a picture because it was just too challenging to do so given that there aren't a lot of good ways to hold onto the unfinished top.  

75192_bag10.jpg

Okay so the next 2 pictures aren't super exciting, but let me explain the first one.  The first one is a picture of the ramp.  The design is pretty complicated, but very impressive.  One reason... you build it outside of the ship and then attach it to the frame.  Another reason, it doesn't require a locking mechanism to stay down or up.  It's designed to stay up or down without any switches or locks.  Pretty cool in my opinion, but maybe I'm overly geeking out over this part.  The second picture is just the ship with the bottom completed and the top on the front started.

75192_ramp.jpg
75192_bag11.jpg

Now for attaching the top.  Again, the pieces are built off of the ship and then attached after the fact.  Most of them are pretty easy to attach although I had trouble attaching a few as there wasn't an easy spot to hold onto the frame to snap some of the sections into the frame.  The ones shown in pictures 1 and 2 are permanently attached versus later on in the build where sections can be removed to see the internals in pictures 3 and 4 below.  

75192_bag12.jpg
75192_bag14.jpg
75192_bag13.jpg
75192_bag15.jpg

Almost there... next up is the cockpit.  I found it impressive that the hallway leading to the cockpit does not lock into place via studs or Technic pins.

75192_bag16.jpg
75192_cockpit_close.jpg

Whew!  All done!  I didn't record how long it took me to do.  I also didn't take a separate picture of the minifigures.  You can look them up elsewhere if you want to see them in detail.  

75192_final.jpg

Congrats if you scrolled down this far... I realize I'm not the first one to post a review, but one more opinion doesn't hurt.  Should you buy this one?  It's pretty pricey.  The price per piece is decent and the build experience was fantastic (in my opinion), but you have to weigh whether you want to spend $800 (or more with tax) if you buy one of these.  Also, you have to decide what to do with it when you are done.  Do you have space to display it?

I enjoyed the build and am glad I bought it.  I was financially able to using some VIP points and profits from my store so it didn't hurt my wallet much.  If you are in a position where you can do it, go for it!  If not, there are a few other options.  You can use one of the various brick rental services on the web.  I have never used one, but it allows you to build the set at least.  Another option is to team up with some friends to build it all together after you each pitch in.  What do you do with it when you're done?  I'm not sure...

What are your thoughts?  Are the costs worth the build?  Should LEGO stop making such huge models that price a lot of fans out of the market?  Leave a comment and let me know what you think or send me an email at store@bricksforbricks.com.

Set Review - #75192 - LEGO Millennium Falcon - Star Wars - Ultimate Collector Series

Part 1 - Unleashing the Falcon

You can see part 2 here.

It's been a bit since I've posted because I broke down and bought the LEGO Millennium Falcon.  I had $155 in VIP points and I used EBates to get another $20 back.  Besides the discount I also got a Darth Vader Pod polybag (#5005376-1).  I ordered it from LEGO Shop at Home, but at the time of ordering it in early May 2018, it was also available at Target, Walmart, and Amazon.com in the US.

LEGO Shop at Home shipped it off pretty quickly and I got a notice from FedEx that we would have to sign for the package.  I think this is the first ever LEGO order that someone had to sign for.  The email I got said that the package would be 34 pounds.  Whoa!  Here it is:

FedEx_Box_75192.jpg

Like many of the other big sets these days, the LEGO Group has packaged the set inside another box.  The first time I saw this was in the Porsche 911 GT3 RS (#42056).  It is a great way to protect some of the sets that cost a bit more.  If you're going to put a bunch of money into a LEGO set, it had better show up in pristine condition.  This set up helps to make it happen and I'm glad the LEGO Group made this change to their product.

75192_inner_box.jpg

The inner box had a few labels.  Of note to me was that this set was made in April of 2018 and I purchased it in early May 2018.  Considering the LEGO Group's trouble in keeping up with demand for this set, they definitely made up for it with some sped up production.  Also of note is that this set was made in Mexico which I'm pretty sure most sets sold in the US are made there.

75192_tag.jpg
75192_tag2.jpg

Here are some pics of the set box itself.  The front shows a good illustration of the set from Episode VI: Empire Strikes back with a Tie Fighter and Cloud City.  On a side note, there were rumors about this set on other earlier sets and there have been a lot of rumors about a Cloud City set coming out.  Could this picture be a rumor for it?  The back side shows the set itself with some of the details.  

The sides have a schematic, the minifigures, and the other side has a picture of the set with a write up about the set itself.  

I included the top just because.  Nothing really special there.

75192_box_front.jpg
75192_side1.jpg
75192_top.jpg
75192_box_back.jpg
75192_side2.jpg

Inside the big box are 4 smaller boxes with some Falcon art and a few quotes from the movies.  I did some reading of other reviews prior to building and learned that you have to open them all to sort out the bags.  I opened them all and with my helpers, sorted bags 1 through 9.  We put 10 through 17 back in the boxes for later.  I didn't take a picture of all the contents like I usually do because of lack of space to take a giant picture with all of the bags.  I think everyone gets the idea anyway.

contents_75192.jpg

A set this big and they had to include a sticker sheet.  Thankfully there are only 12, but still for the price, couldn't they have printed on the stickers?  Most are fairly small and easy to put on, but the big label is a pain as you'll see.

75192_stickers.jpg

Okay so there is the opening... next up will be the build.  I was up against a move so I had to get it built quickly.  Thankfully a friend and 2 of his boys pitched in to help and made sure we could get it done beforehand.  The build will be up next so stay tuned...

Set Review - #60169 - Cargo Terminal - LEGO City

I don't review a lot of LEGO City sets as they tend to repeat.  The fire fighters, police cars, and others tend to repeat every year.  The cargo theme along with a few others, tend to repeat less often.  I saw #60169, Cargo Terminal come out and was interested.  It originally came out on 27 May 2017. However, the original retail price is $79.99.  With 740 pieces that comes out to $0.108 per piece.  I found that to be pretty high, but thankfully I picked it up on Amazon.com for 20% off for $63.99 or $0.086 per piece.  So definitely better.  Sadly, the set was only 20% off on Amazon.com for a small amount of time.  Keep watching it though and it may come back.

Onto the review...

The set box is similar to most city sets.  The front shows the full up set.  The back shows the play features along with the standard minifigure that is saying "Hey!"

box_front.jpg
60109_box_back.jpg

The contents include 8 parts bags numbered 1 through 8 to go with the instructions.  Bag one includes a piece separator as you can see in the picture.  There are 5 instruction booklets and then a sticker sheet.  Thankfully the stickers are mostly license plates and a few others so it's not a massively stickered set like some in the past have been.

60109_contents.jpg

The first bag is a forklift.  This is not the first appearance of a forklift in a City set.  It has been in the Cargo Terminal #60022 from 2013 and Cargo Truck #60020 from 2013.  This one includes a female minifigure, a hand cart to move things around and a small pallet with miniature LEGO sets on them.  These have appeared before to include in 2010's LEGO City Truck (#3221).  Not too much has changed on this forklift design although it is in red versus orange or yellow.

I pictured some of the extra small pieces included at the bottom of the photo for reference.

bag 1.JPG
60109_bag2.jpg

The second bag is a crane that has a movable arm.  That is the arm rotates up and down but the hook part does not move in and out of the arm.  The hook attaches to a crate that you build in yellow with the LEGO logo stickers on either side.  The forklift can load the pallet of LEGO sets into this crate.  The set includes 3 other crates that can be picked up with this crane.

The third bag is the start of the truck to carry the crates.  Nothing too special about this part of the build.

60109_bag3.jpg
60109_bag4b.jpg
60109_bag4a.jpg

Bag number 4 completes the truck.  It comes with a driver who has a beverage and one crate with a mini-jet ski or similar type item in the crate.  The truck has room for 2 crates in total.

The fifth bag is a trailer that attaches to the truck to carry additional crates.  This allows you to load all of the crates that come with the set onto the truck.  Nothing too impressive about this build.  My only complaint is that the front axle has a ball attachment to the back of the truck and then the axle itself is on rotating plates.  When you attach it to the truck and have it turn, it can over spin.  I would go with either the ball attaching to the truck or the rotating axle, but not both.  Too be fair, it doesn't take away from the trailer or the set that much... it's just a nit picky complaint that I have I guess.

60109_bag5.jpg
60109_bag6.jpg

The sixth bag is 2 additional crates.  One has a small four-wheeler and the other is... um... maybe a snow plow that is supposed to attach to a larger truck?  I'm not really sure.  You could pretend it is a number of things I guess.  The crates are built similar to the others where the fork lift can lift off the cargo and the crane can pick up the crate itself.

The seventh bag is a small hut that could be the entrance to the cargo area.  There is a female minifigure that sits inside with a coffee maker, some cookies, a camera with a view of traffic, a wrench, a walkie talkie, and a barrier arm that swivels up and down.  Like many City sets, this leaves a bit to be desired with no back wall to the building and not a lot else to it.  It's sets like these that I enjoy because I can then use my own pieces and parts to expand upon them to make them better.  Also, it can be a good addition to a larger cargo yard that you are building.

60109_bag7.jpg
60109_bag8.jpg

The eighth bag is a rack where the forklift can place the pallets.  There are four slots for the 4 items with the set.  As mentioned with the building, the shelving could stand to be expanded, but that's where your imagination can come into play.  It's a good start to what could be a larger cargo yard.

Here is the entire set.  In my opinion, it's a great set.  There are lots of play features, there is room for expansion, and it's not a repeated City set that you see re-hashed every year.  Definitely a good set for a kiddo or for a nerdy adult like me who builds city scenes with LEGO bricks.  Look for the opportunity to get this on sale.  In early May 2018, the set is around 19% off on Amazon.com in the US.  LEGO seems to add to the cargo theme every few years versus annually so if you can't get this one, you'll have to wait a few years.

Happy building!

60109_final.jpg

Set Review - Series 18 Collectible Minifigures - #71021

The 18th series of collectible minifigures were released in the US on 1 April 2018.  There are 17 minifigures in this series and they retail for $3.99 in the US.  After the Ninjago movie minifigures and the second set of Batman movie minifigures, I am glad to have another original, creative set.  This series is being released along with the 40th anniversary of the minifigure so there is a party theme to celebrate.  So here they are...

The first four minifigures are costumed with tails.  The cowboy has the back half of the horse that he's riding.  The unicorn and cat just have tails.  The dragon has some impressive wings and horns on the back as well as a tail.  In keeping with the Batman Series 2 minifigures, these also all have orange base plates to stand on versus the standard black base plates in many of the past series.

series18_1.jpg

The next four all have some impressive costumes.  The first is a spider.  He has a pretty impressive spider on his back and is holding a small spider.  The next is an elephant with a tutu.  She is next to a mouse and has an alternate face where she is pretty shocked to see the mouse.  I'm a big fan of the cactus.  If you have never seen an actual Saguaro cactus up close, they are pretty impressive and some get rather tall.  I think this minifigure costume is a good representation.  Next is a firework of some sort.  The sun glasses definitely add to the costume.

series18_2.jpg

Here are four more party minifigures.  The first is a clown that makes balloon animals.  There are two balloon animals and the scale and accuracy of each were well done by the LEGO designers.  Next up is the blue brick girl.  Along with the red brick guy, they were the most numerous in the orders that I placed.  The last one to mention is the flower girl.  There's a flower costume hat and a pot to go around the pants.  This one is definitely outside the norm for what LEGO creates and I'm a fan.

series18_3.jpg

Next up are two with some bigger pieces that are quite different from the past 18 sets of minifigures.  First up is a guy popping out of a cake.  He is a full minifigure and just fits in the larger cake piece.  The splashes of frosting on his shirt are a nice touch and the gold party hat helps too.  The next one is a race car driver.  He has some creative patches on his shirt and the car looks like it could be a part of the Speed Champions line.  

series18_4.jpg

Finally there is a boy who is a party attendee.  He is holding a balloon and has a gift that includes some past LEGO collectible minifigure bags.  Then there's the original LEGO policeman minfigure from back in the day holding the original set he came from.  I ended up purchasing 3 orders of 17 from LEGO Shop at Home (they only allow you to purchase 17 per order) and I only had one of the policeman minifigures.  There is a girl to attend the party too, but she did not come in the first 51 minifigures I ordered.  If I get her later, I will add her picture to this post.

series18_5.jpg

I was about to wrap things up with this post and then had to save it as a draft.  In the meantime, another order of series 18 minifigs arrived and the party girl showed up.  She is similar to the party boy only she has a purple party hat and balloon.  Her gift is full of 1x1 round tile sweet treats.  

It took 4 orders of 17 minifigures from LEGO to get all 17 minifigures.  I'm thankful to have a store to sell the extras in otherwise this method is not the way to go to collect these.  With that being said though, this series is awesome.  These are some great minifigures that were creatively designed.  If you're a collector of these, I recommend picking these up over some of the past licensed minifigure sets.  

series_18_party_girl.jpg

Set Review - #21039 - Shanghai, China - LEGO Architecture

I don't review too many of the Architecture themed sets, but here are a few I've done in the past if you are interested:

#21023 - Flatrion Building, New York
#21031 - Burj Khalifa, Dubai, UAE

This review is of one of the Architecture skyline series within the Architecture theme.  These skylines were started in 2016 with New York City, Berlin, and Venice.  2017 had Chicago, London, and Sydney.  2018 brought this set and will have Las Vegas which was delayed due to it's inclusion of the Mandalay Bay resort and casino and a forced redesign after tragic events that happened there a few months back.

This set is the first in Asia and my guess is it is an attempt to garner support from the huge market in Asia and China.  It was released in the US on 1 January 2018.  It contains 597 parts and retails in the US for $59.99.  That works out to $0.10 per piece.  I purchased the set for $47.99 from Walmart which works out to $0.08 per piece.  As of the writing of this post (early April 2018), the set is on sale for 20% off at Amazon.com and Walmart in the US.

Onto the review... The box looks much like the other Architecture sets.  Set on the front and then description of buildings on the back.  It opens the same way as the others too.

21039_box_front.jpg
21039_box_back.jpg

The contents are 6 bags, an instruction booklet, and 2 flex rods not in bags.  The instruction booklet has some great pictures of the actual city and some descriptions of each of the buildings.  After the English version it goes through the same in Spanish and French.  I'm kind of a fan of the unmarked bags.  You have to find the pieces versus opening bag 1 and then 2 and so forth.  It makes it more of a challenge to build.

21039_contents.jpg

The first part of the build is the base.  I am a fan of how it's built.  Some of the past Architecture builds I have done have just had a rectangular base.  I like how this one has a rounded part and isn't symmetrical.  

21039_base.jpg

The part of the build includes the Chenghuang Miao Temple, Longhua Temple and Pagoda, Radisson Blu Hotel (in the back), Bund area, and the Oriental Pearl.  The first 2 older buildings would be really awesome to build on their own in a larger scale, but I can't see LEGO building them.  The Bund area is designed pretty well considering how small of a scale it is shrunk down to.  The Radisson in the back isn't all that exciting.  I'm not as familiar with the city, but I would think they could have picked a better building.  

21039_left.jpg

The buildings on the right side are much more impressive in my opinion.  The Oriental Pearl is definitely an interesting design and the LEGO designers did a good job scaling it down.  The World Financial Center is another good build and if anything the brick color is great.  The final building is the Shanghai Tower.  The use of the Technic 3x3 half beam curves and the flex tubes to create the curved shape is an ingenious technique.

21039_right.jpg

Here's the final set.  I think it looks great.  I do think it's overpriced at the retail price so grab it at 20% off from Amazon.com or Walmart if you can.  If you're a fan of the Architecture theme or the skylines, I would definitely add it to your collection.  It's a great build and it comes with some great pieces to use elsewhere too.  What are your thoughts?

21039_final.jpg

Set Review - #10260 - Downtown Diner - Creator Expert

Thanks to the LEGO Group for producing another modular building.  WHOOHOO!!!  I'm always excited to buy, build, and review these sets.  You can see past reviews here:

#10255 - Assembly Square
#10251 - Brick Bank
#10246 - Detective's Office

The Downtown Diner was released on 1 January 2018 in the US.  It retails in the US for $169.99.  With 2,480 pieces, it works out to $0.069 per piece.  Not too bad.  You can see the LEGO Designer video on YouTube here.  Onto the review!

Here's the box...

10260_front.jpg
10260_back.jpg

This set contains 5 sets of parts bags, an instruction booklet wrapped in plastic, a tan 32x32 stud baseplate, and 4 gray 8x16 plates.

10260_contents.jpg

The first bags start the first floor and include an orange piece separator.  Lots of 2x2 tiles to lay down and a black and white pattern that looks pretty cool once its done, but takes a bit to install.  The details for the diner itself start to appear here with a table and booth with ketchup and mustard on the table, a juke box, and a gumball machine.  The short order cook is in this set of bags.  His cooking area has what appears to be some bacon cooking on his cooking surface.  This set also includes the start of the stairs that go up to the upper levels.  

Not much to talk about in the back.  There is a trash can and a brown square container out back.  Other than that, it's pretty plain in the rear of the building.

10260_bag 1a.jpg
10260_bag 1b.jpg

The second set of bags completes the first floor.  It includes the waitress minifigure on skates serving some ice cream.  There are some pancakes to cook on the griddle and on the table.  The bar is completed with a soda machine with 2 flavors.  The stairs to the next floor are finished and there's a light at the top.  Also, what stands out to me is the clear window design on the front with it's nicely designed curves.  The "DINER" sign in its bright pink is also pretty impressive.  

IMG_5079.JPG
10260_bag2b.jpg

Here's a close up of the first floor diner.  You can see the coffee maker on the left, the grill with its bacon and pancakes and the hood above it.  There are some pictures on the wall in the back and on the right.  Some of the accessories include 2 coffee mugs, a camera, a frying pan and knife for cutting, the plate of pancakes, and the ice cream that the waitress is carrying.

10260_floor1.jpg

The third set of bags completes the second floor which is a fitness center.  The front of the building has the teal green rounded bricks surrounding the clear windows that goes from the bottom of the floor to the top and eventually connects to the next floor. 

The back doesn't have too much other than a fun stairwell that curves up.

10260_bag3a.jpg
10260_bag2b.jpg

Here's a closer look at the inside of the second floor.  You can see a boxing ring, a punching bag, a bench with a bar and weights, some dumb bells, and a water cooler.  This floor contains 2 minifigures which are a male boxer with boxing glove hands and a female in a light green workout outfit.

10260_floor2.jpg

The fourth set of bags completes the third floor.  This floor is a music recording studio.  There's a recording area with a sound room, a mixing station, and a waiting area with a fancy chair.  There's also a small porch where the picture shows a female minifigure standing out on it.  

My favorite part is the front of this floor.  It continues the windows from the previous floor and the very sleek teal green design that surrounds the windows.  It culminates at the top with a curved half-circle teal green part.  

10260_floor3a.jpg
10260_floor3b.jpg

Here's a top view of the floor.  The recording studio is on the right side of the picture with the sound booth on the bottom of the picture and the mixing board on the top.  I like the use of the steering wheels to make the speakers in the mixing area.  The recording area is pretty detailed with some sound dampening materials and a microphone.  The wall has a picture of an album along with a gold record.  The rest of the room looks more like a waiting room.  There's a table with two glasses and a drink pitcher, a lounge chair with a table, and 2 rugs on the floor.  One of the windows has an air conditioner in it (on the left side of the picture) which is similar to the second floor.

10260_floor3c.jpg

Now some views of the top of the building.  The left side has a skylight window that can be propped open or closed.  There is a ladder that to climb up to the roof as well.  On the right side of the picture, you can see an antenna (or is it a lightening rod?).  The details on the front were rather simple to build, but still quite detailed like many of the other modular buildings.

10260_top1.jpg
10260_top2.jpg

This set includes a car.  Other modulars include a car to include the Palace Cinema and the Fire Brigade sets.  This one is pink and looks to be maybe 1950s or 1960s style (I'm not a car expert so someone correct me).  It has space for 3 minifigs and has some decent detail to it.  I like it!

10260_car.jpg

This set contains 6 minifigures and surprisingly they are somewhat controversial.  This is the first modular building to have minifigures with facial expressions, facial hair, and some even have dual faces.  Past modulars have been the standard 2 dots for eyes and a smiley face mouth.  Personally I am a fan of the change.  It adds more detail to the set and helps to make it more realistic.  I think it was a good move for LEGO to make the change.

10260_minifigures.jpg

Here are some final shots of the set.  First is from the front view, then from the left side, and then from back back.  This set can be placed on a corner in a city scene, but as you can see on the left side, the sidewalk just ends as it goes up some stairs.  Maybe it would be better next to a parking lot or another modular with a sidewalk there.

10260_final1.jpg
10260_final2.jpg
10260_final3.jpg

As already mentioned, I'm biased and I enjoy these sets.  So yes, definitely go buy this one if you are a fan of modulars.  They are fun to build and there are a lot of great pieces if you want to use them for something else.  While modulars are a bit expensive, you can wait to get them when you have VIP points or they have been discounting the retiring set on Black Friday over the past 2 years.  

Well done LEGO!  Another great set!

What are your thoughts?

Set Review - #21313 - Ship in a Bottle - LEGO Ideas

We're on the 20th LEGO Ideas set already.  Can you believe it?  Ship in a Bottle was released on 2 February 2018 in the US for $69.99.  With 962 pieces, this works out to be $0.073 per piece.  This is quite a different set from what LEGO has released in the past so let's take a look.  Here is the box, both front and back sides.

21313_front.jpg
21313_back.jpg

Instead of the box opening up from the sides like many sets do, this one opens up on the top.  It reveals an instruction booklet, 4 large clear pieces, and 4 sets of bags.  Numbers one and two are single bags, 3 has 3 bags, and 4 has 2 bags.  

21313_box.jpg
21313_contents.jpg

Bag one is the ship.  The build is very detailed considering how small it is and uses a lot of SNOT techniques.  There are a number of the teal colored pieces used, but they are hidden for the most part.  The cannon ports look pretty realistic considering how small it is.  There's a crows nest, a steering column, and a bridge area too.  Pretty impressive in my opinion.

21313_build1.jpg

Bag two is the bottom part of the bottle.  This part was surprisingly more challenging than I expected.  Mainly the bottom part uses all clear tiles and bricks.  It was a challenge to build in the same color for that entire part of the bottle (in my opinion).  The rest of the bottle wasn't too bad, but it was more fragile than I expected.

21313_build2.jpg

The third set of bags are 3 bags of 1x1 round translucent blue plate (there is probably a more technical term for these pieces so I'm sorry if I screwed it up).  The instructions say that you need to complete step 59 a total of 284 times.  I don't think I've ever seen a LEGO set have 284 steps on one page.  Thankfully it's easy to dump the pieces in.

21313_build3_instructions.jpg
21313_build3.jpg

The final set of bags completes the bottle and the base.  In the picture below you can see the top of the bottle.  It is pretty realistic looking and there is a 2x2 round tile with what would be a wax seal, but is printed with the initials of the LEGO designer who made the set (a nice touch in my opinion).

The base is also a great design.  There is a brick made compass below where the bottle rests, 2 globes on either side of the base, and the name of the ship which is Leviathan.  If you want to know where the name comes from, look up the philosopher from the 1600s named Thomas Hobbes.  He has a book with the same name.  My recommendation is to avoid the book and just build the set.

21313_stand.jpg

Here is the completed set.  I am very impressed with the final design and how it looks.  In my opinion, it is one of those sets that is worthy of display in your Brick Cave.

21313_final.jpg

Final thoughts... get this set!  It's another great model from the Ideas range and it's definitely worth it.  The build is challenging, there are some great pieces to use if you plan to build something else with the pieces, and it really looks impressive when it's done.  What are your thoughts?