SPACESHIP!!!!!!!!!!!! No, not that kind of spaceship. This one is different. And just to start… LEGO, I hate you! How did you know that I was a Trekkie as a kid and that this set would appeal to me. I don’t normally do this, but yes, I did buy this set on release day which was 28 November 2025. Yes, I paid the $399.99 for 3,600 pieces which works out to $0.111 per piece (yikes)! I did get the Shuttle Pod GWP and I may sell it so that could help lessen the price (maybe).
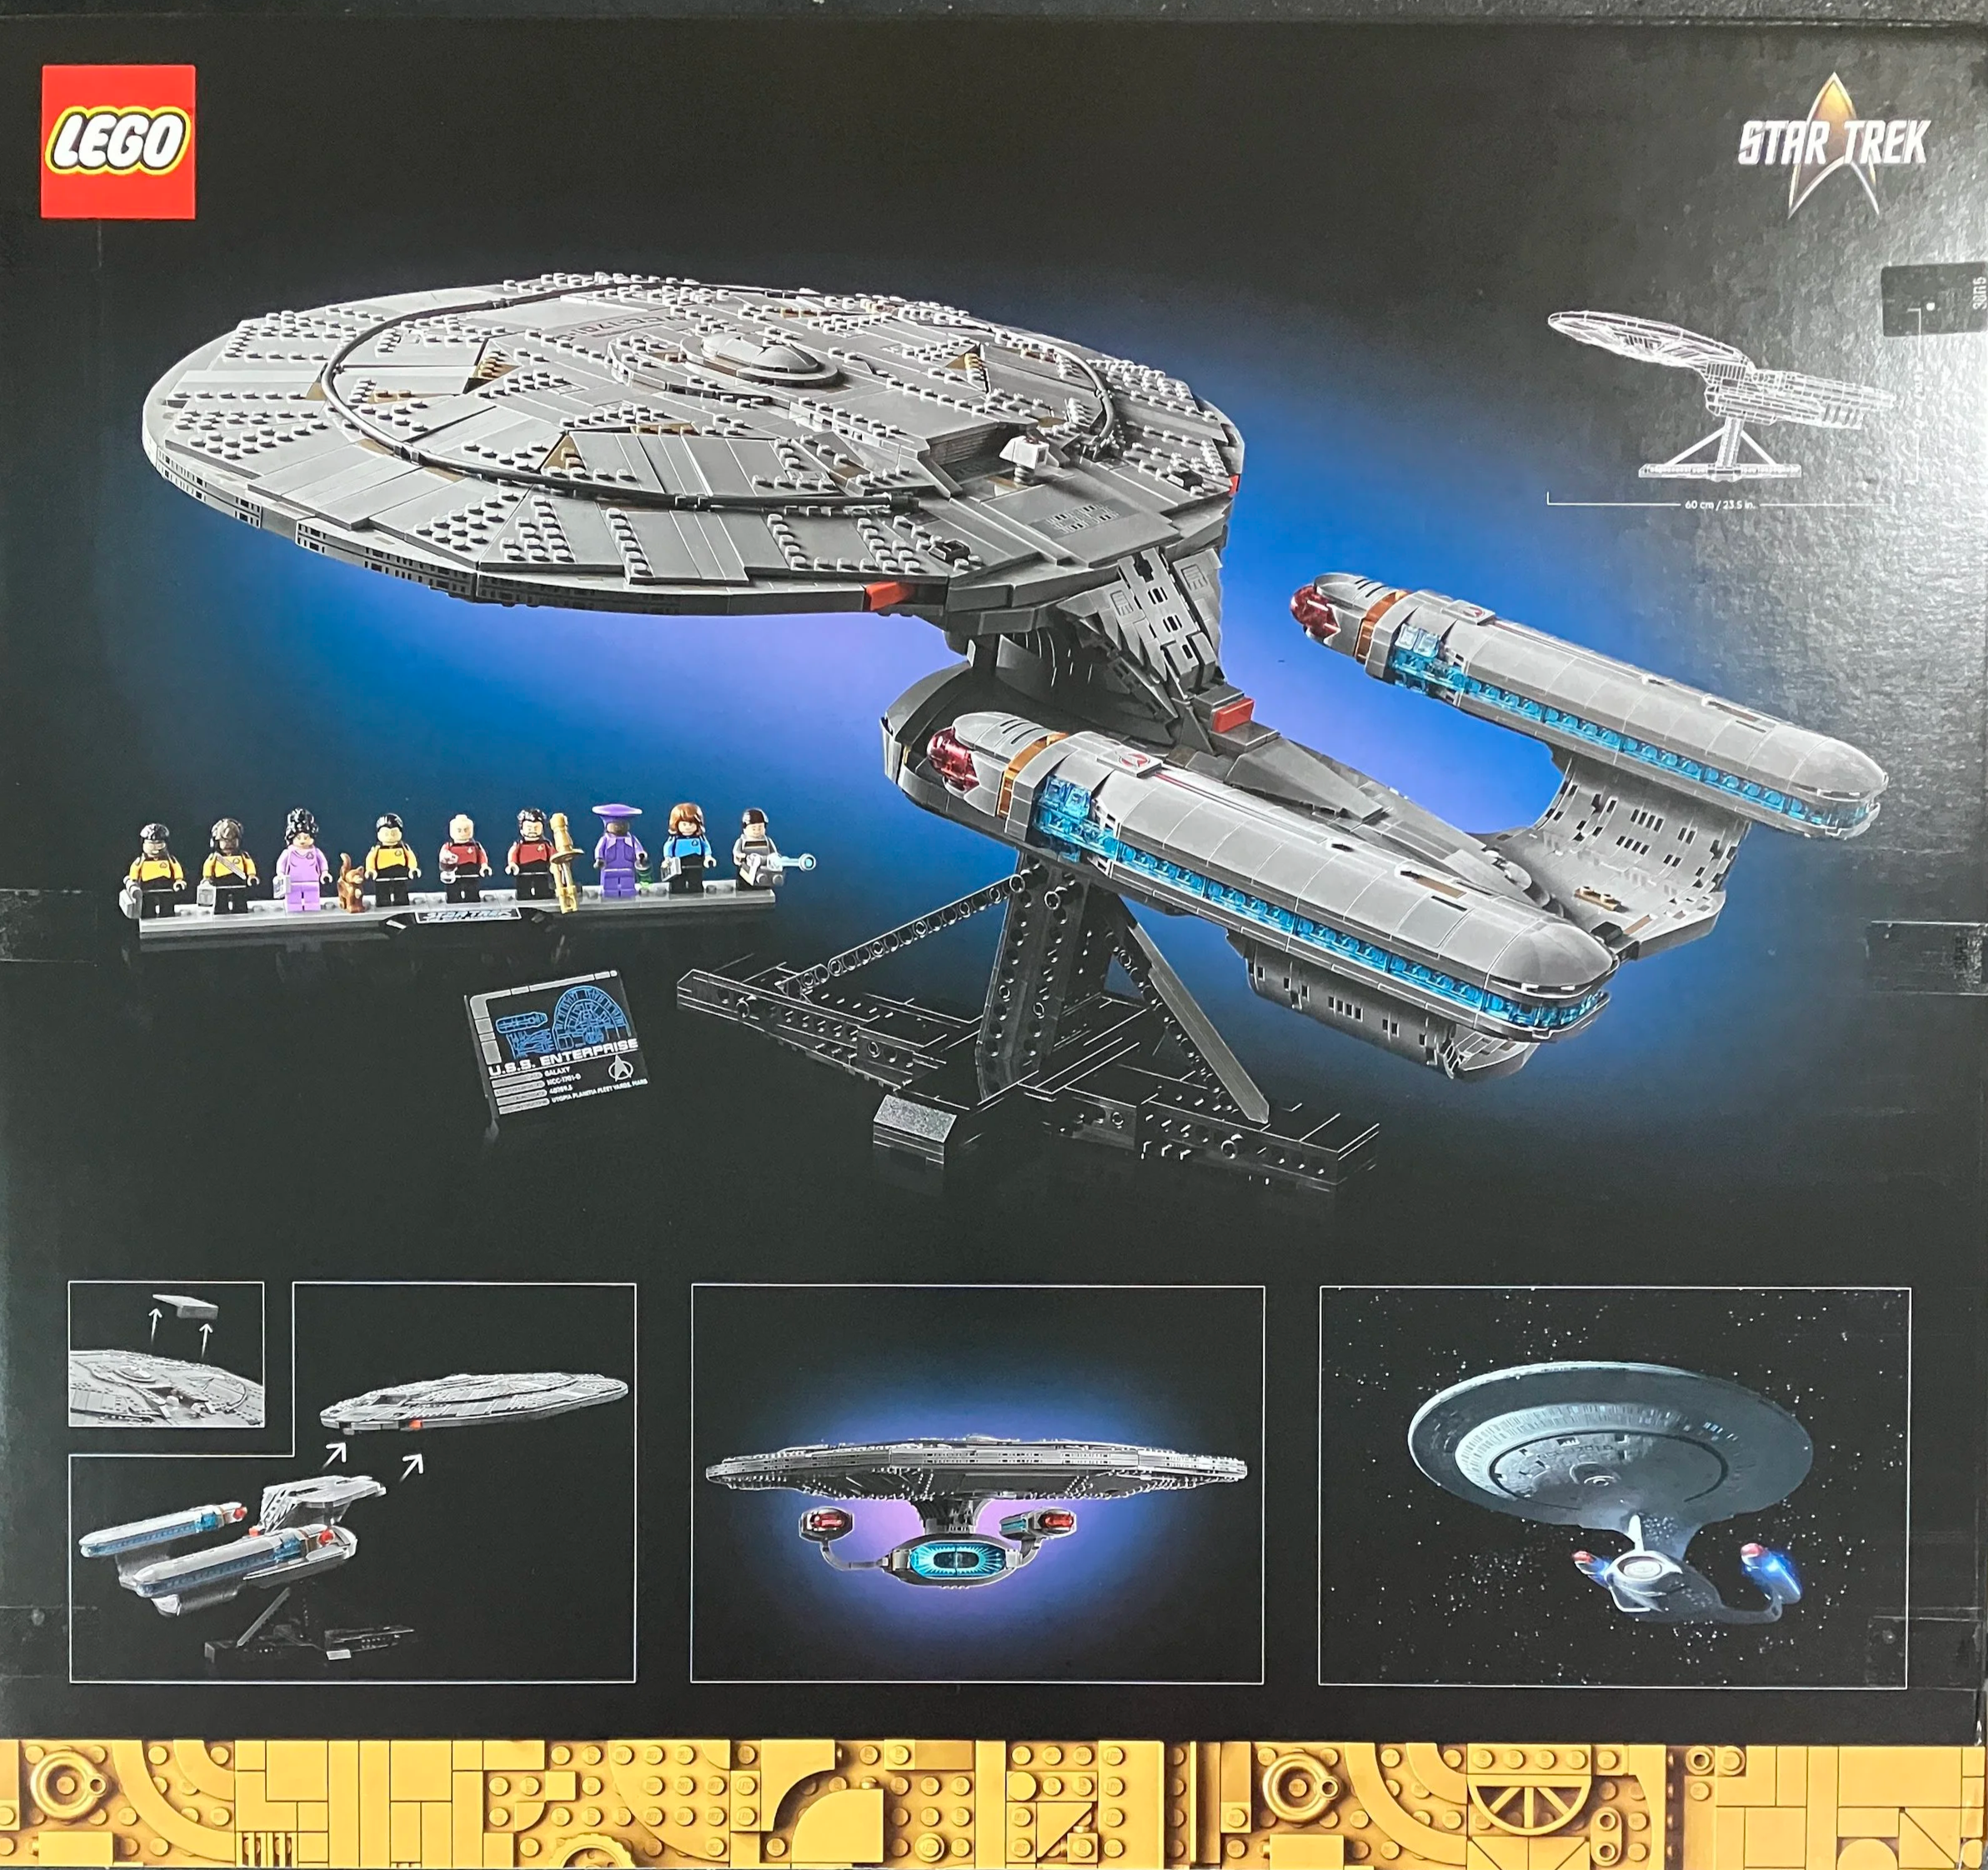
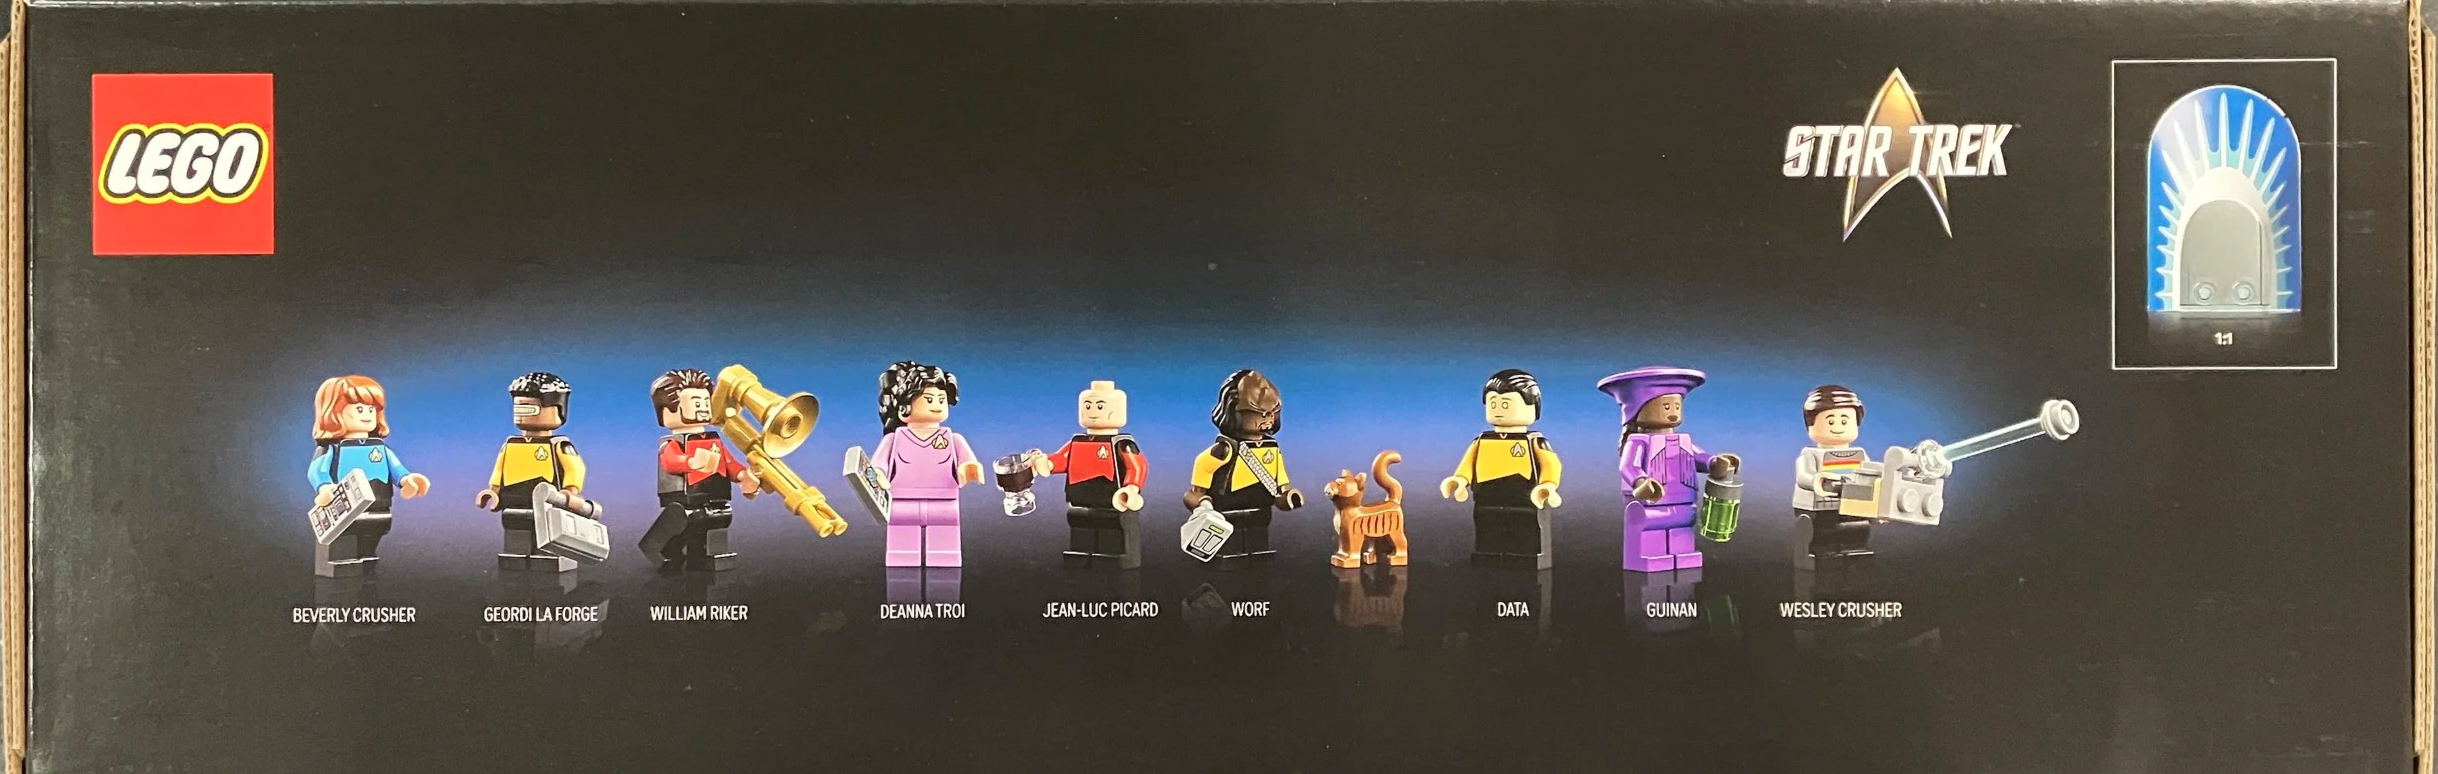
The box is pretty sizeable with the full build on the front along with the set name and Star Trek logo. The back shows the set, minifigures, stand, sign, dimensions, and the ability to split the ship into sections. The top of the box shows the nine minifigures and Data’s cat.
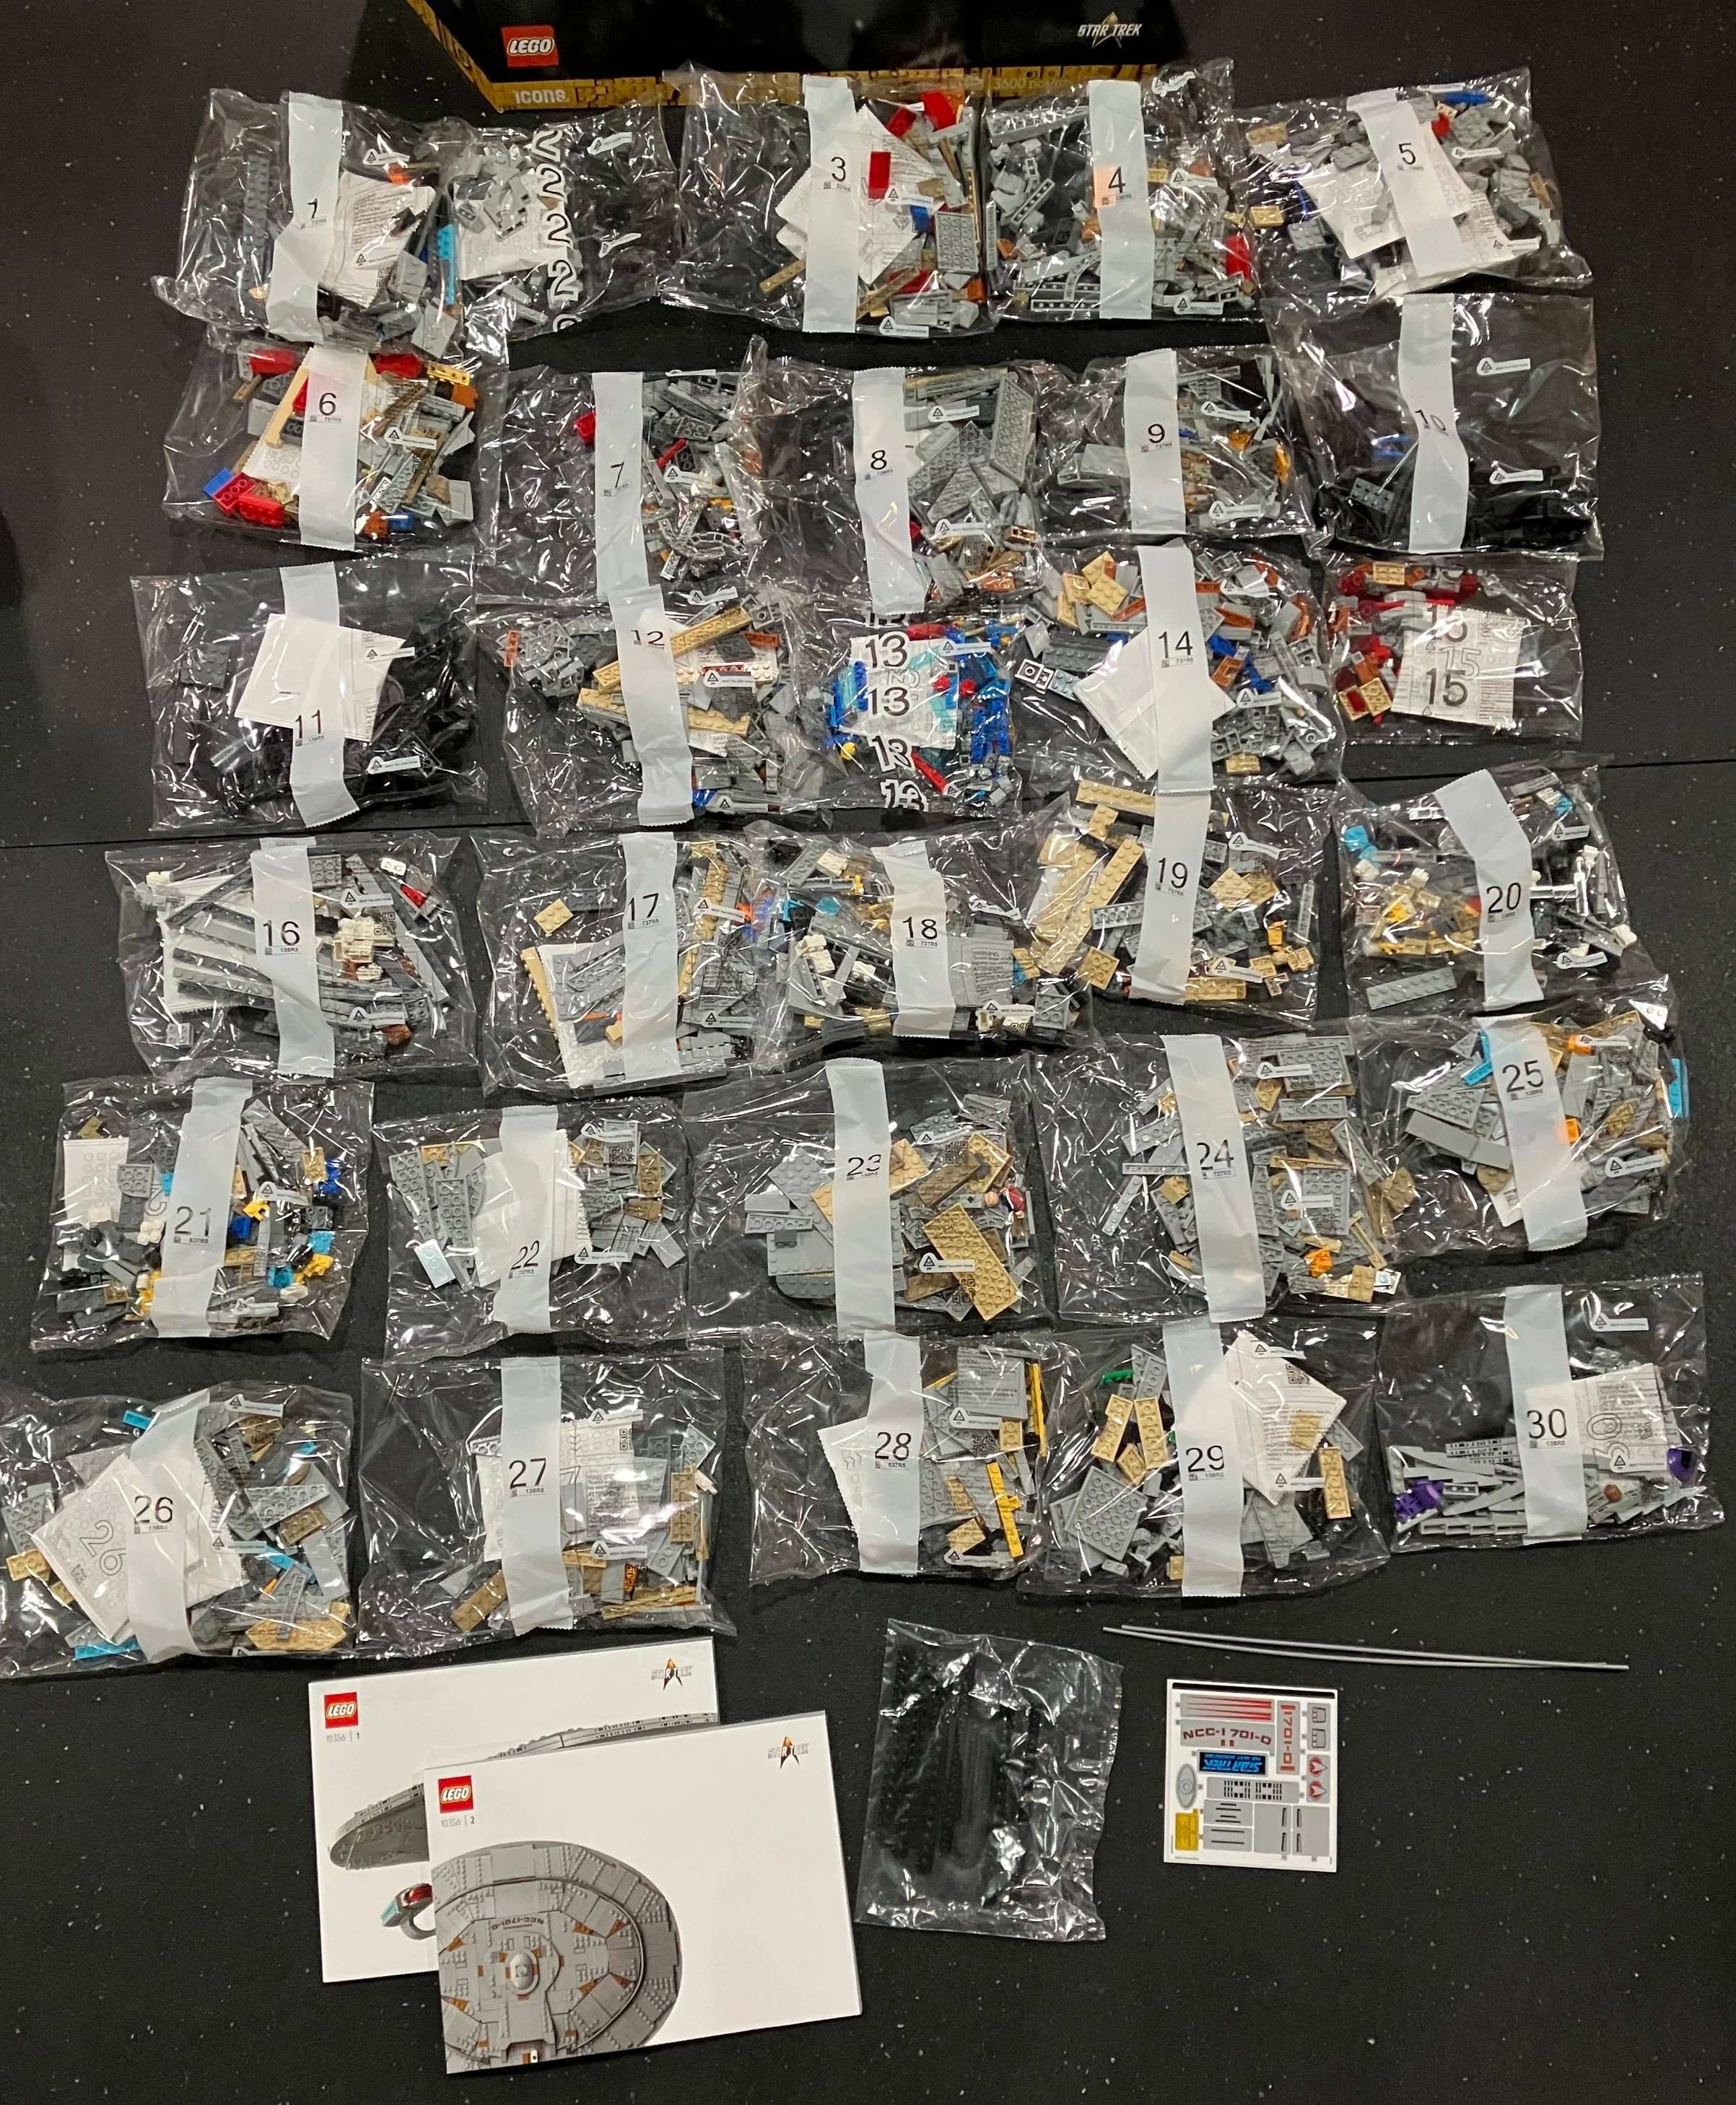
The box contains 30 numbered parts bags, a parts bag that is not numbered, two long tubes, two instruction books, and a smaller sticker sheet.
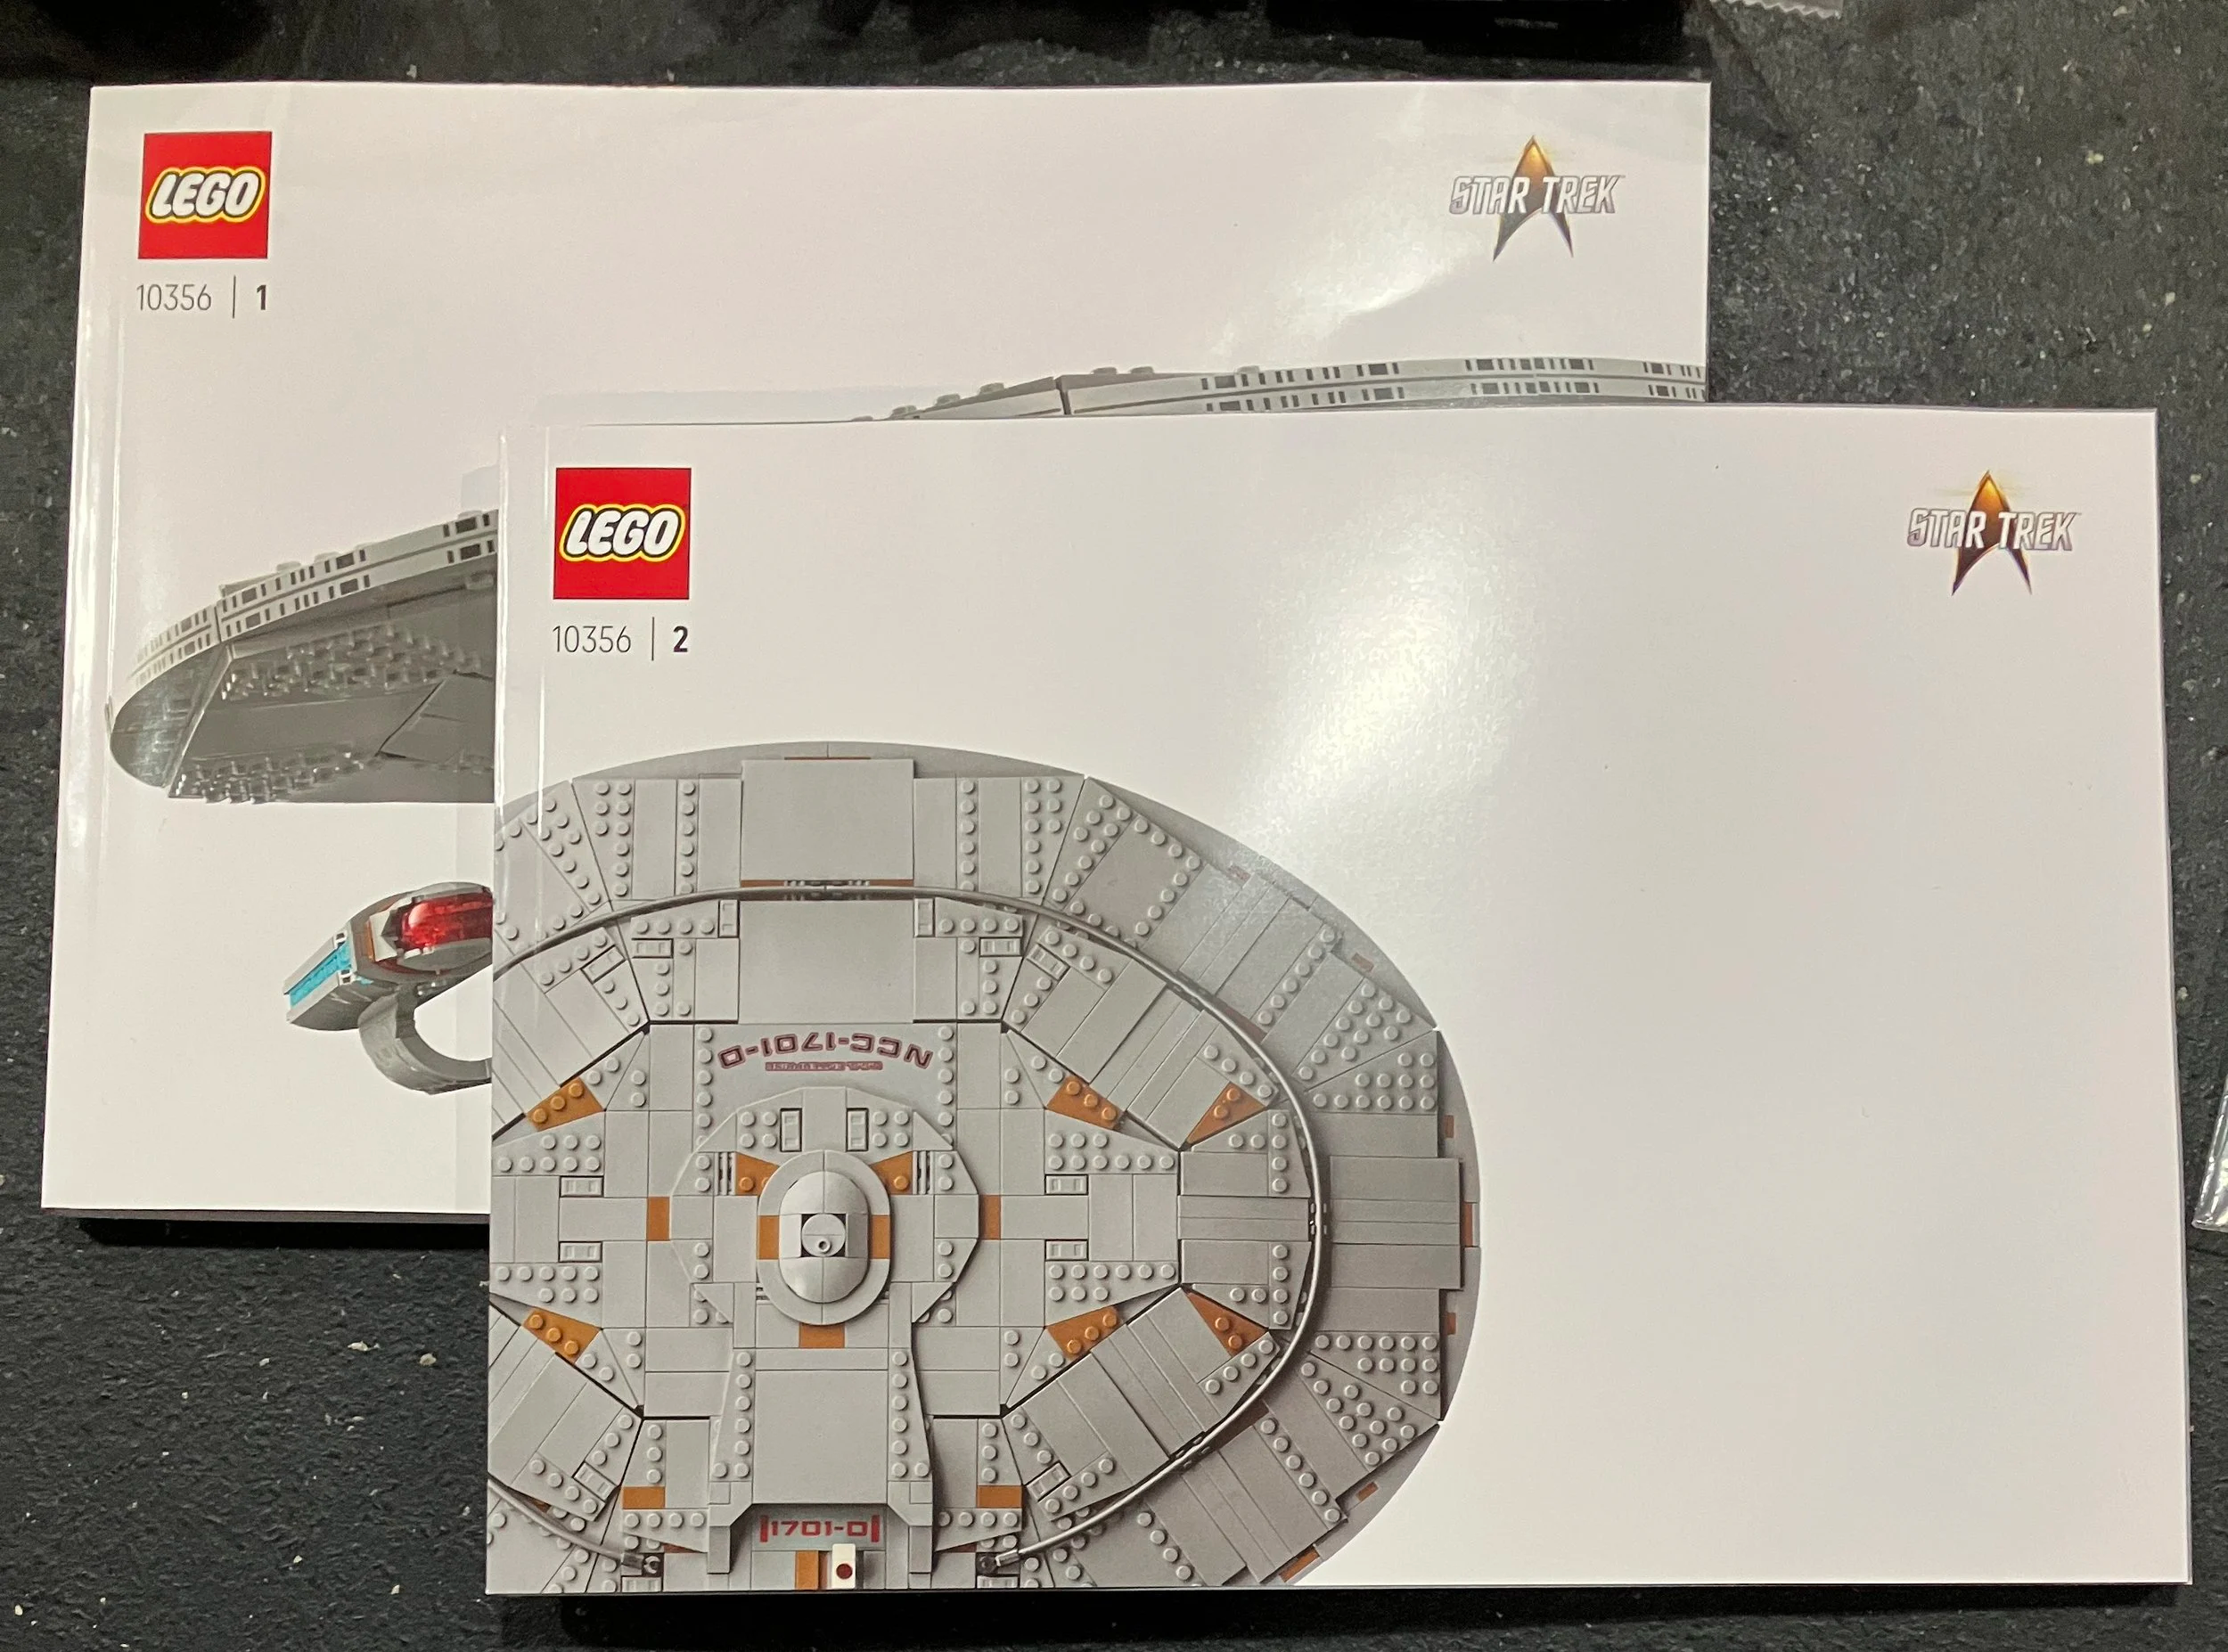
The set comes with two instruction books. The first book builds the engineering sections with the engine nacelles. The second book is for the saucer section.
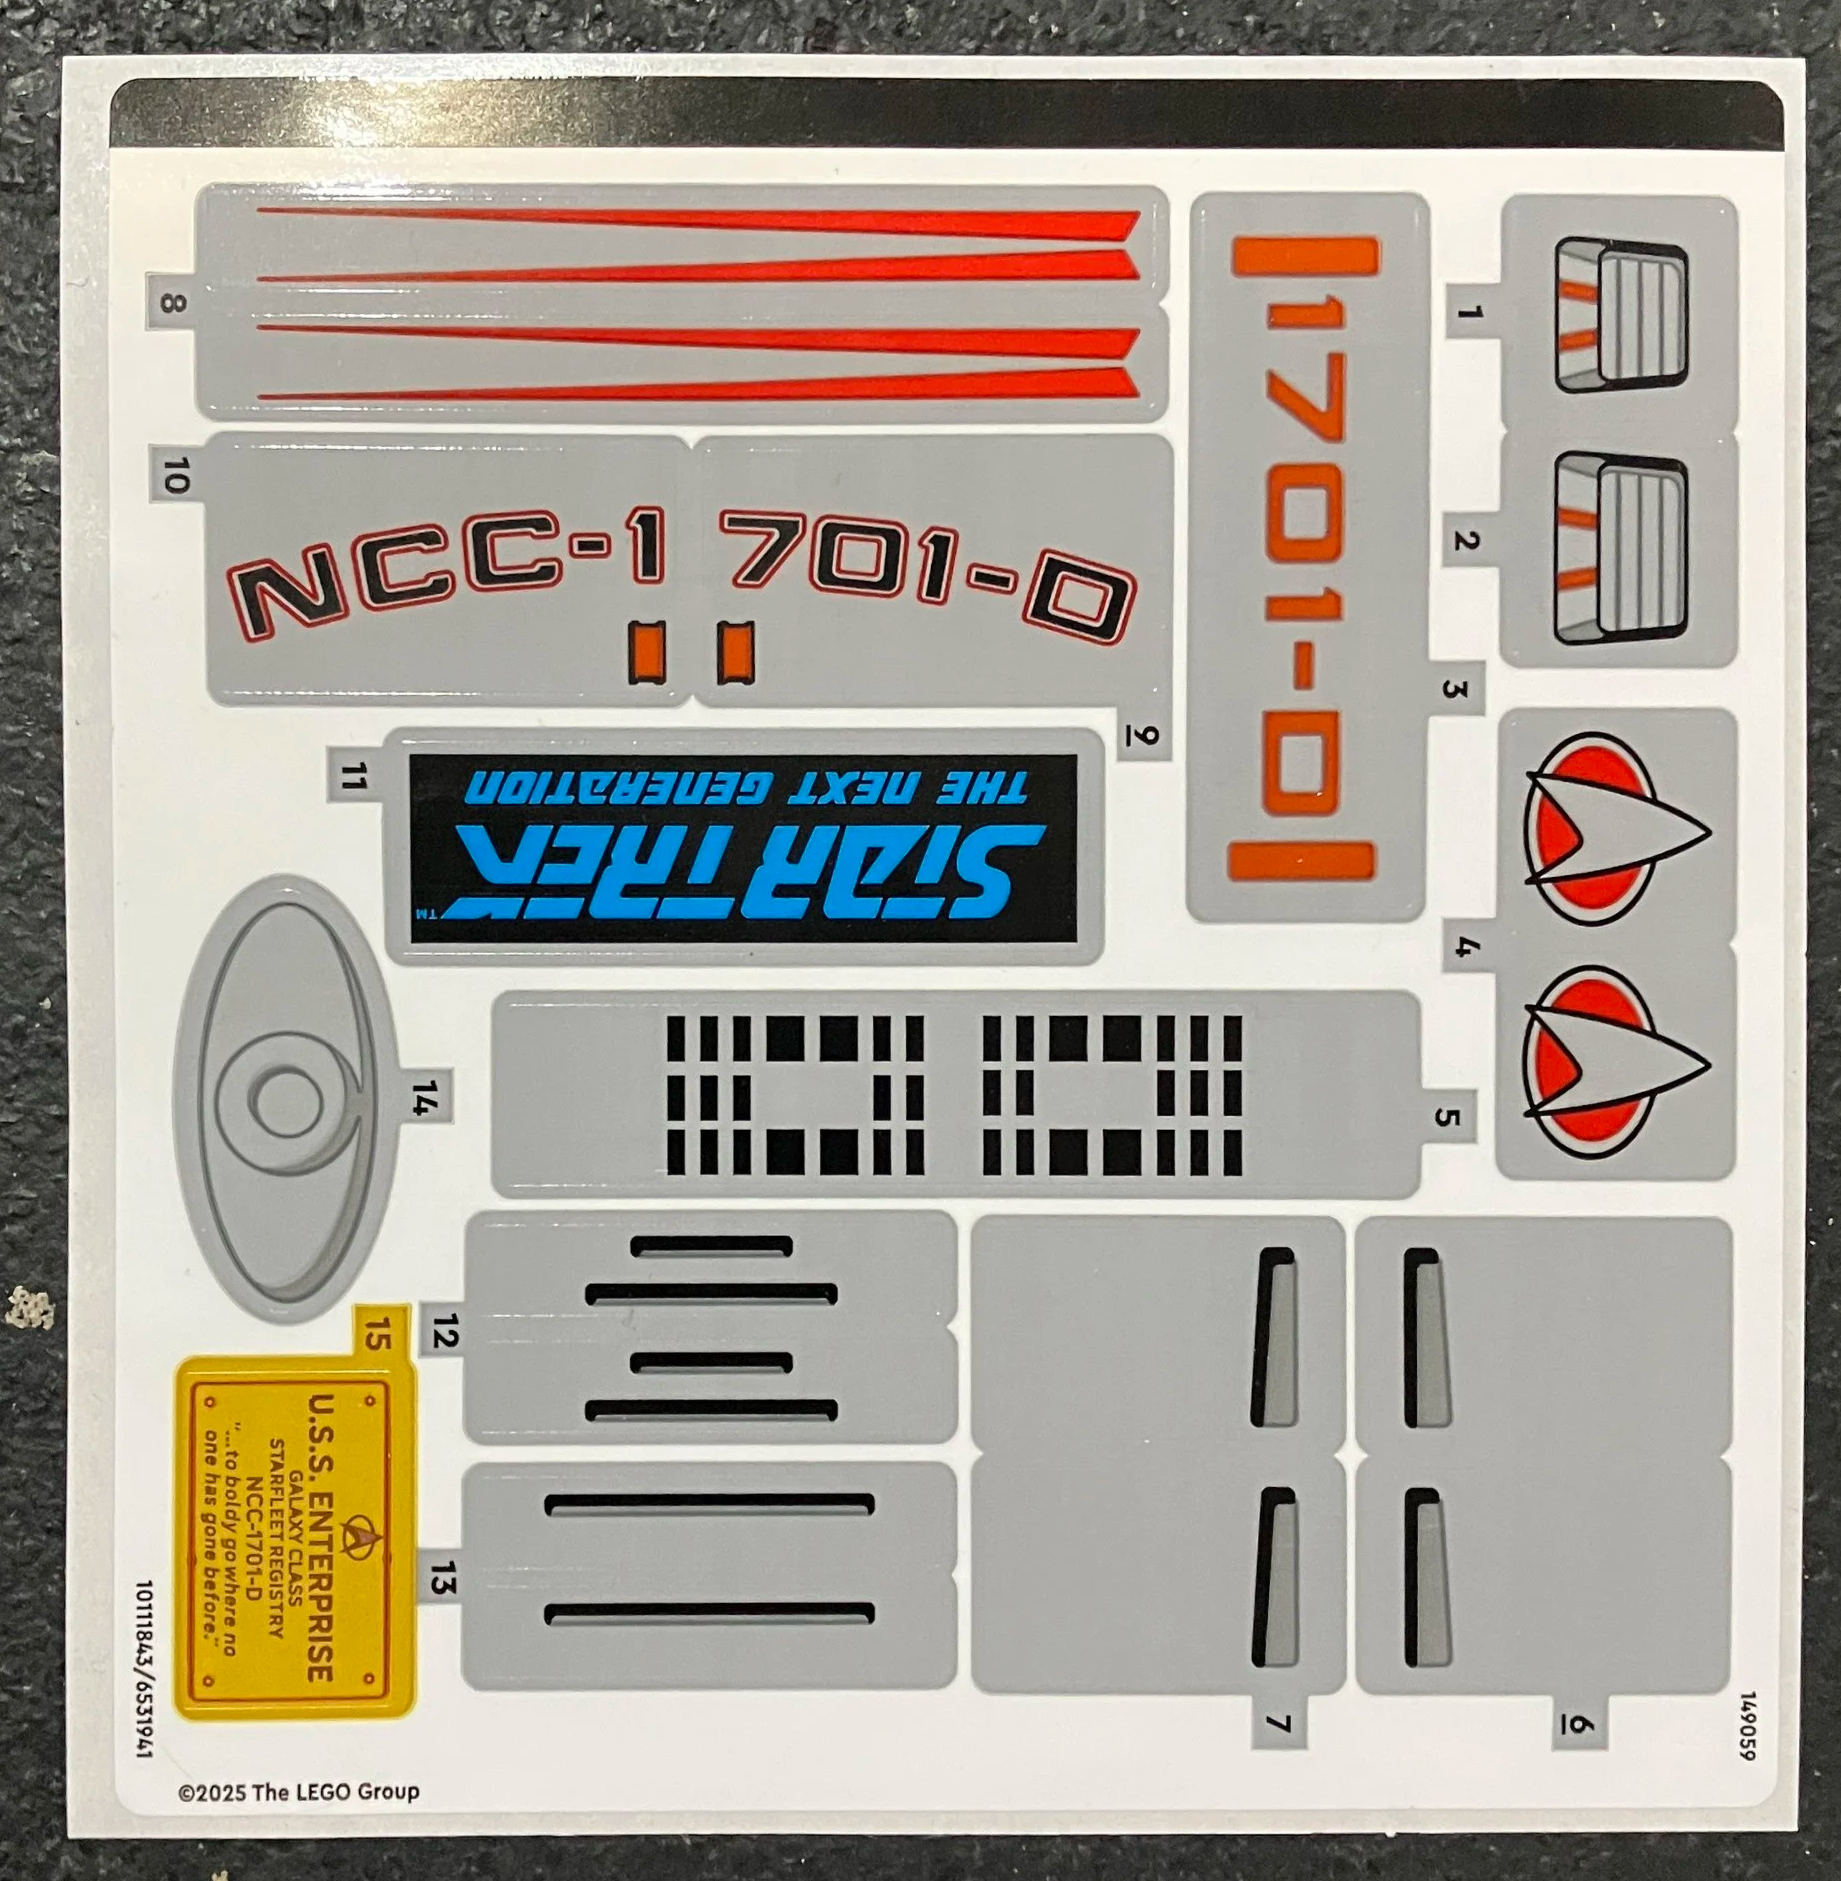
There is a small sticker sheet which is mixed in with some printed pieces. I’d prefer no stickers, but these weren’t too bad to install.
Bag one builds the minifigure stand and the first minifigure which is Dr. Crusher. It also starts to assemble the engineering section. Bag two continues this section.
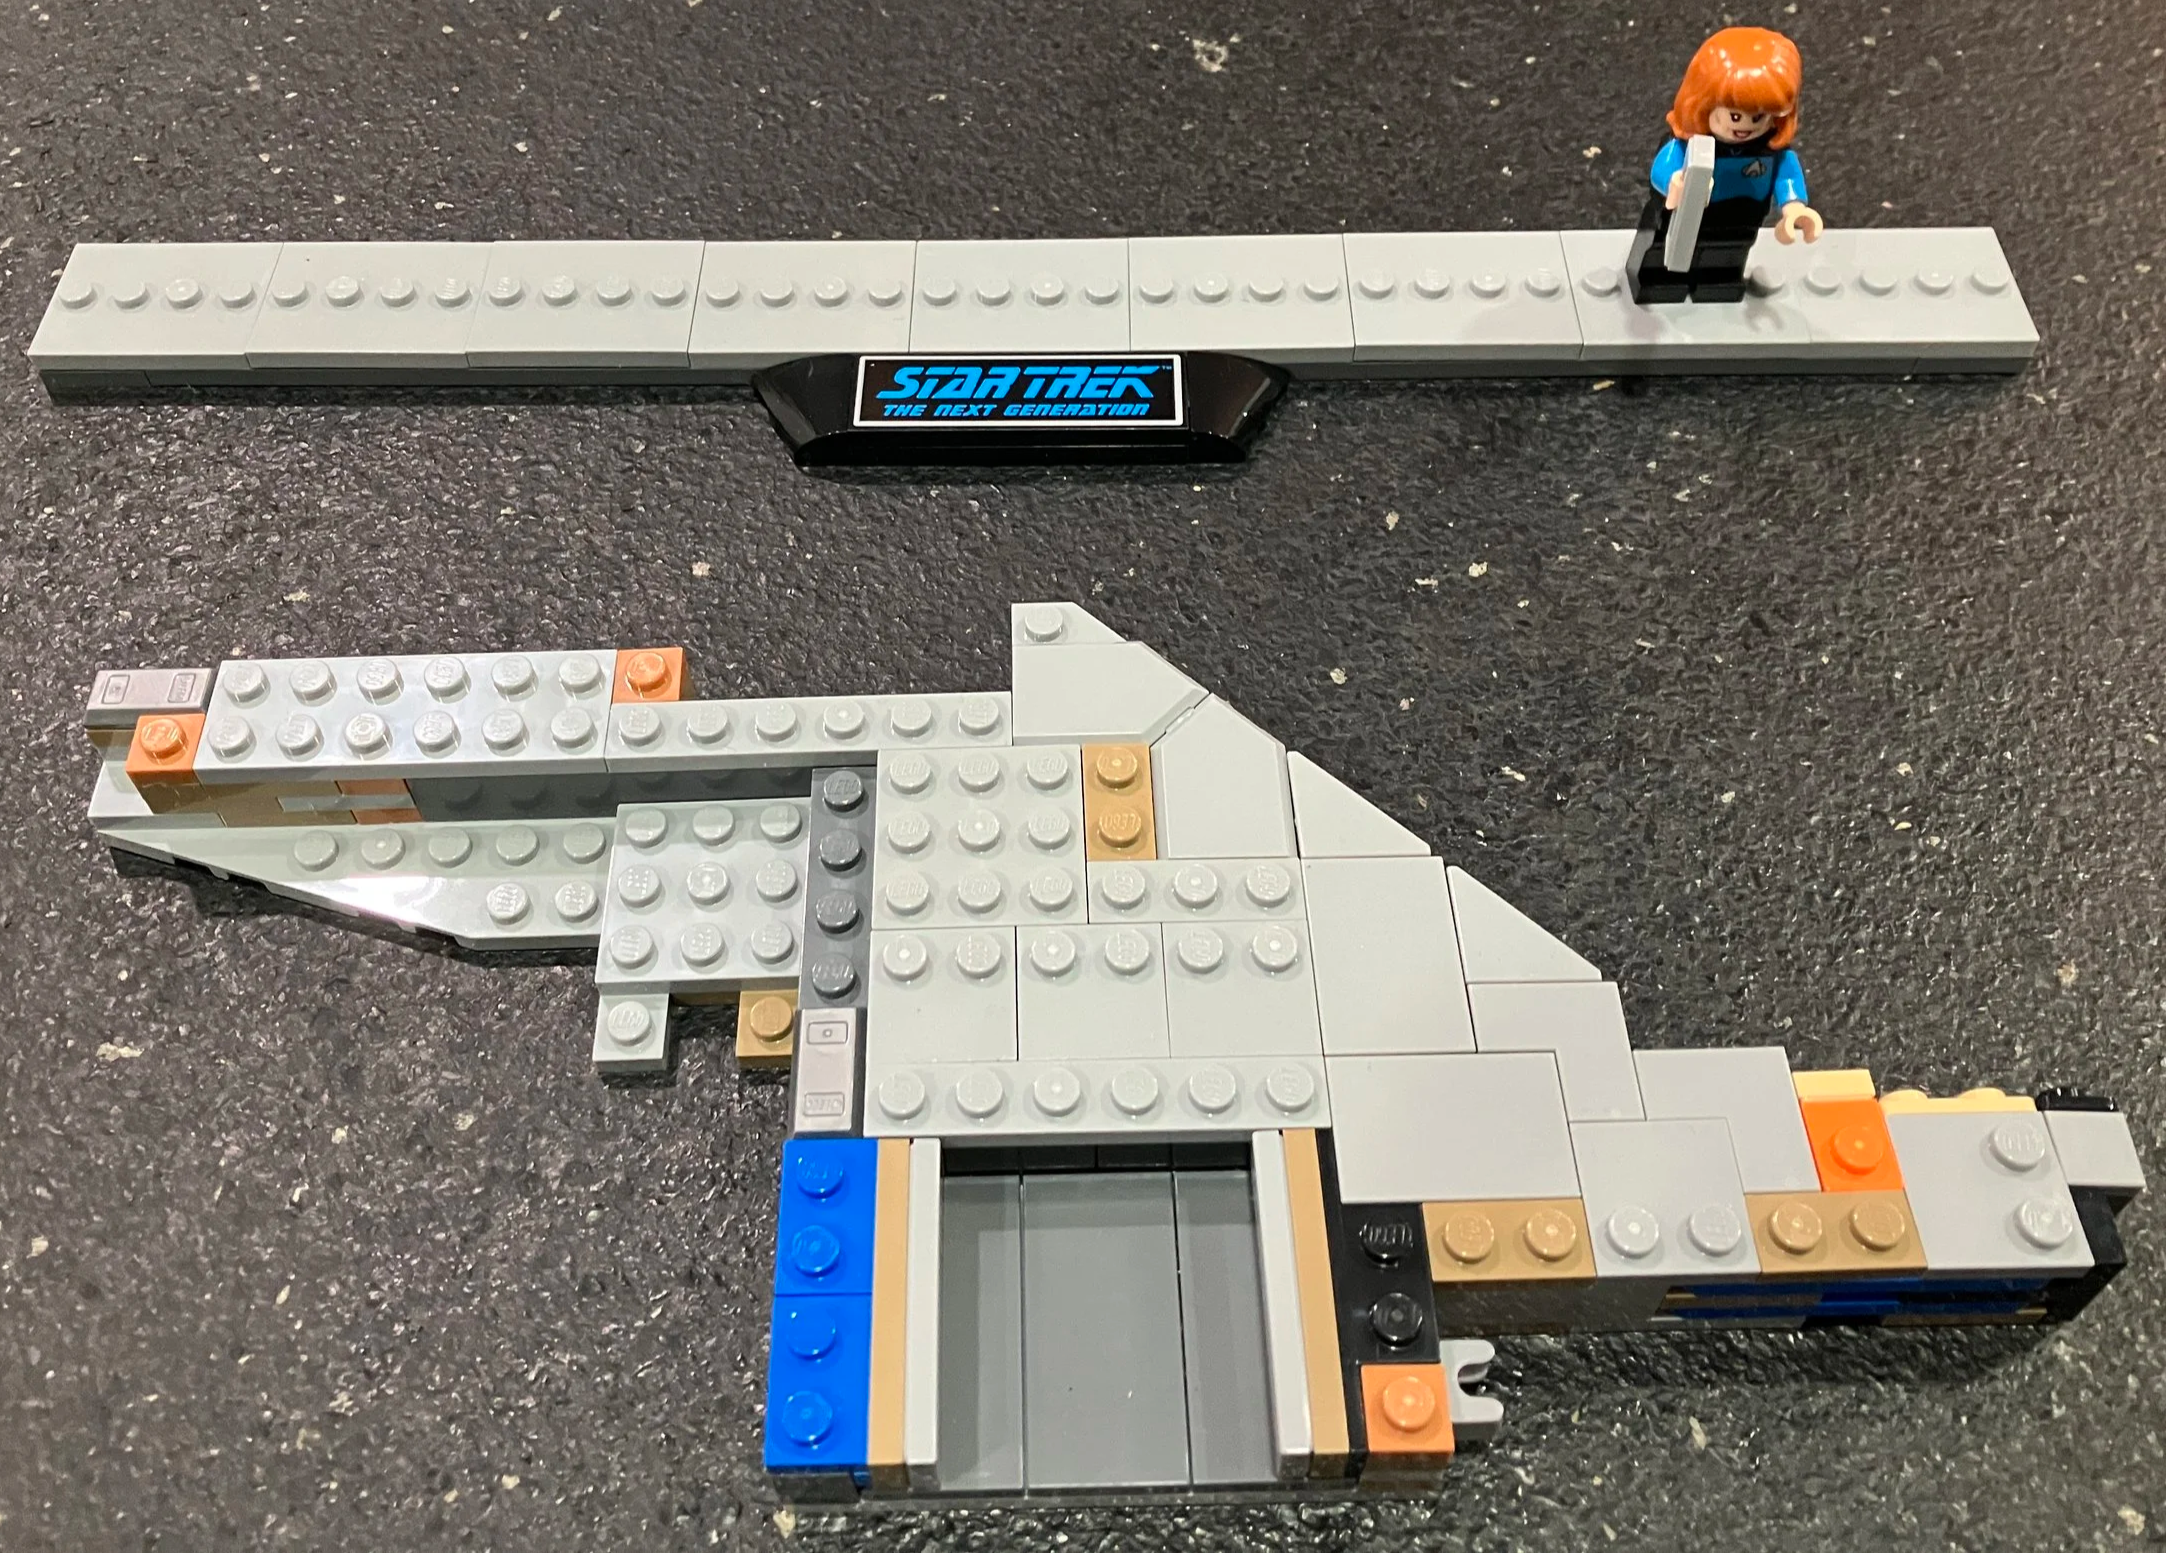
Bag three continues the engine section. Bag four starts to look like a half of the engine section. You can start to tell at this point how the designer achieved the different curves of the ship. This bag adds in a young Wesley Crusher.
Bags five and six start to assemble the other half of the engine section which is a mirror of the other half of the engine section.
Bag seven connects the two sections and it really starts to come together as looking like the USS Enterprise. Bag eight adds in some curves on the bottom of the section and you can see the slots where the stand is connected.
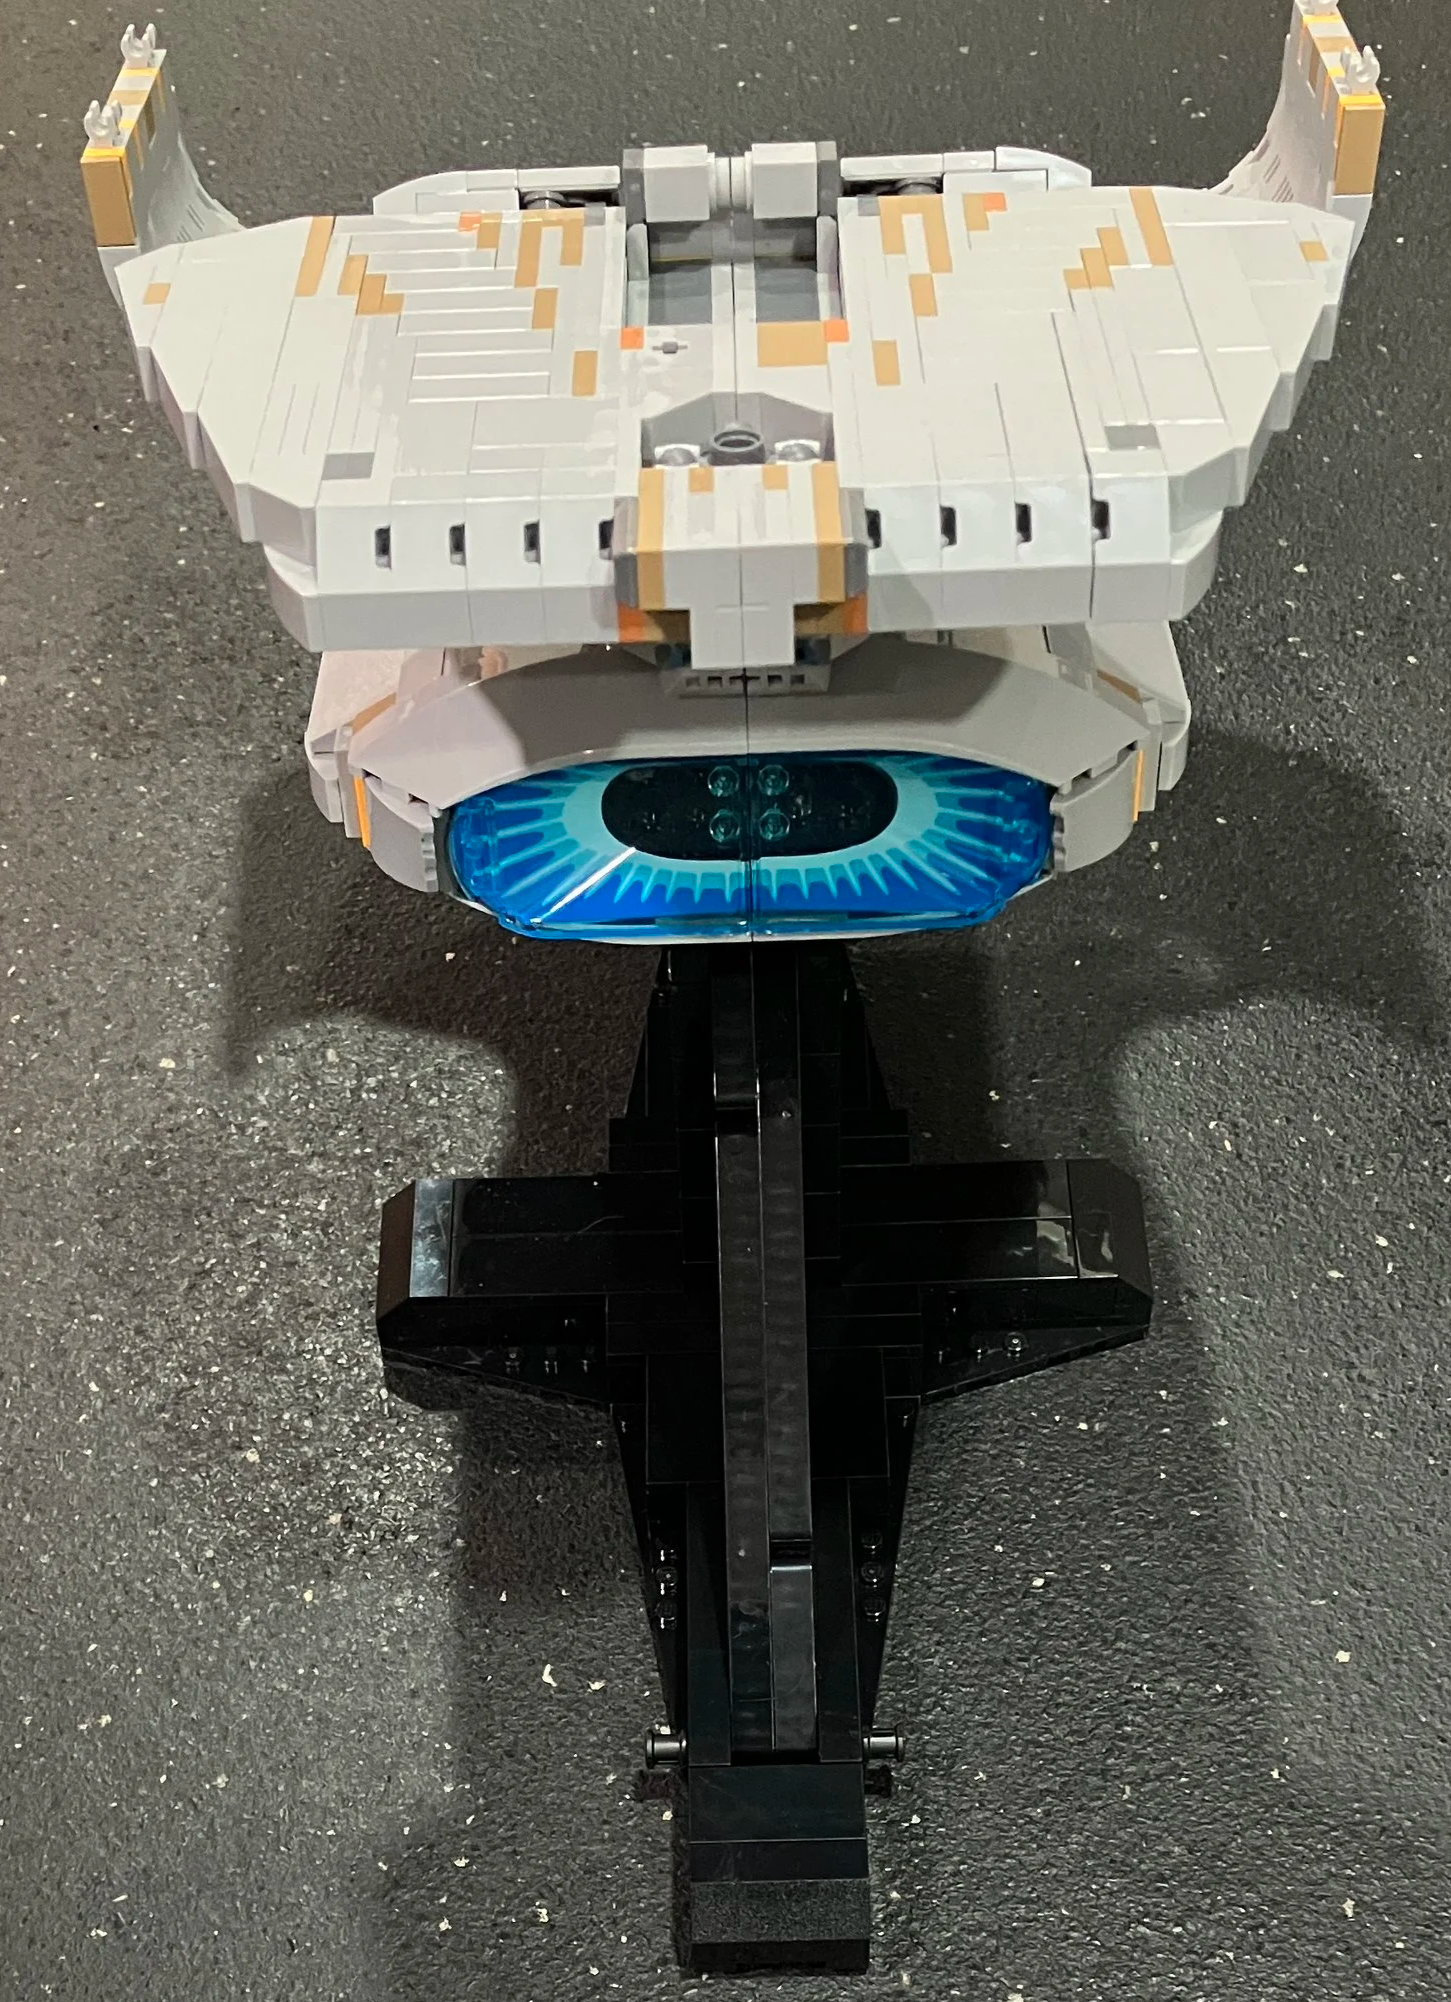
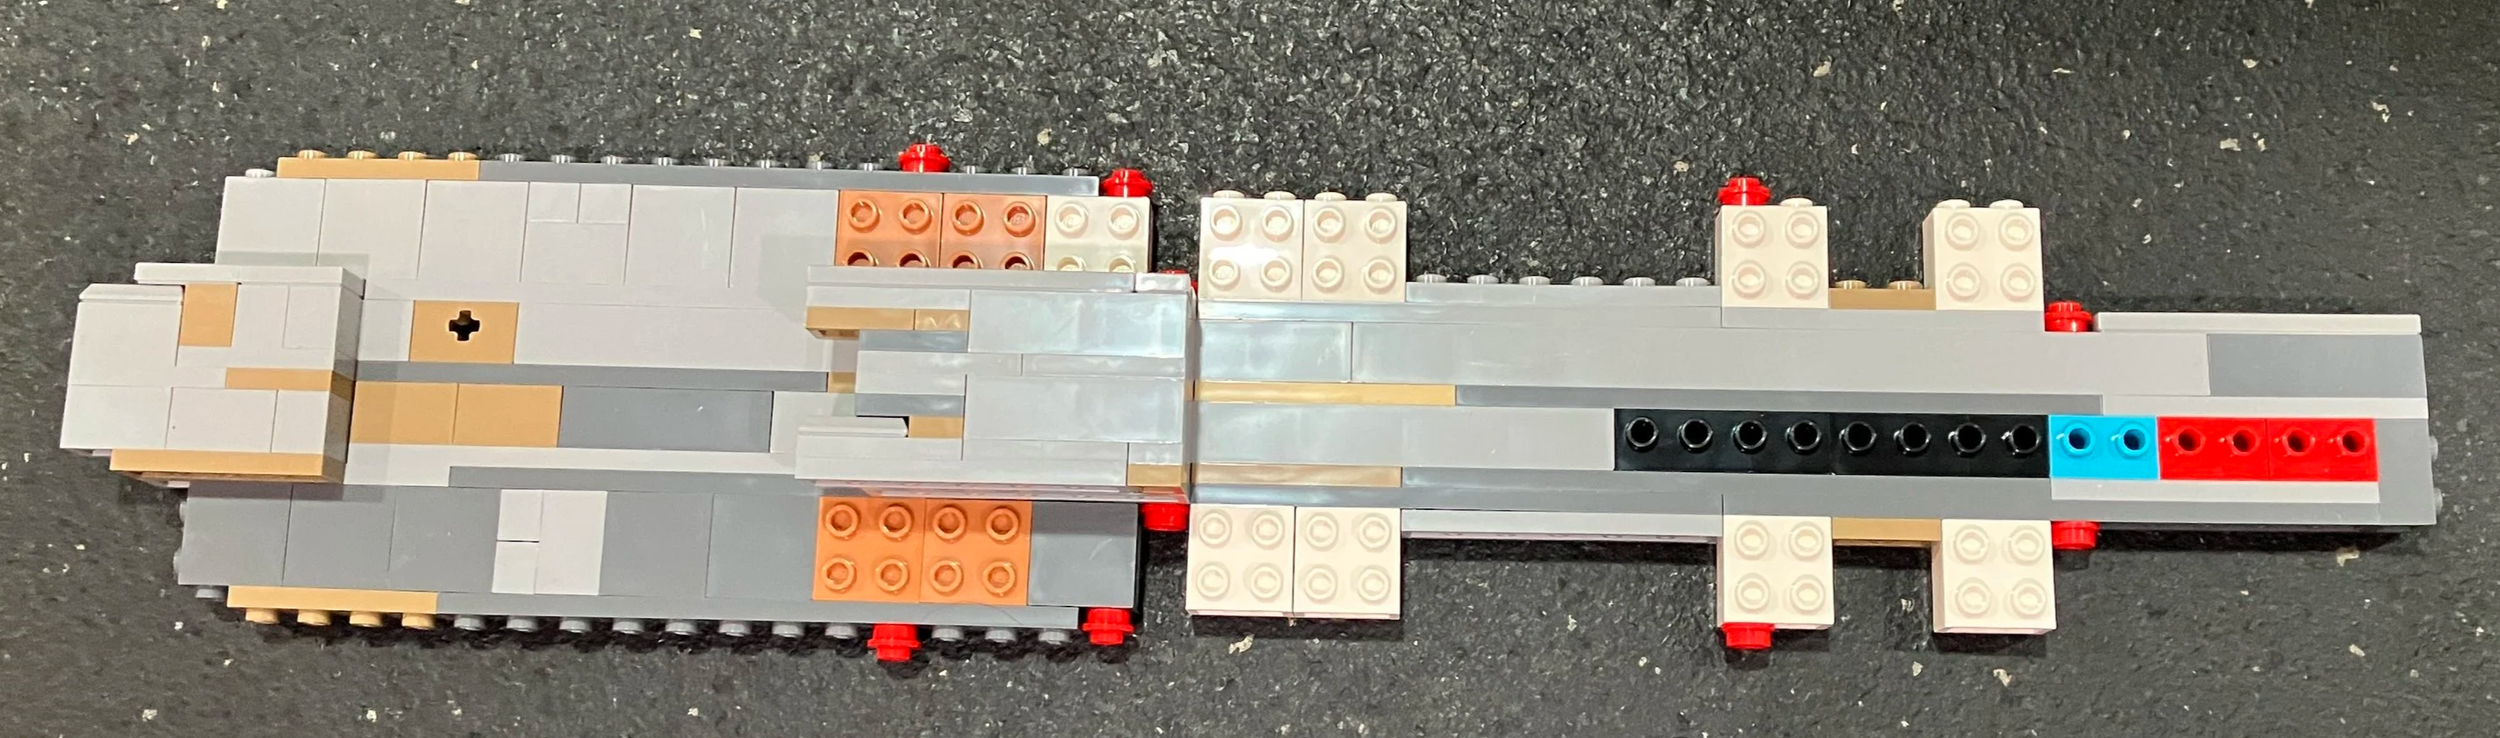
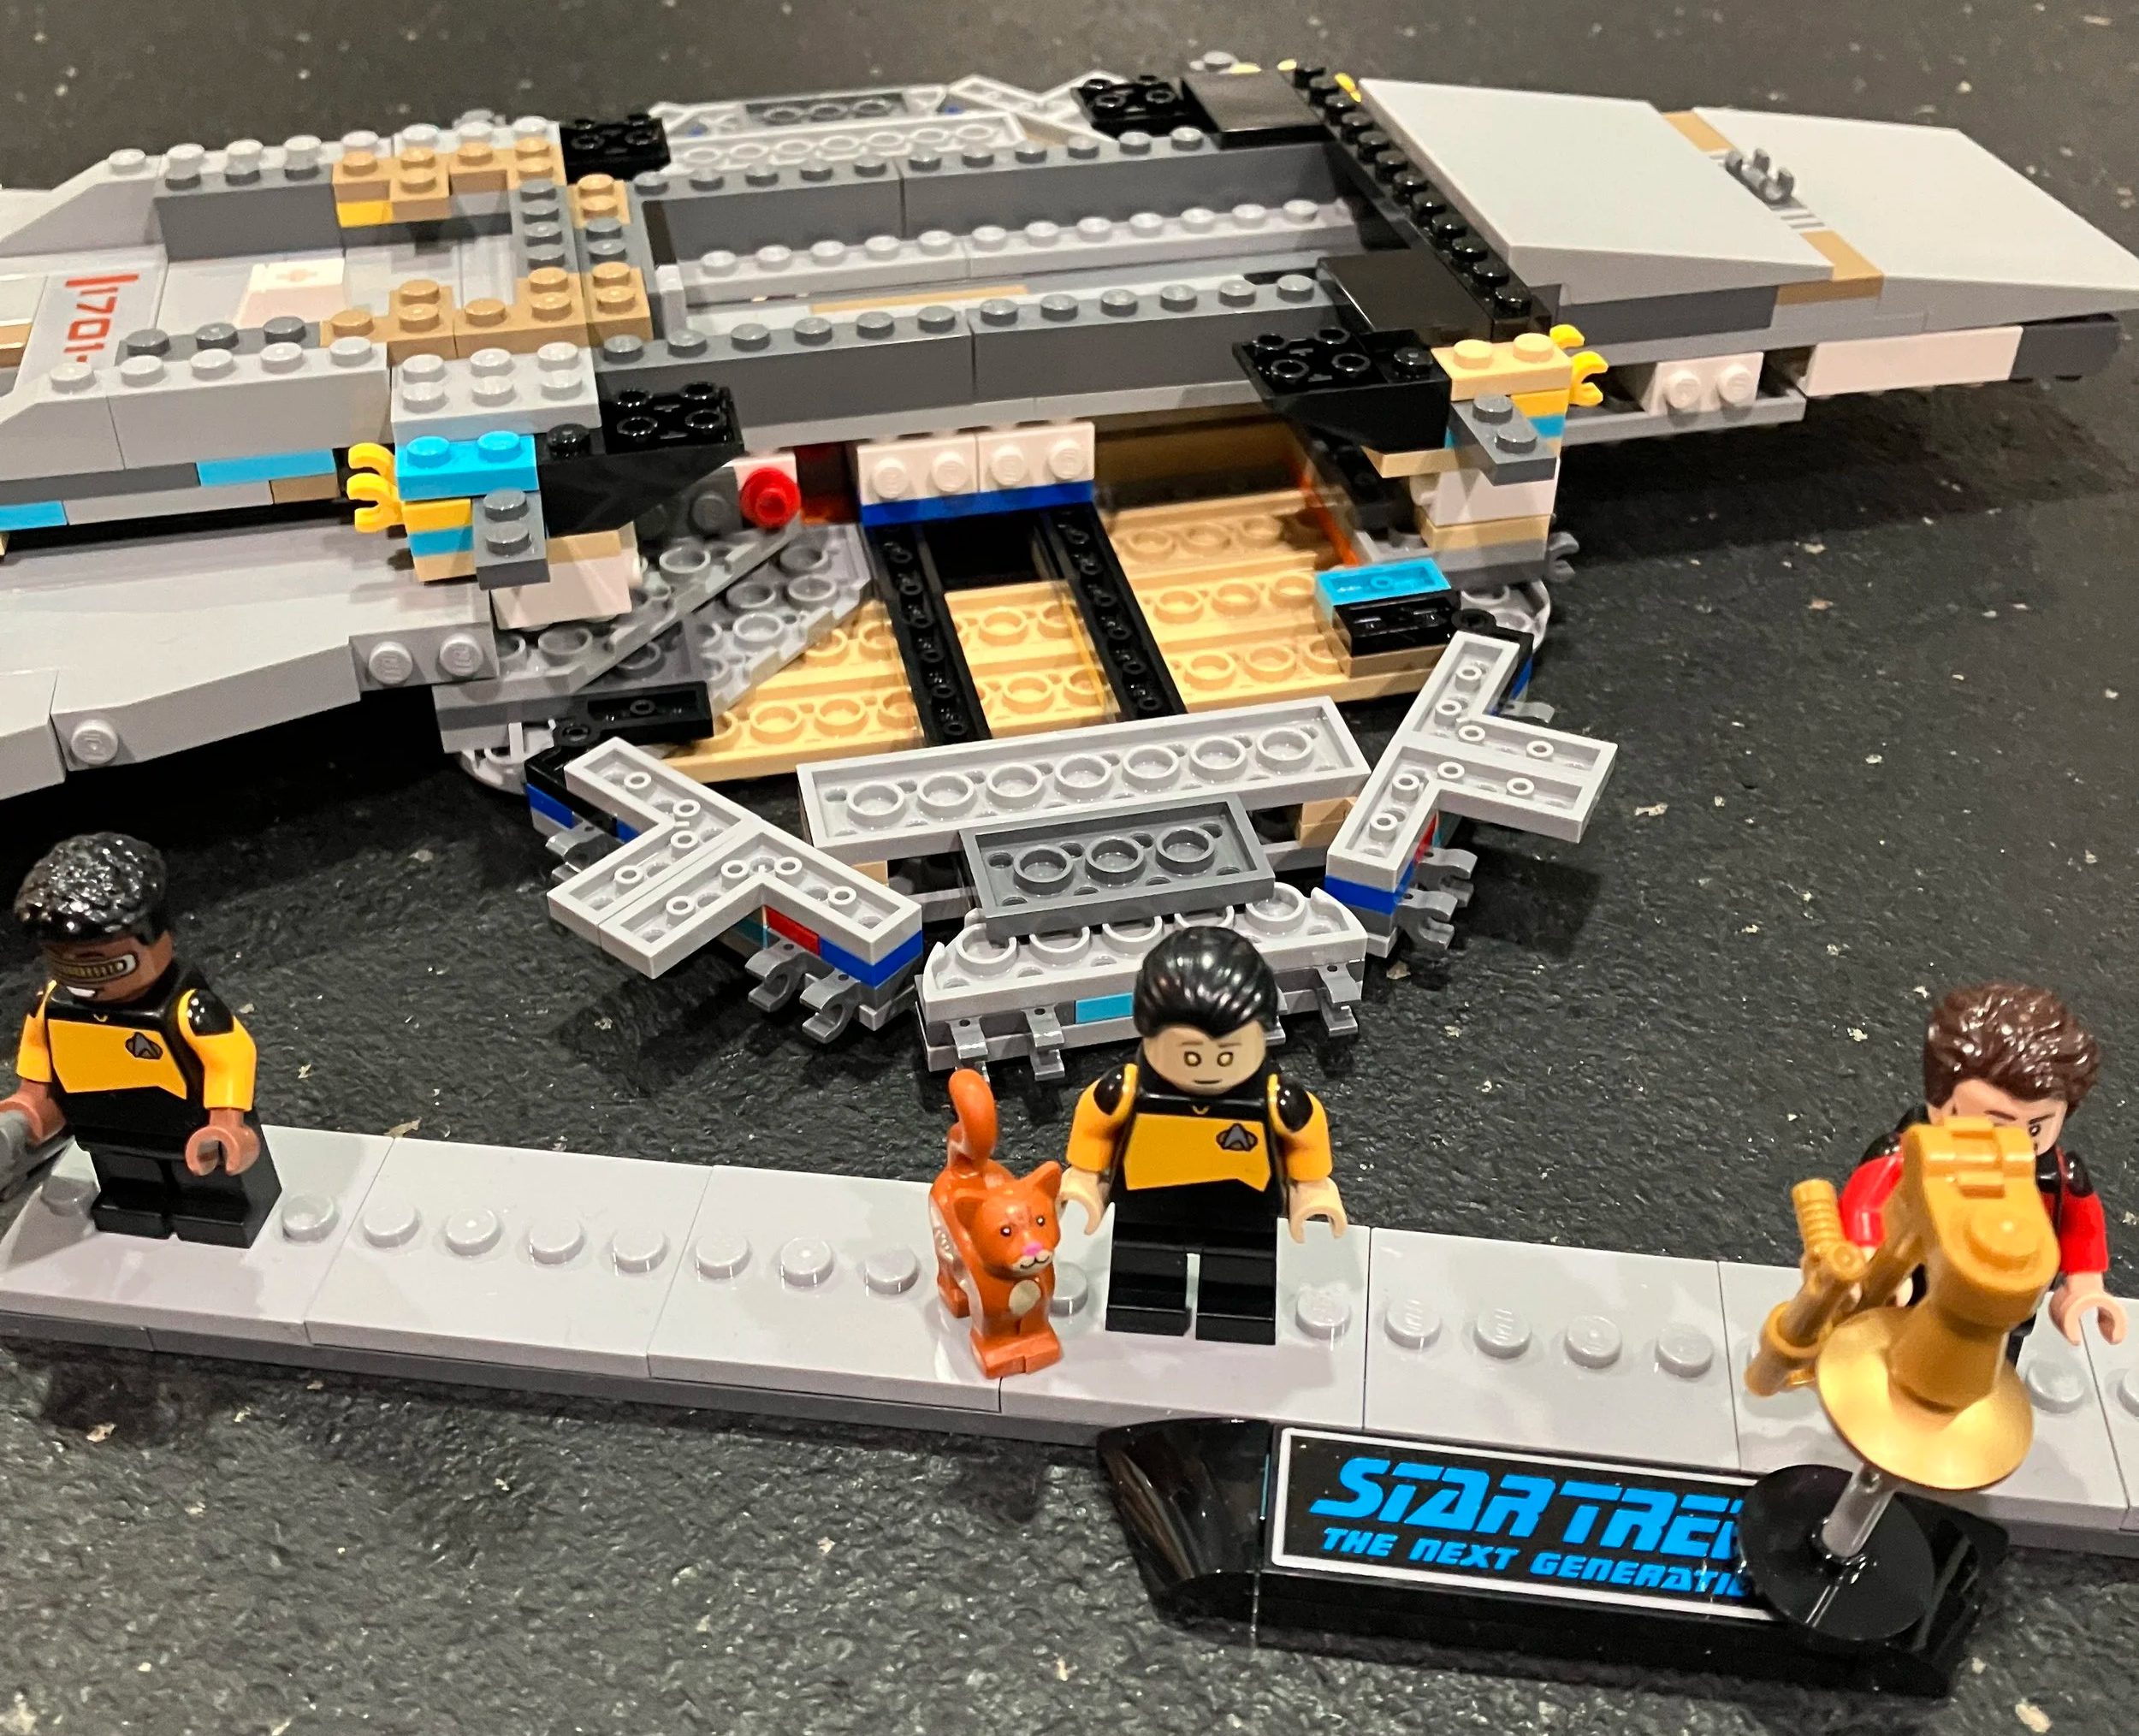
Bag nine adds in the blue dish on the front and the reddish-orange impulse engine on the back. This bag adds in Commander Riker and his trombone.
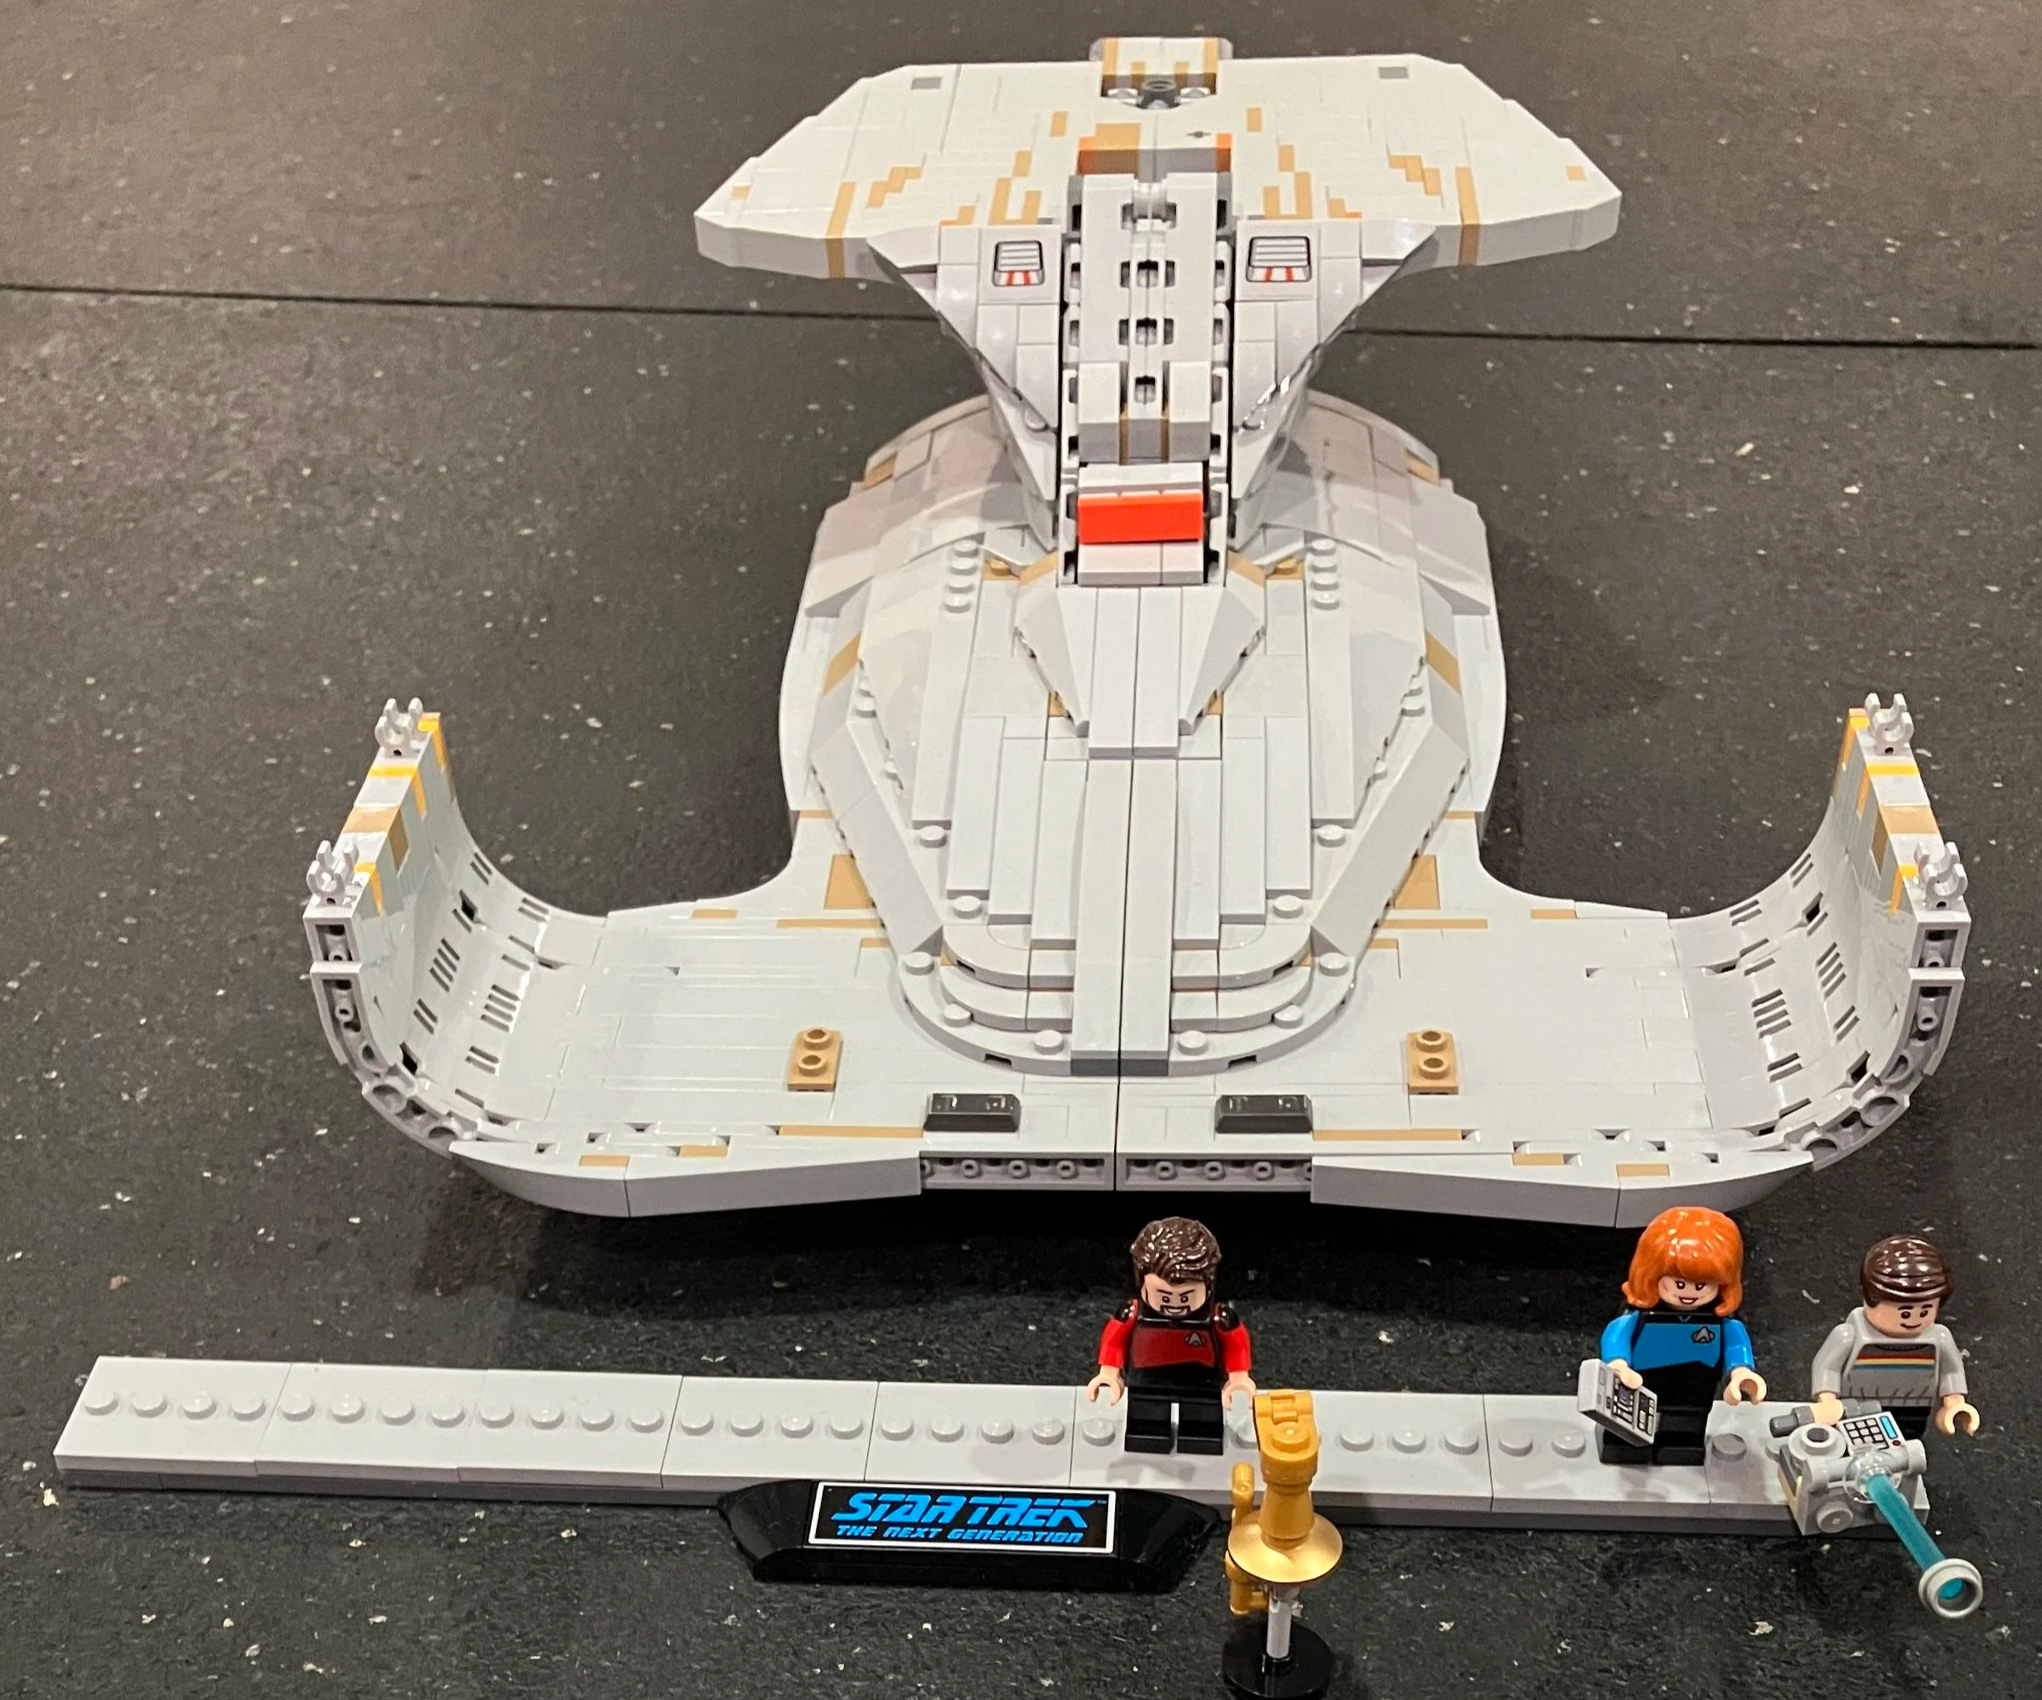
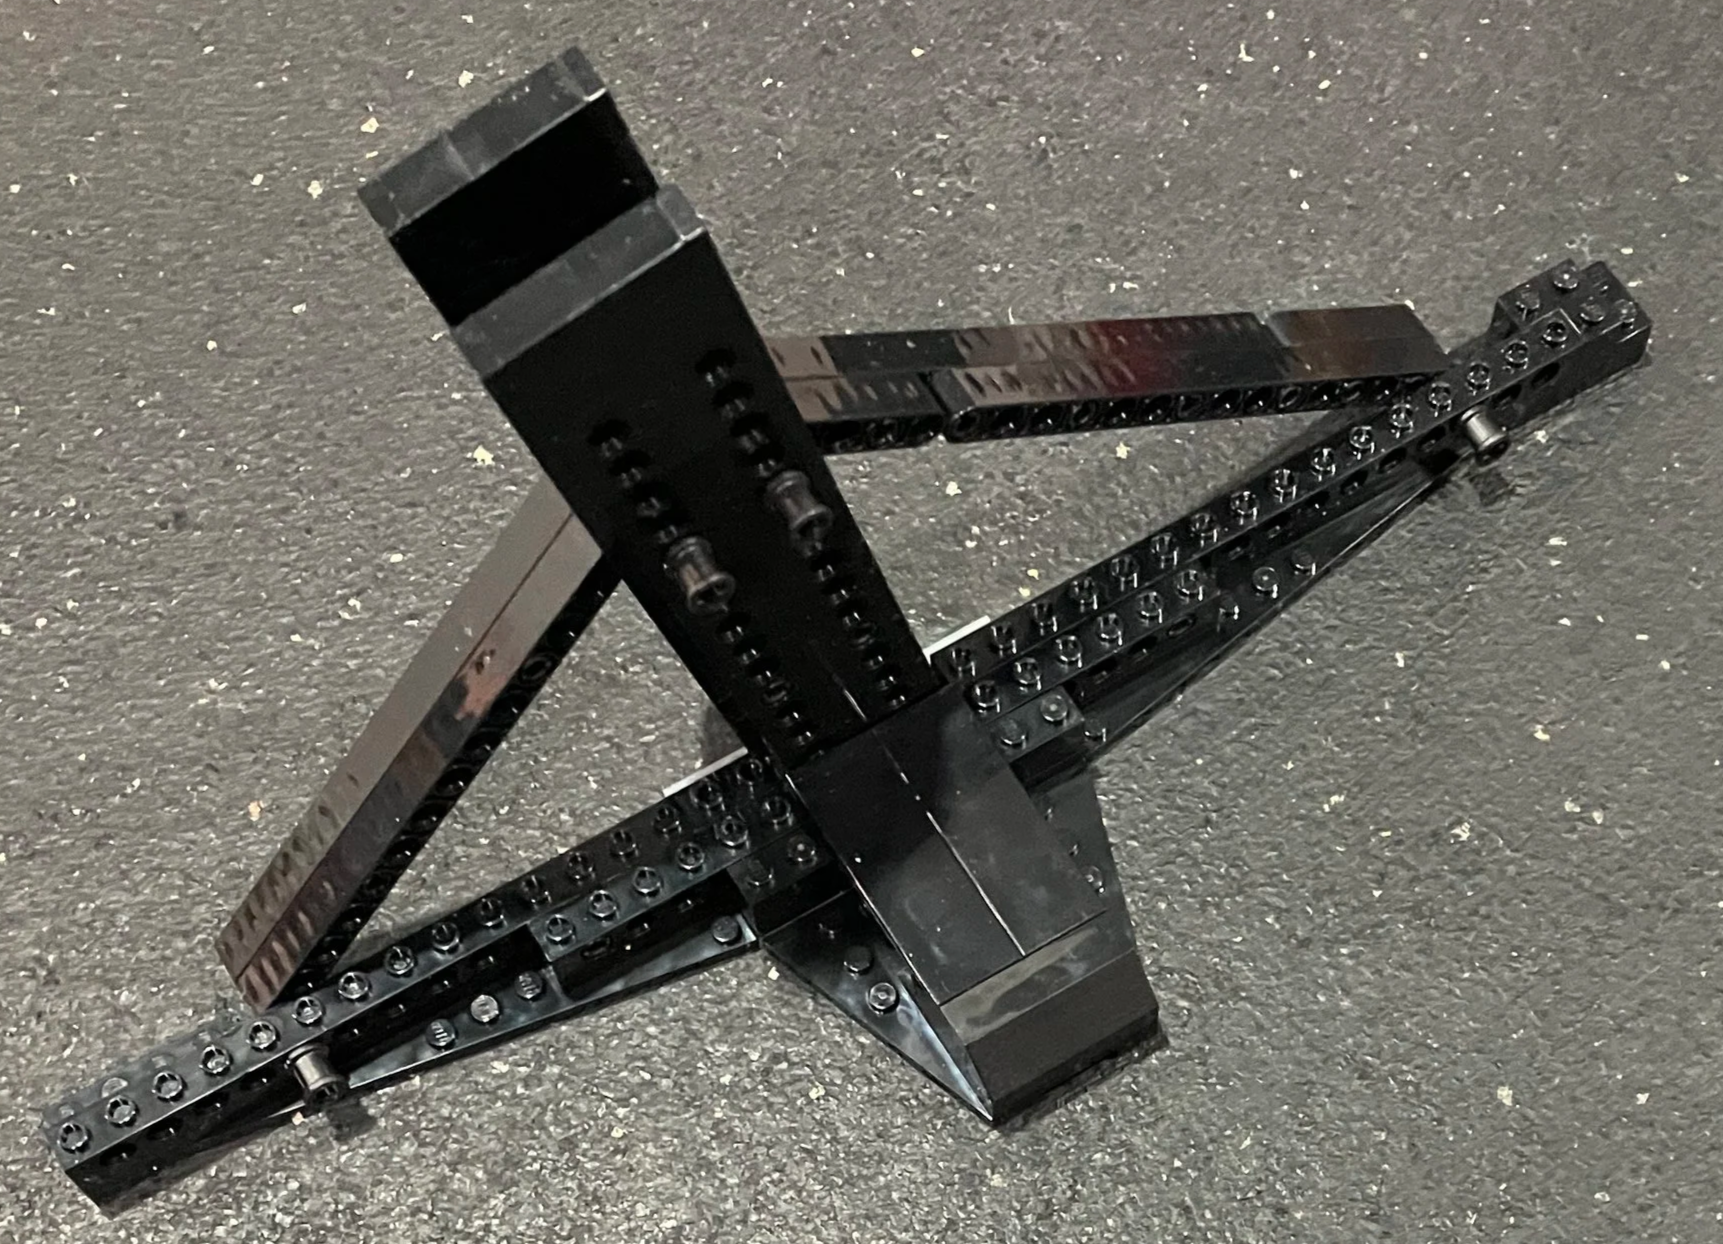
Bags 10 and 11 assemble the stand. It is a mix of Technic pieces and System pieces and despite its size and the overall size of the ship, it holds up quite well at the end and keeps the ship stable.
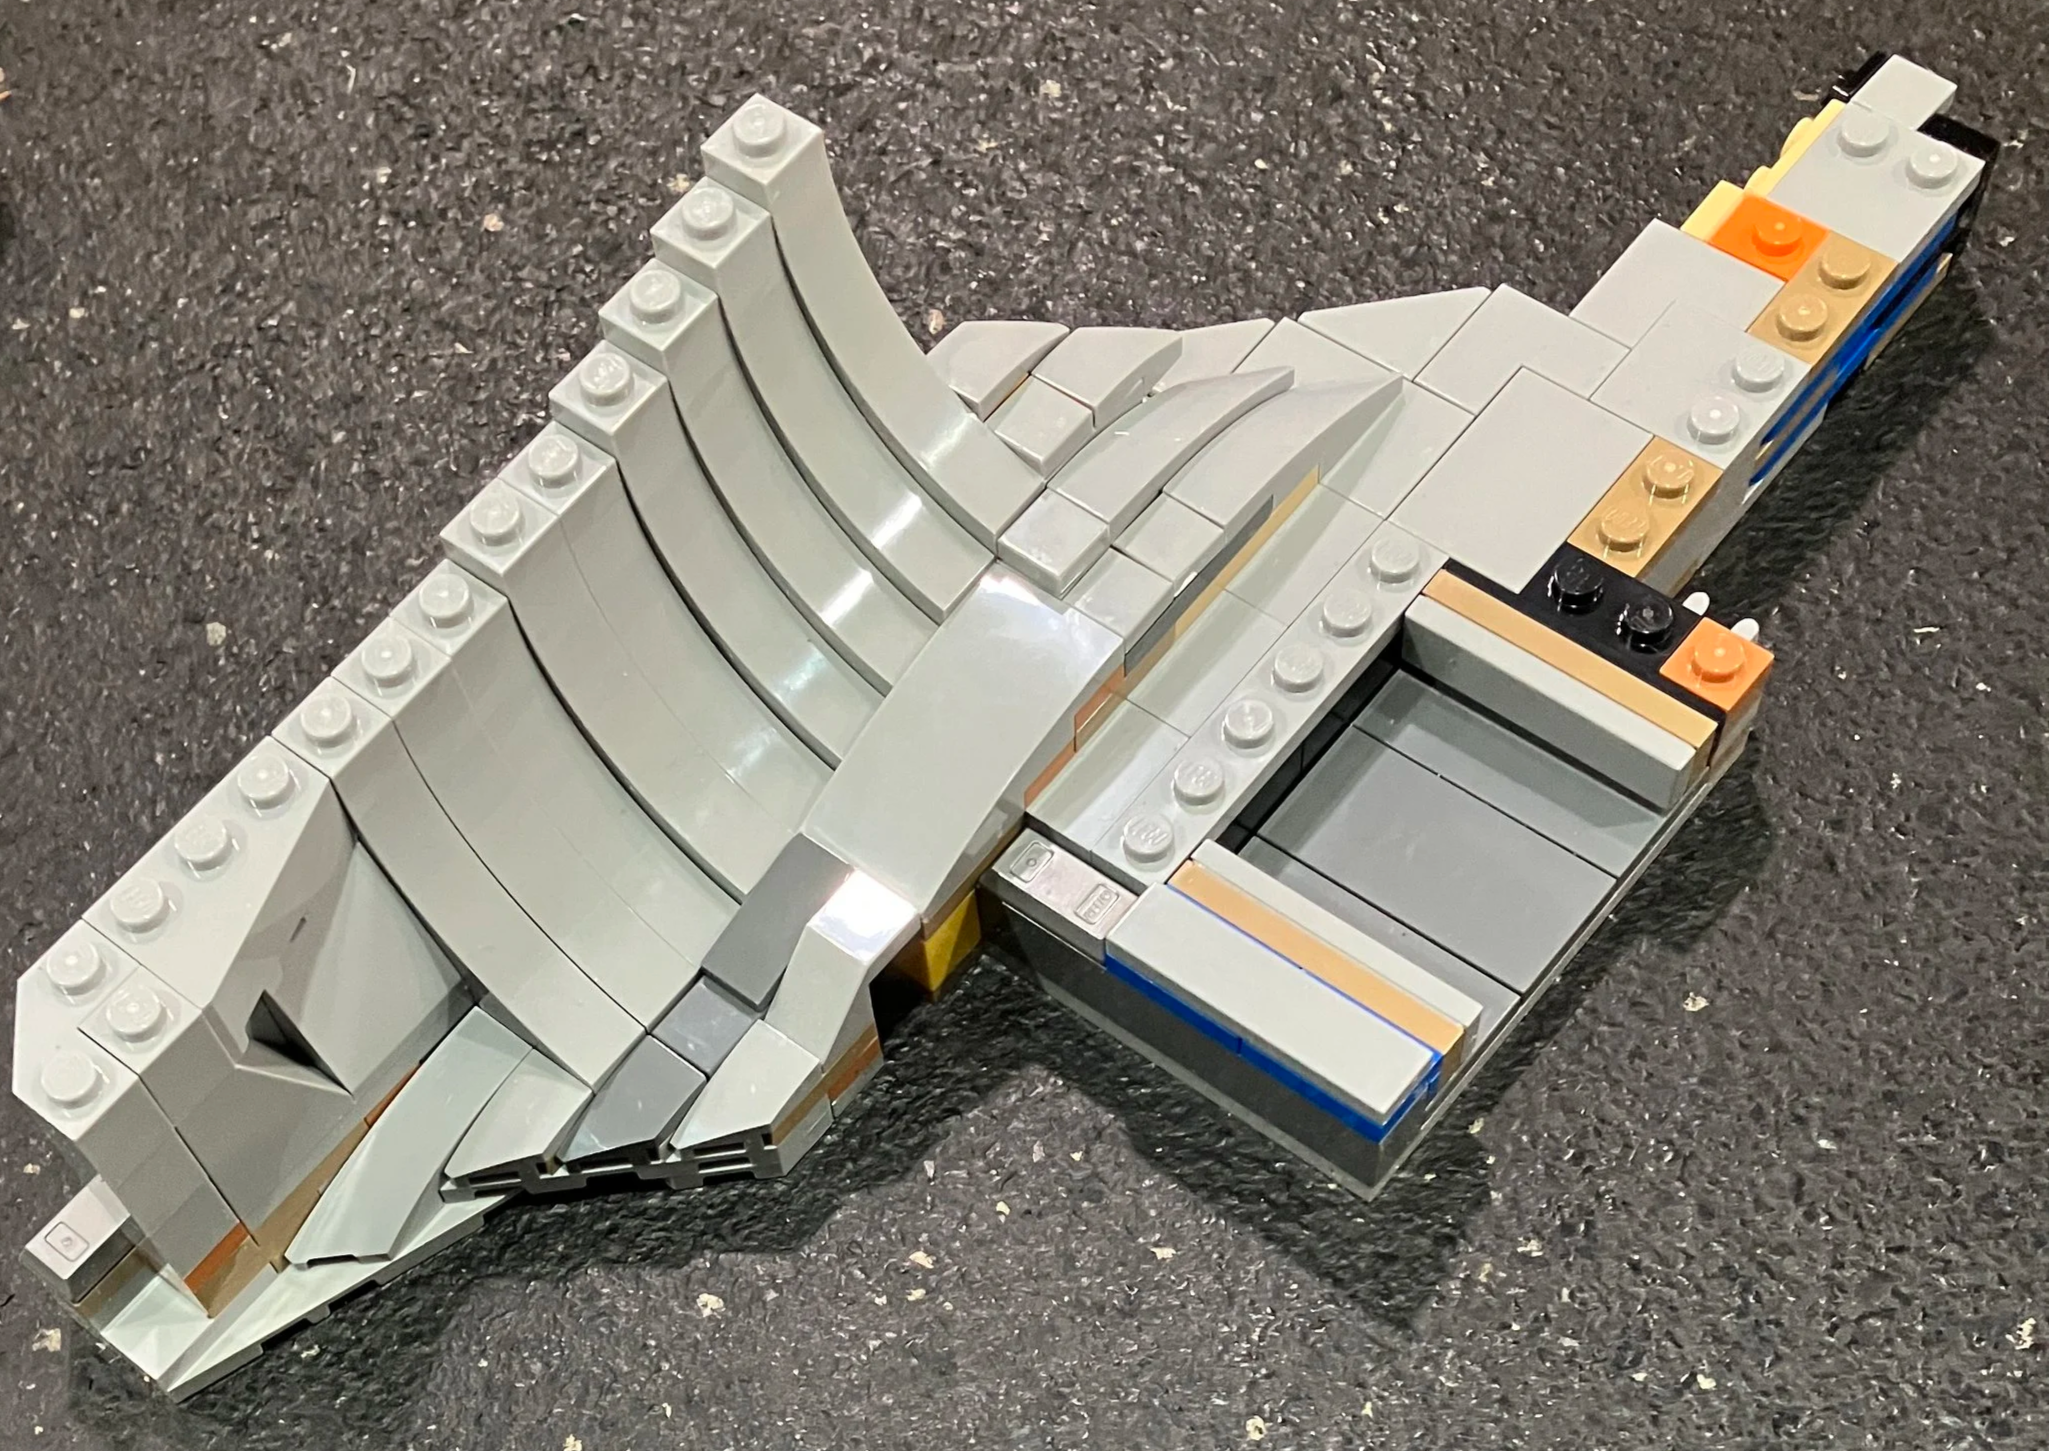
Bag 12 begins to build the engine nacelles by starting with the top covers. Additionally, it adds Geordi La Forge, the ship’s engineer.
Bag 13 adds the blue color of the nacelles with trans-blue pieces. The picture shows how the designer used SNOT techniques to enable the connections between the top and what will eventually be the bottom pieces.
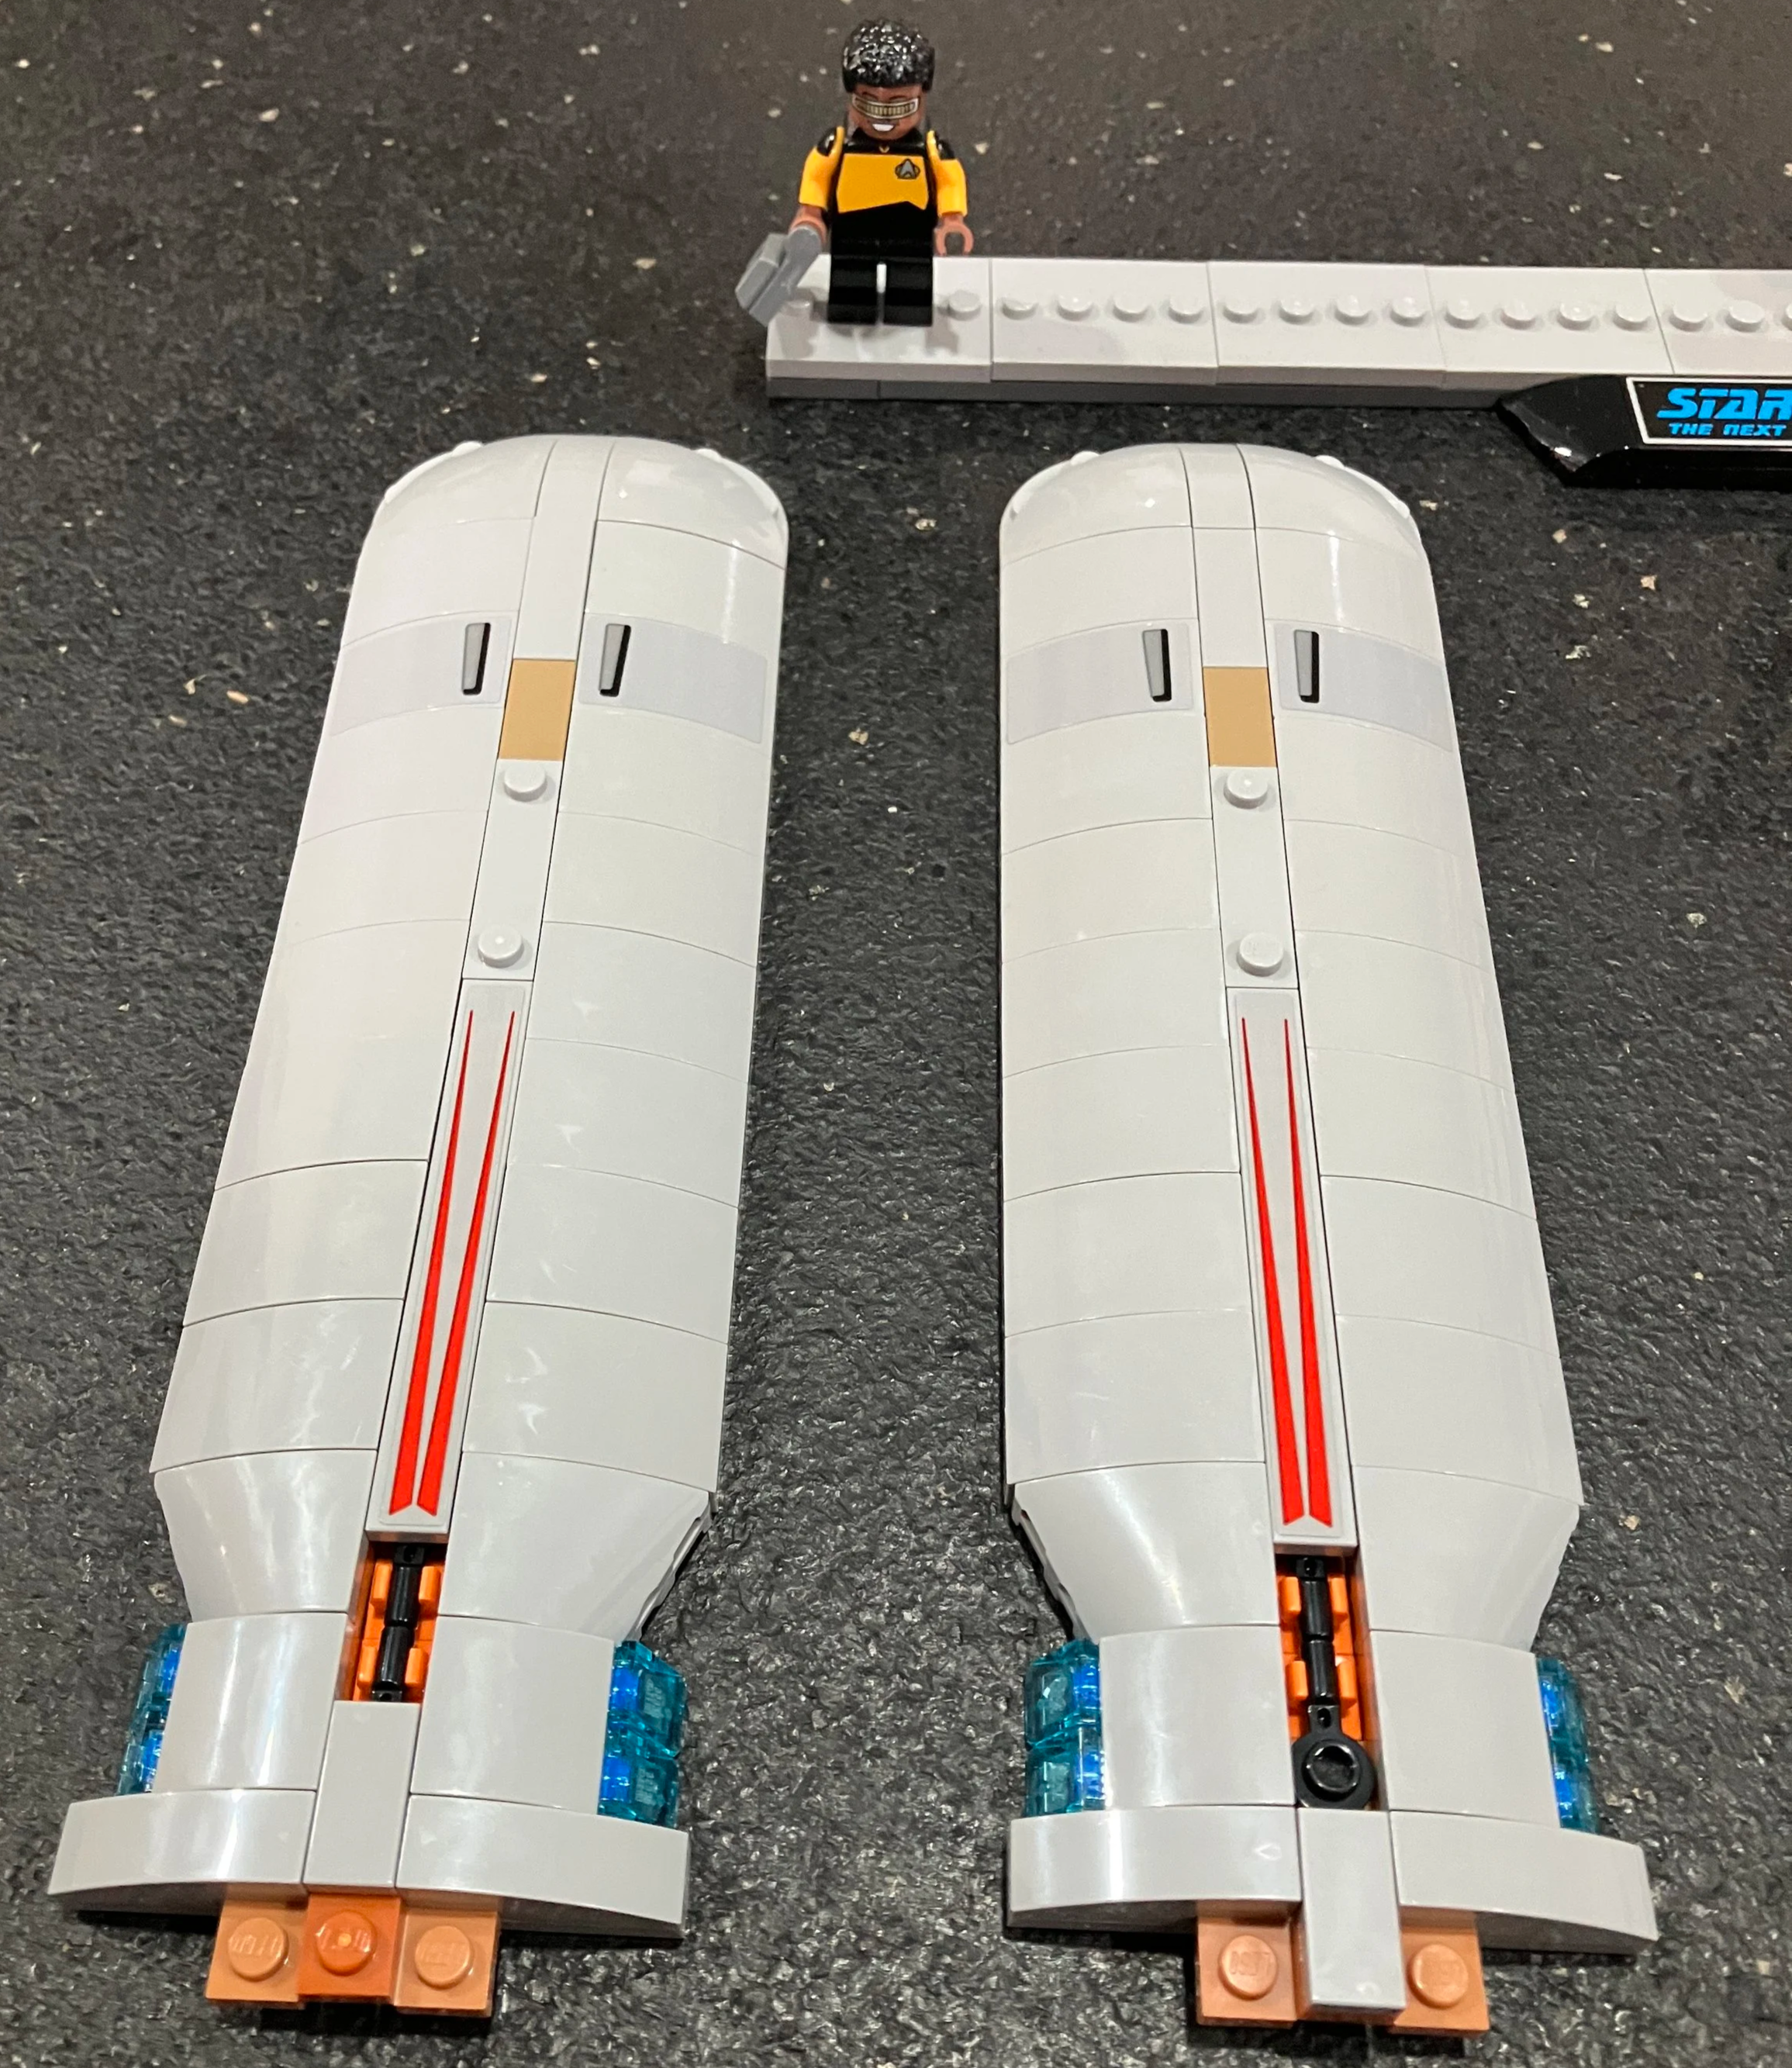
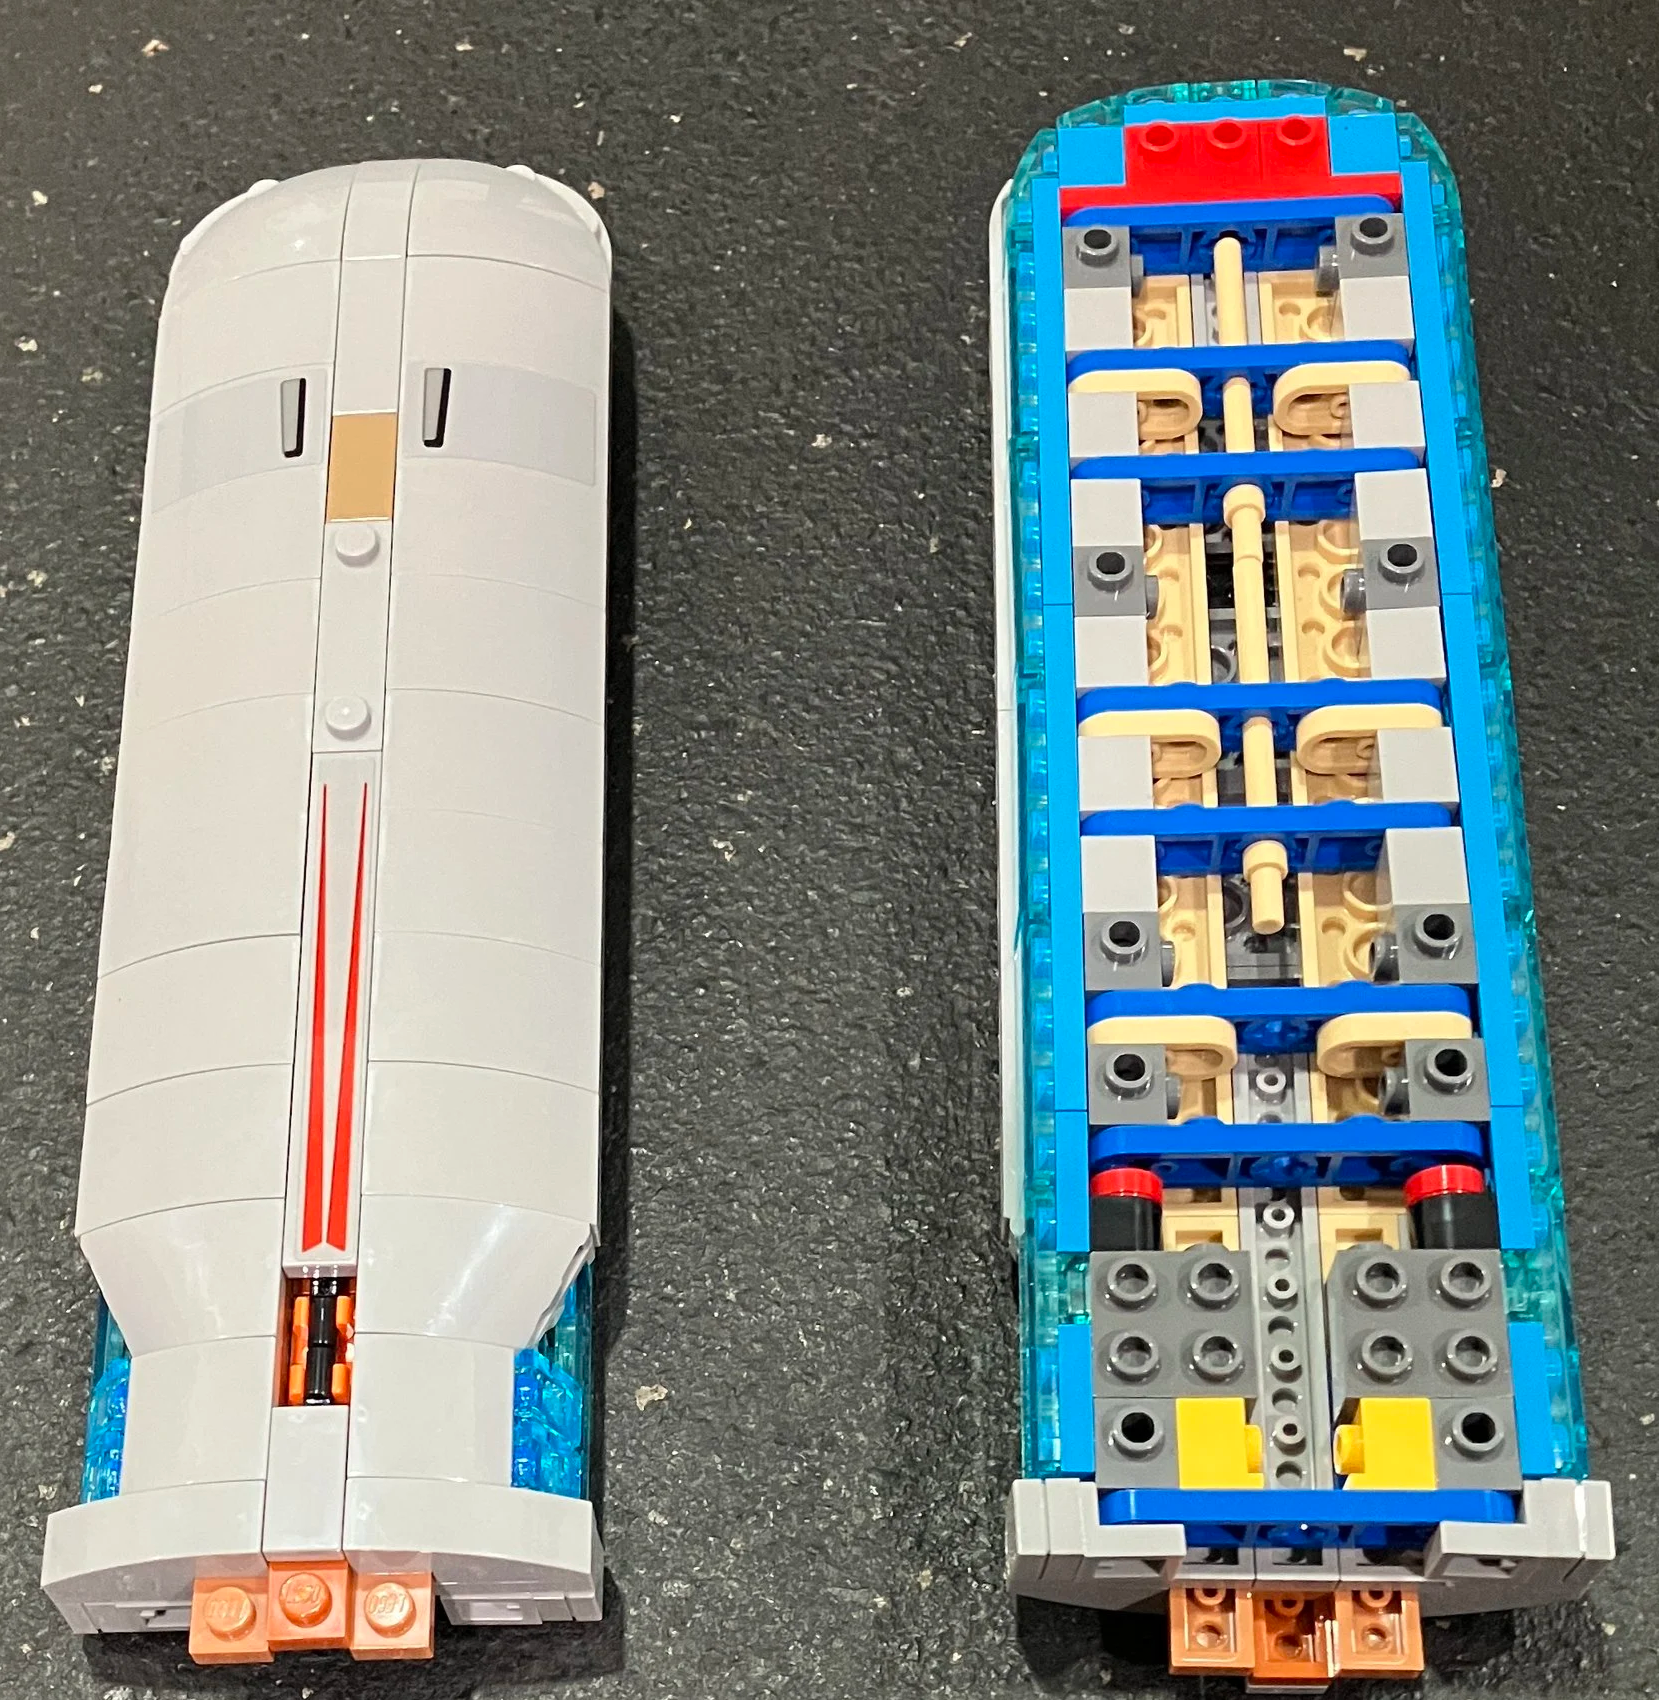
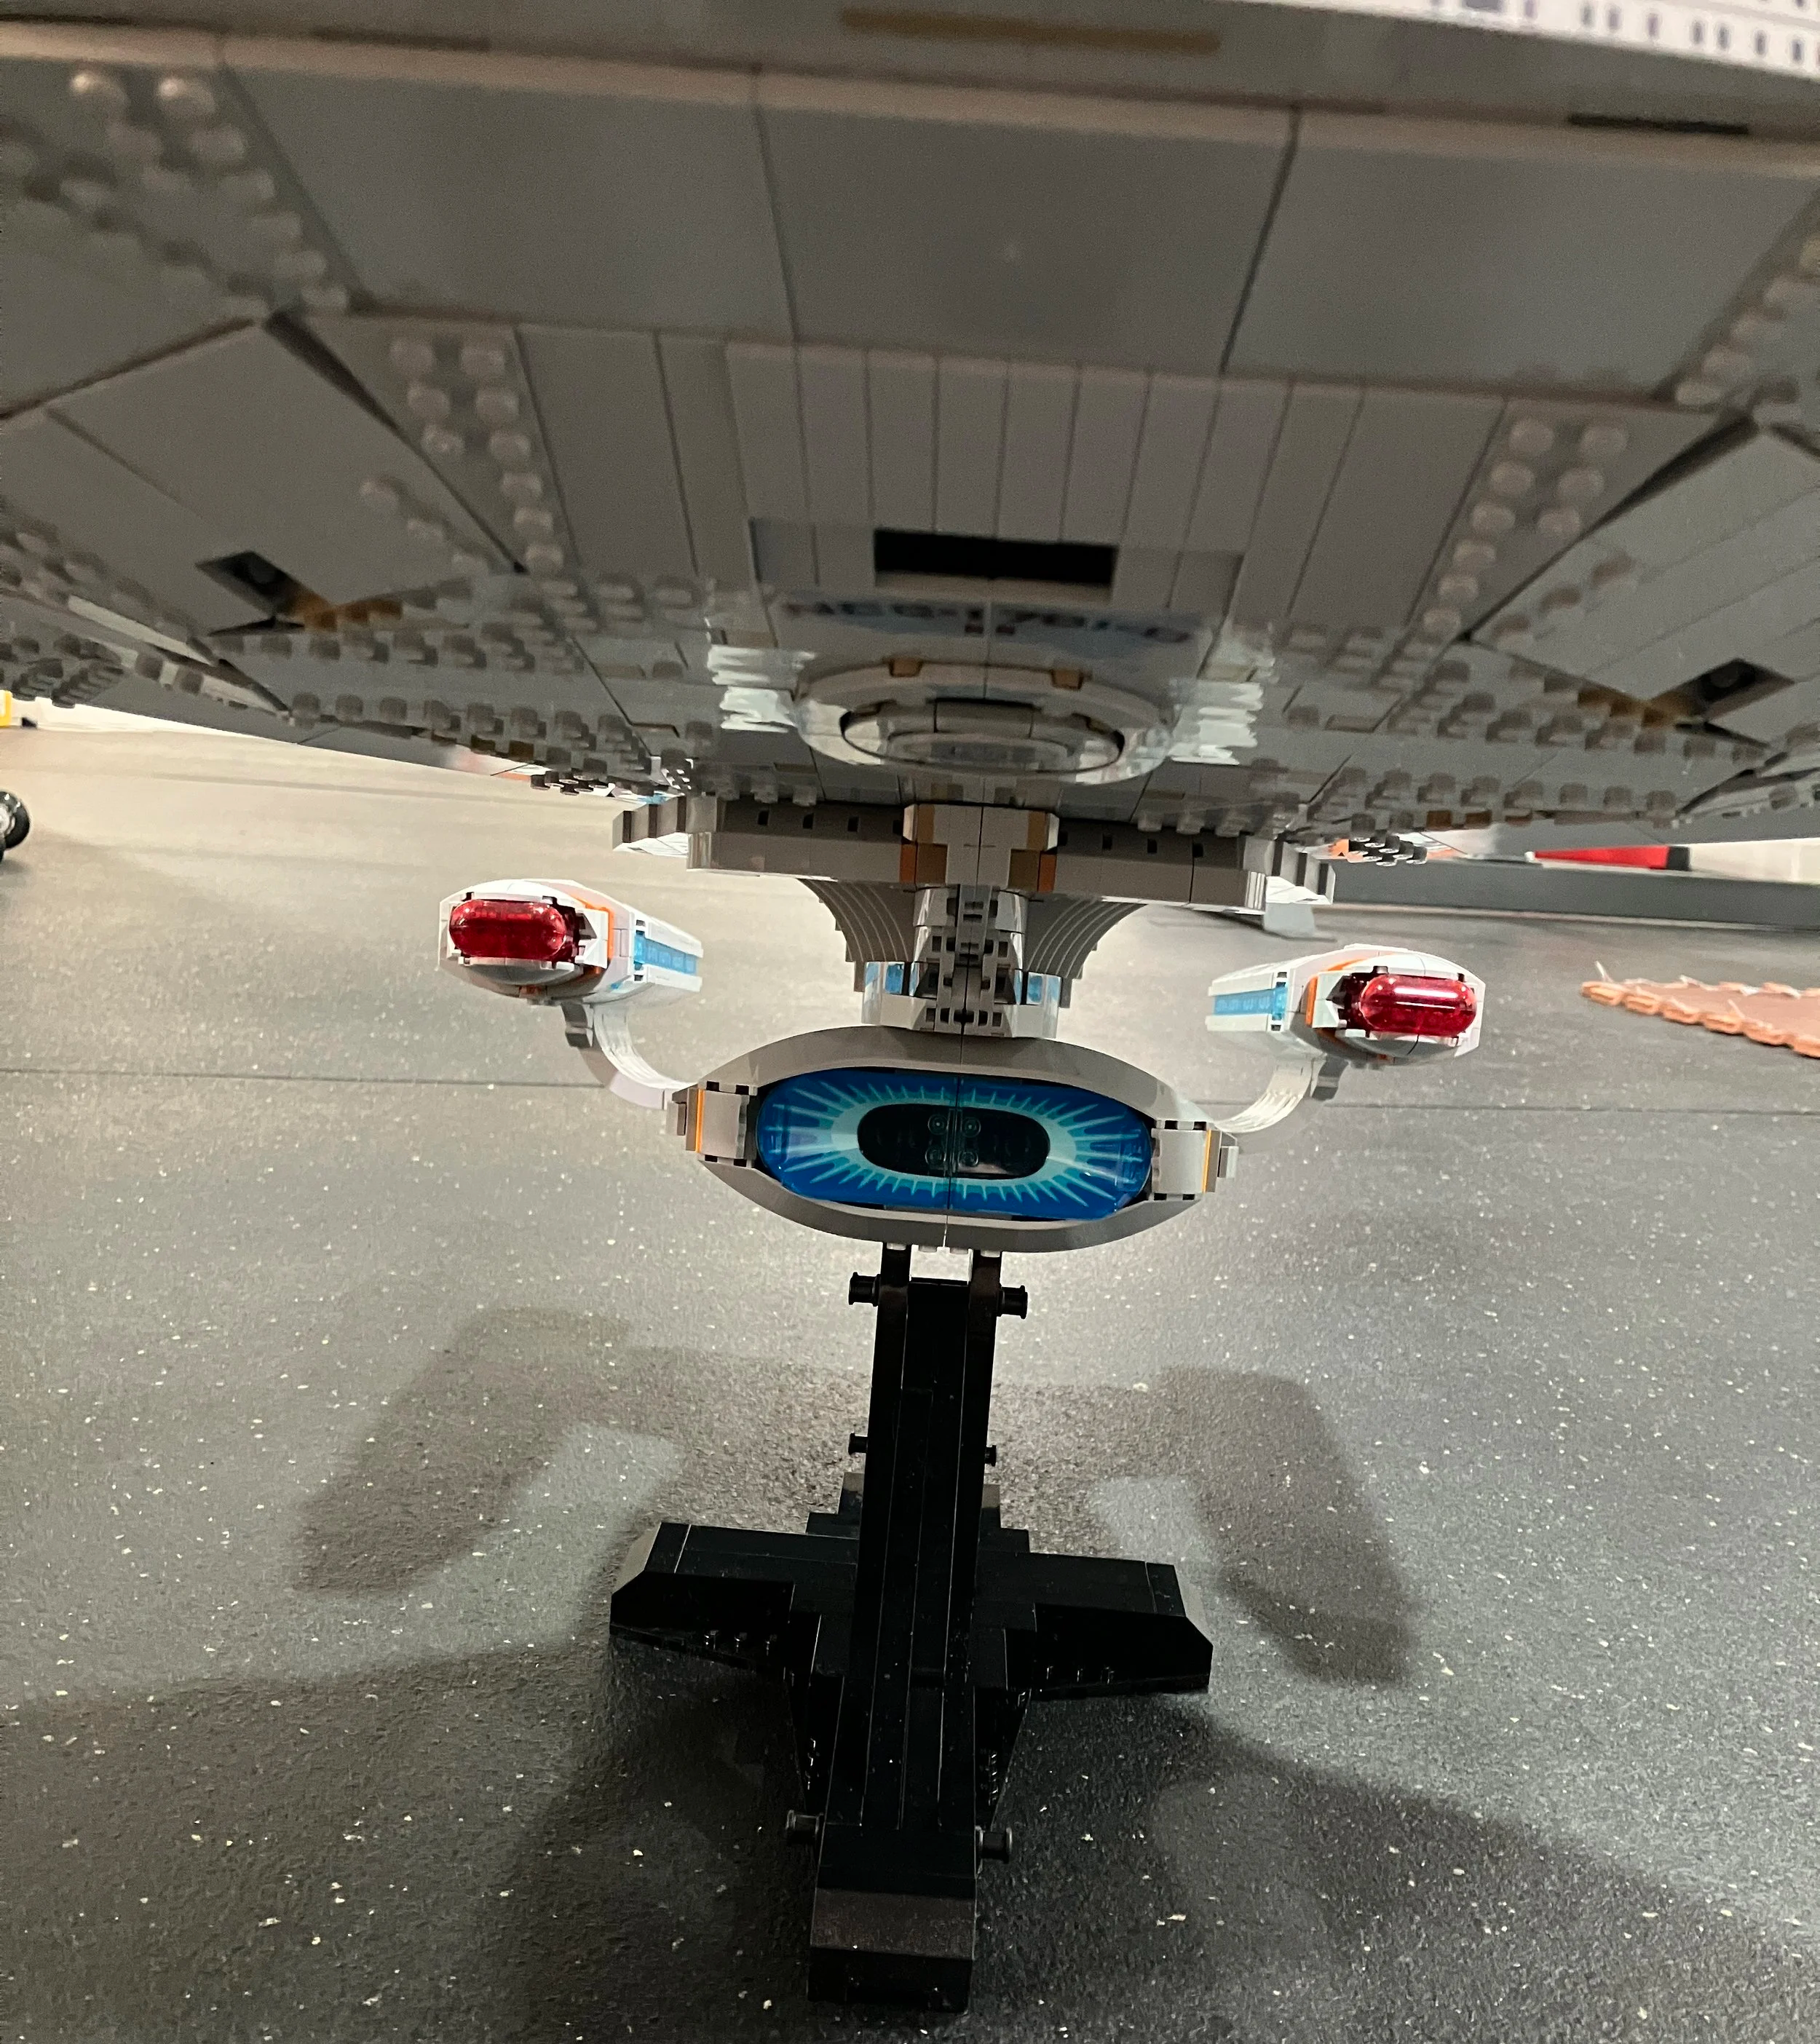
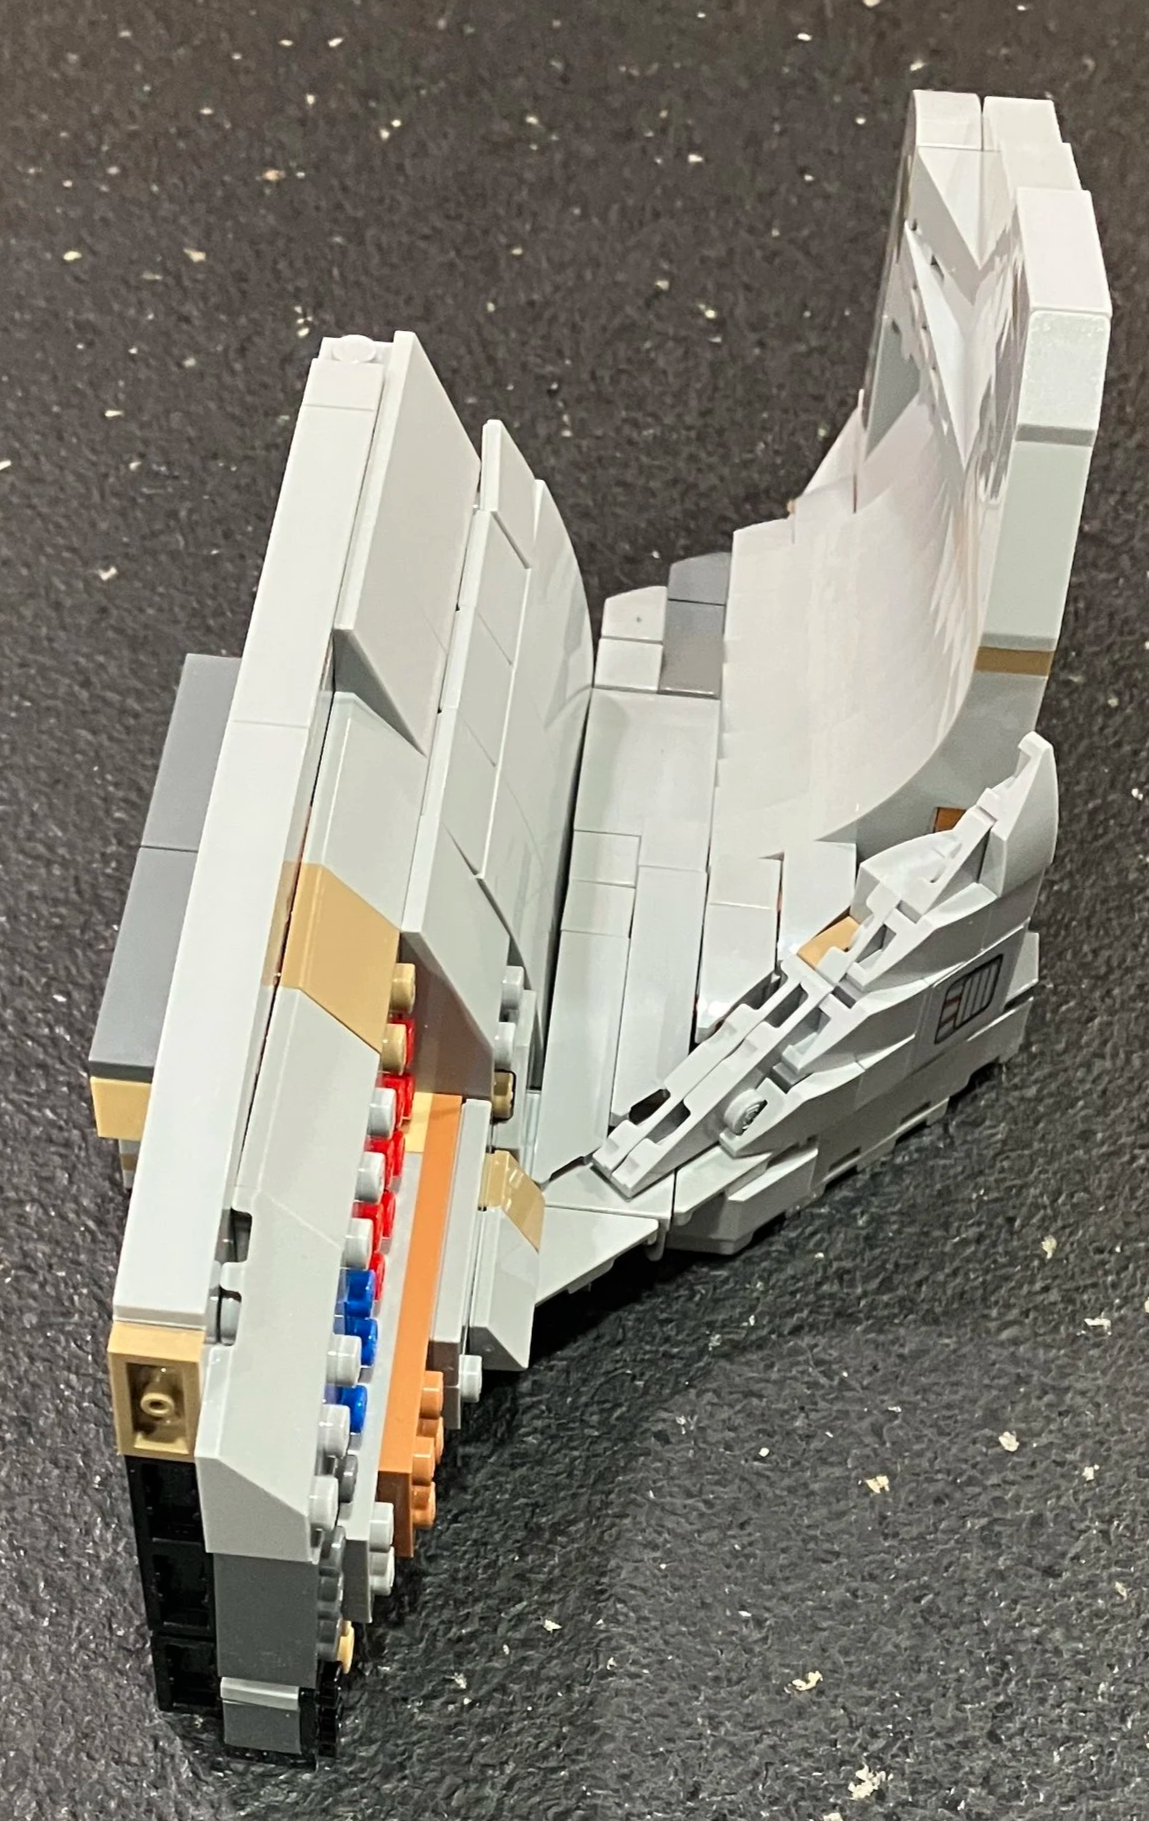
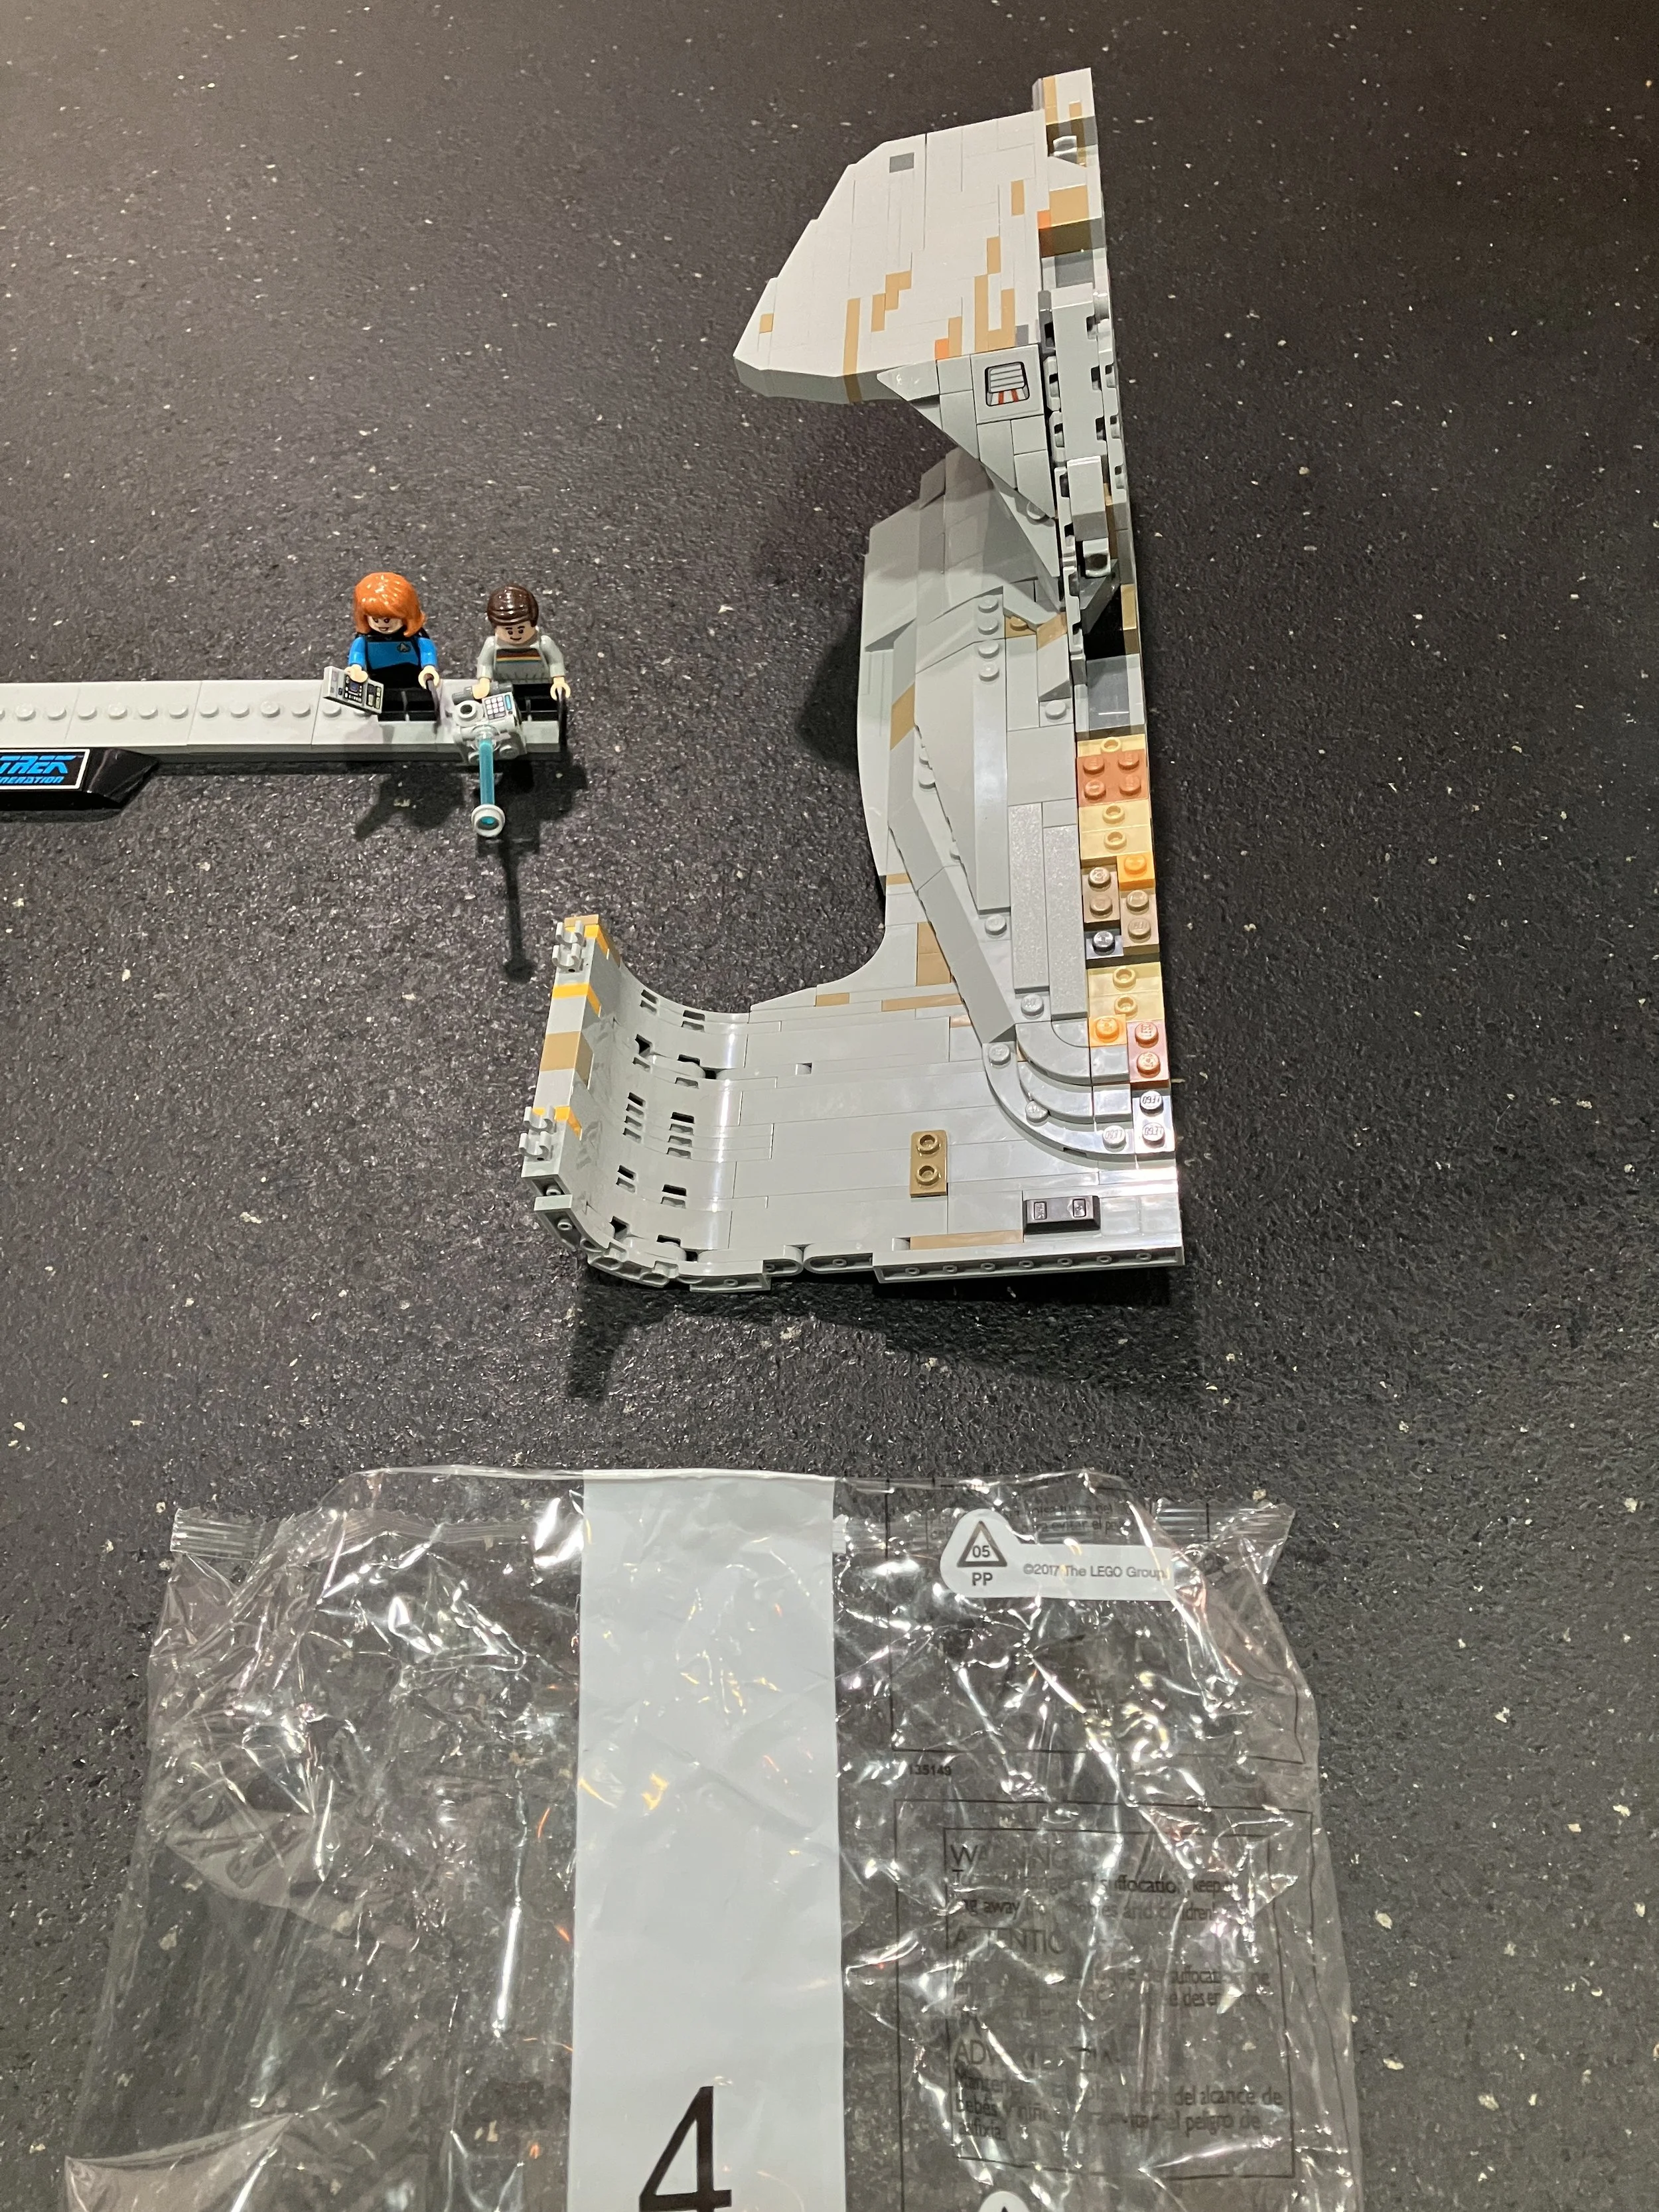
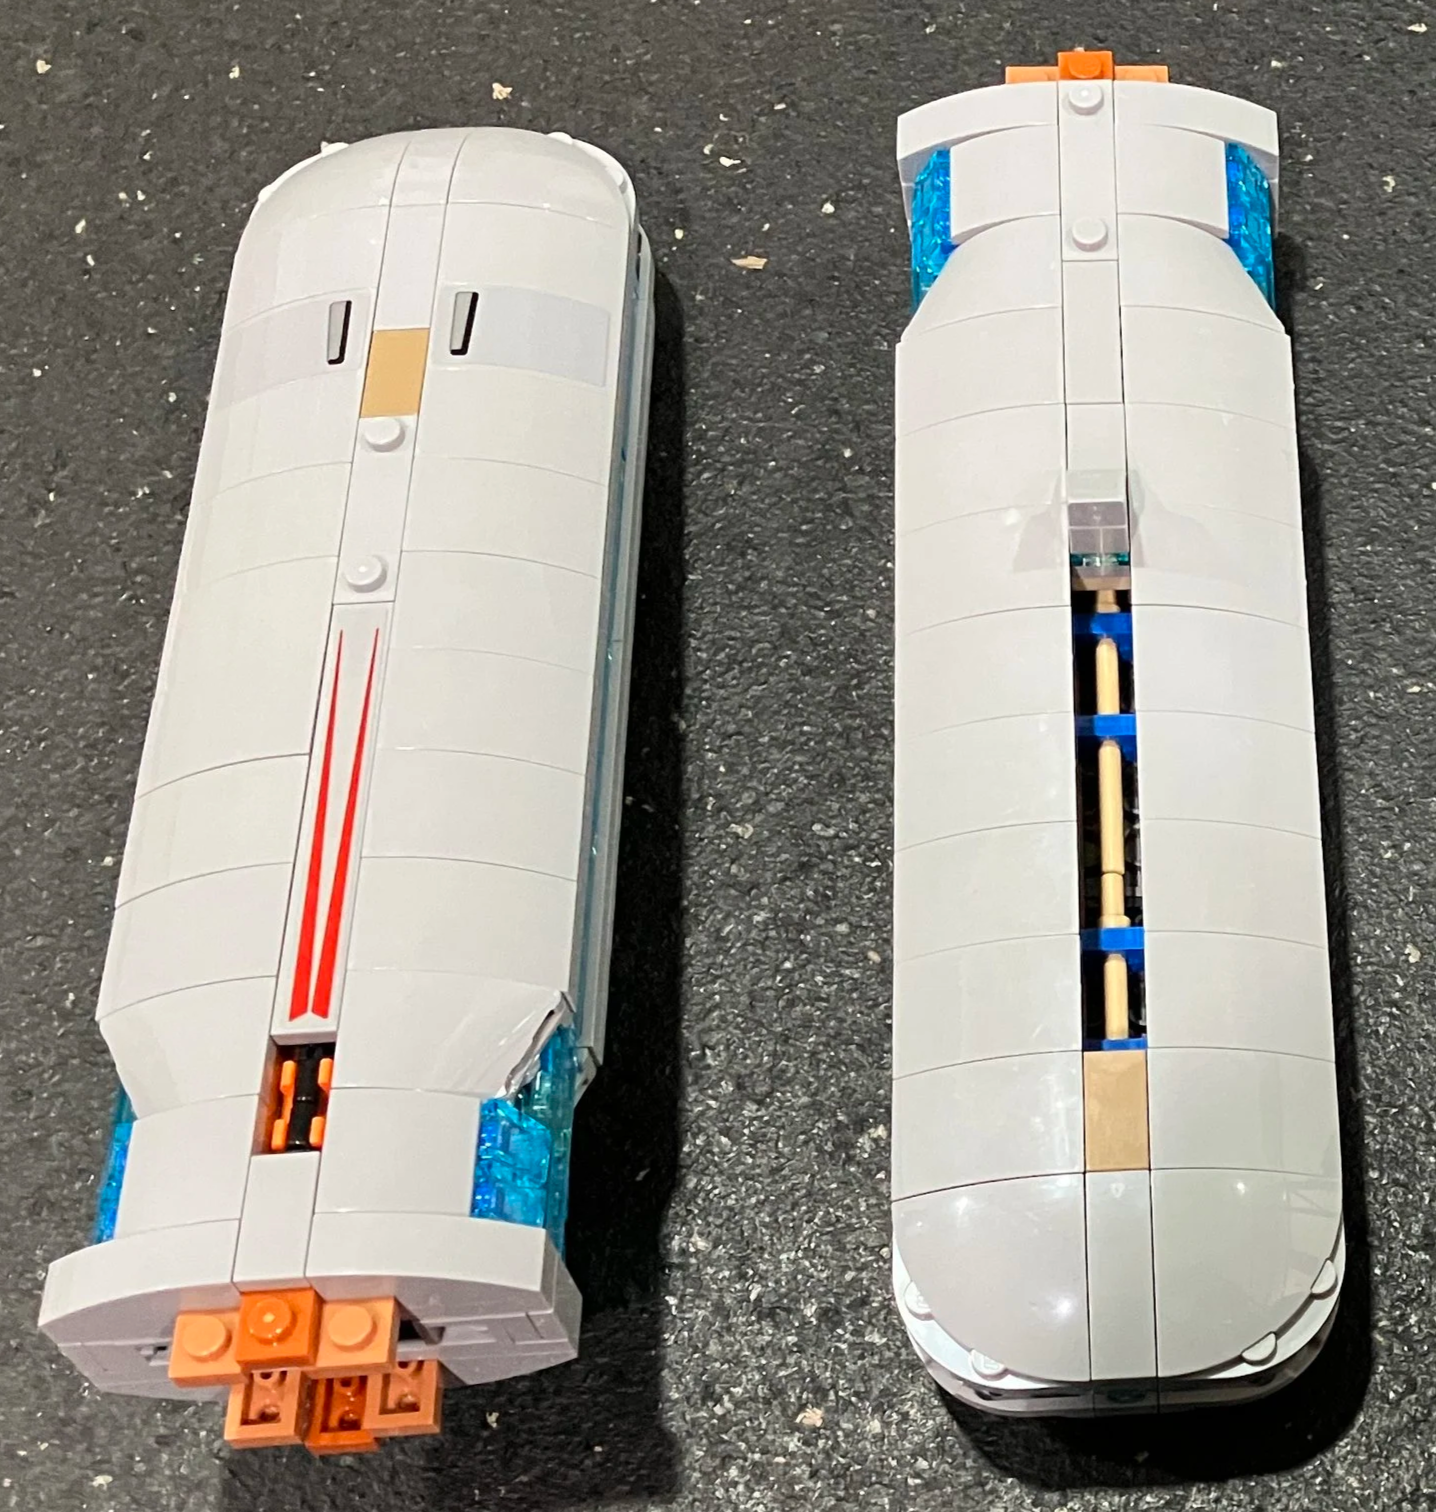
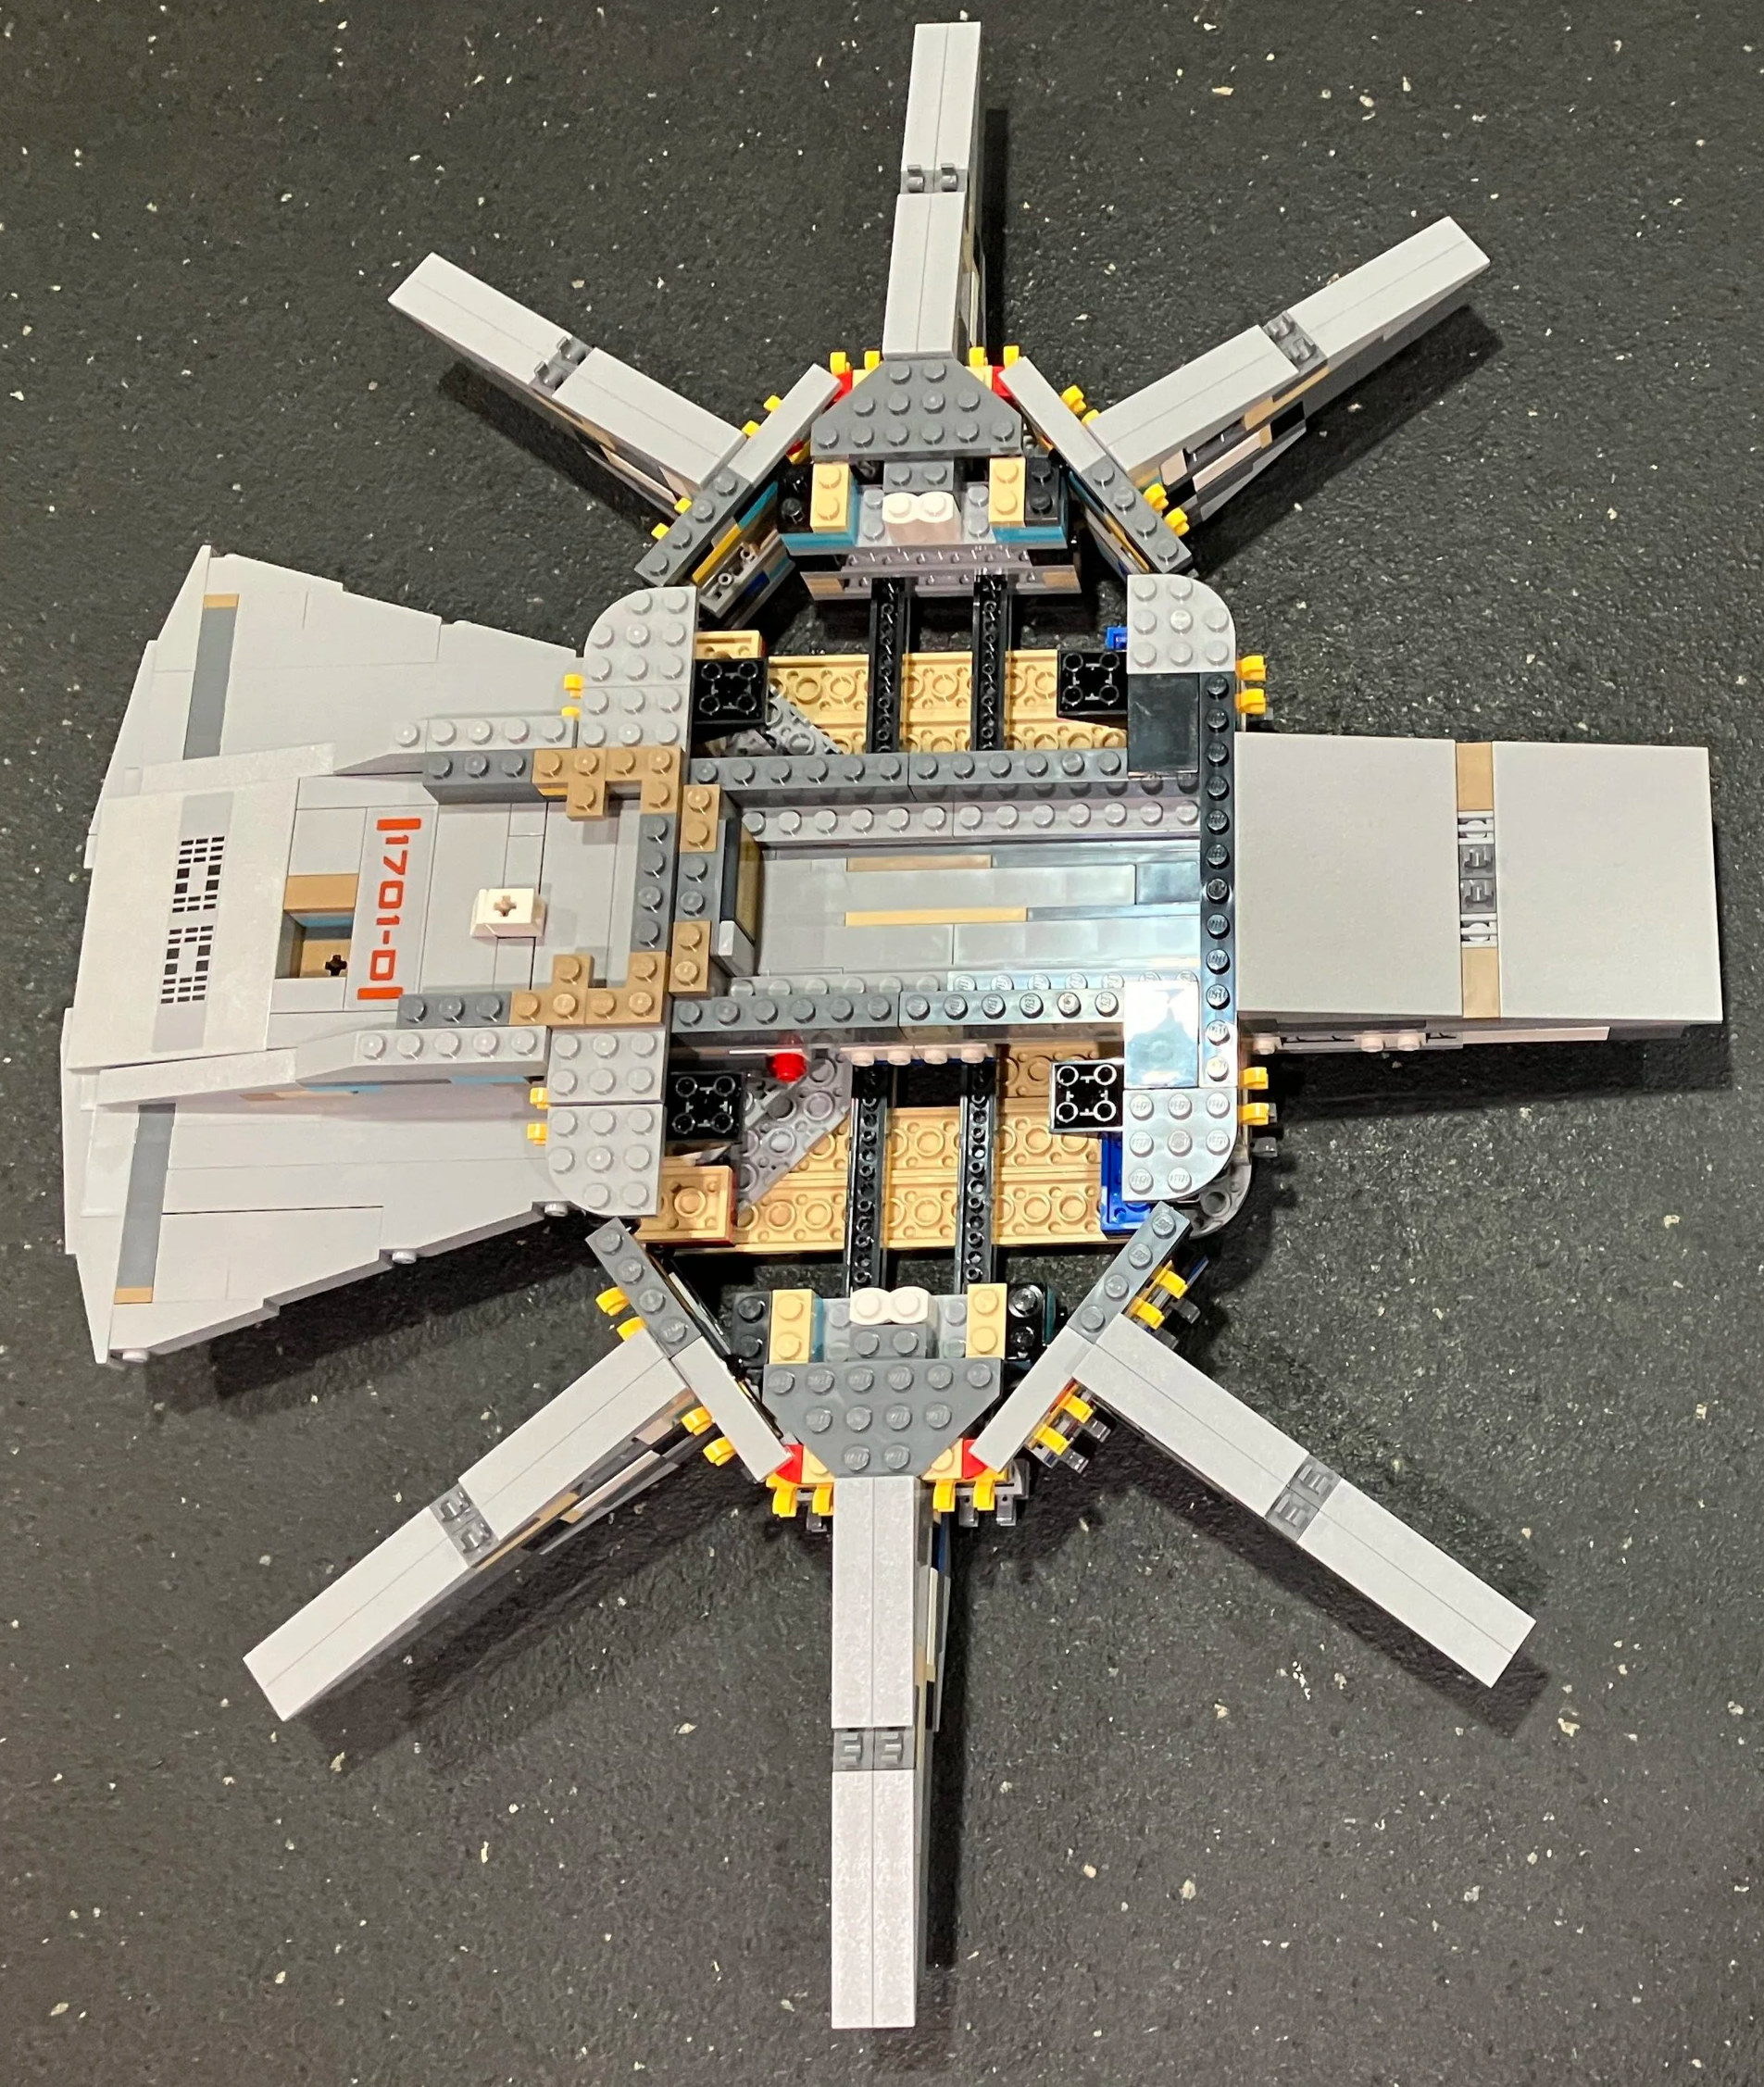
Bag 14 adds the bottom connection sections and you can see how it clips onto the rest of the ship. Bag 15 adds the red fronts to the nacelles and connects the final nacelles to the engine section.
Bag 16 switches to the saucer section and the second instruction book. At this early stage, you can’t tell what parts you are building
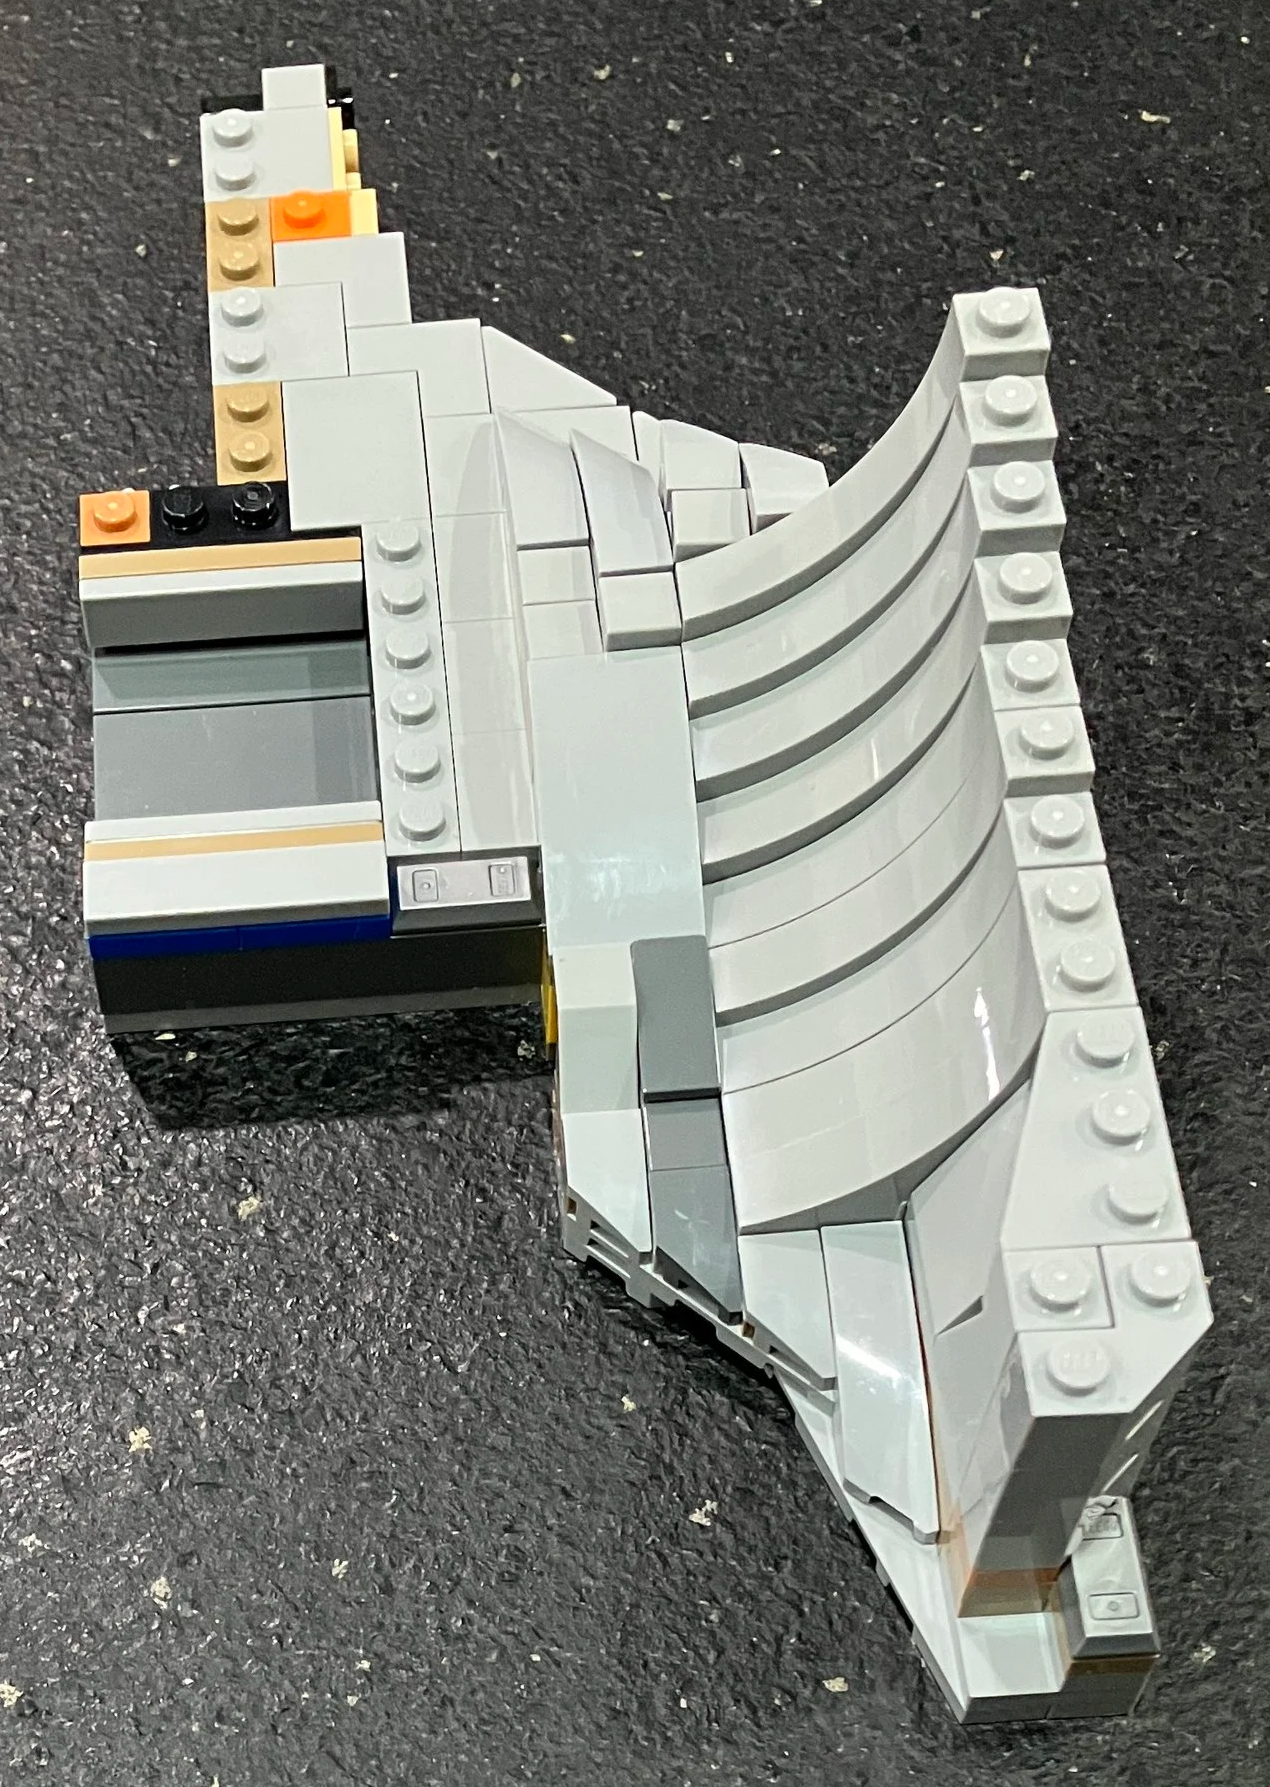
Bag 17 adds more pieces and in the picture, the right side in the picture will become the back of the saucer.
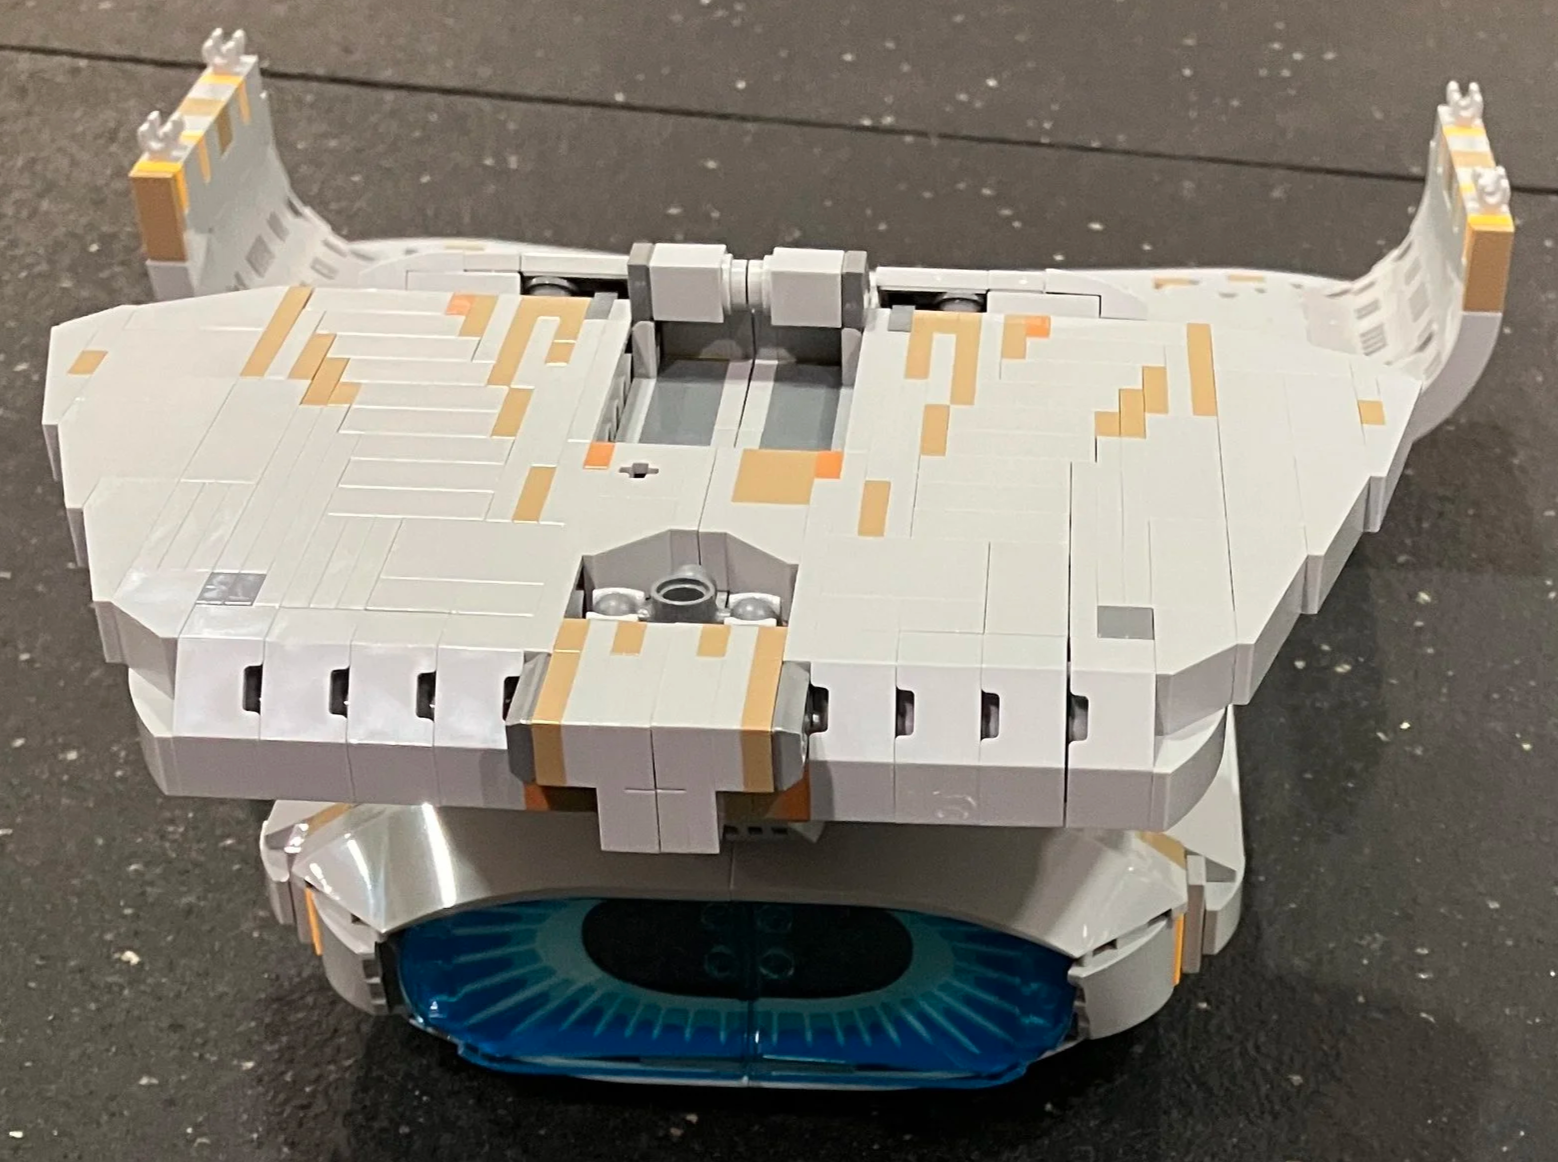
Bag 18 adds more to include what will be a shuttle bay and one of the shuttles (or at least a miniature version of a shuttle).
Bag 19 adds in some of the internal connections that will connect to the pieces that enable the curved shape. Additionally this bag comes with Data and his cat Spot.
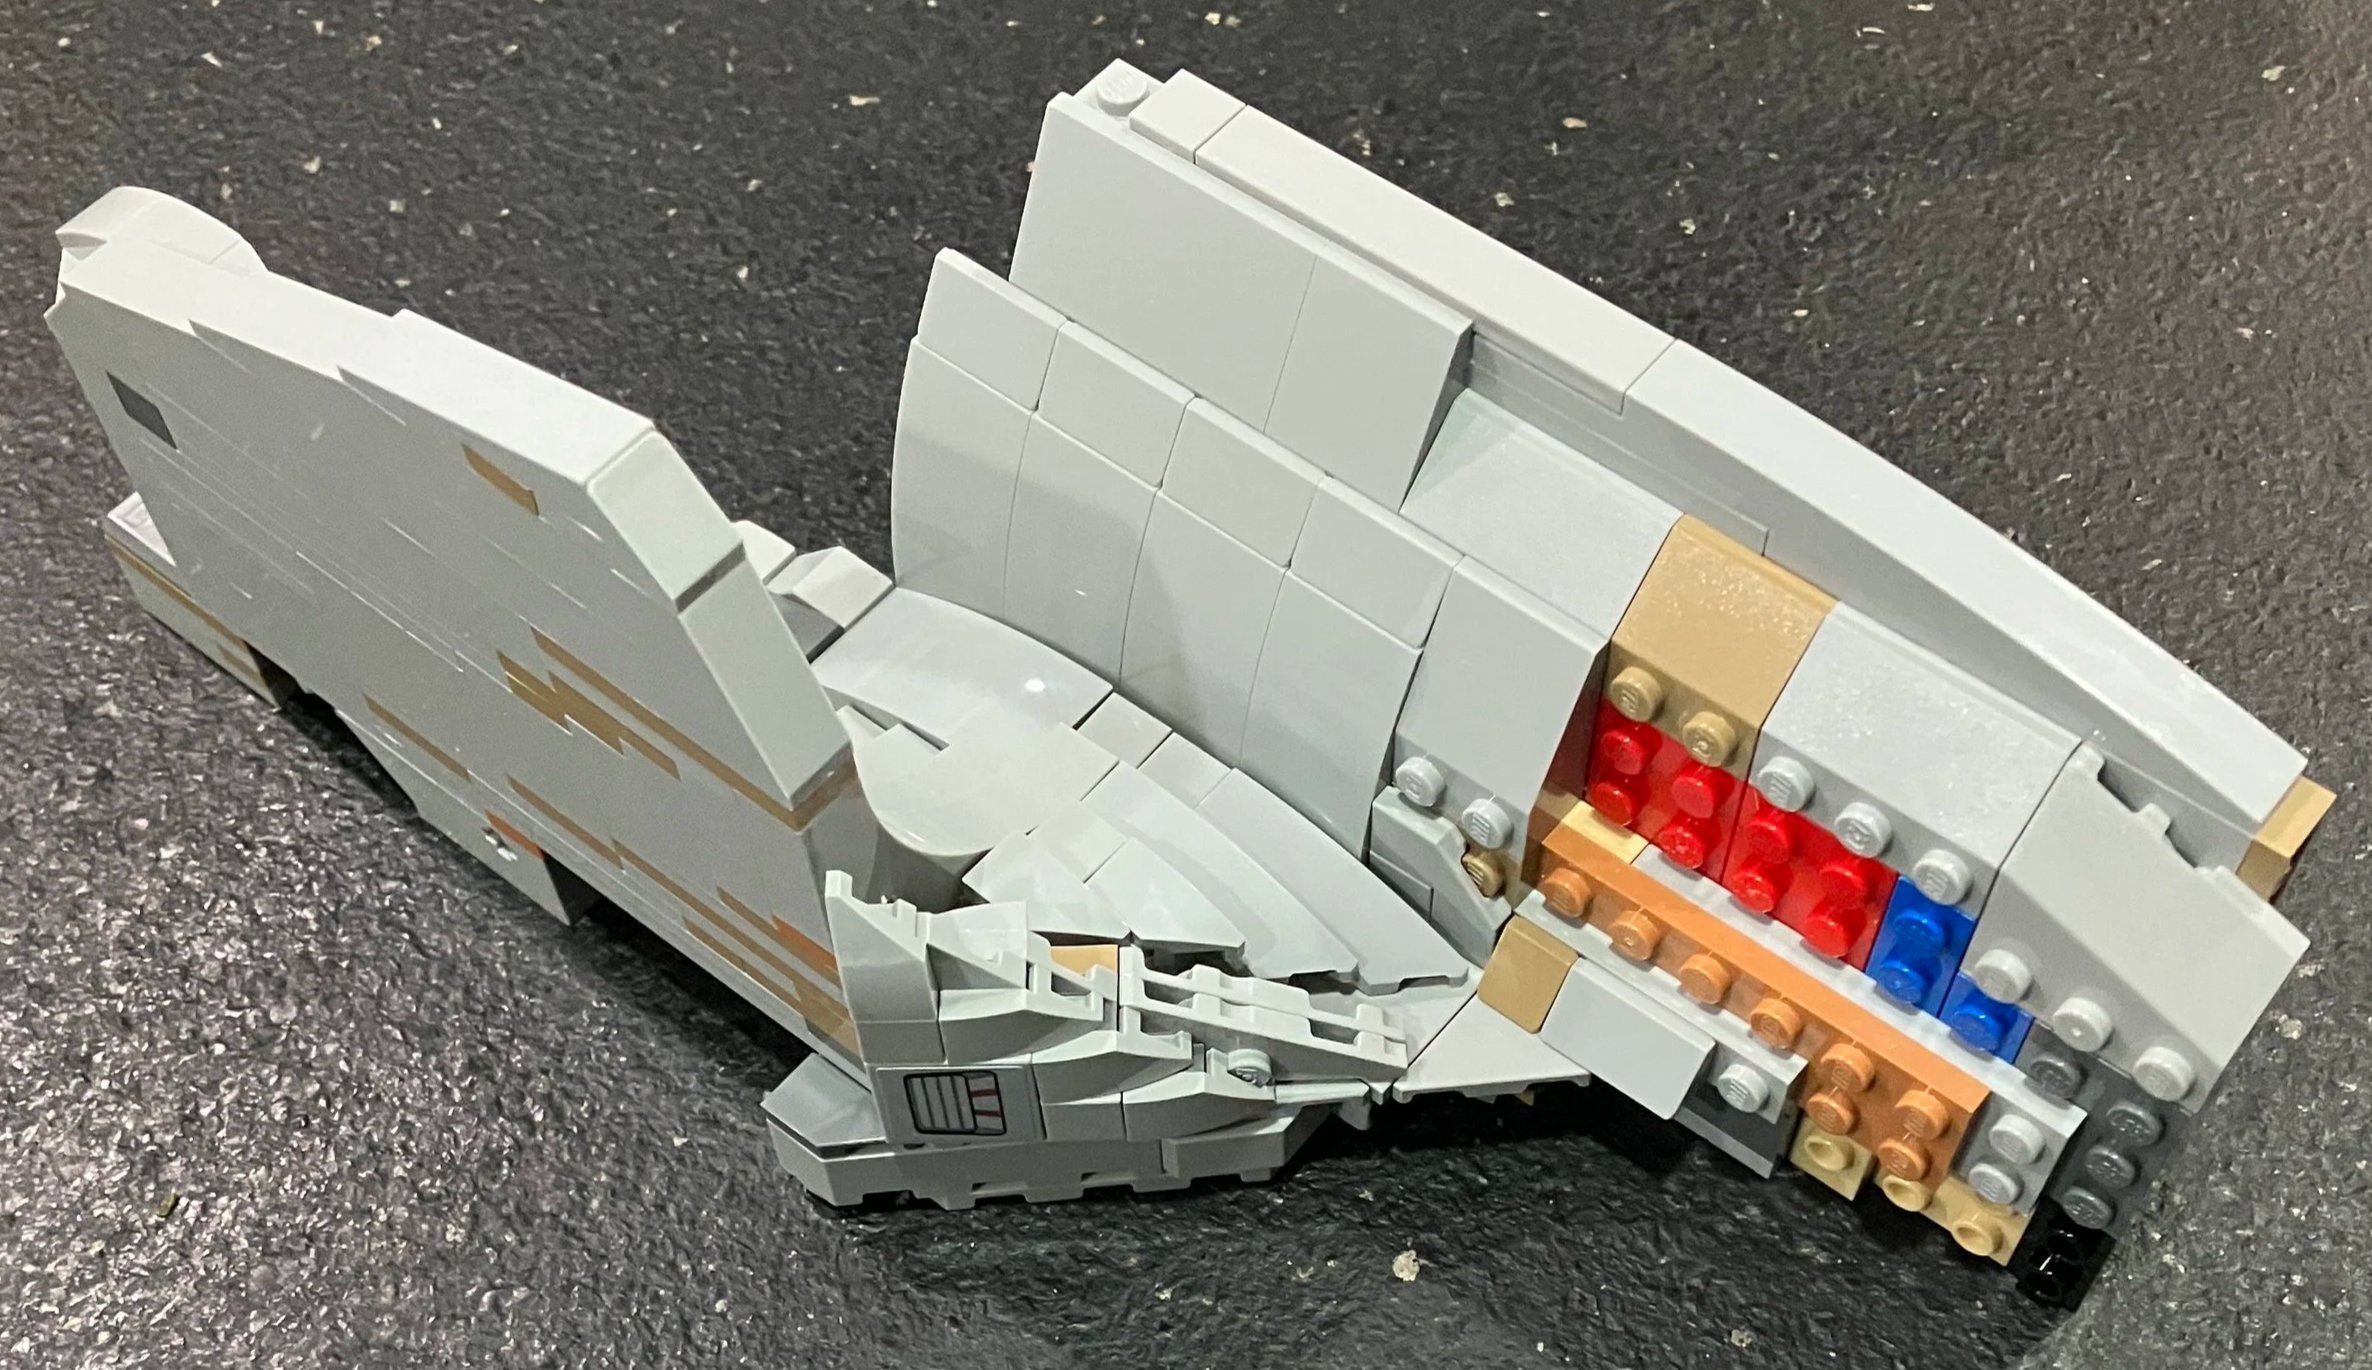
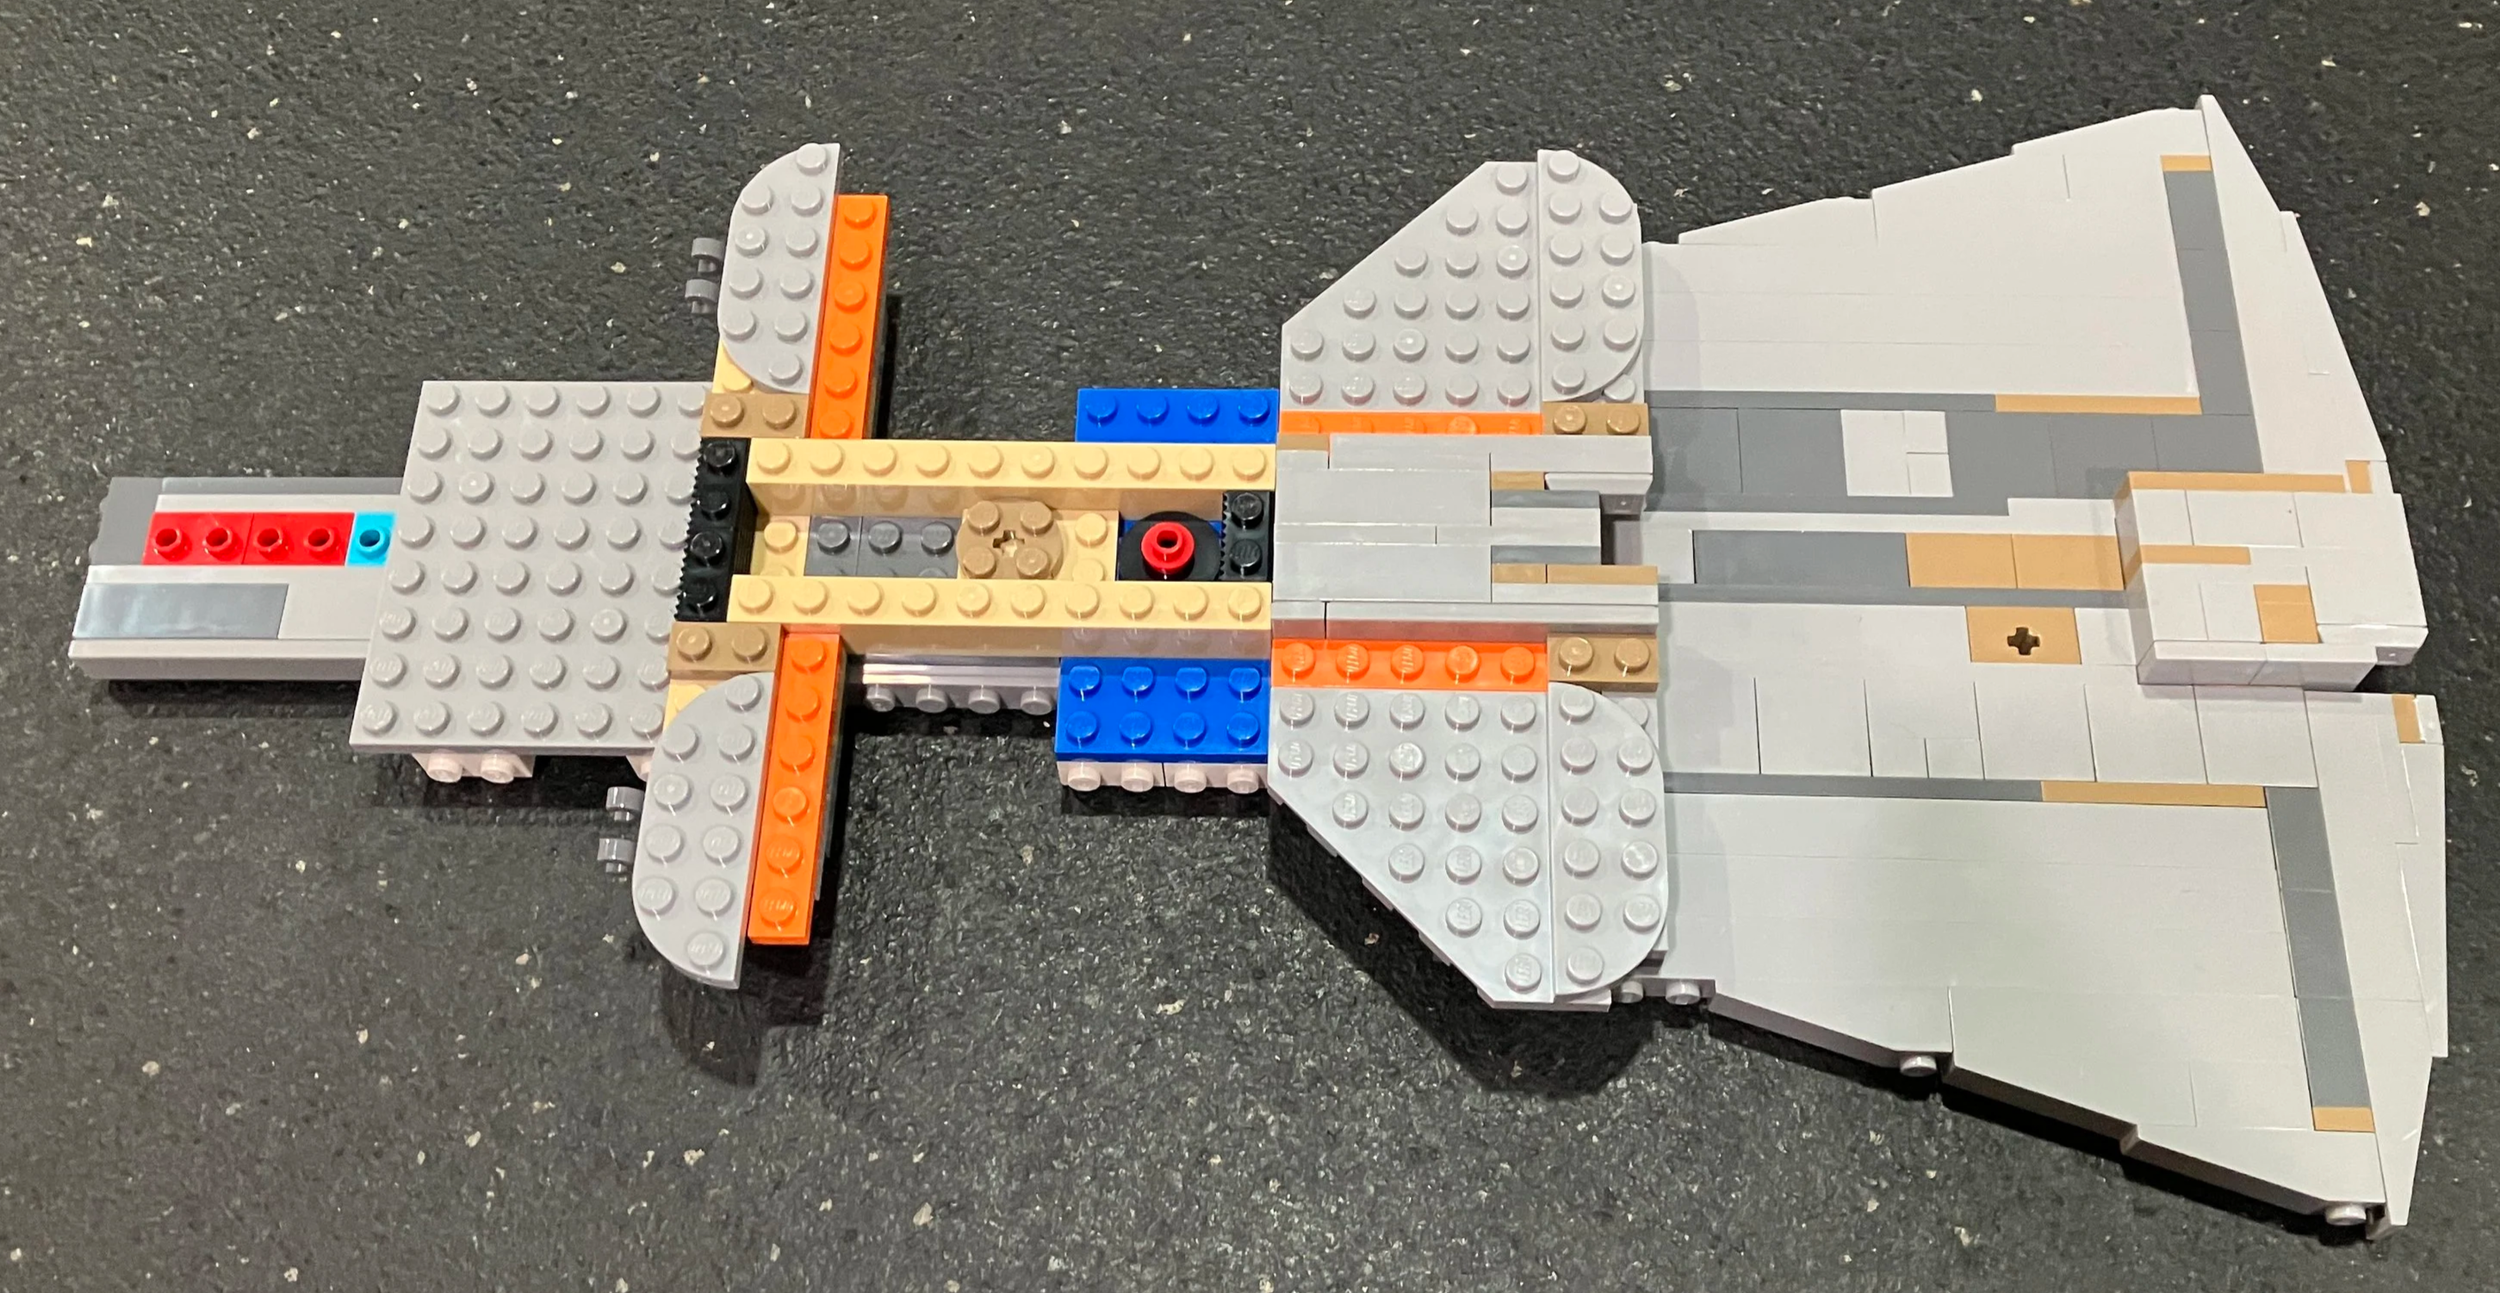
Bags 20 and 21 build out the main supports on the left and right of the saucer section. Bag 22 adds in plates and tiles in the center part of the saucer.
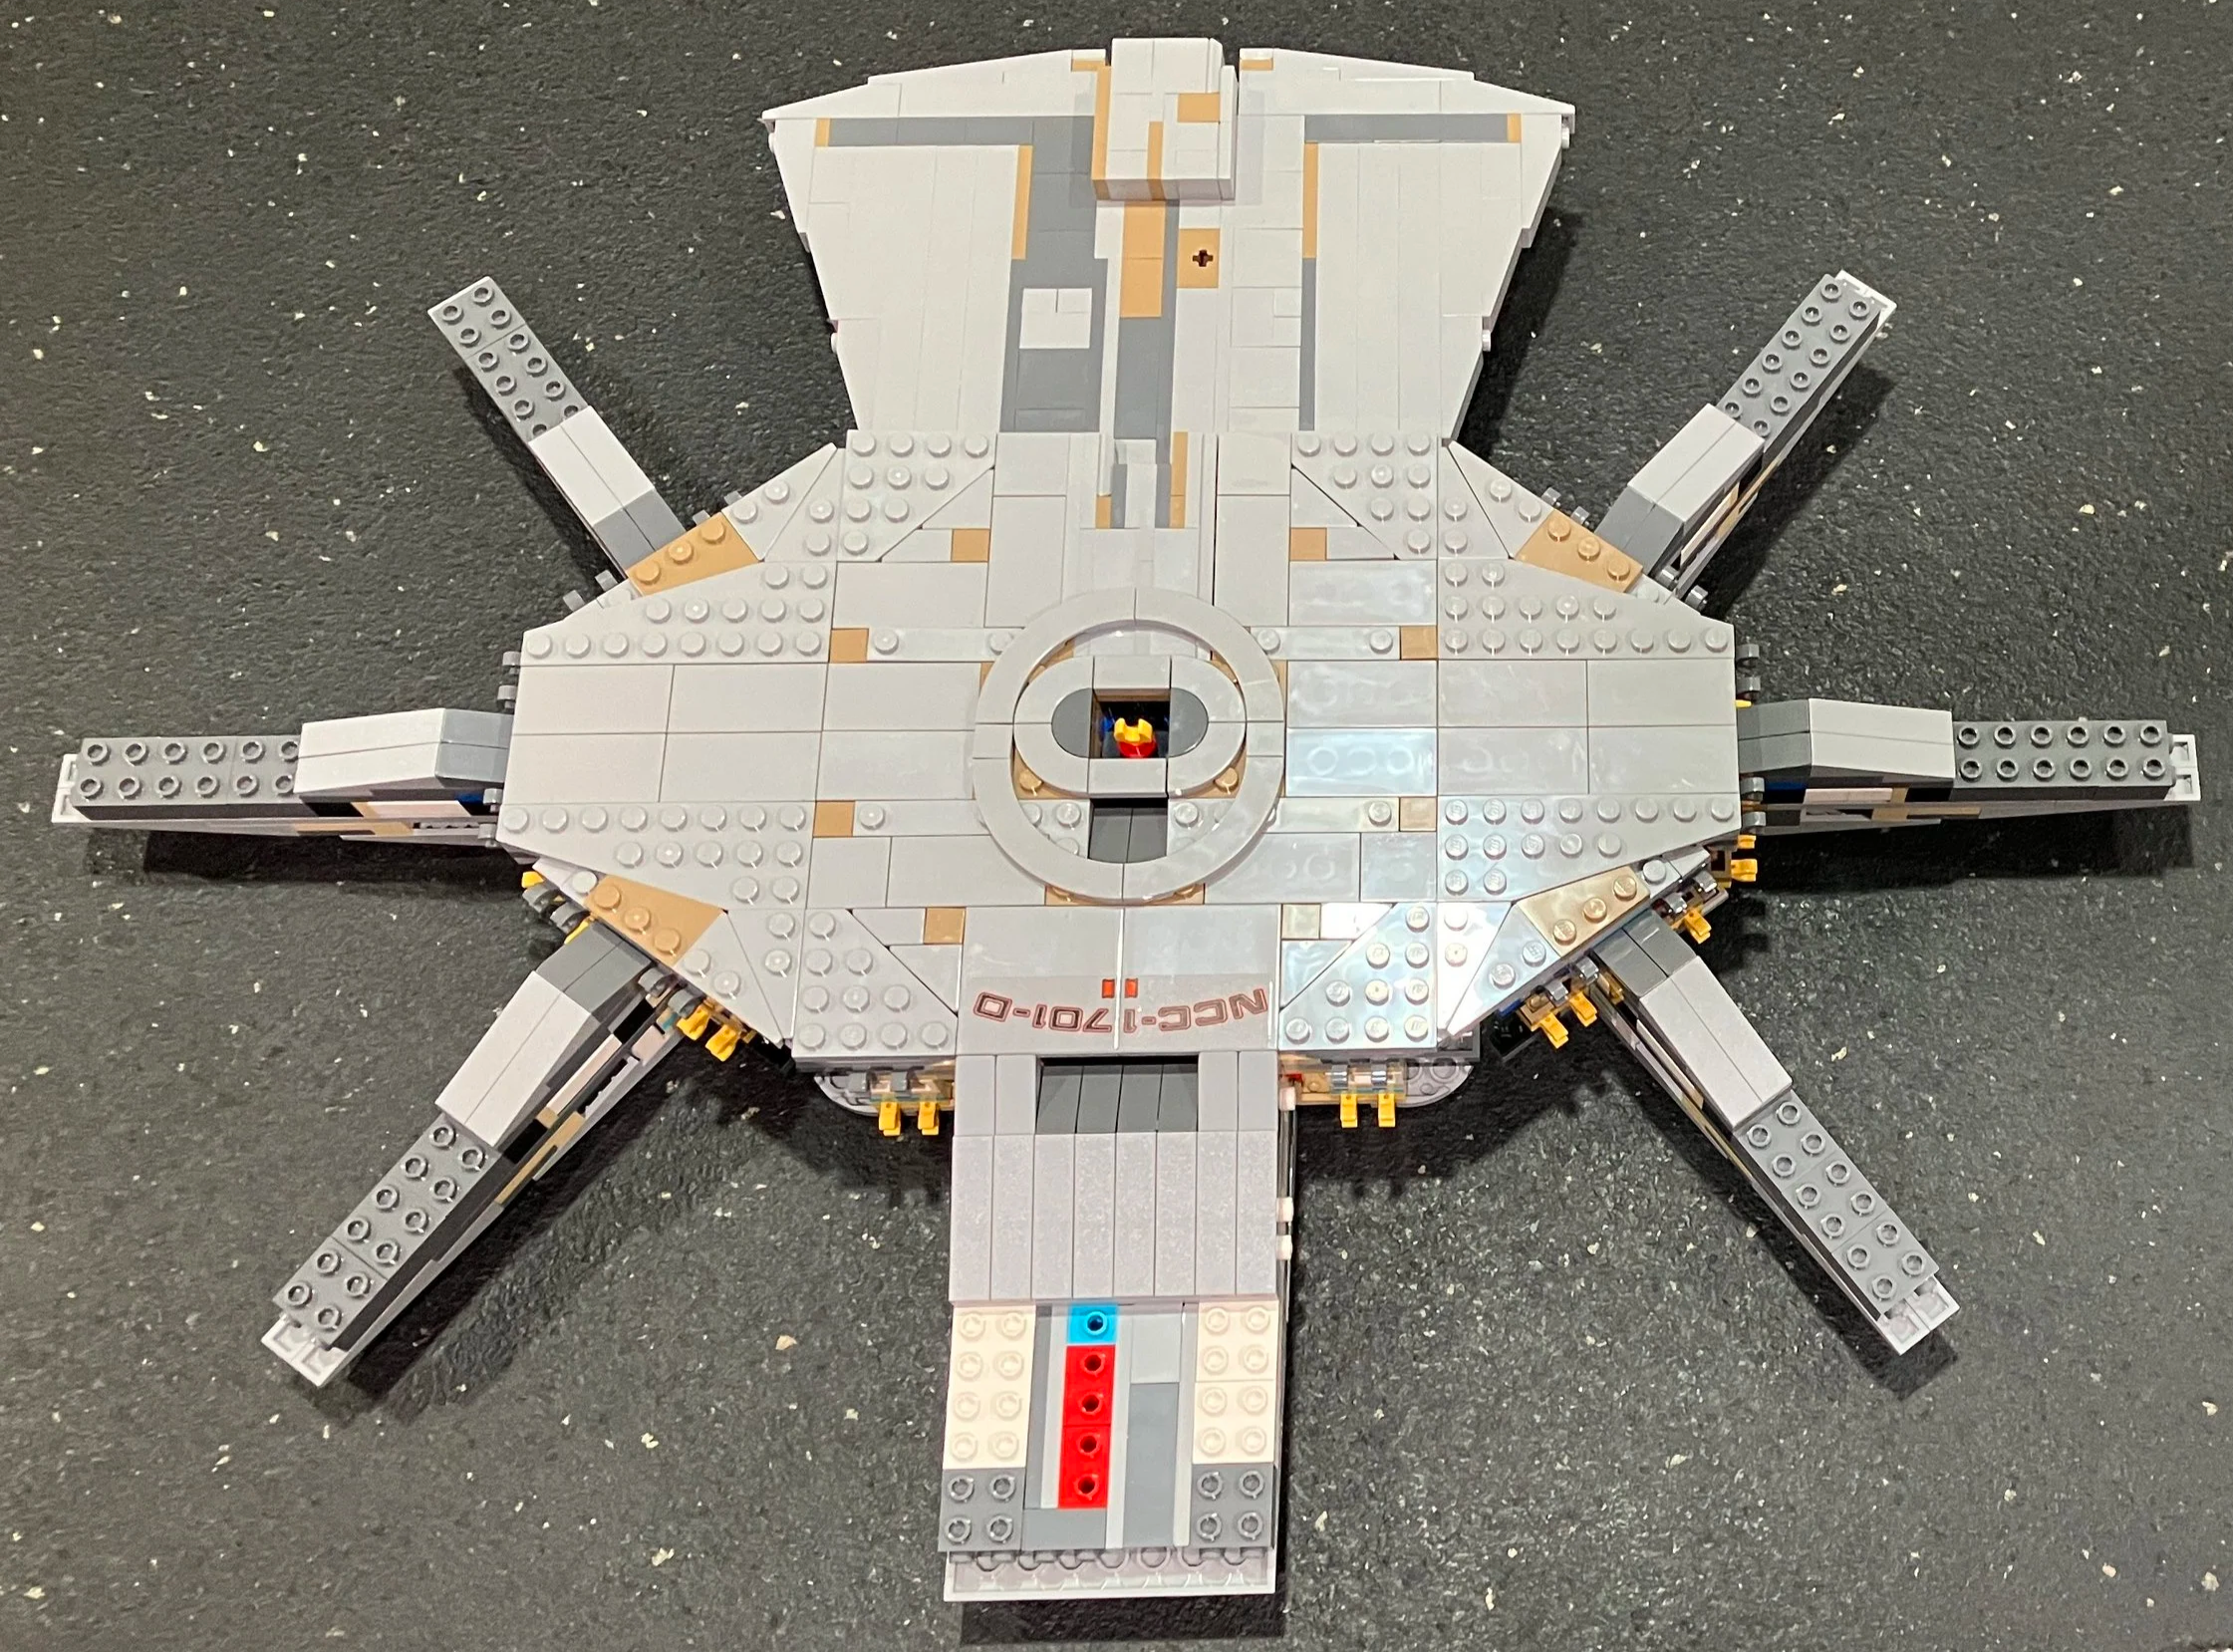
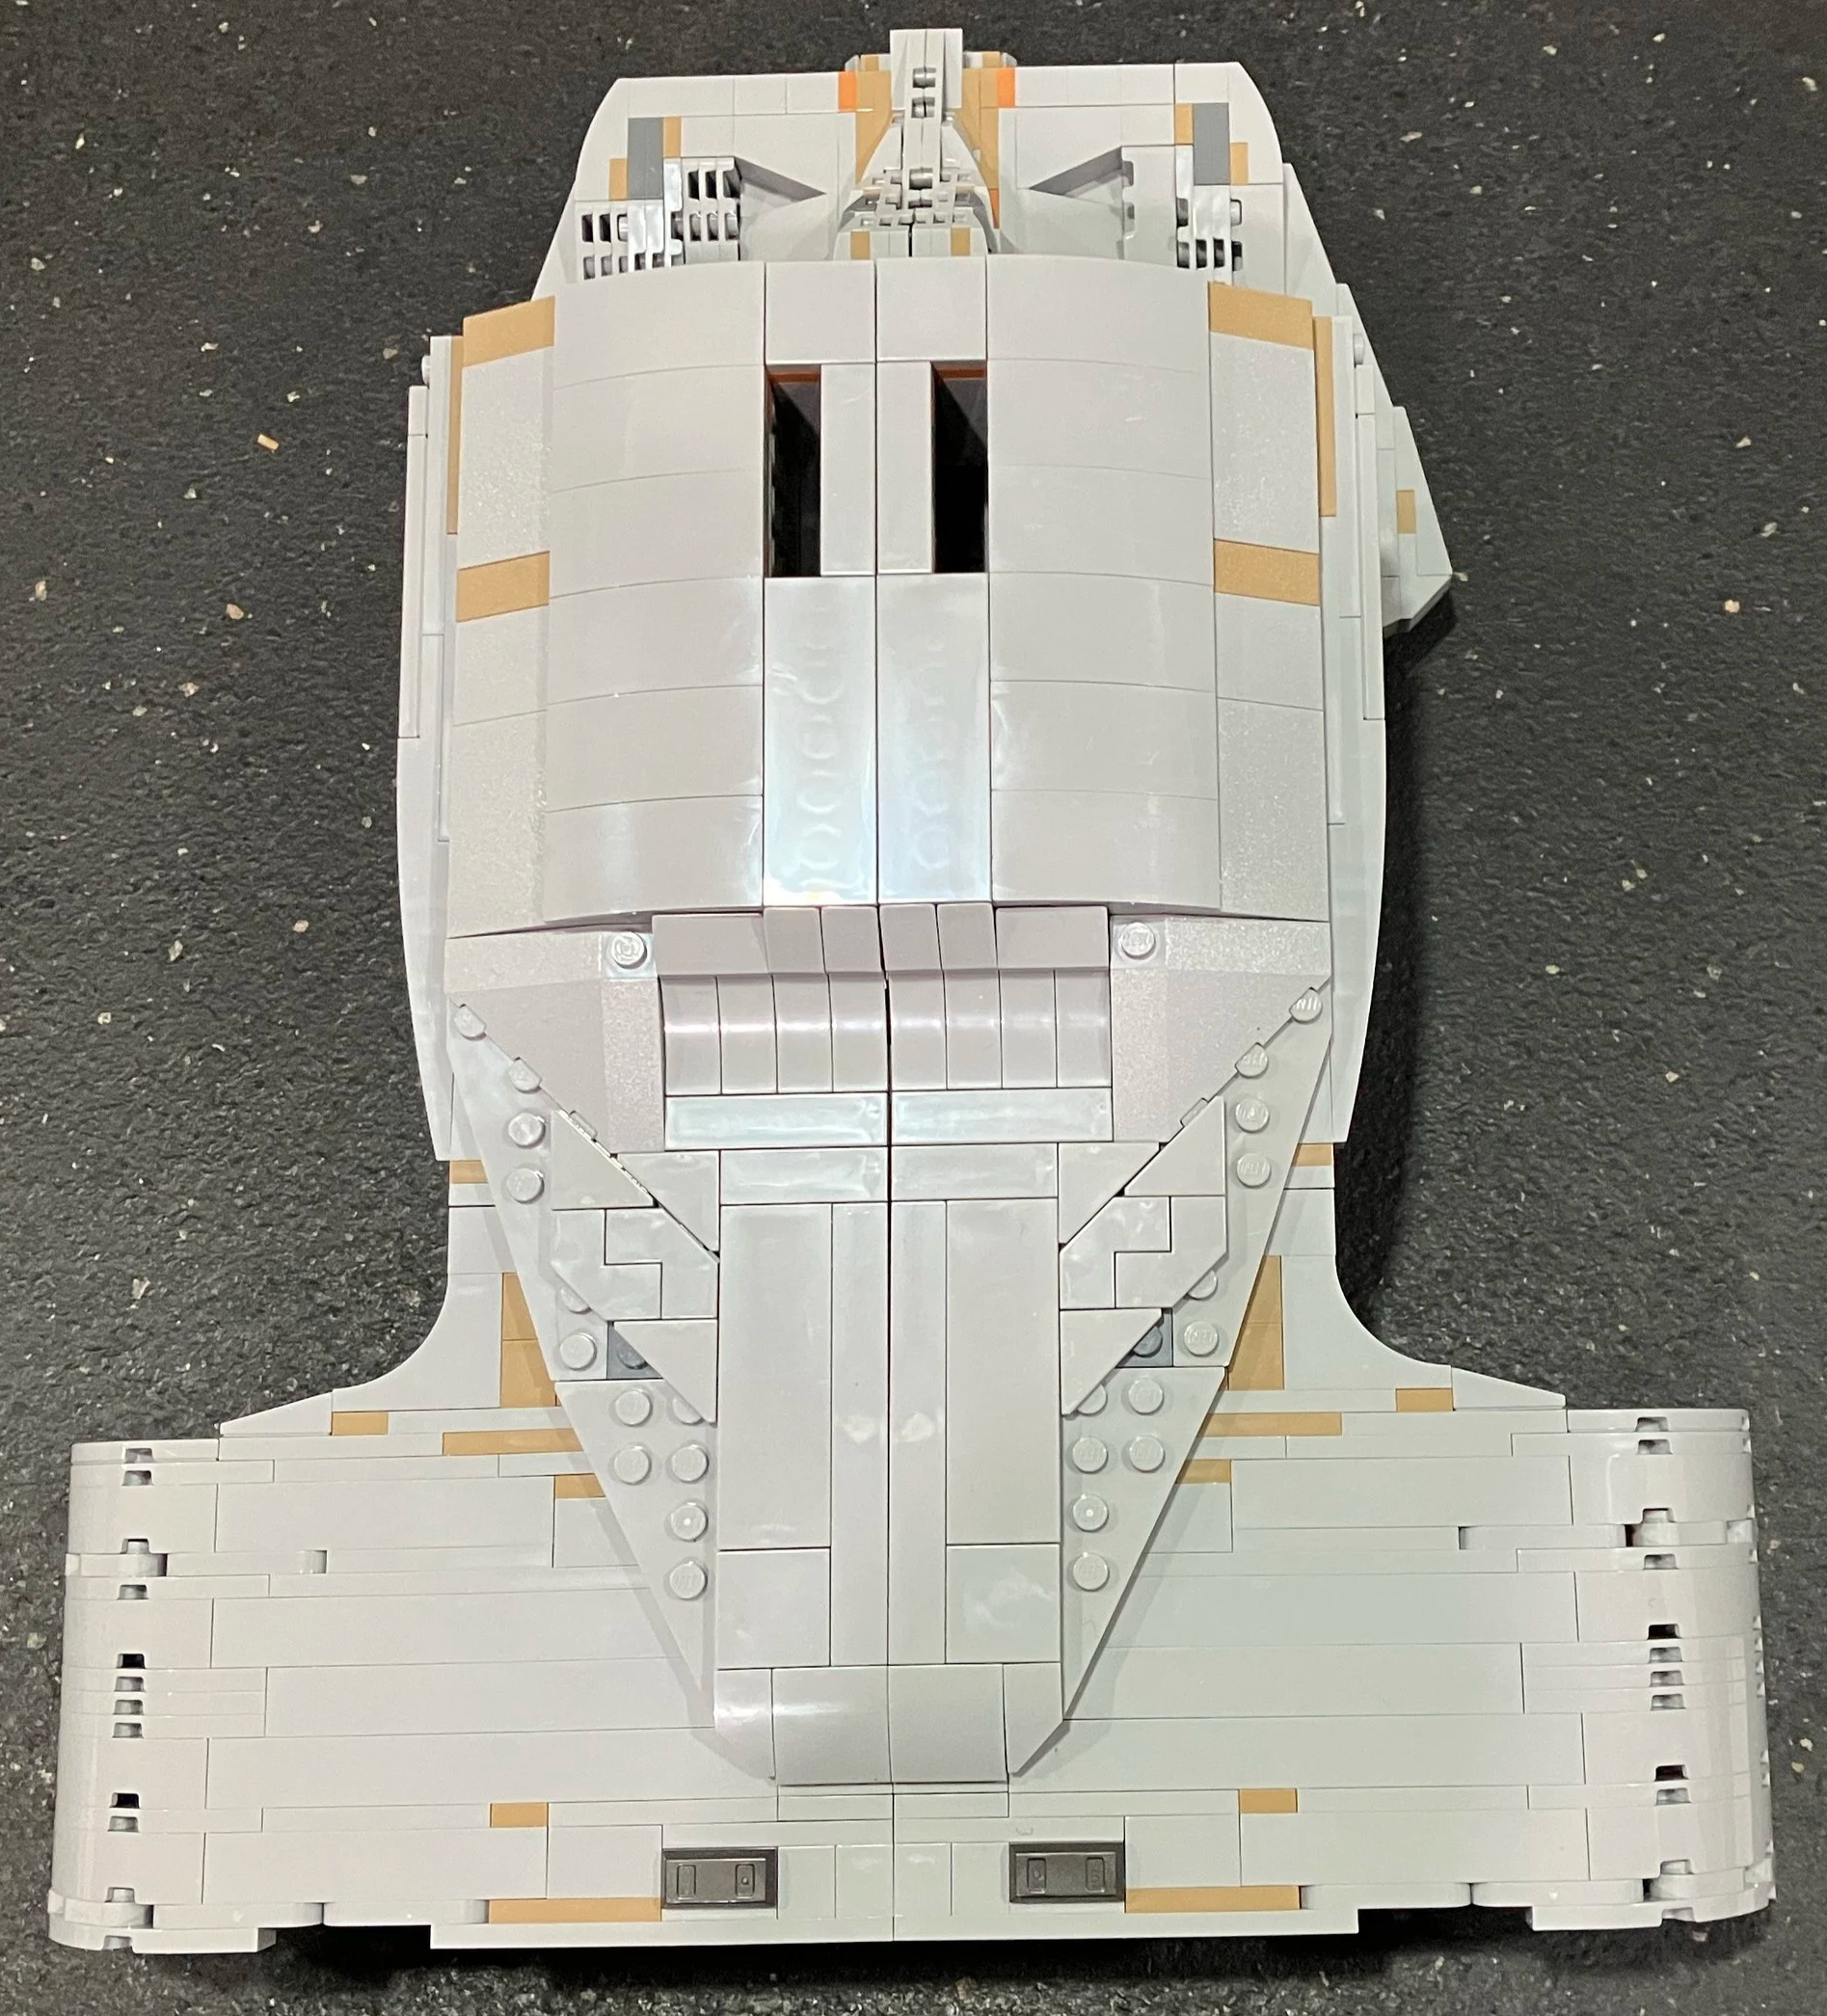
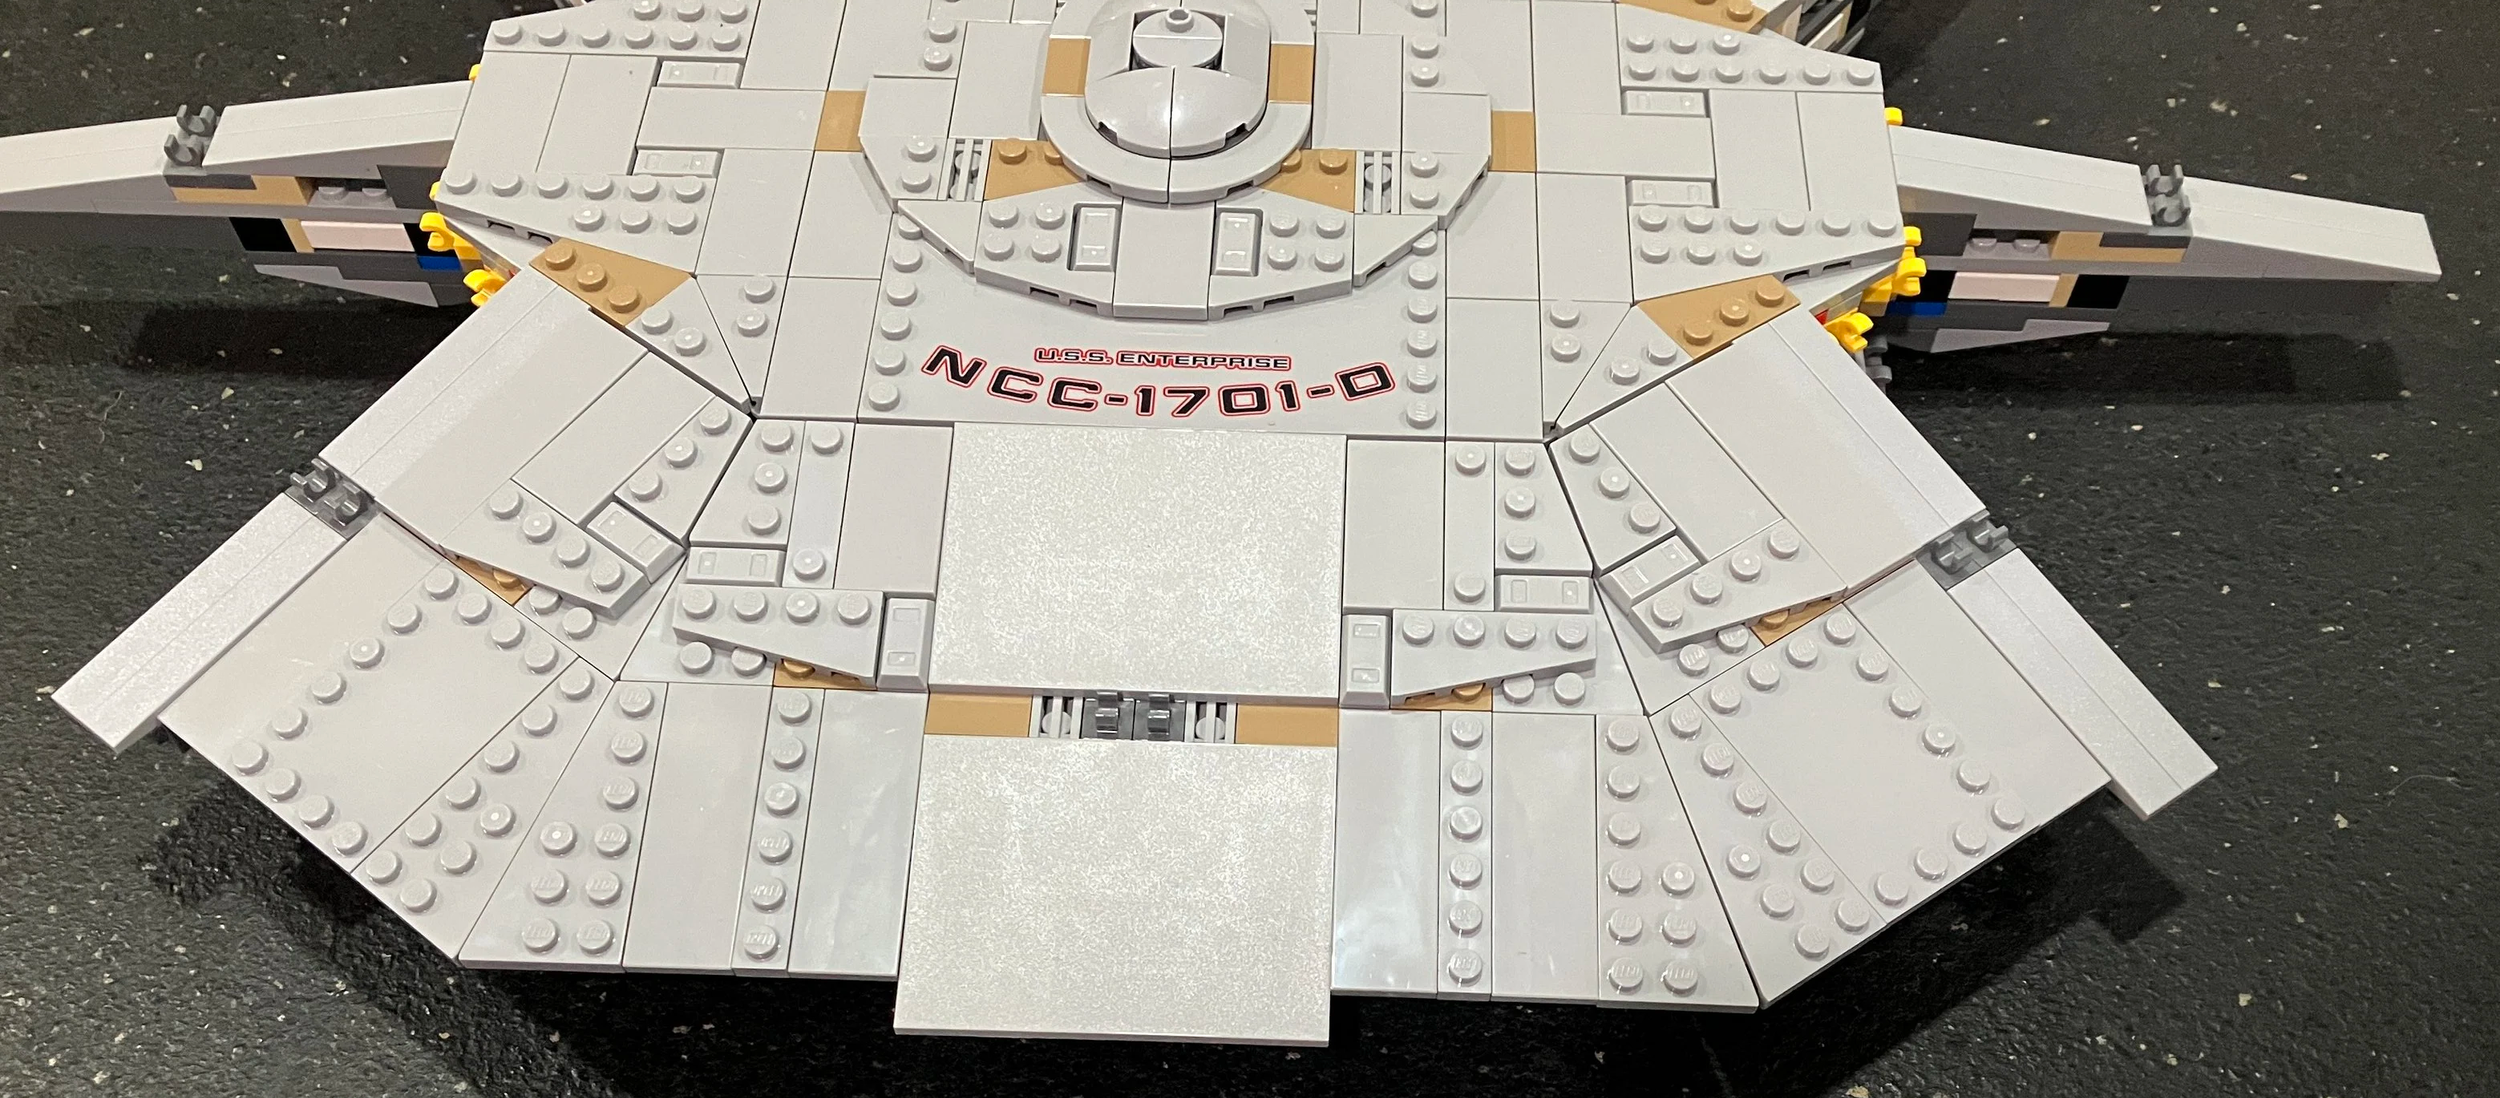
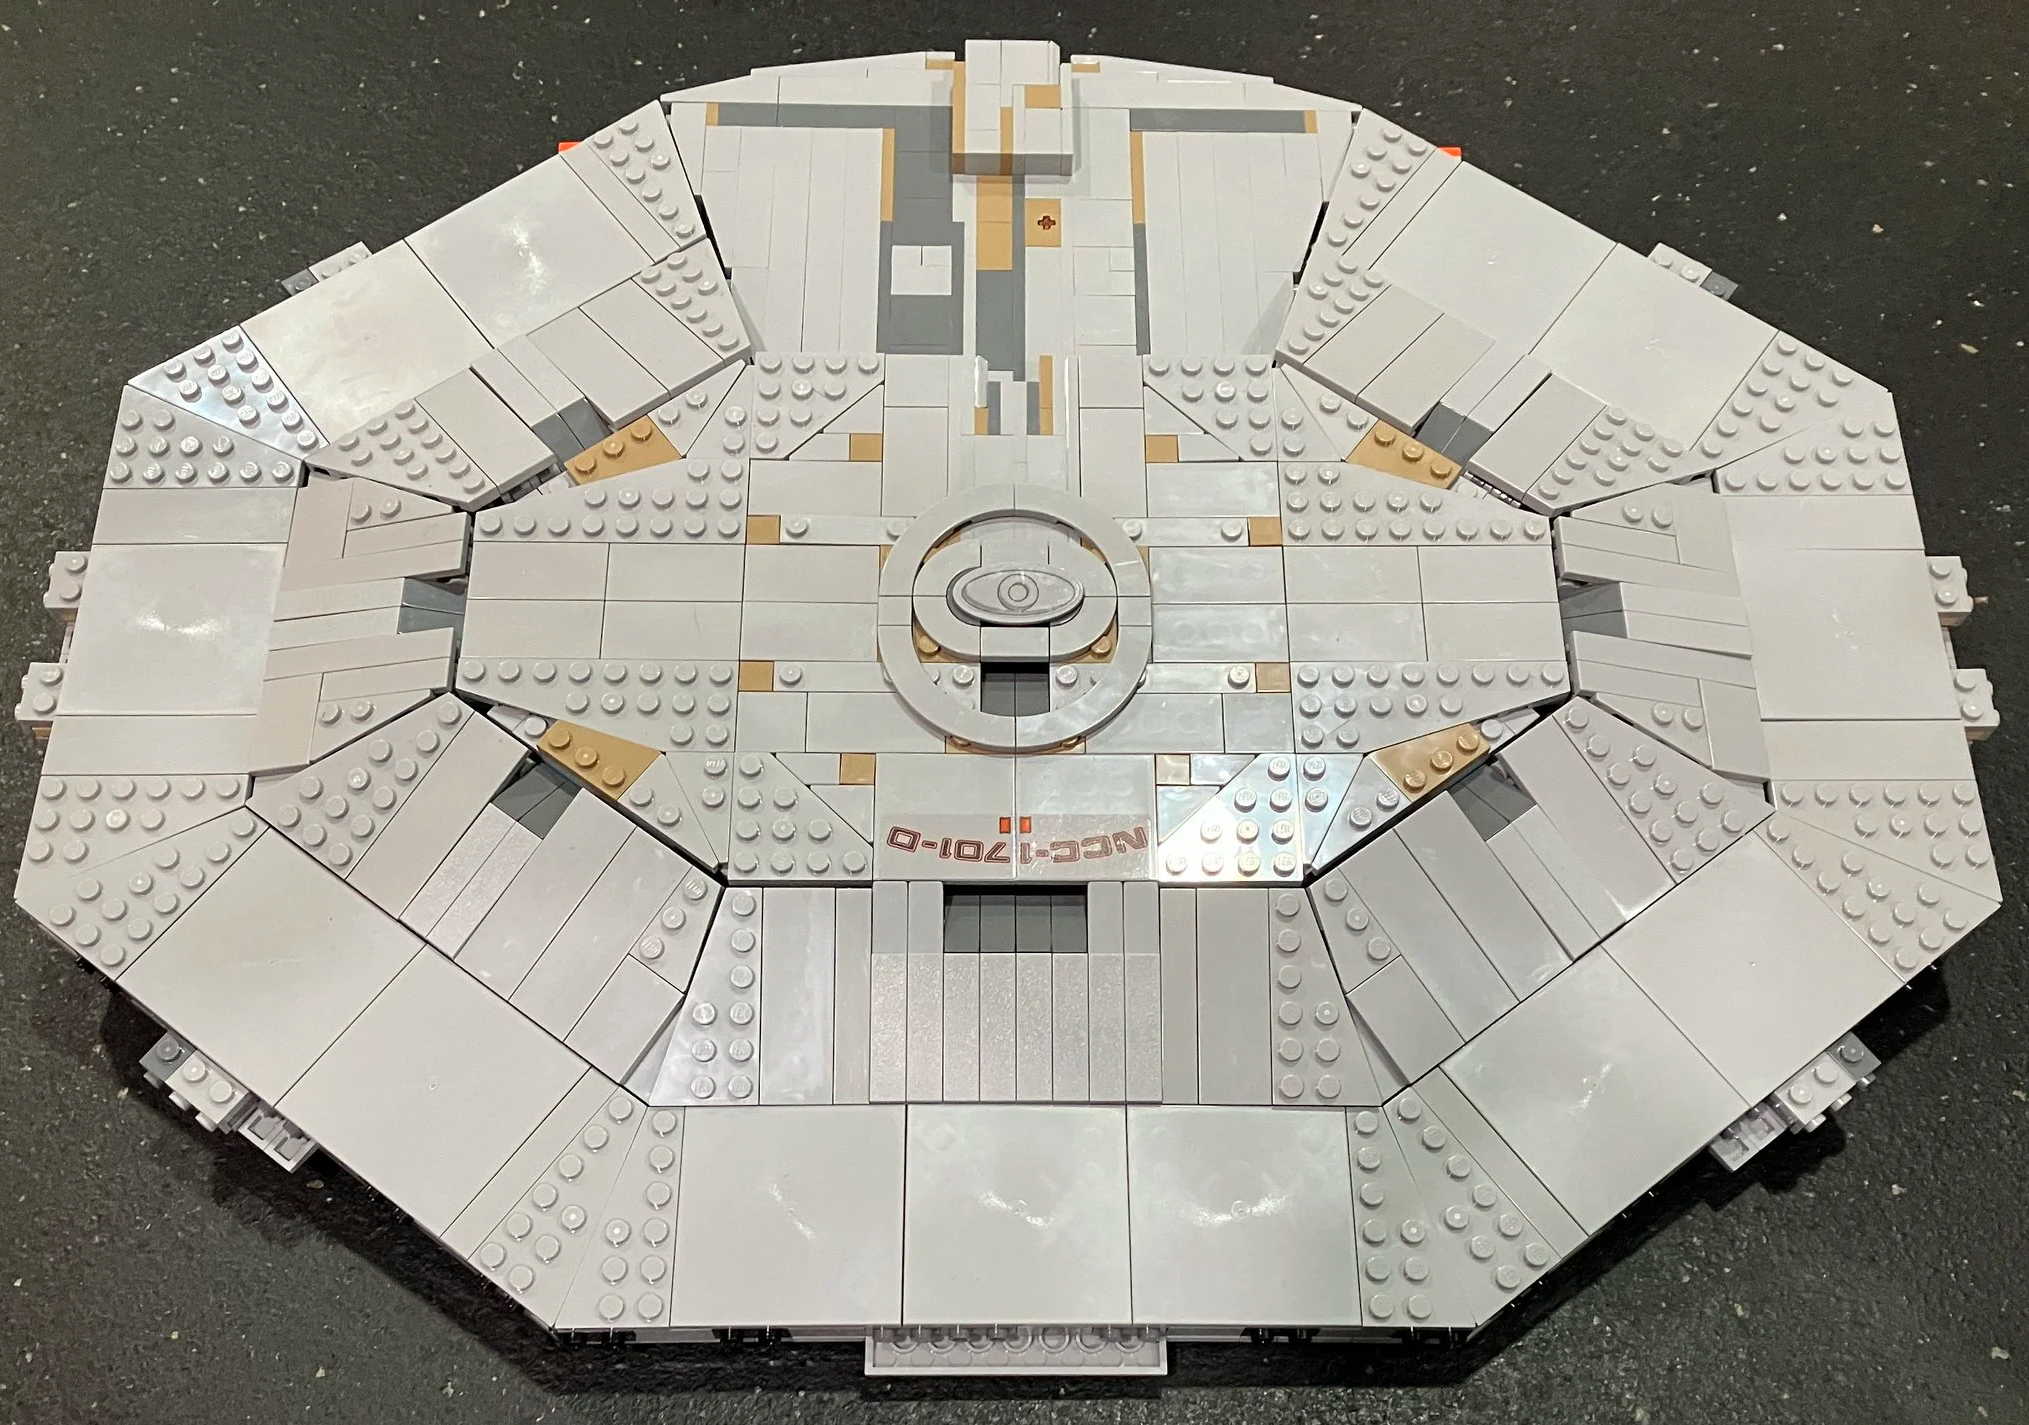
Bag 23 continues to build out the saucer section and adds the Captain Piccard minifigure. Most importantly here is the bridge section is built and you add in a great printed piece with the ship’s name and number..
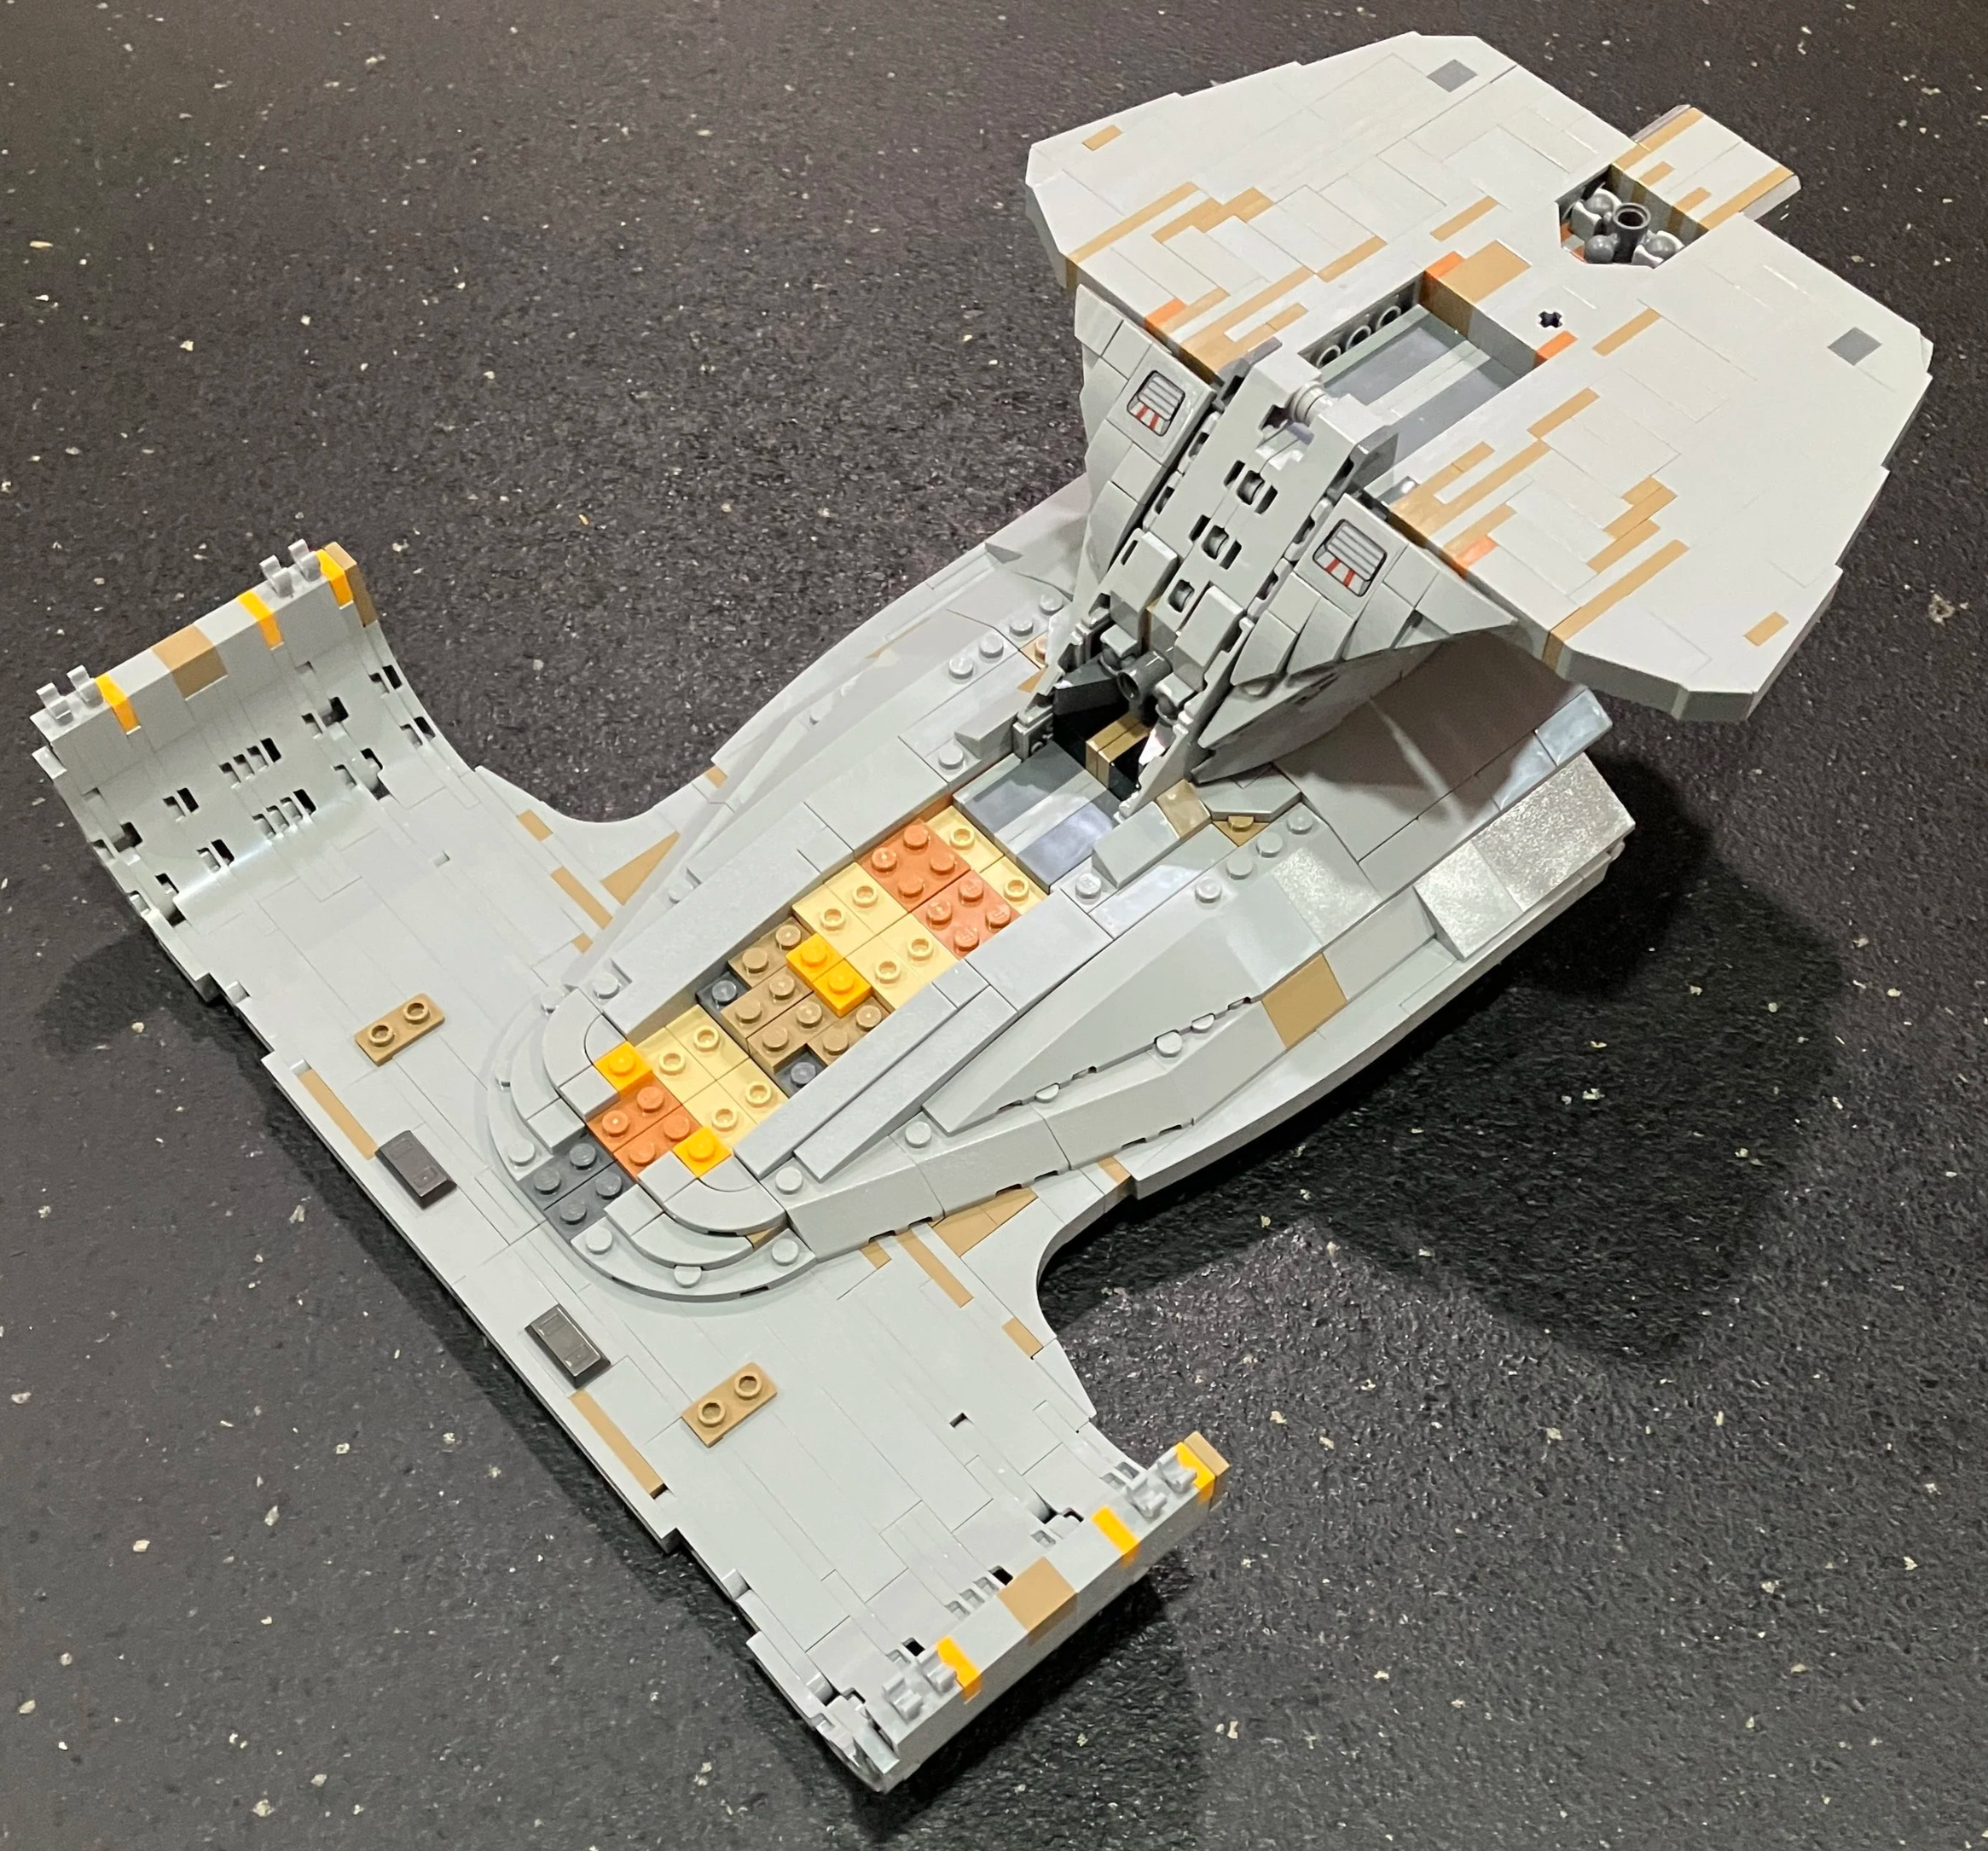
Bag 24 then begins to fill in the gaps that exist in the saucer section. Each section is pretty similar and it clips into the subsection that was built previously.
Bag 25 continues to fill in the saucer section and adds the Counselor Troy minifigure. Almost done by bag 26.
Bag 27 finishes up filling in the gaps of the saucer section. Bag 28 adds the additional impulse engines on the saucer section. The Worf minifigure comes in this bag, but I failed to include it in this picture.
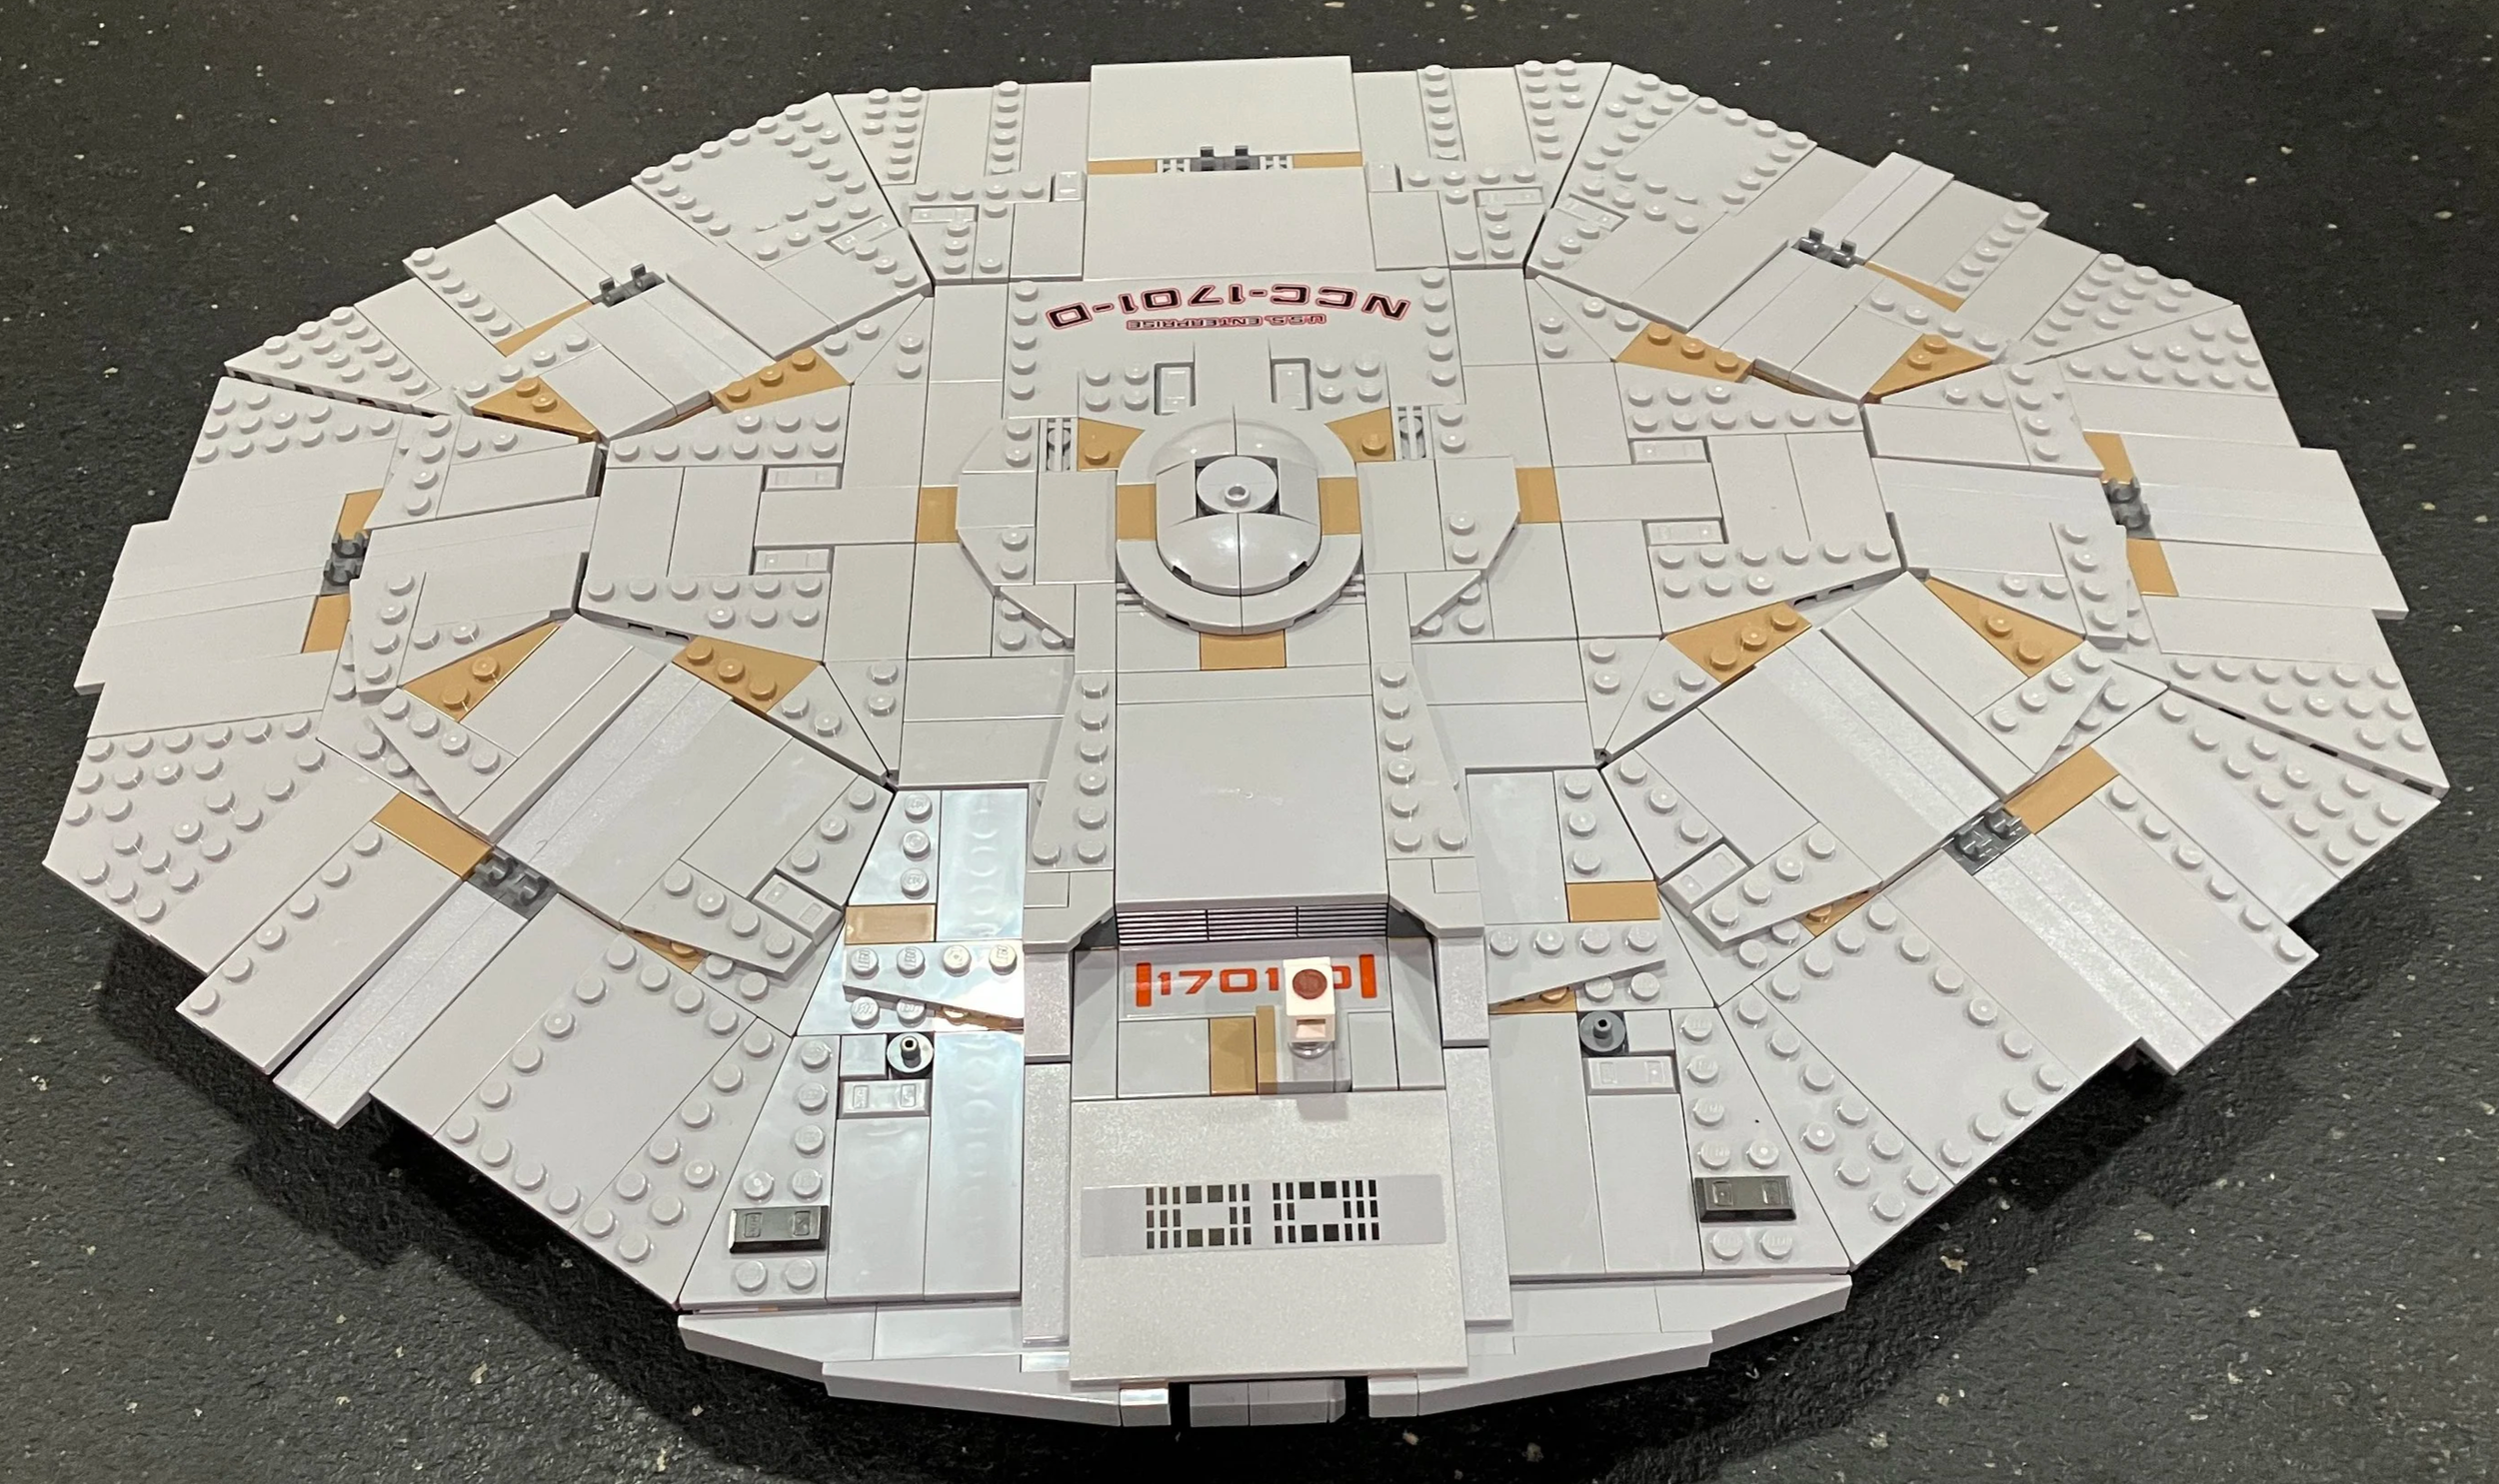
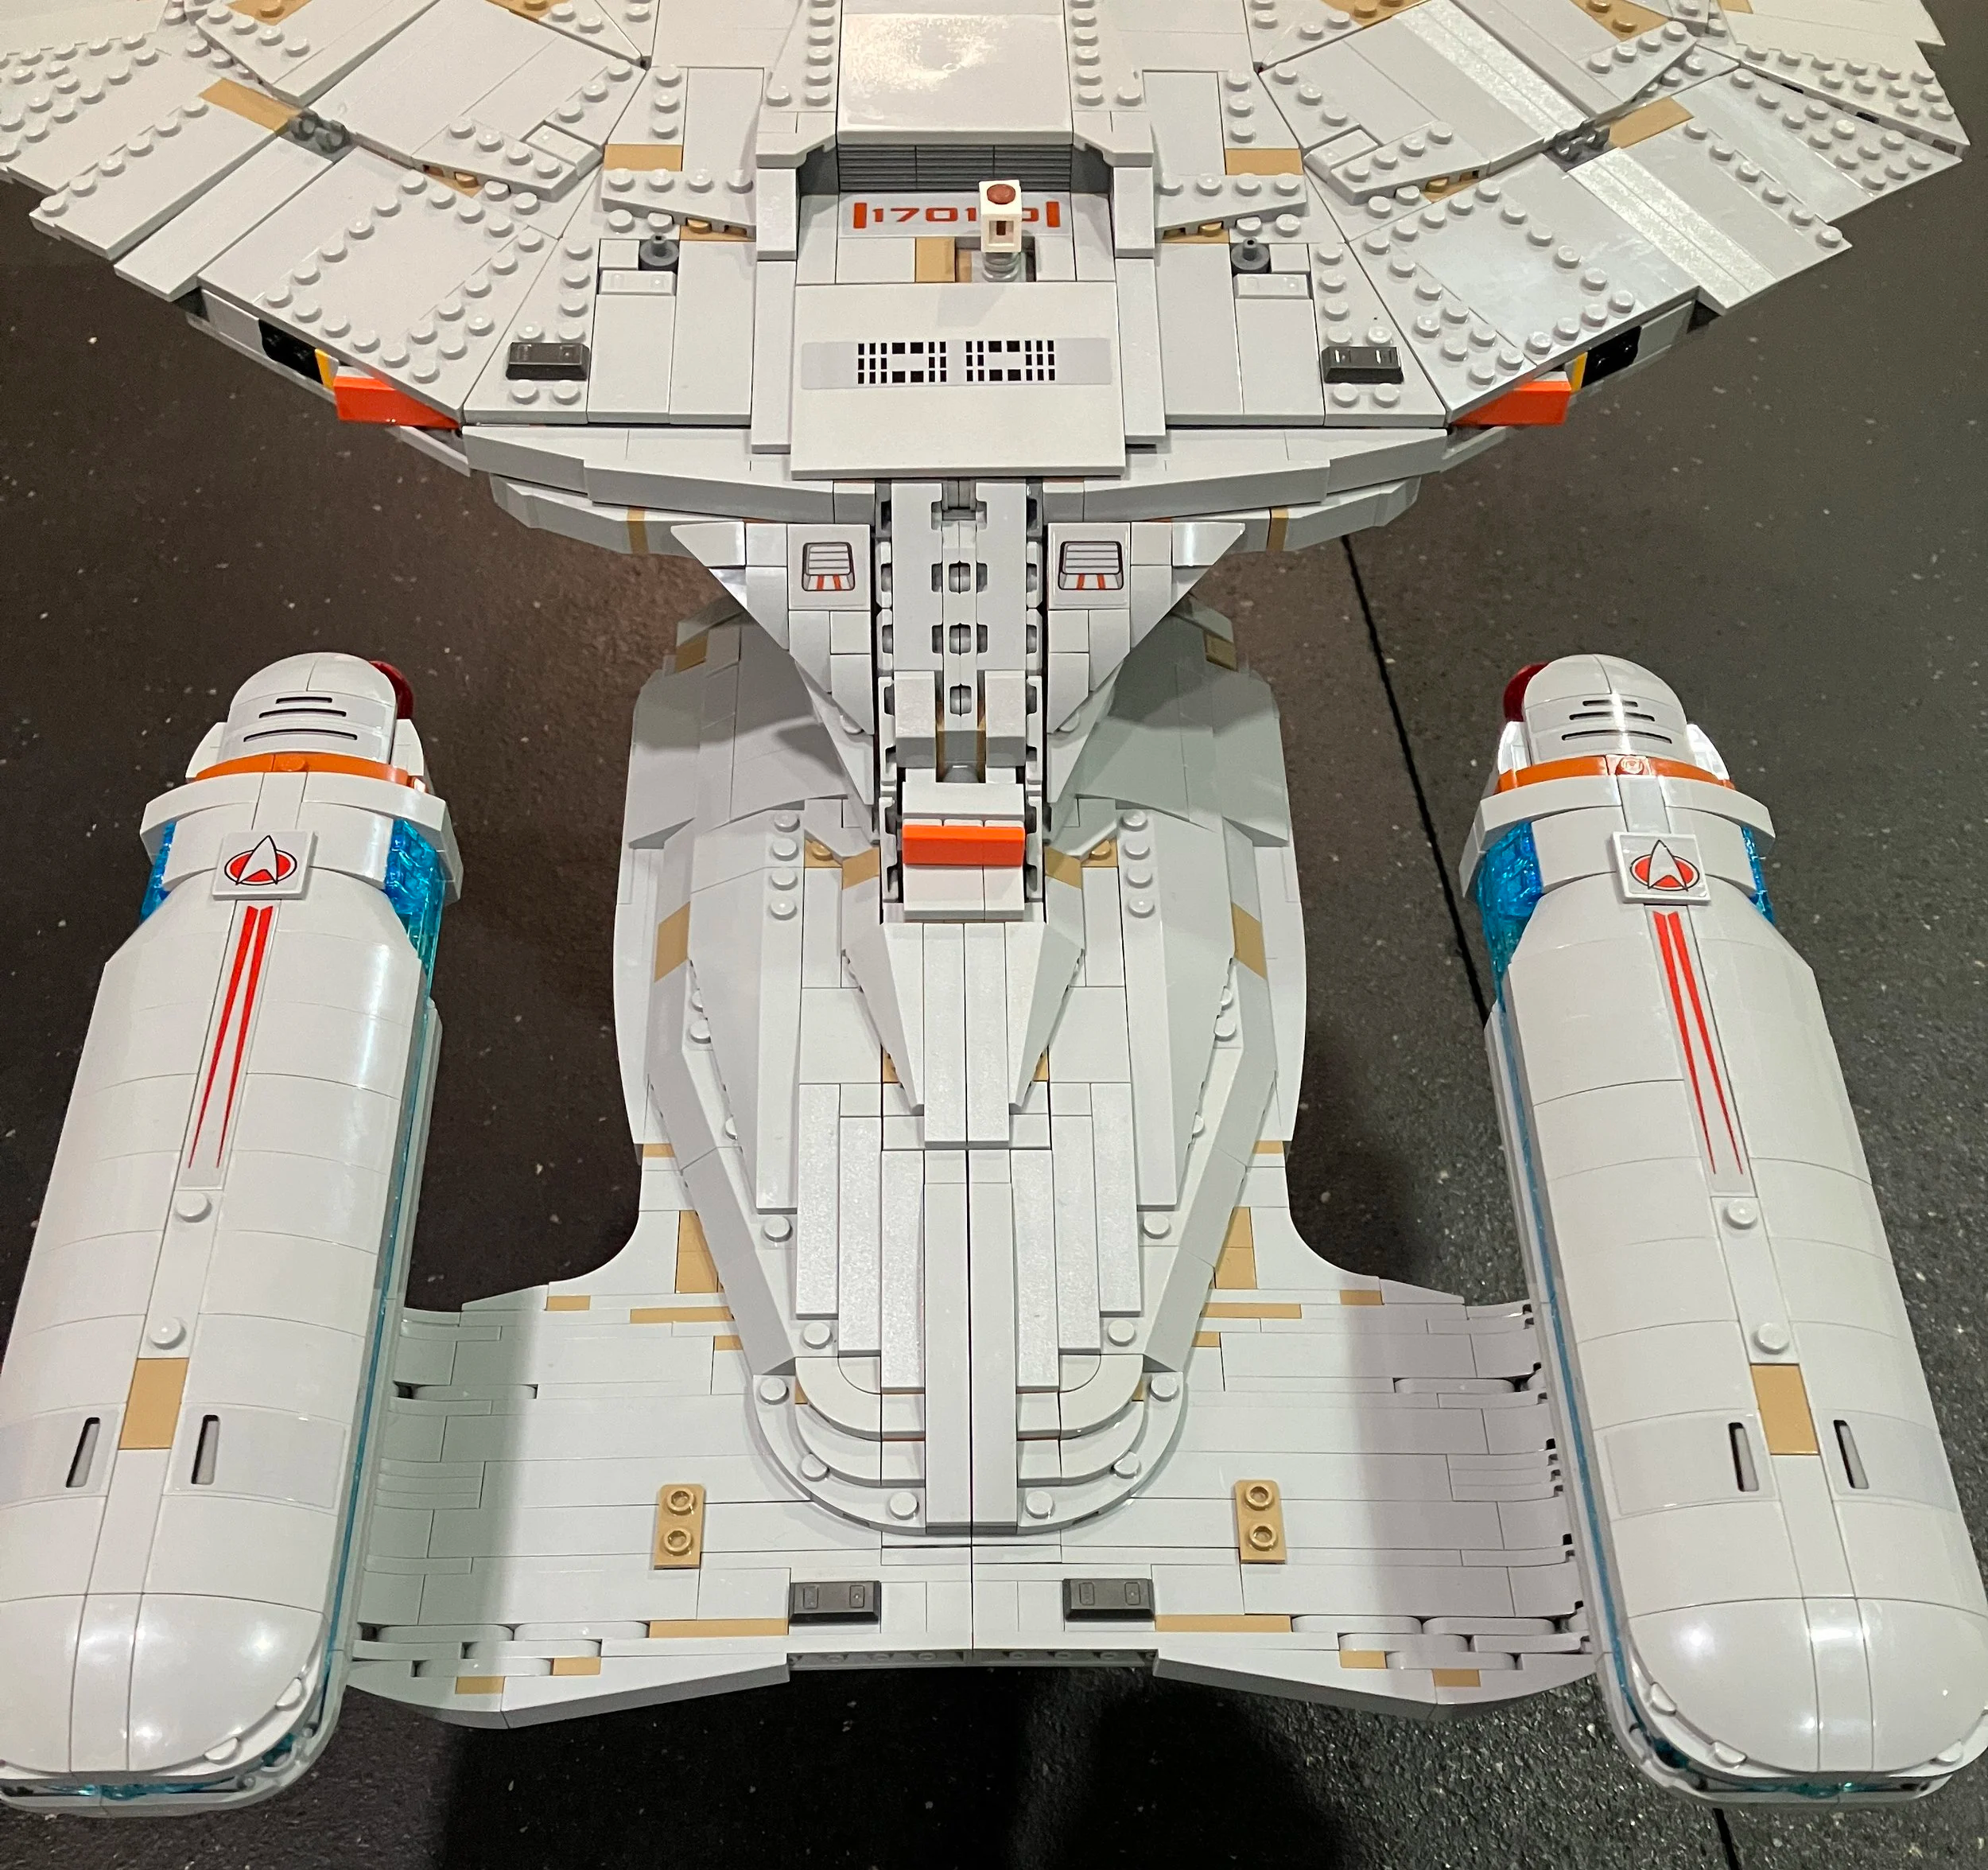
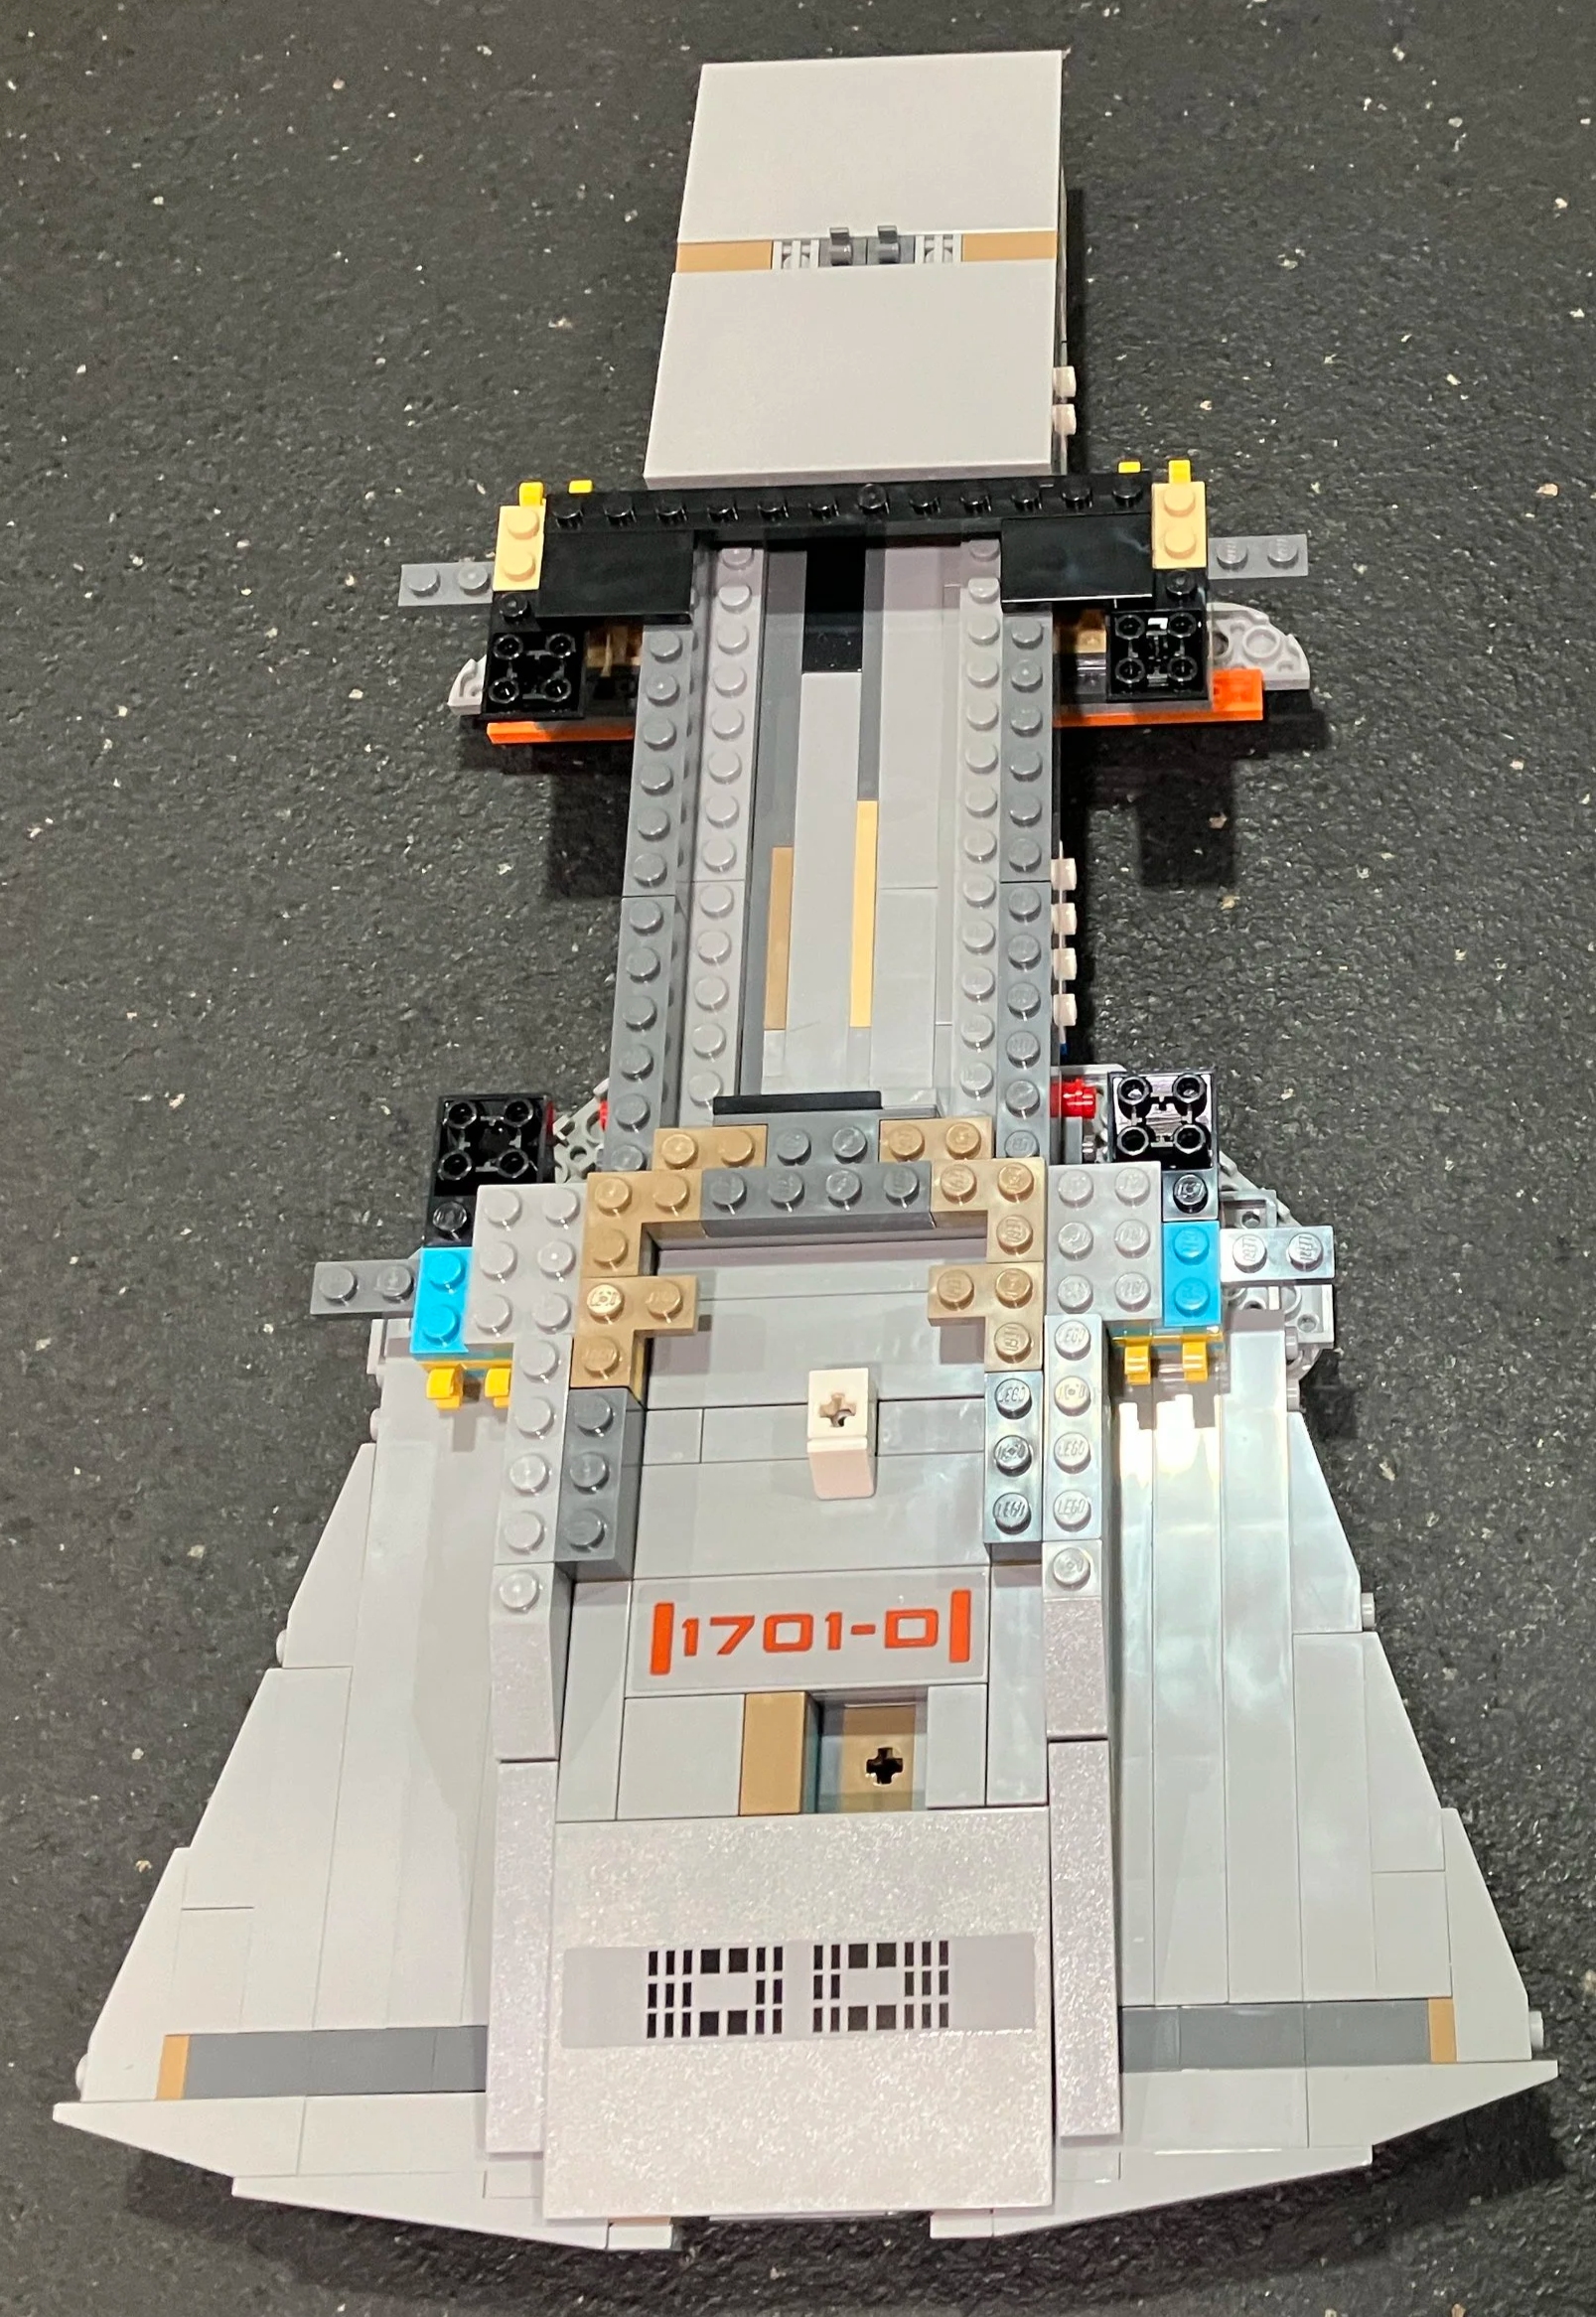
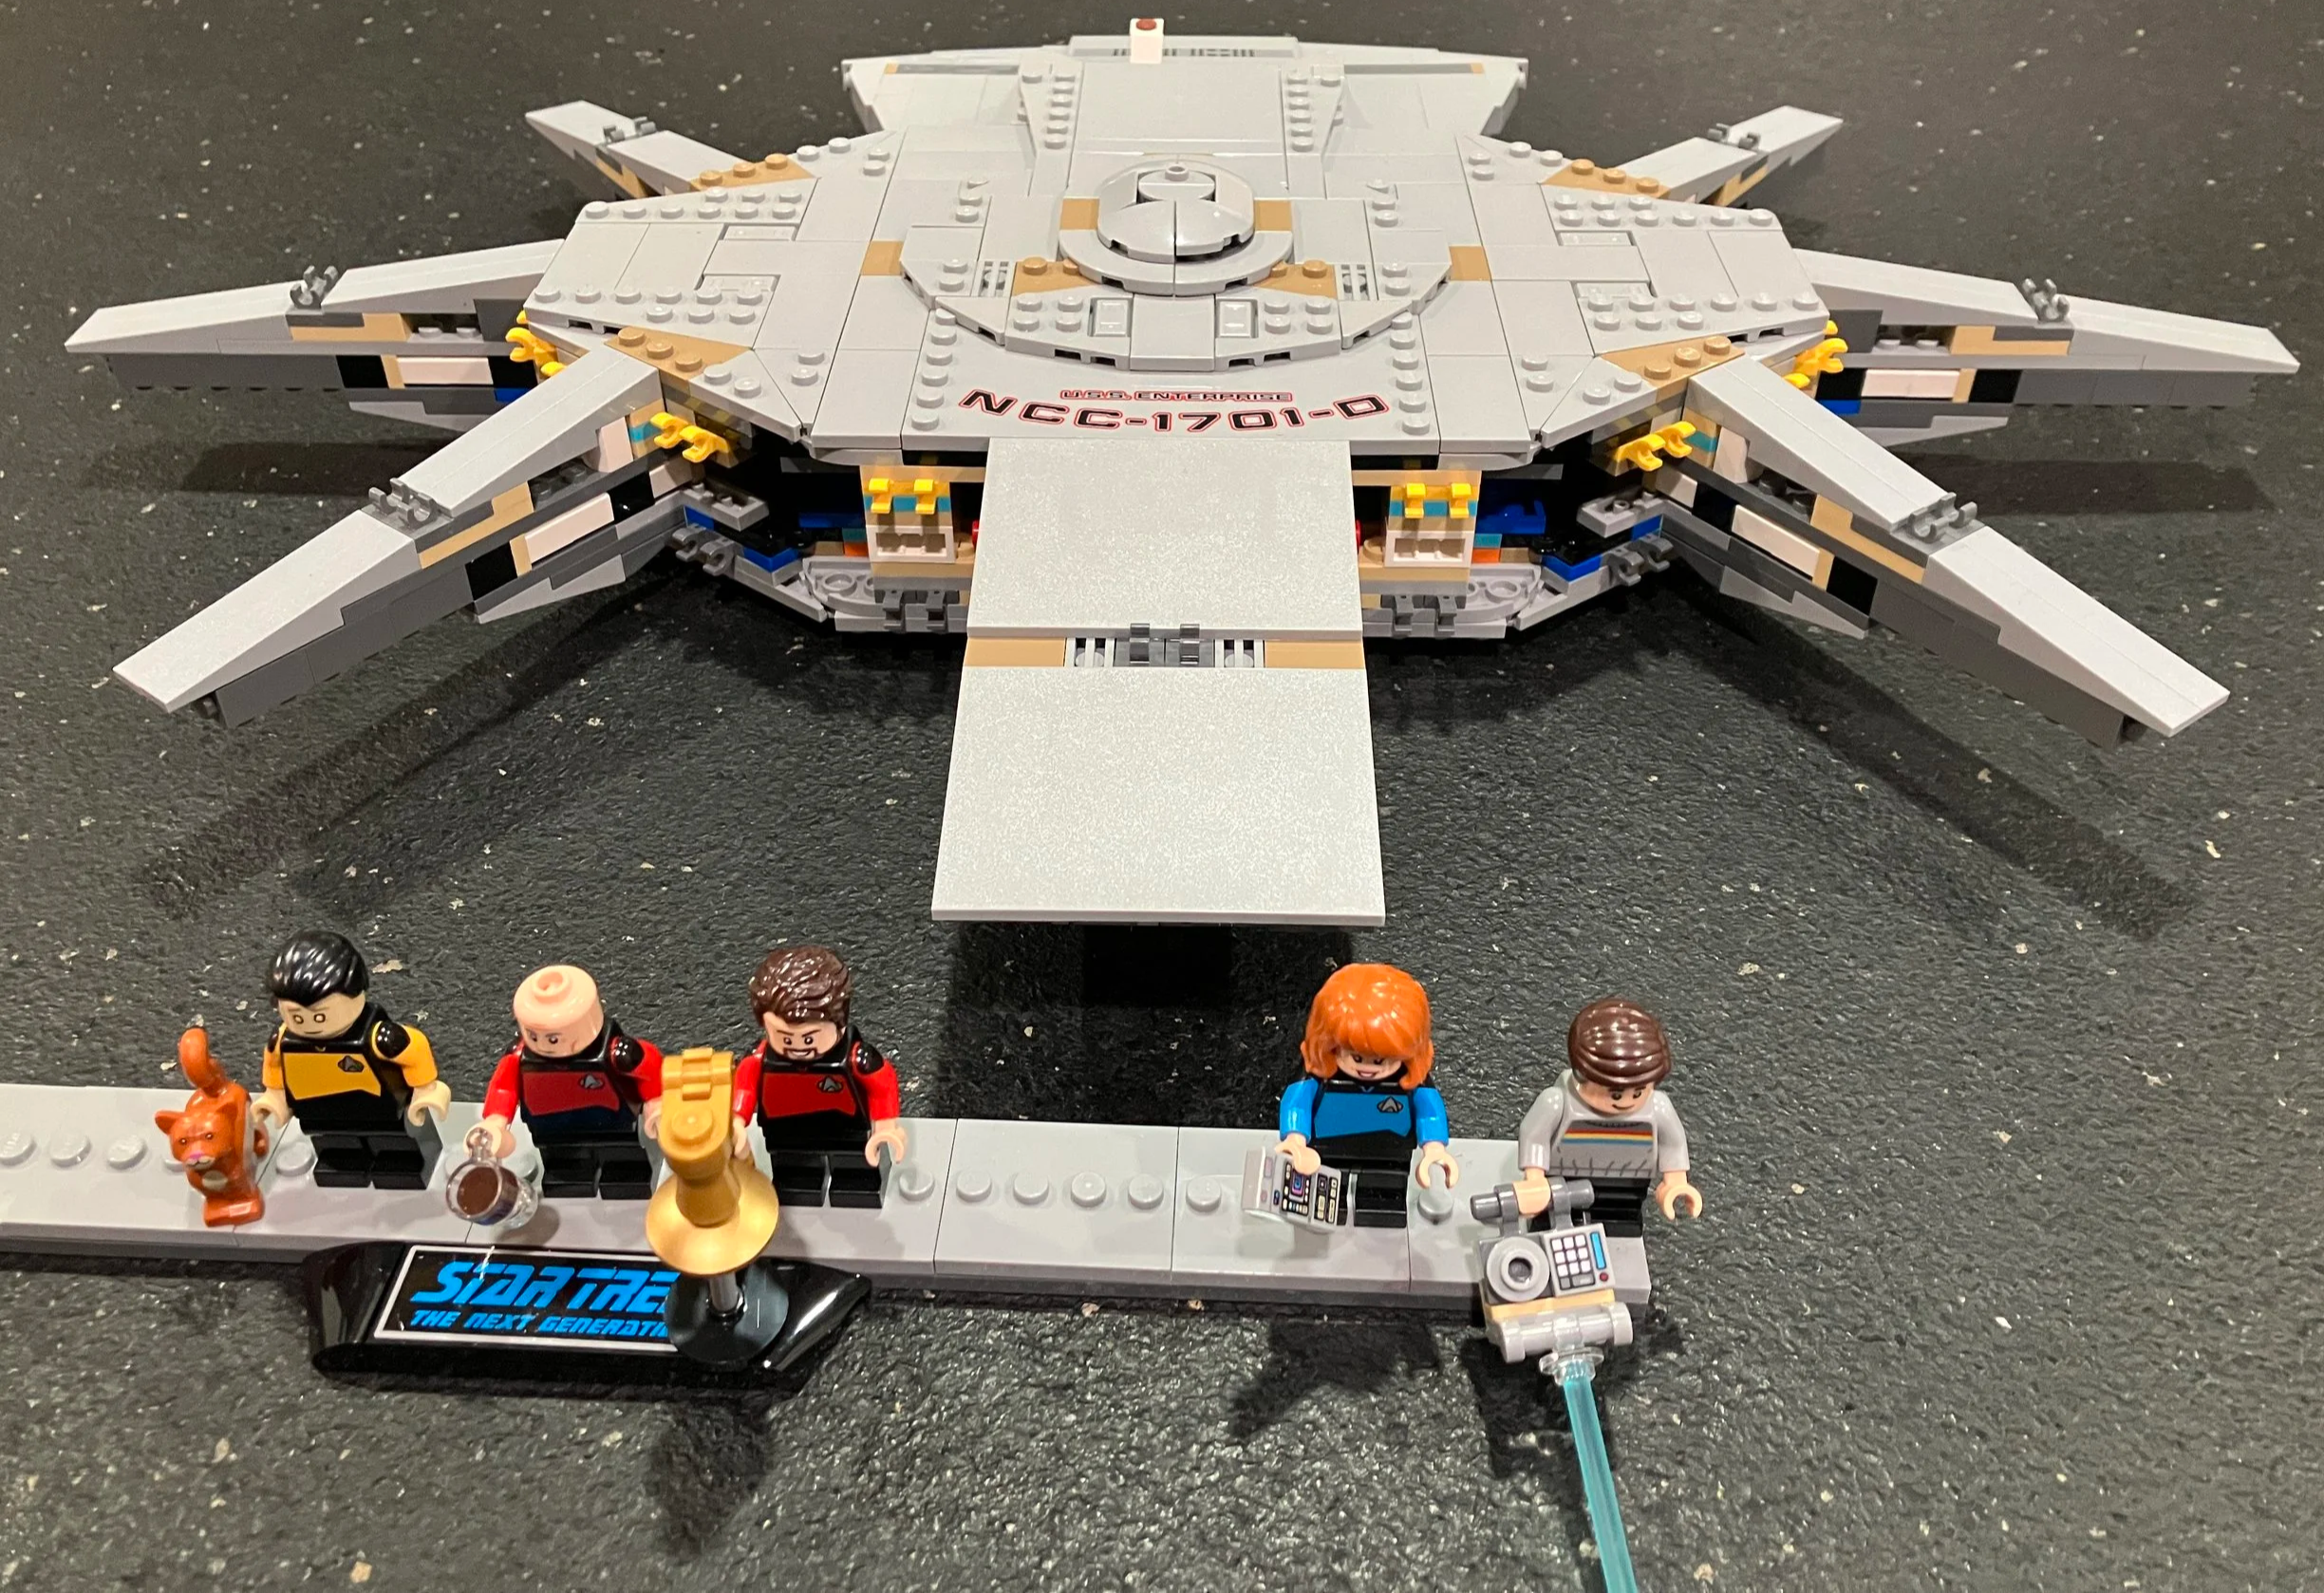
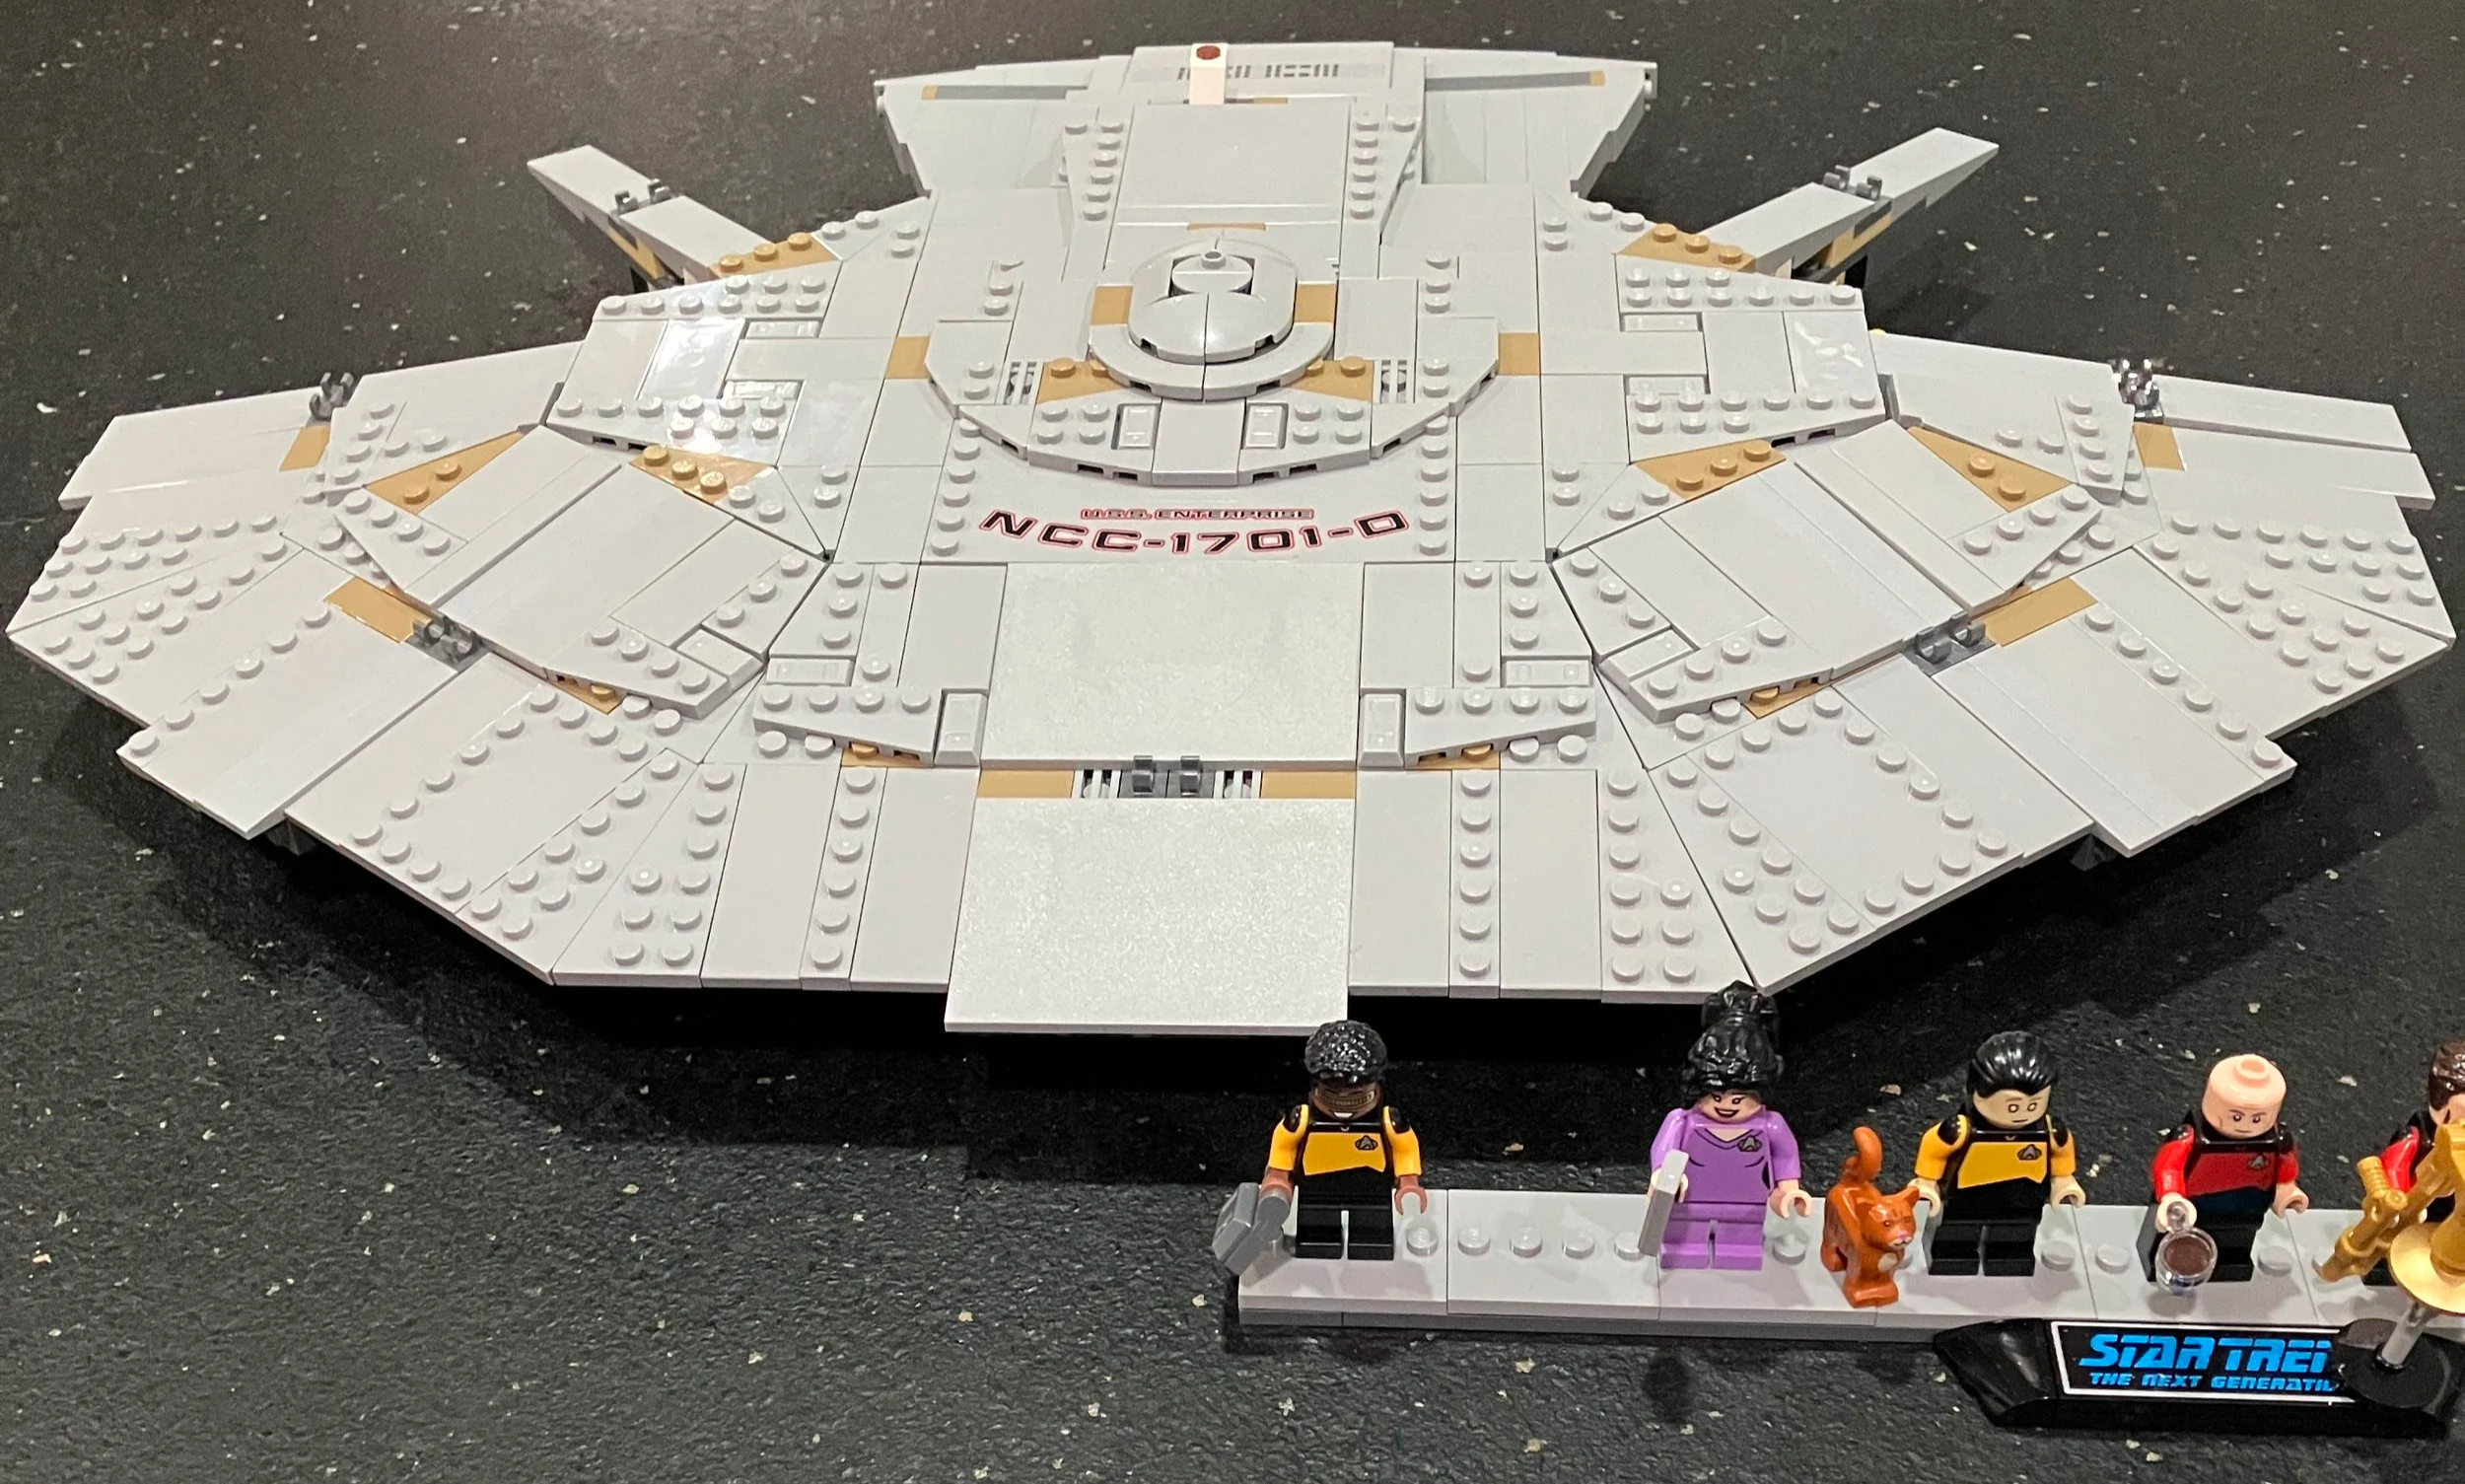
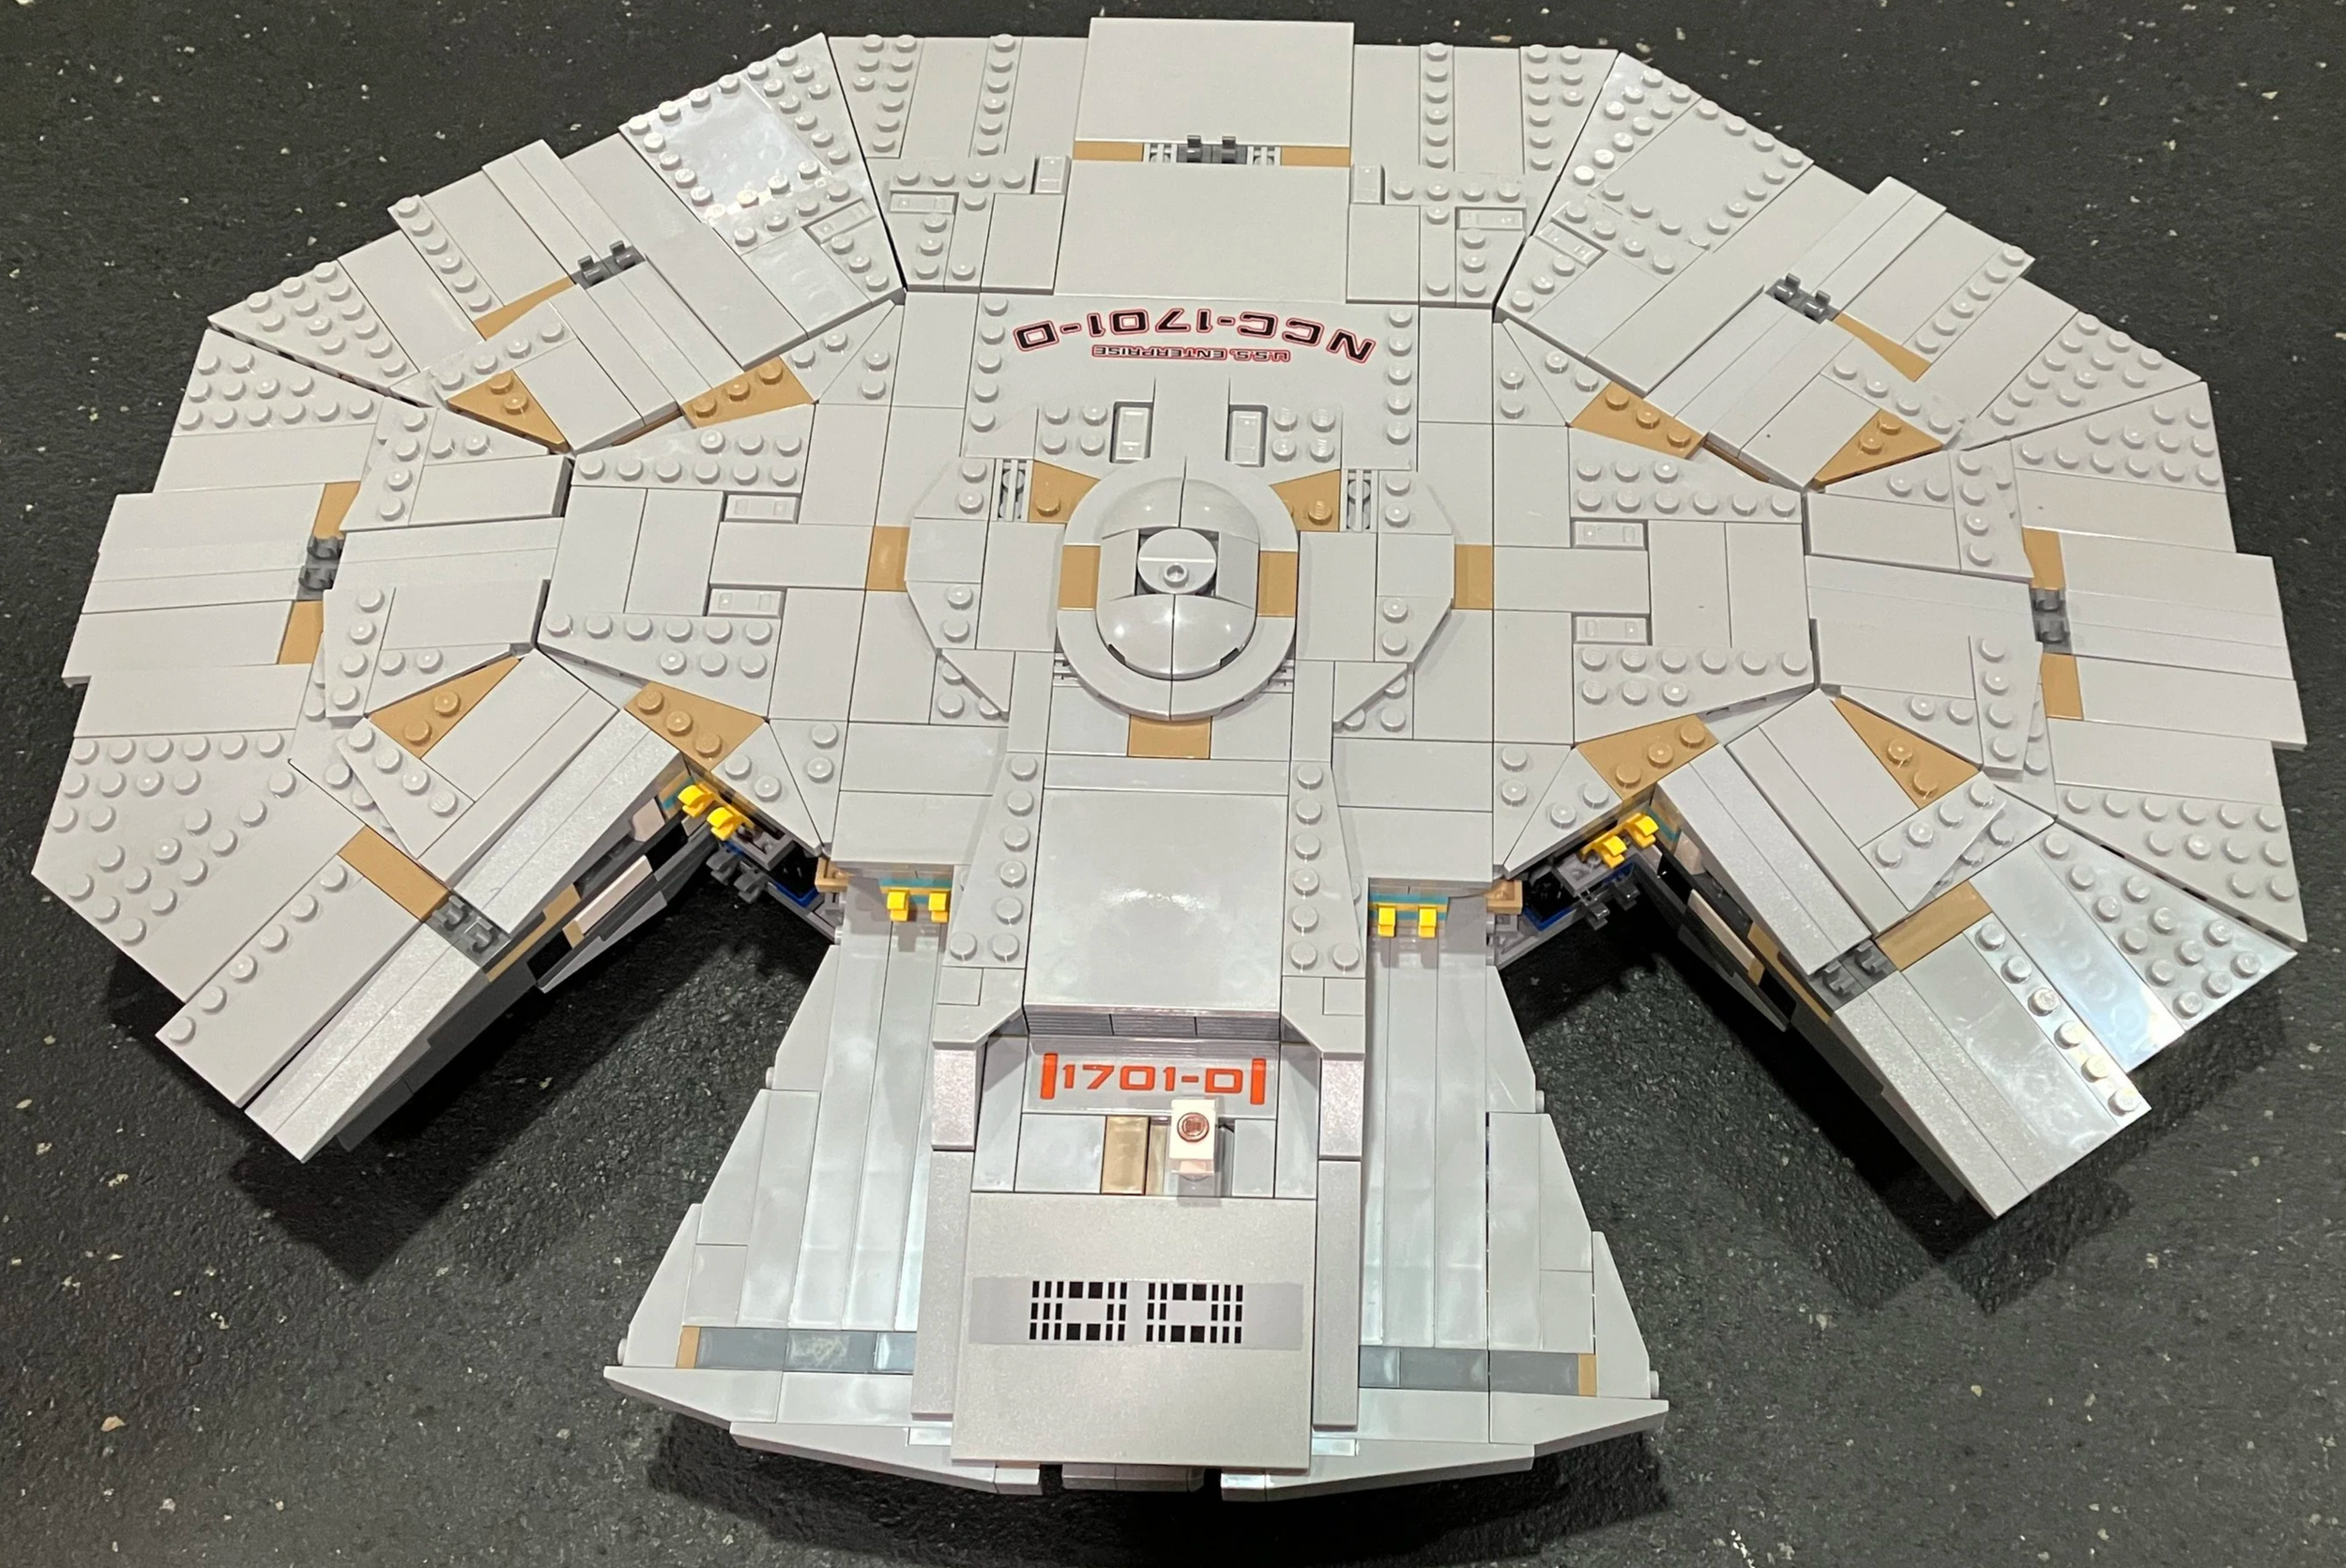
Bag 29 adds some details on the bottom of the saucer. Finally bag 30 wraps up the build by adding the windows on the edge of the ship. The instructions note that they were black originally until the show’s creator’s changed the model so that it could be lit inside to have lights in the windows. The last bag includes Guinan and makes reference to the 10 Forward gathering area.
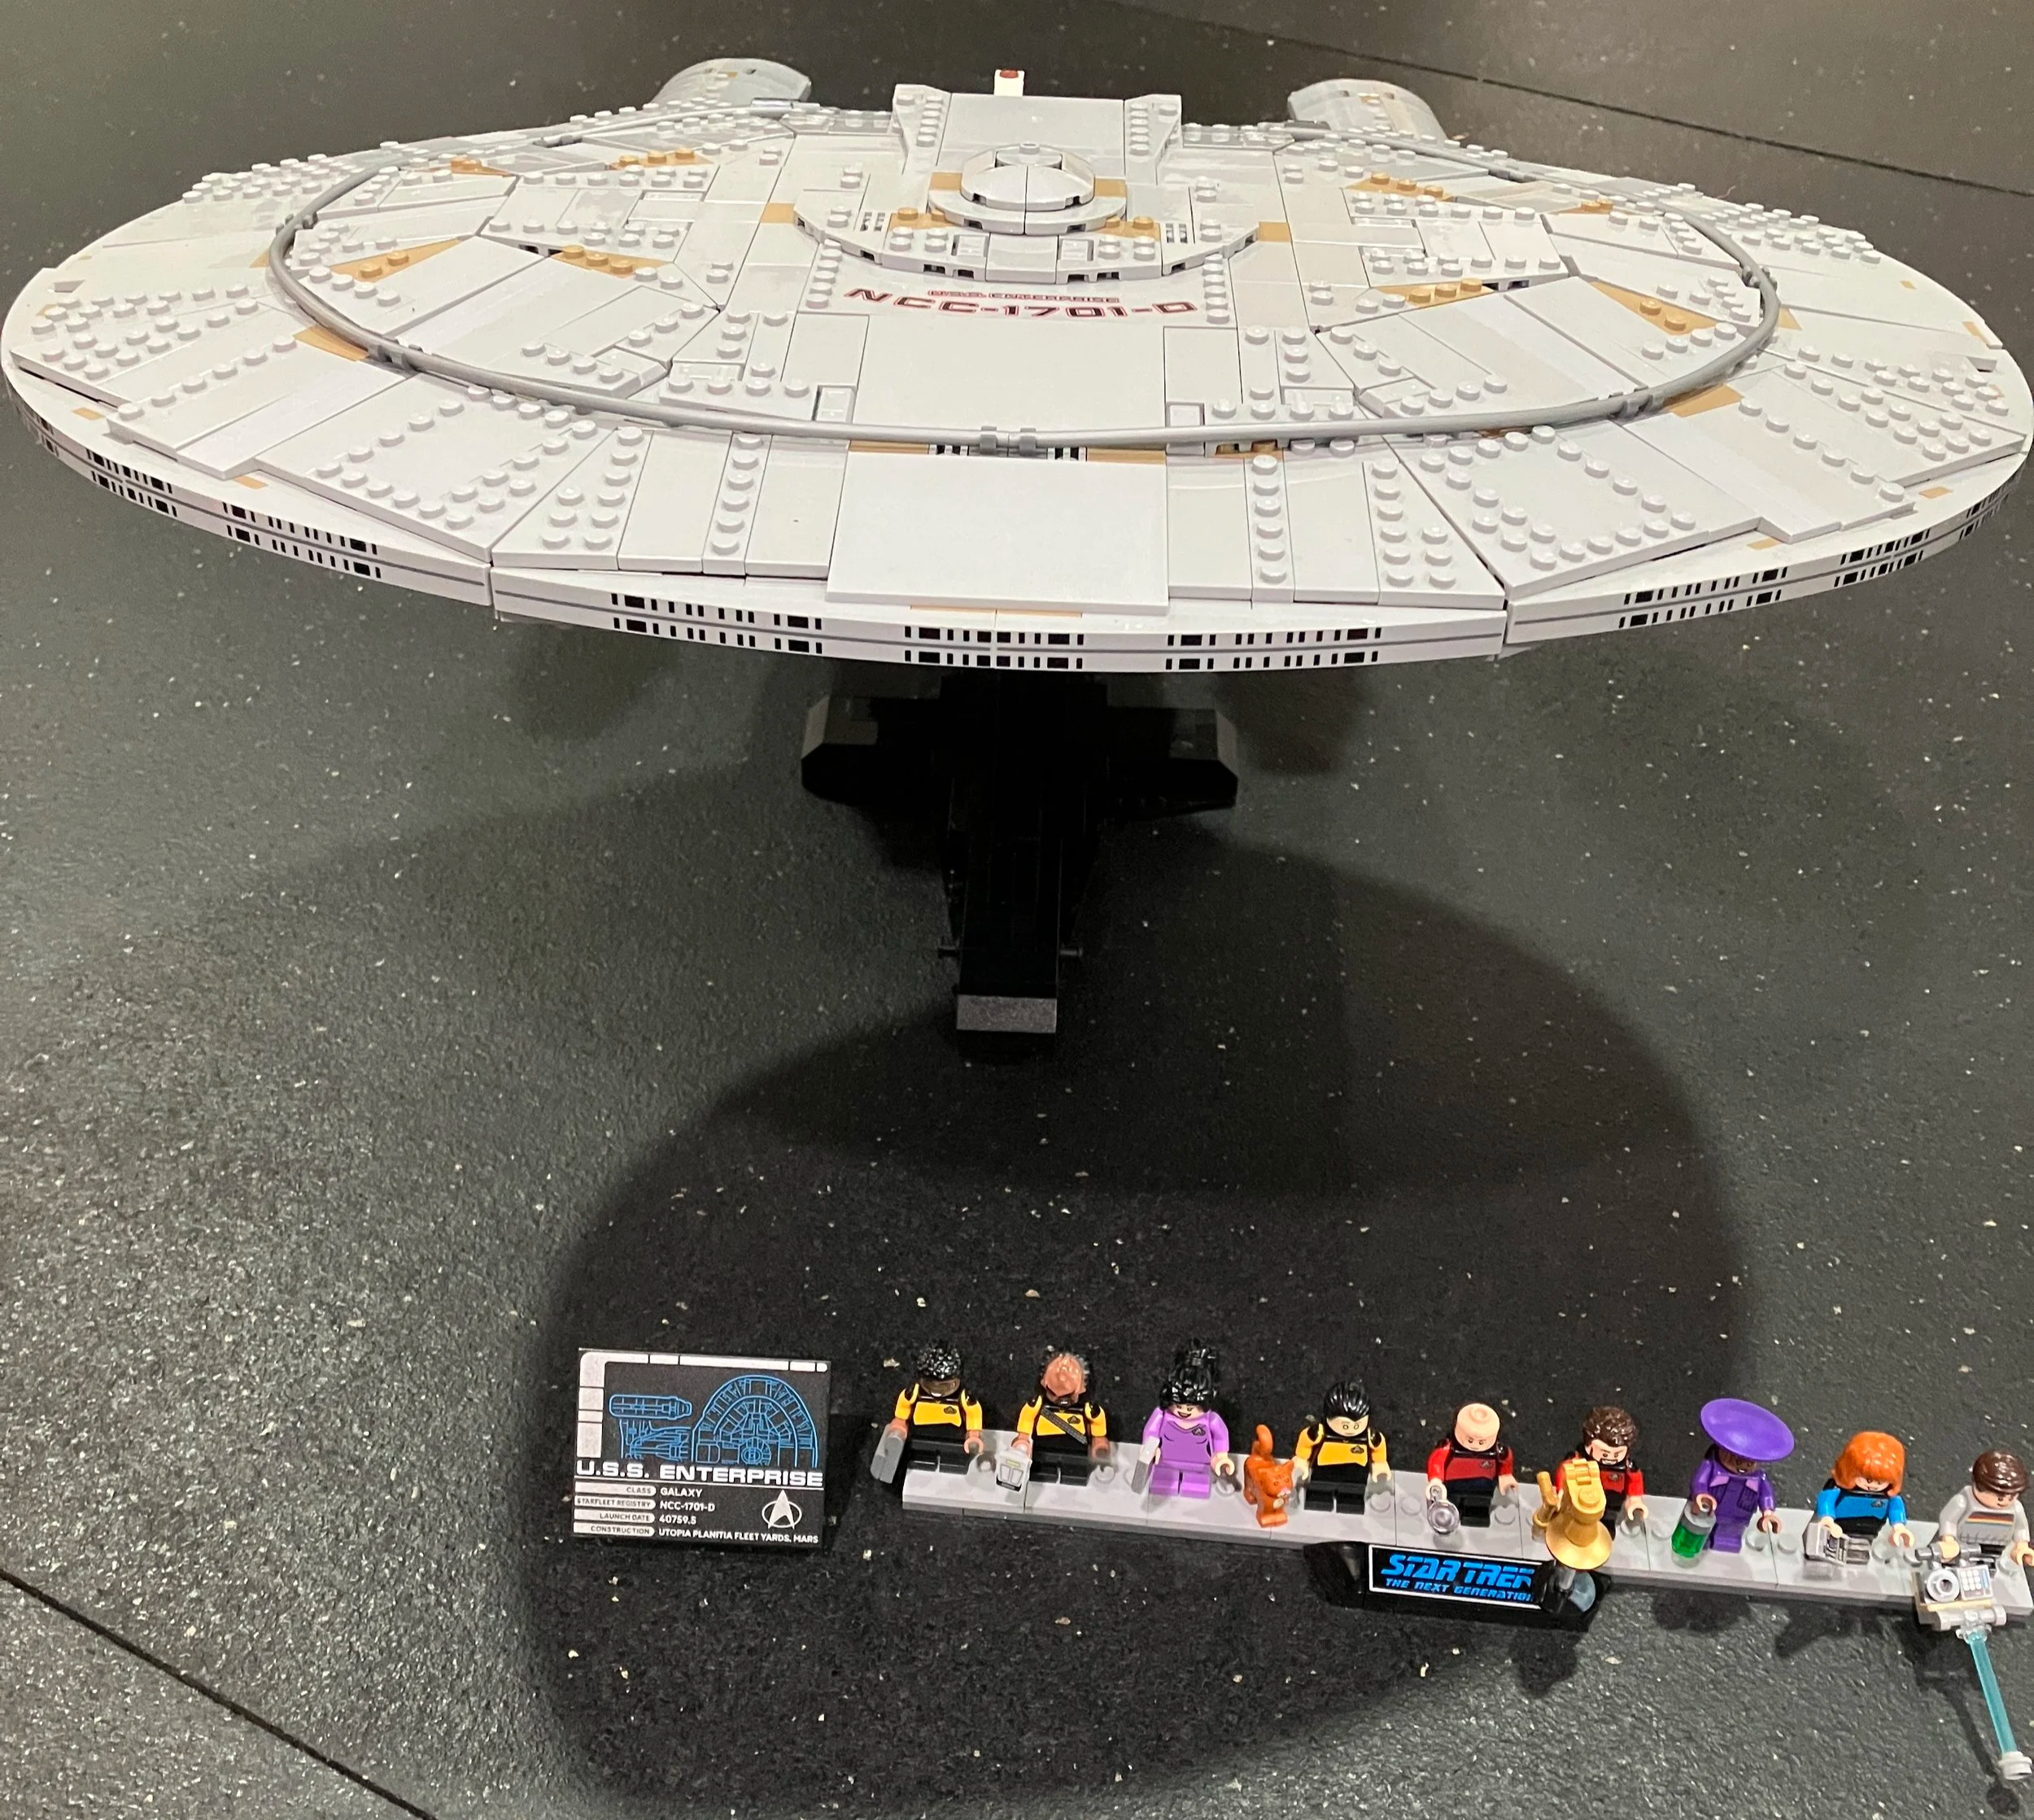
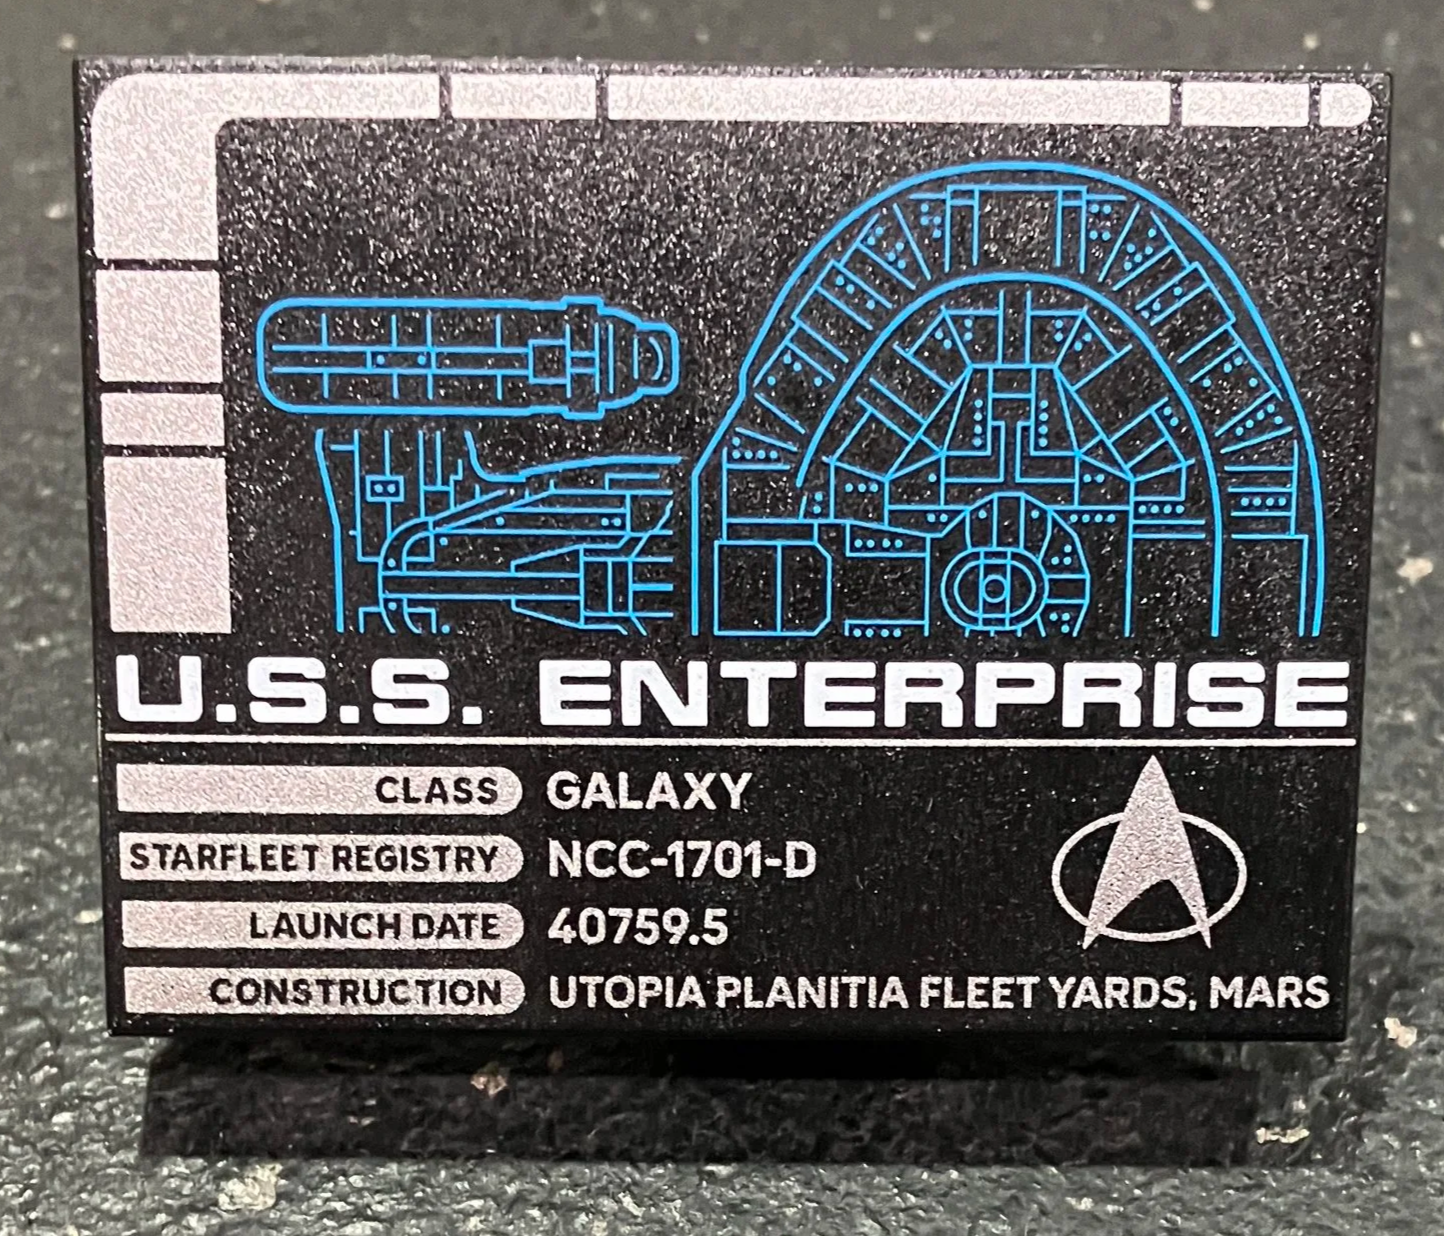
The last bag also builds a placard for the ship. It is printed. YAY!!!!
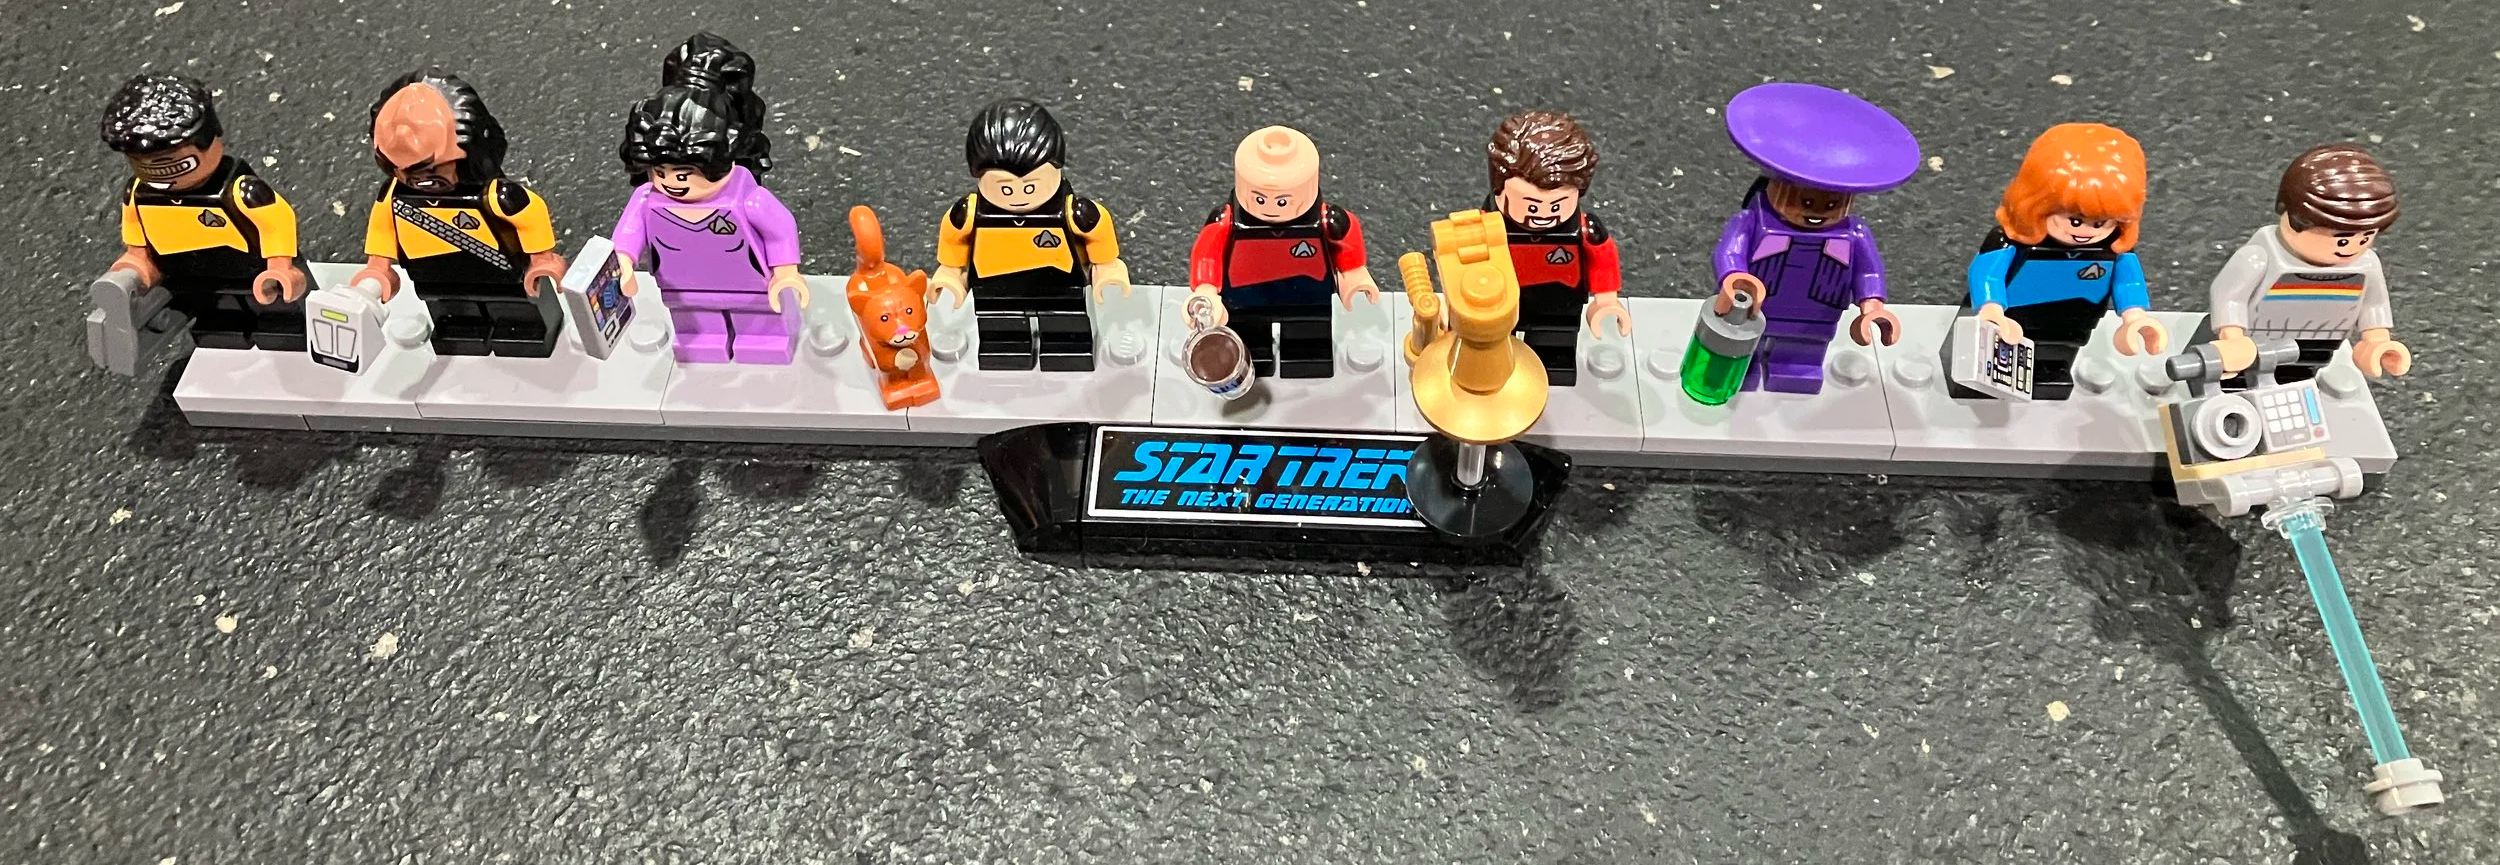
Nine unique minifigures and a stand to put them on with a sticker logo. As a Trekkie, I can’t complain here. I’m sure these will be popular. Were there others that should have been added? Maybe. I think this is a good representation and it captures the main characters well.
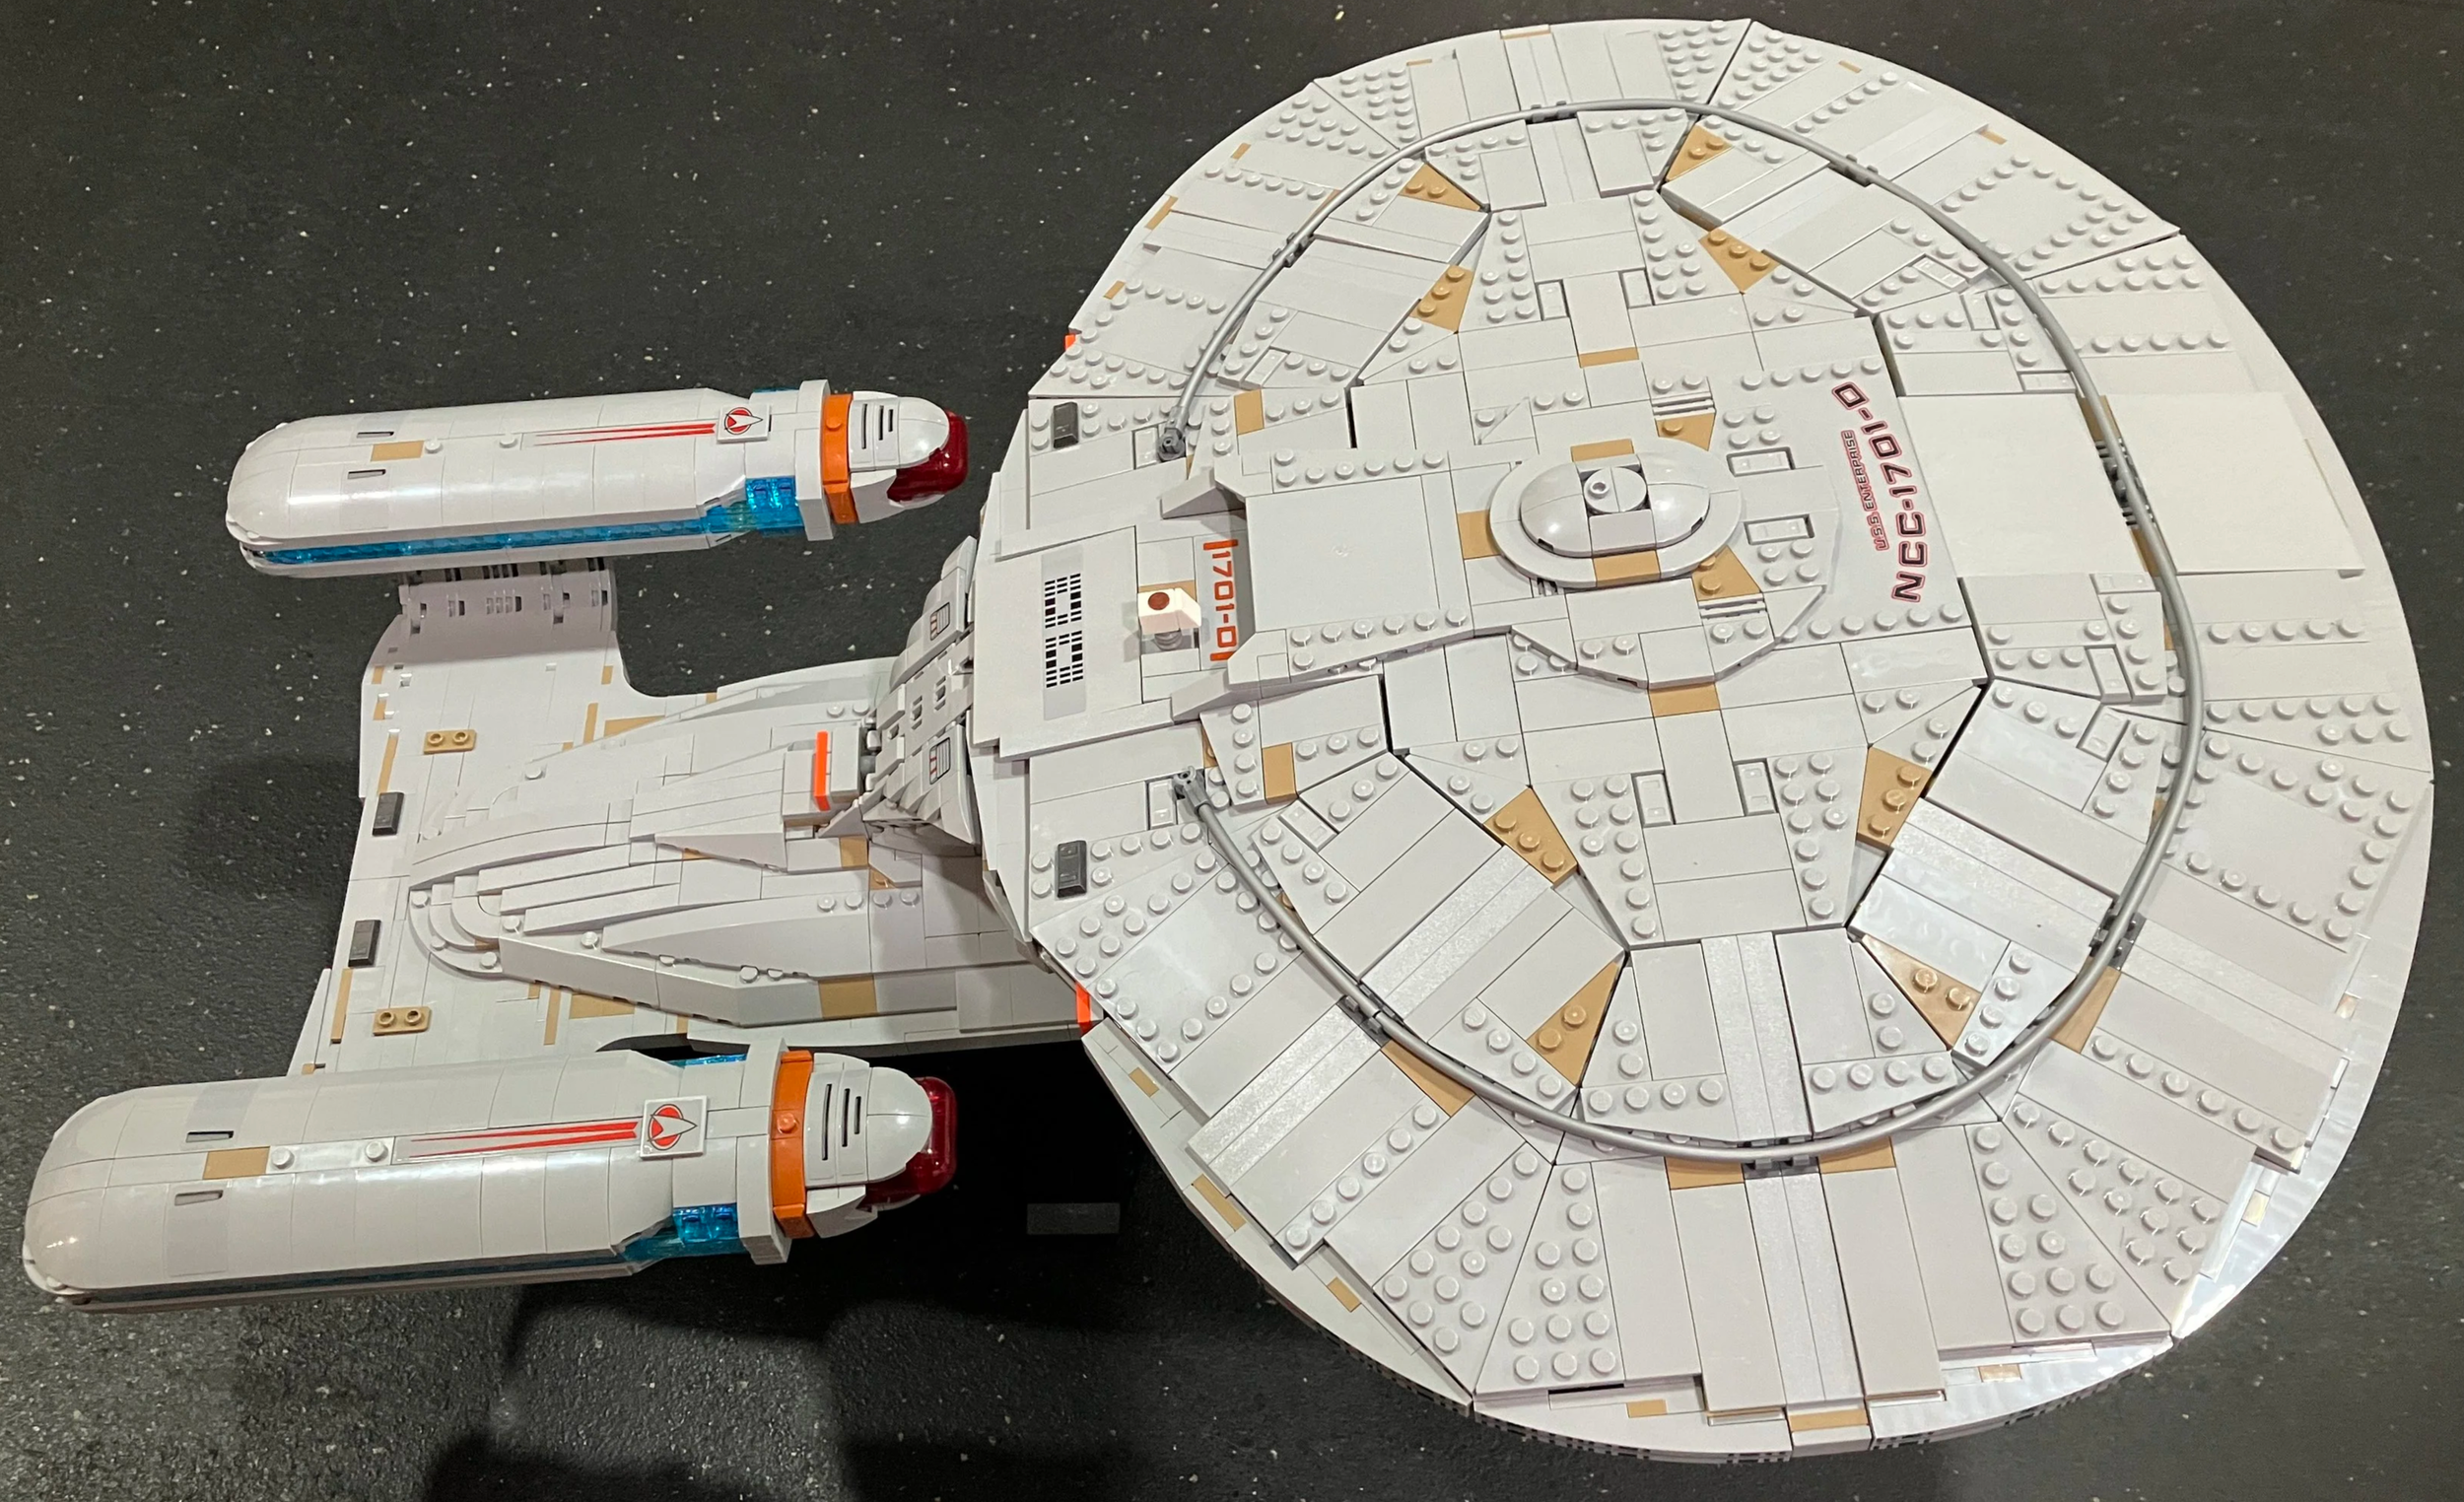
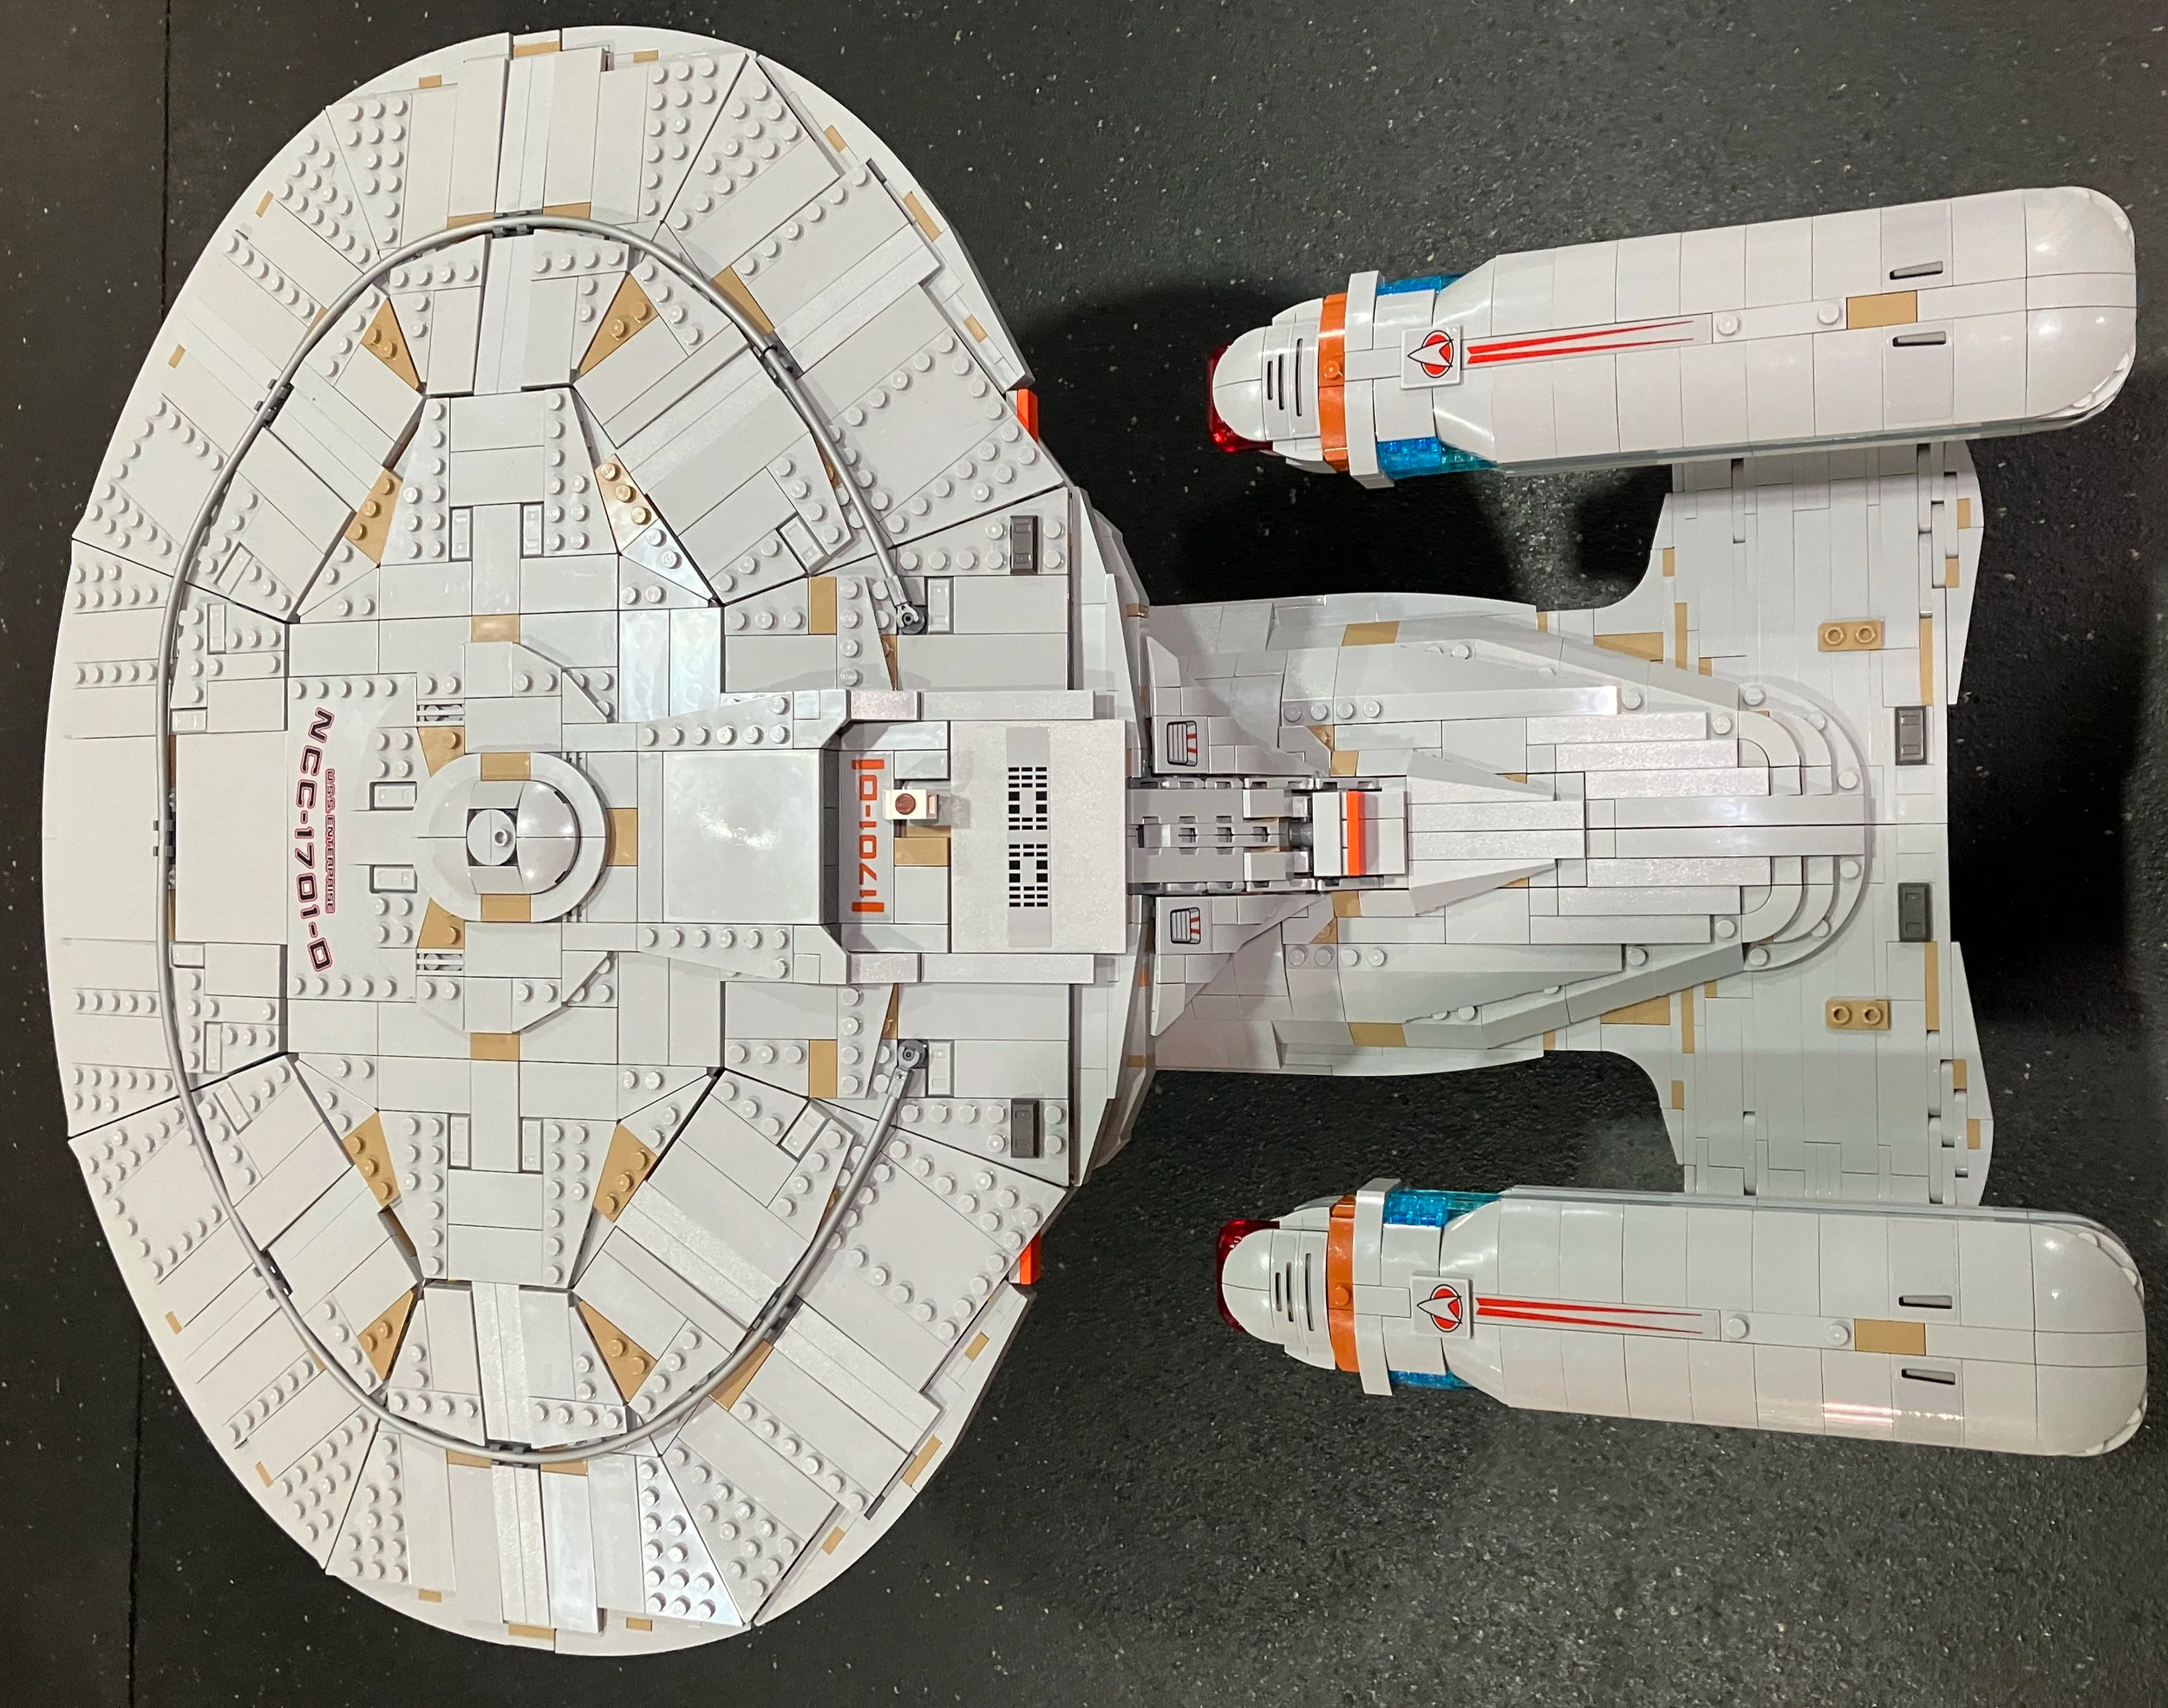
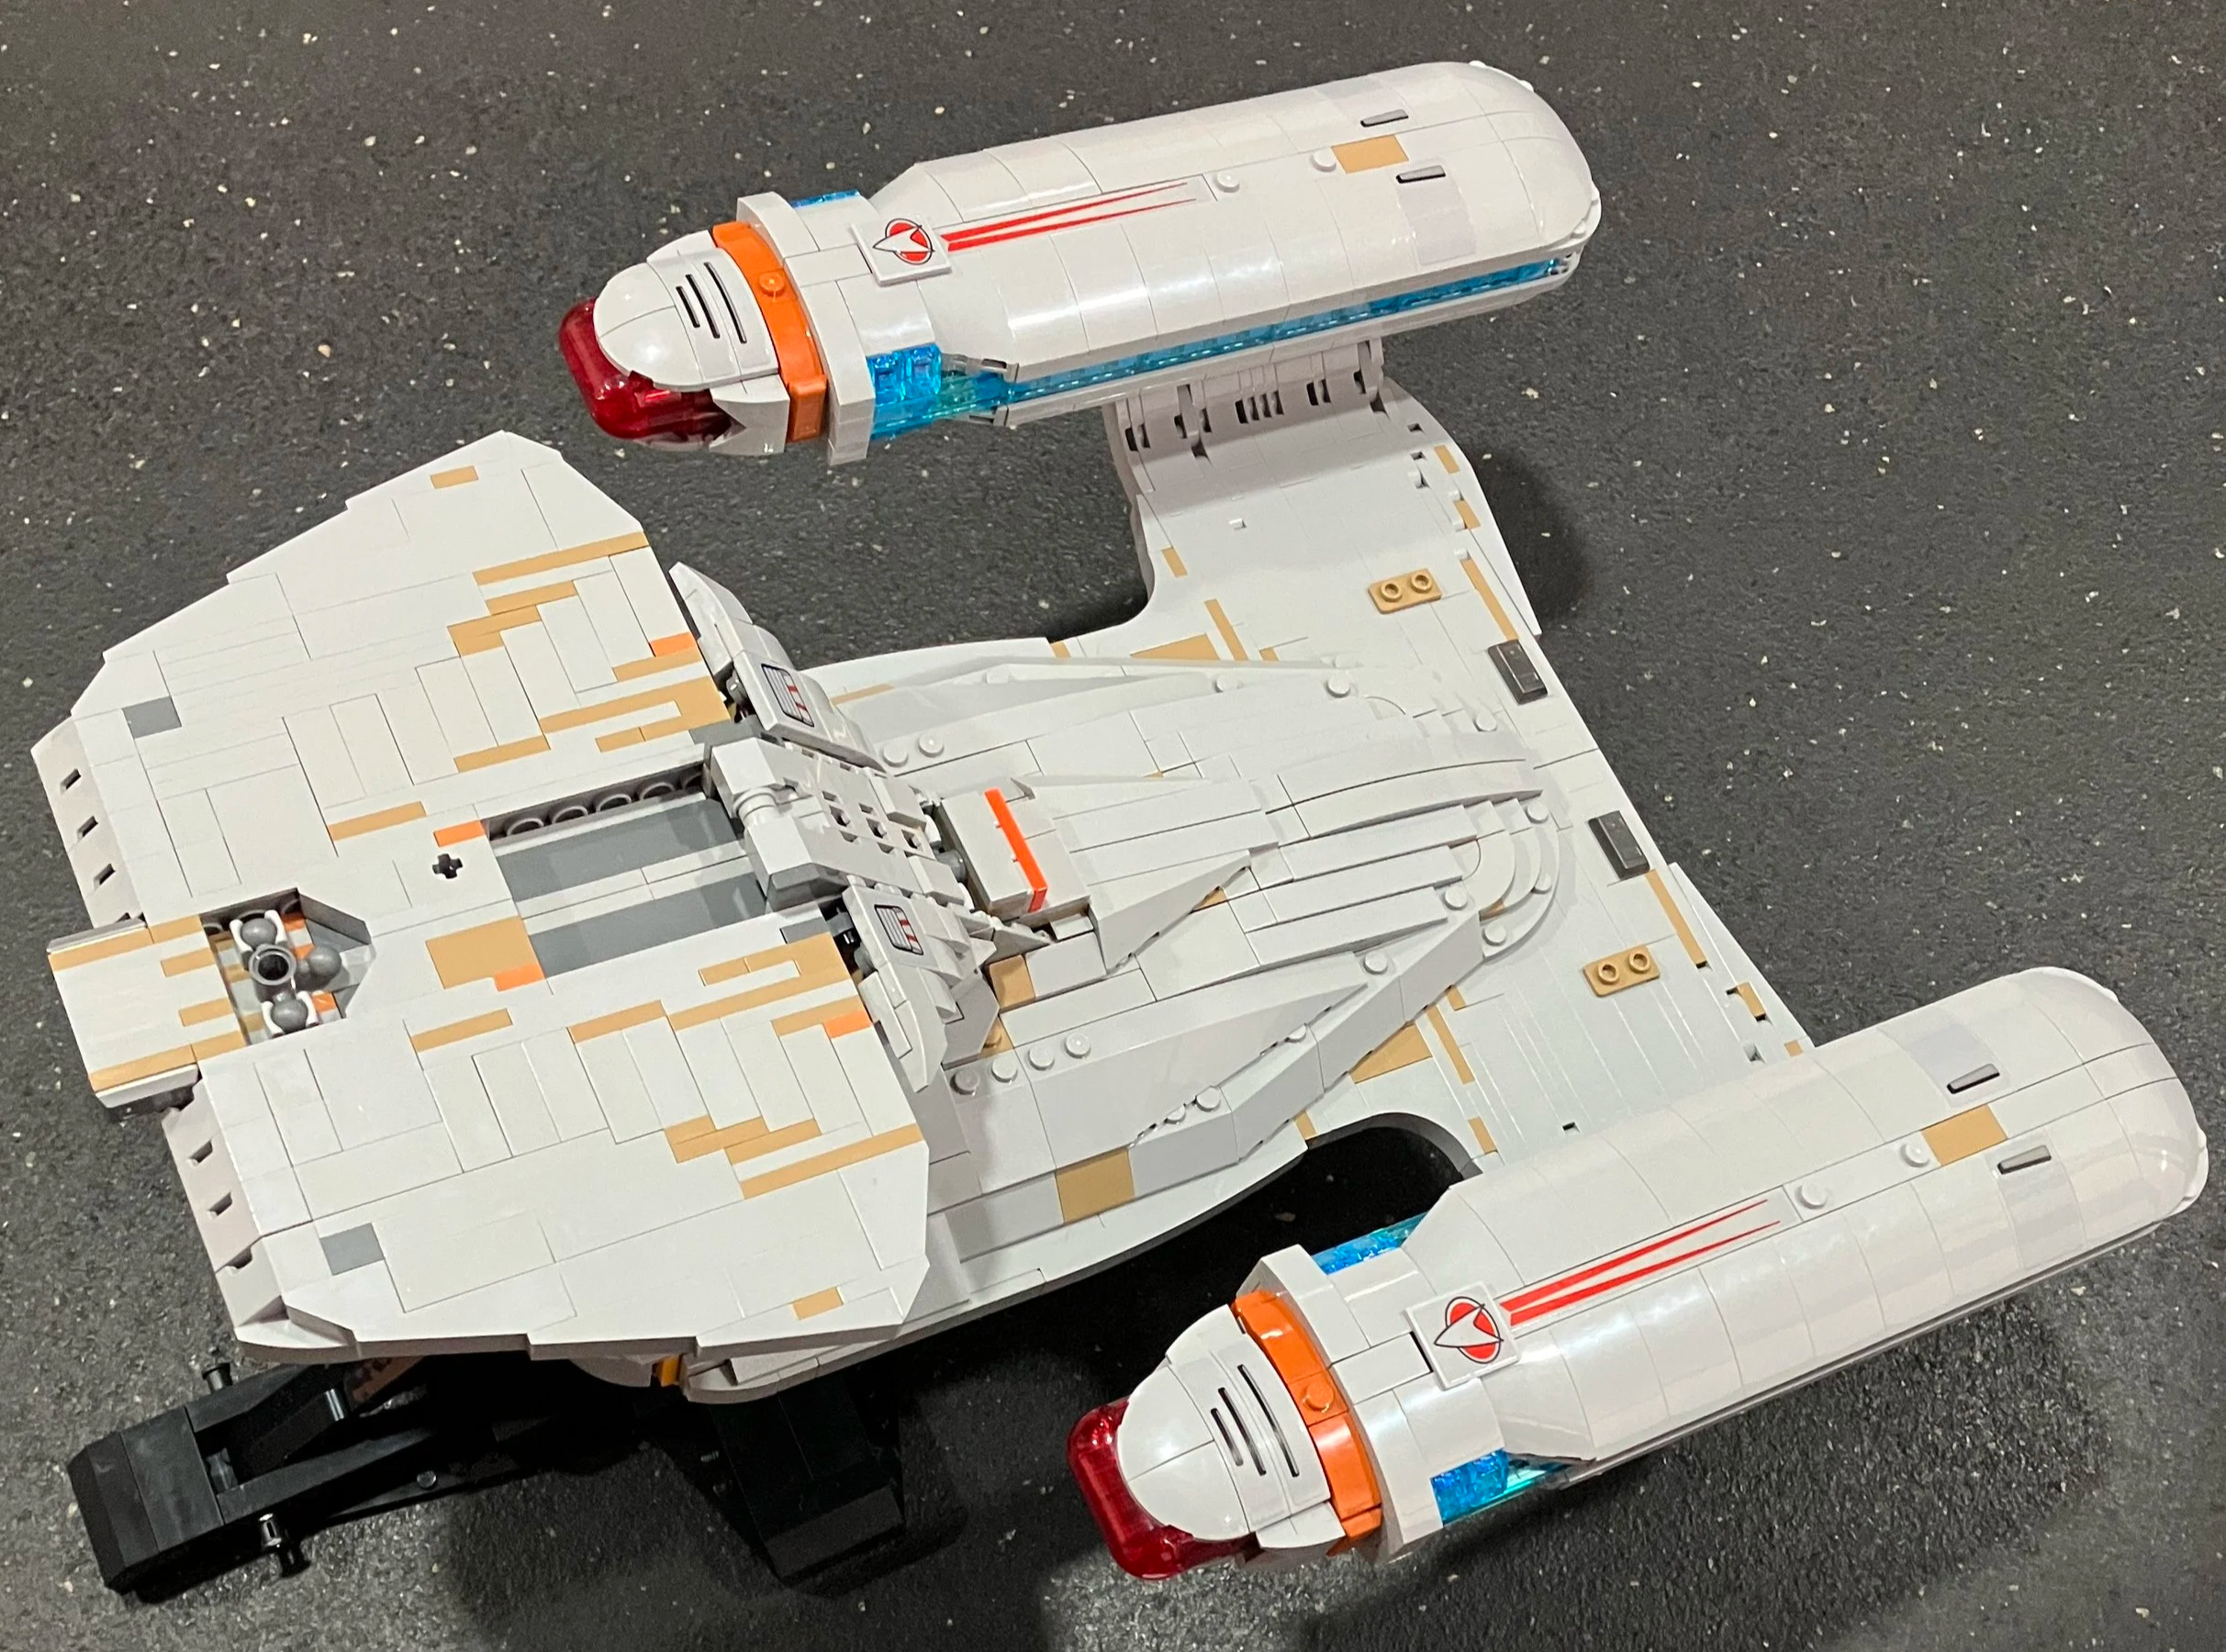
Here’s the final build. I think it looks great! I made the comment to someone that it’s a good thing it came out now instead of when I was a kid as I would have been bugging my parents like crazy to get this as a LEGO fan and Star Trek: The Next Generation fan. Lots of great pieces and the build was fun, but the price… ouch! The GWPs helped, but still it’s a lot. Not sure it will ever go on sale, but look for opportunities to get double VIP points, GWPs, or any other bonuses you can to lessen the pain if you have to get it.
Happy building!
Engage!