The former Creator Expert theme and now 18+ has had a number of vehicles. While I have not purchased them all, the last one I reviewed was #10265-1: Ford Mustang. On 17 February 2021, they released the next vehicle in the line, #10295-1: Porsche 911. It retails for $149.99 in the US. I contains 1,458 pieces and works out to $0.103 per piece.
So let’s see what this one has to offer…
The box has the 18+ branding with various gray pieces printed on the bottom. The rest of the box is black with the Porsche logo on the bottom right and “911” in the upper left. The front shows the Turbo version. The bag shows a larger version of the Targa. Then it shows some of the up close details of both vehicles.


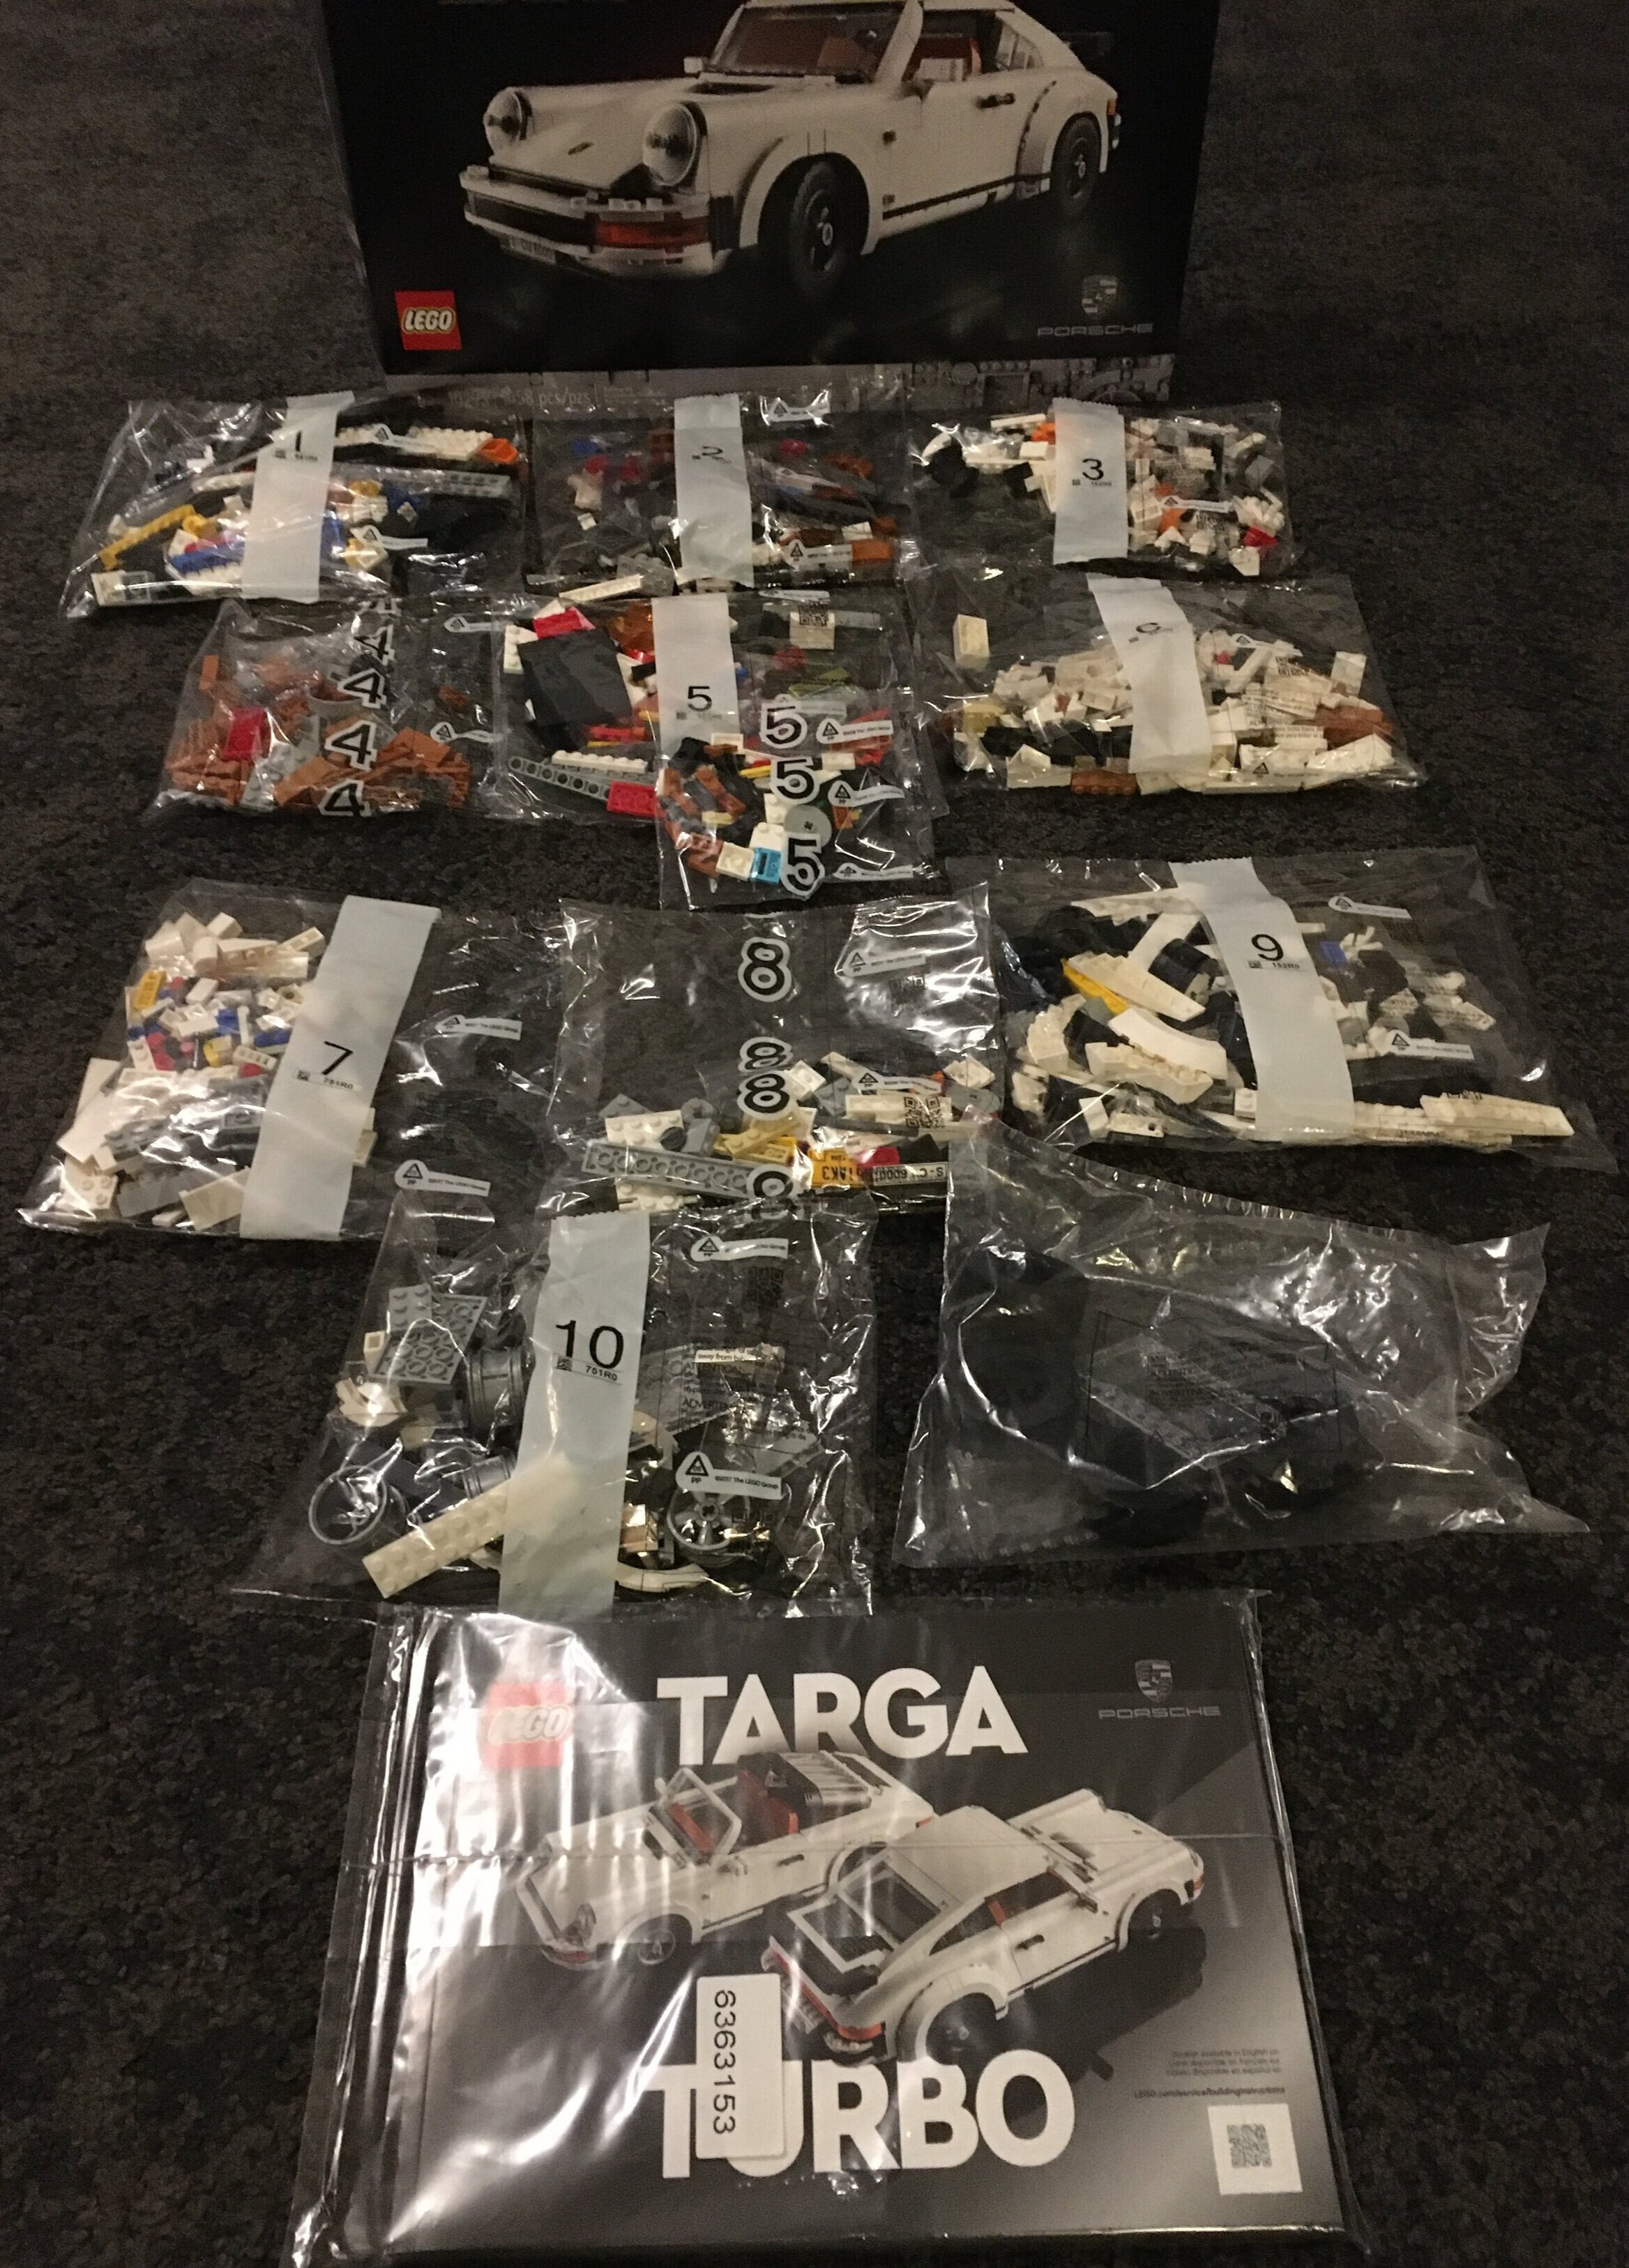
The set contains 11 numbered bags. One for each number with two numbered five. Then there is one bag not numbered with some larger pieces. The instructions are bagged up like most of the larger sets.
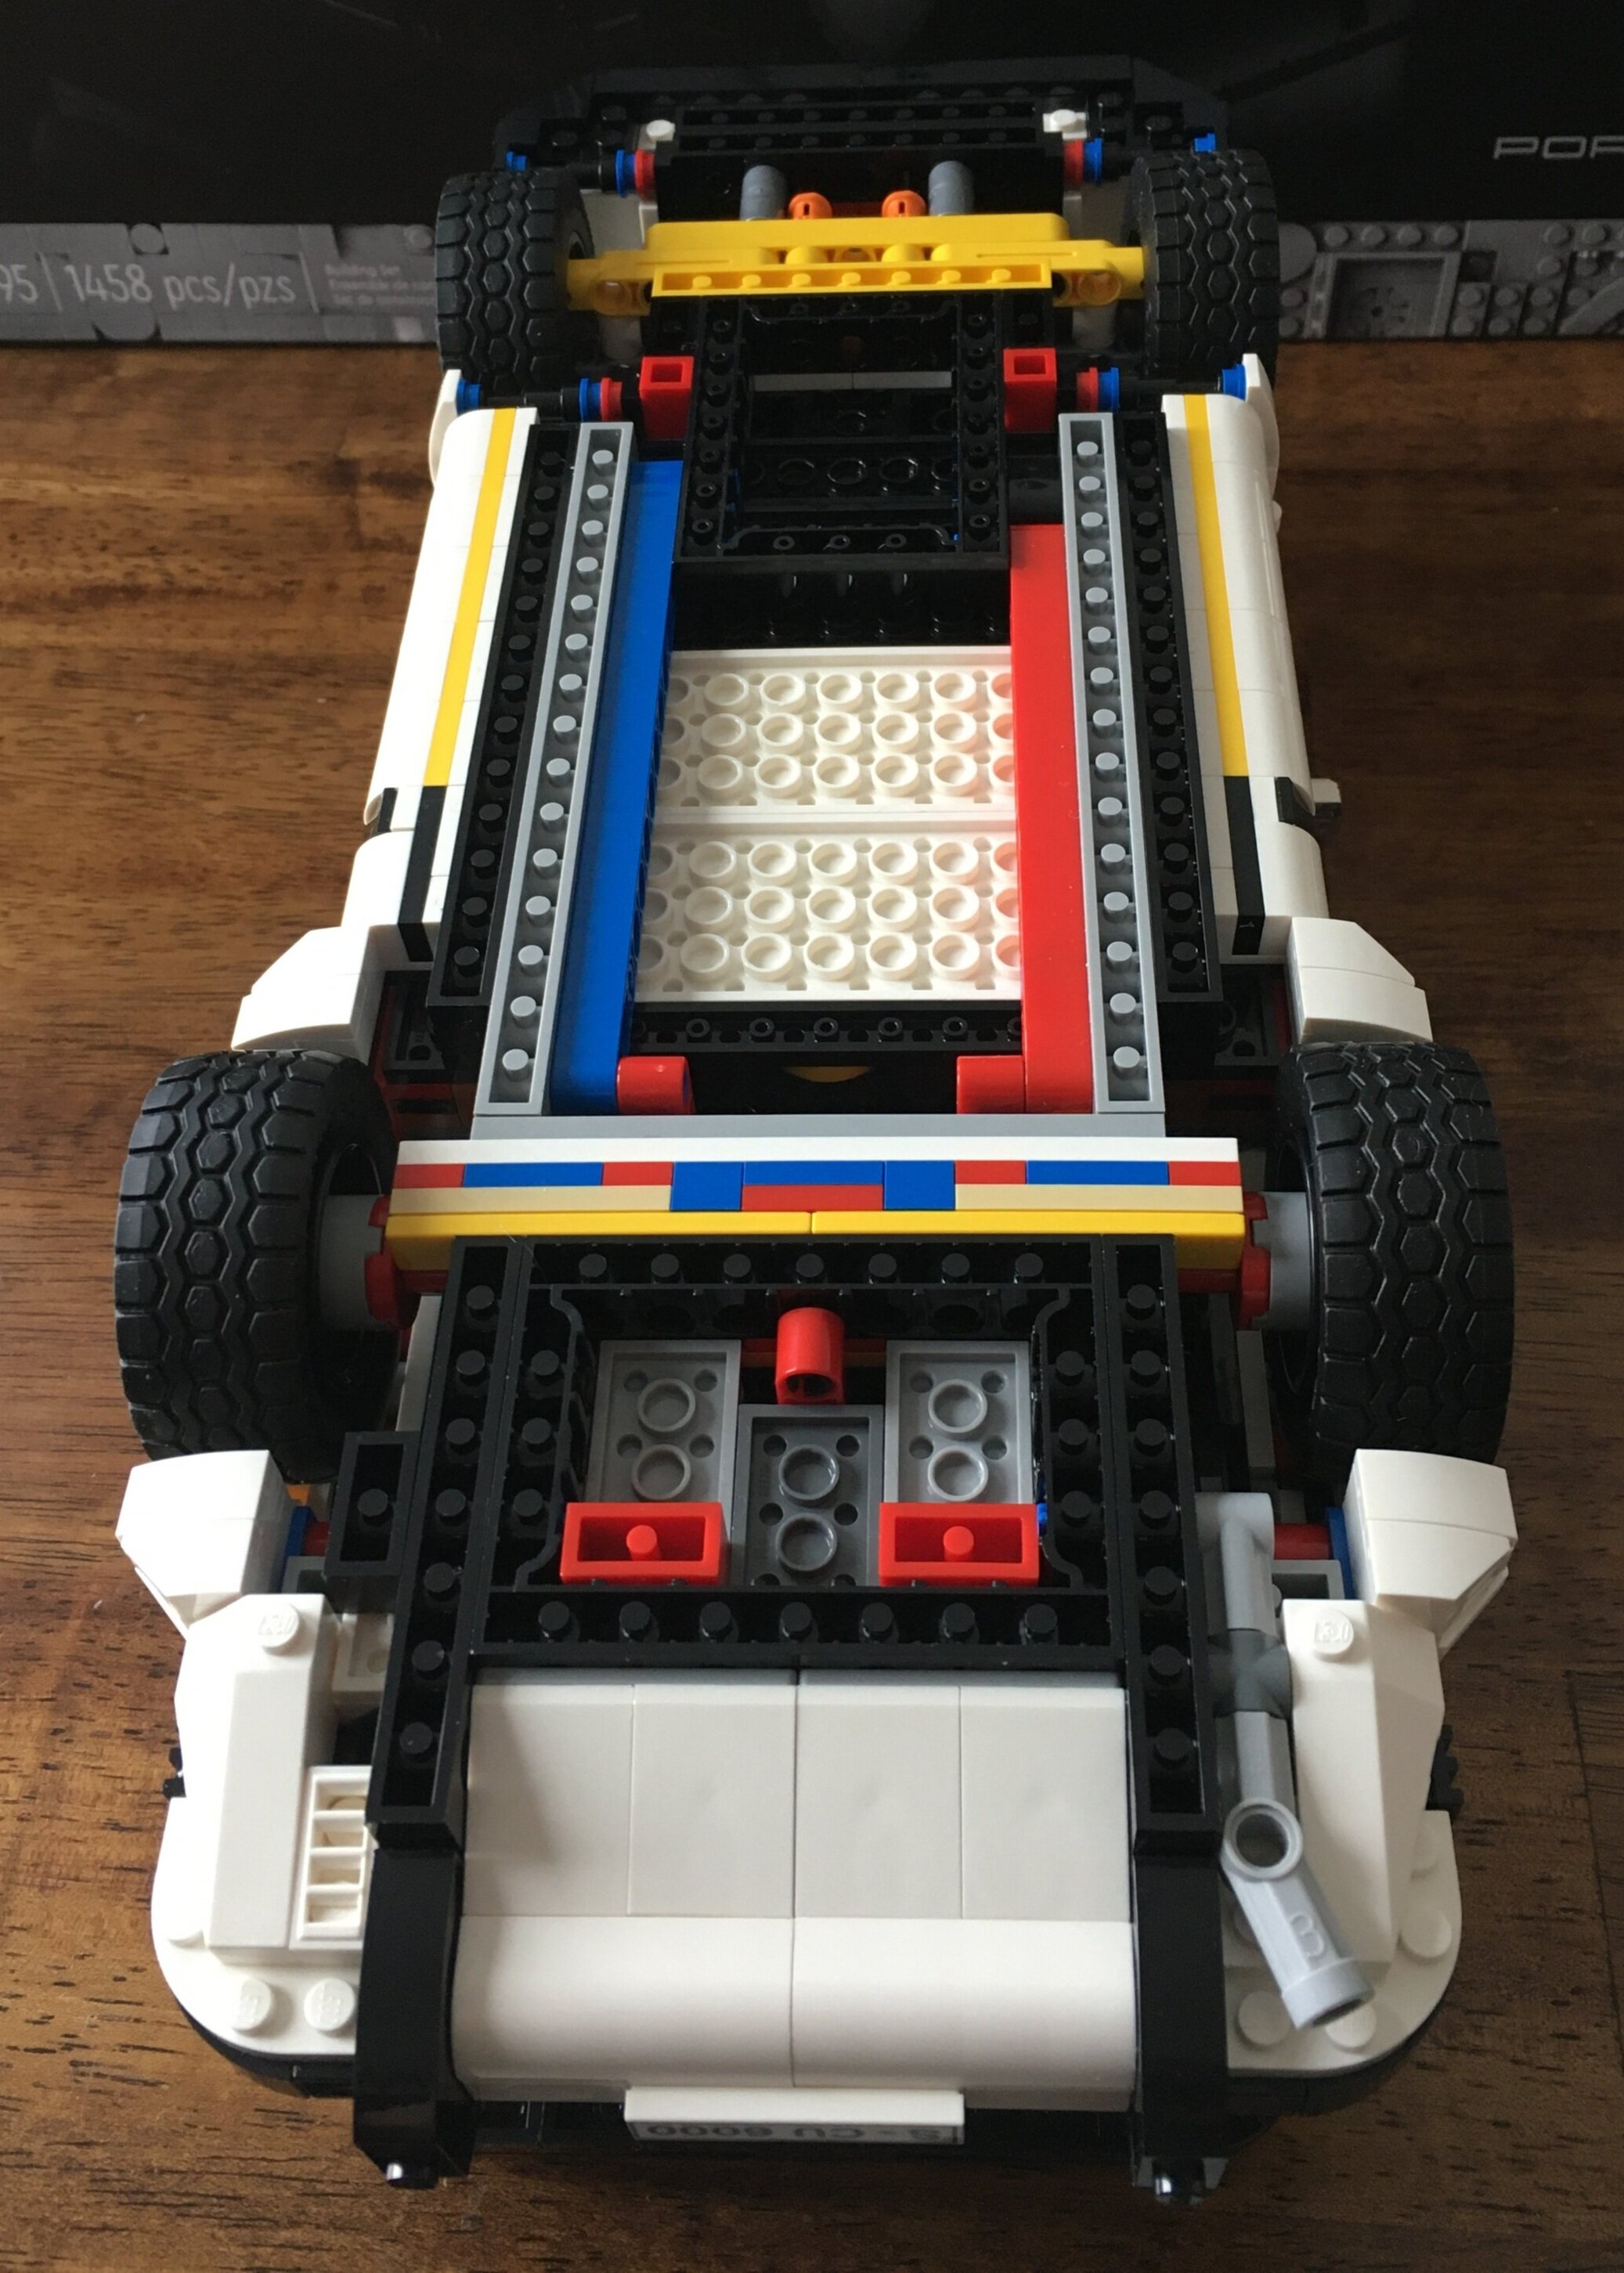
The first bag includes a piece separator and starts to build the base of the vehicle. It uses a lot of Technic pieces and pins to establish the base/frame.

The second bag adds some of the rear structure to the car to include the start of the wheel well area. It also starts the structure that will hold up the rear windshield area. The main section you see is the rear bench seat. I had to look it up, but the color is called Dark Orange according to Brickset.com which makes it look like it could be a leather seat.

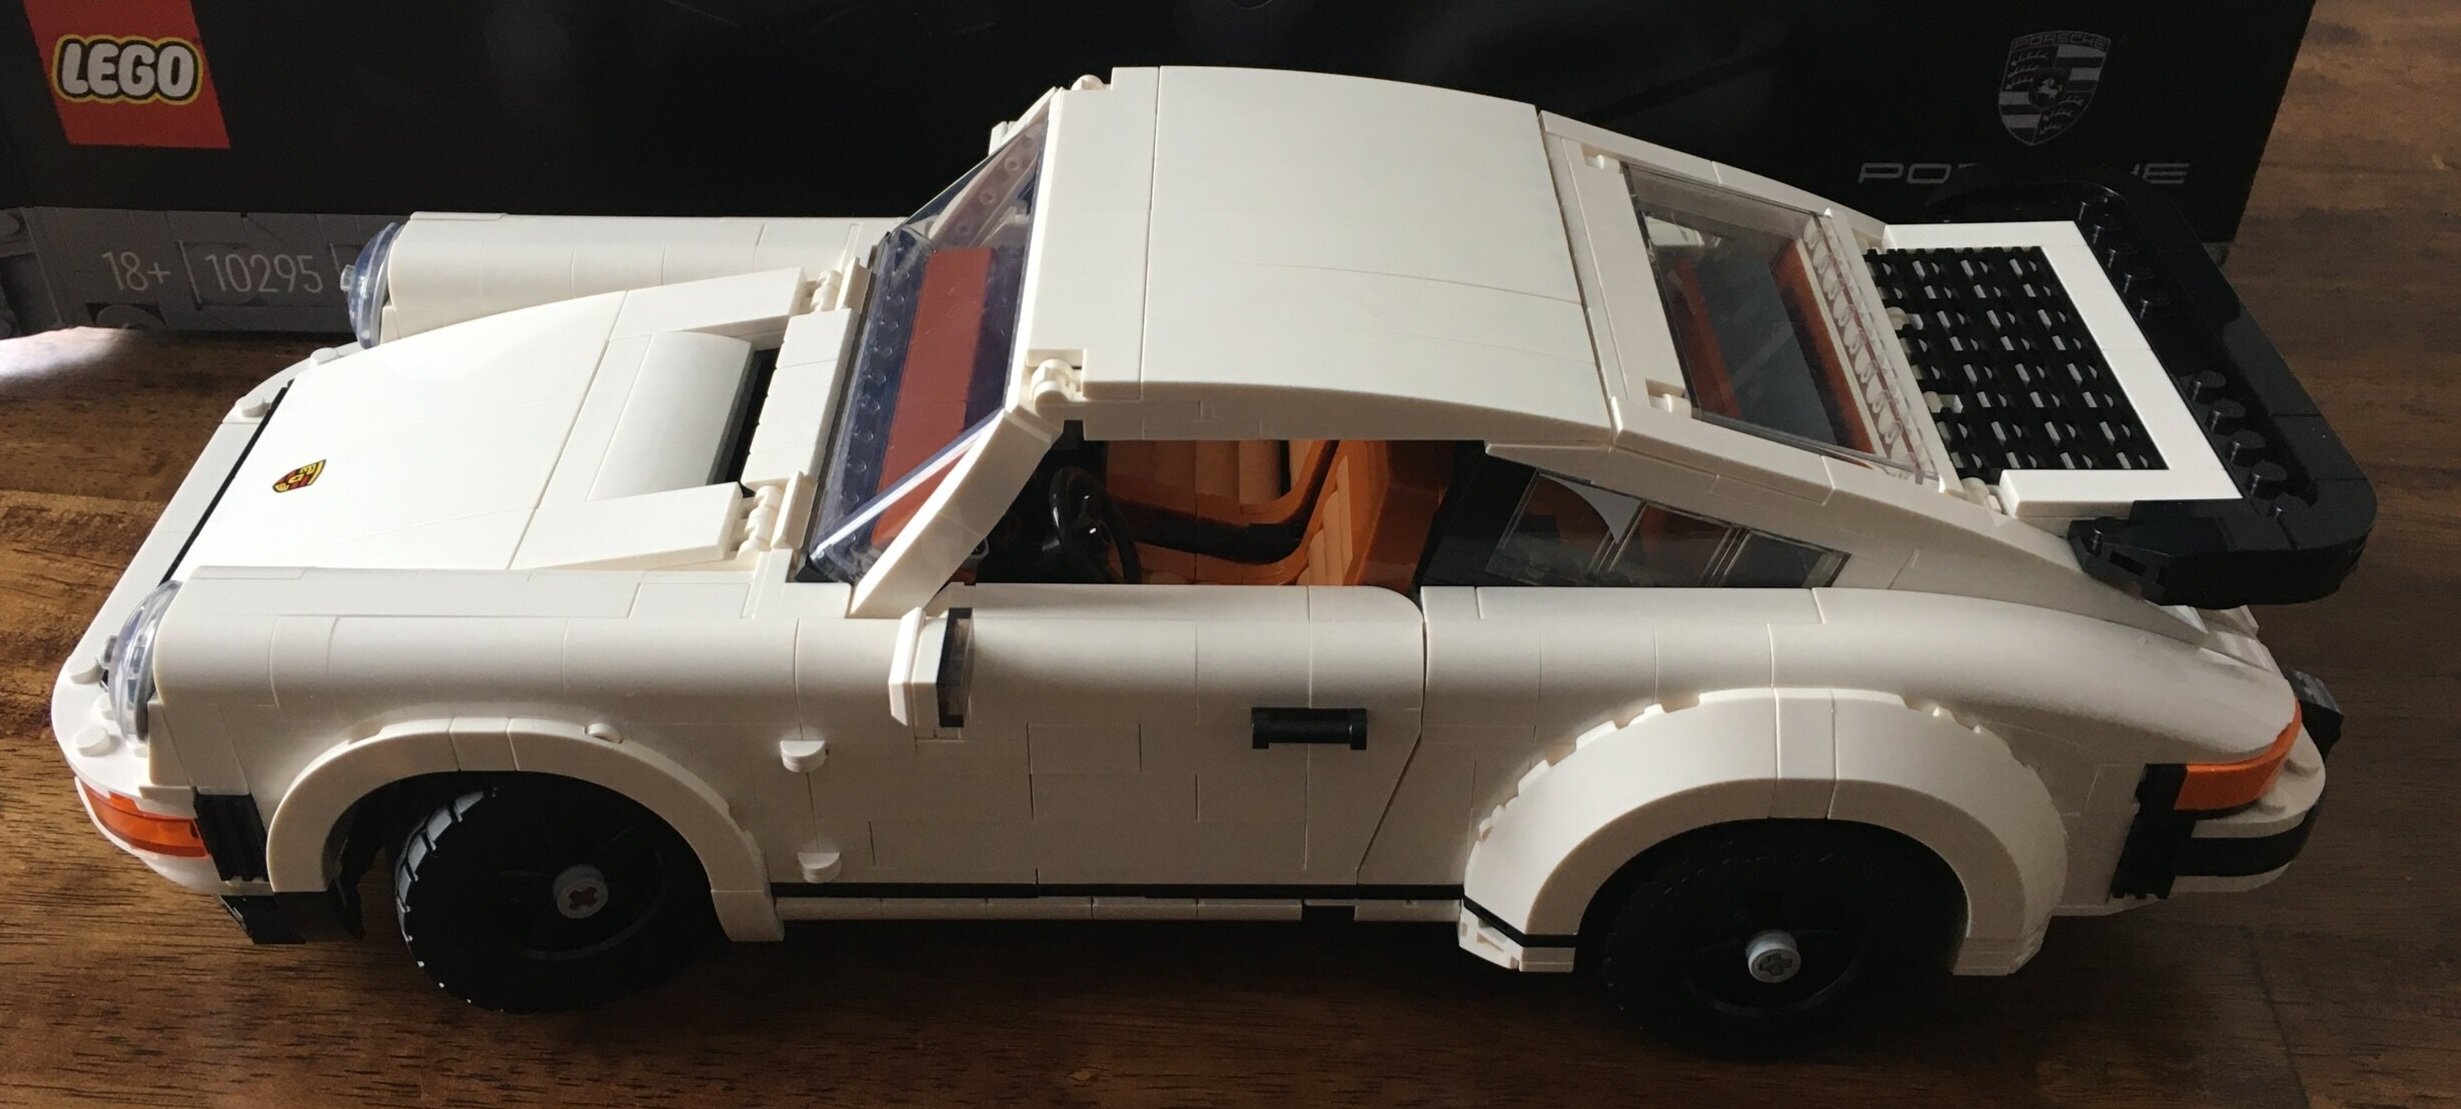
The rear of the vehicle really starts to take shape in bag three. The main body shape is added pretty smoothly with some different angled pieces. In the back, there is a tile with the “Porsche” name printed on it and then two 1x2 clear tiles with the brake lights printed on. And I’m super glad these weren’t stickers as I wouldn’t have placed them that straight. Additionally, they added in a larger orange bow brick that makes the turn signals up. I think this is the first time LEGO has used a piece like this versus using cheese slopes or translucent bricks/plates. I like how smooth it makes the car look and how it fits right in with the curves of the vehicle.
A few other small details… you can see the the exhaust pipe underneath the driver’s side, rear of the car and then on the rear of the car you can see where the license plate can hook on.

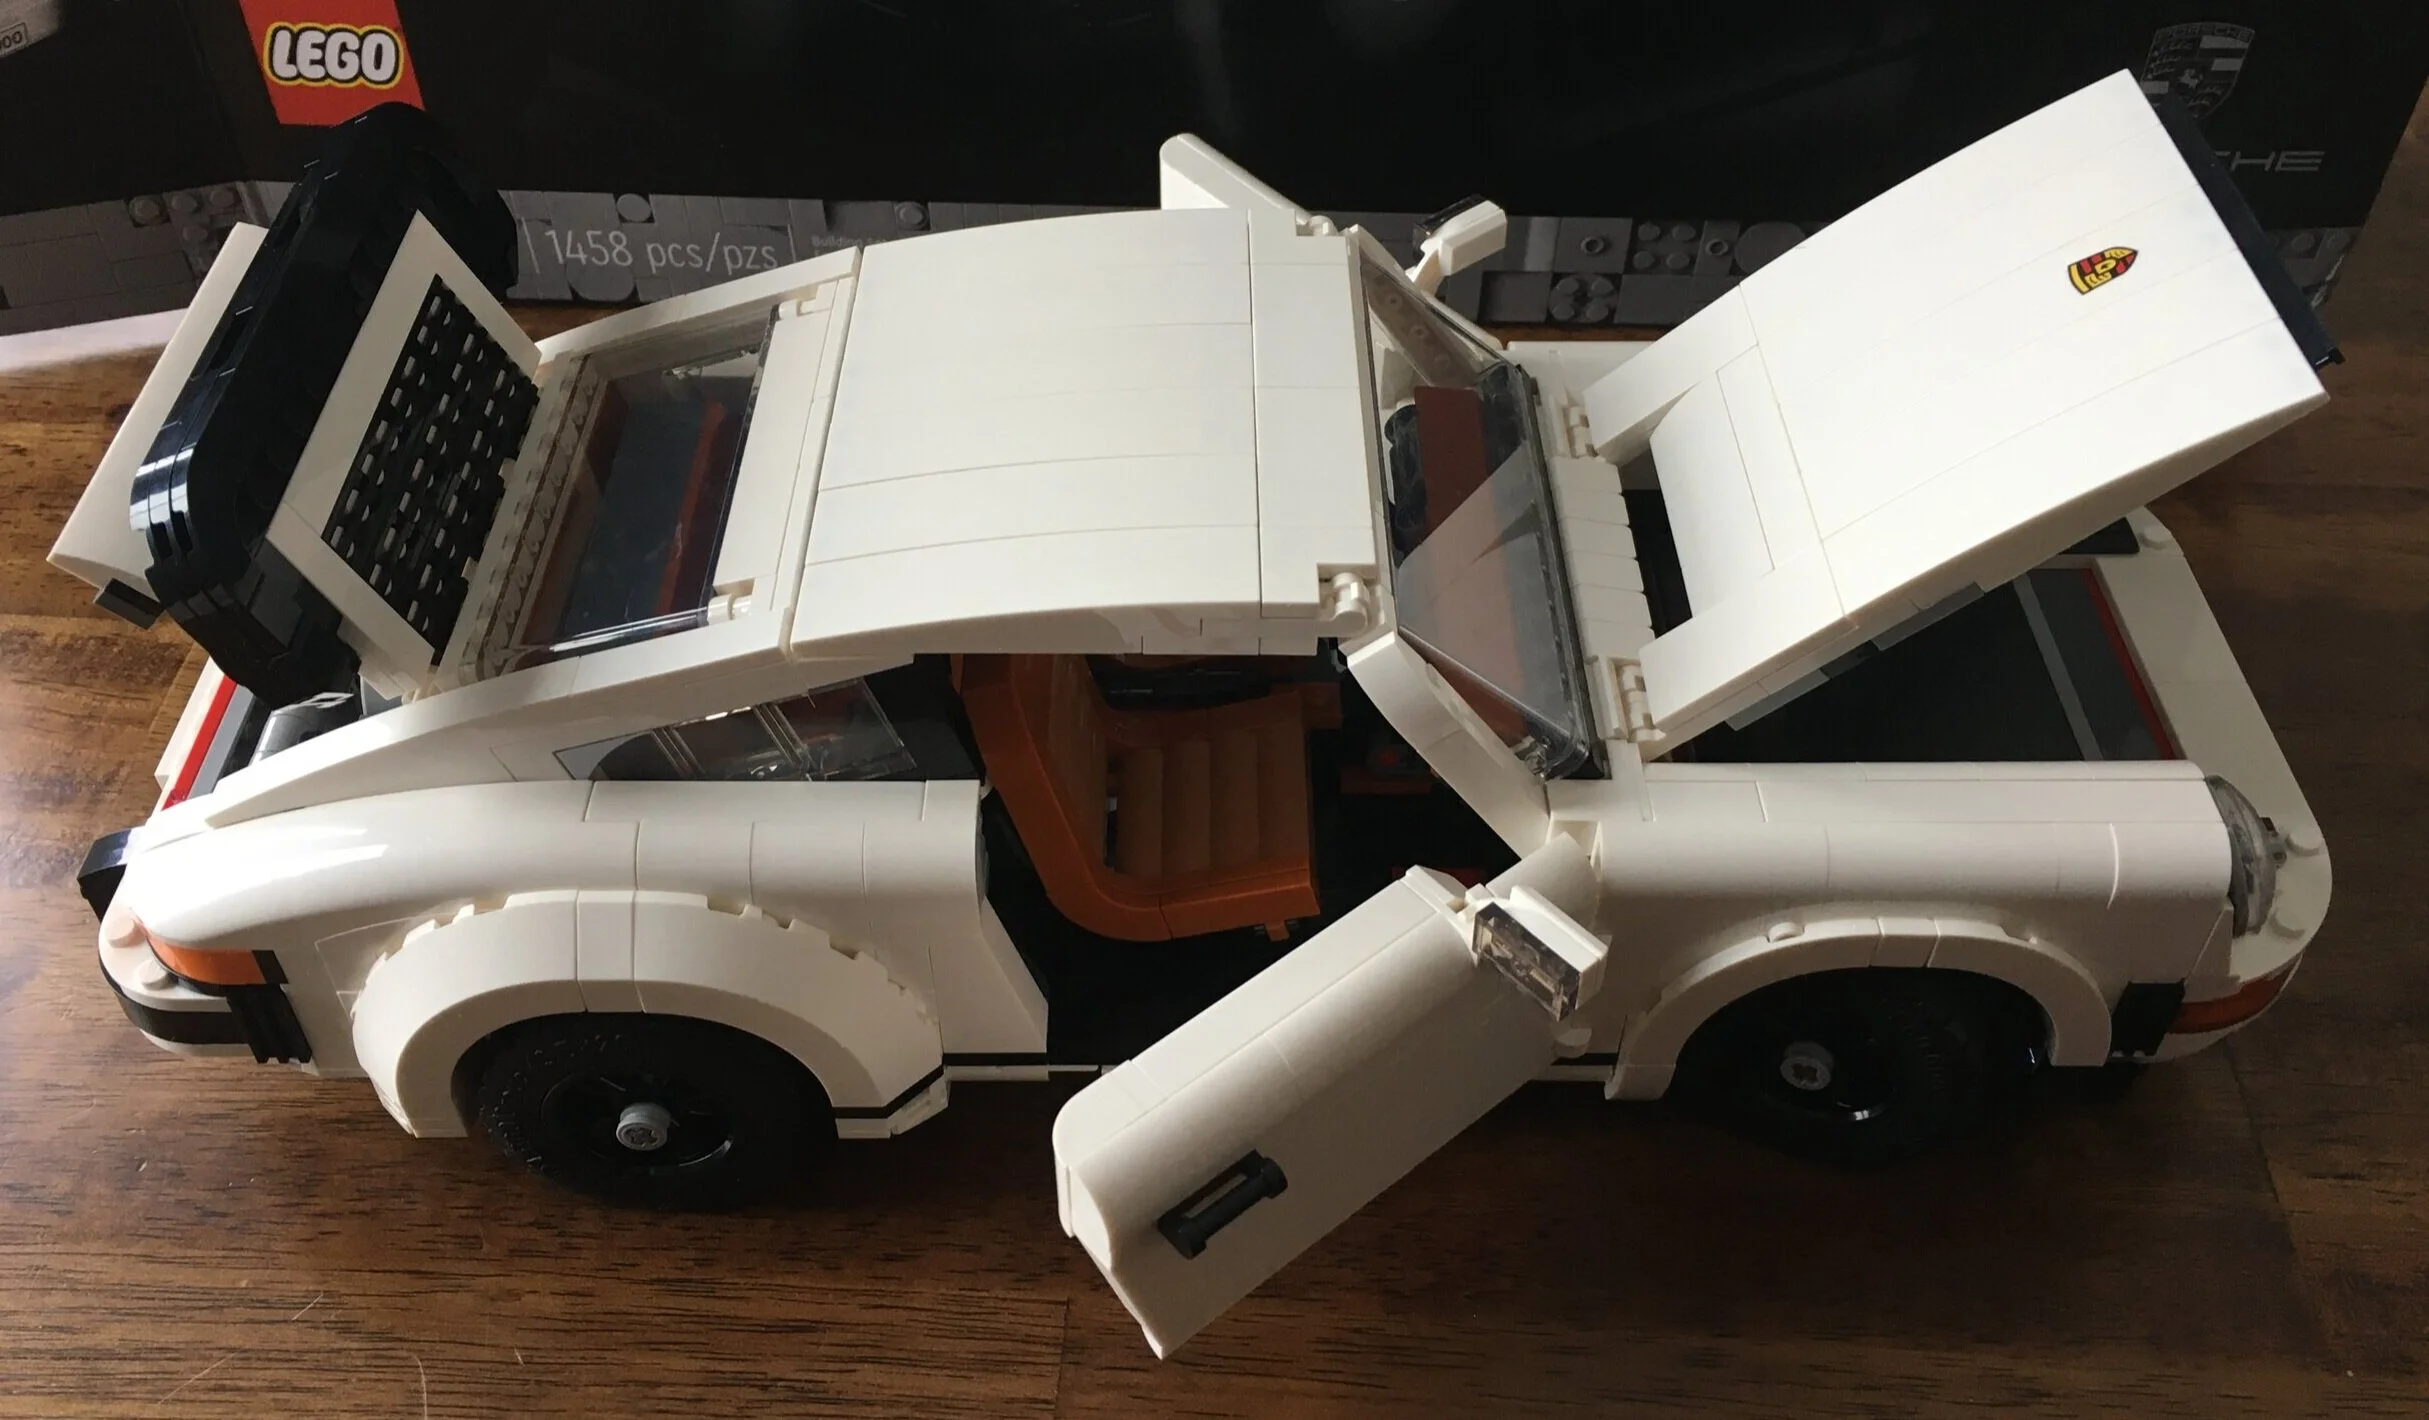
The fourth bag adds in the driver and passenger seats. Both seats are dark orange for the head rests and then the outer seat sides. The inside portions of the seats is a medium nougat color and it is built with textured bricks. The seats are anchored in the front on the bottom and then rotate forward so a passenger can squeeze into the back seat area of the two door vehicle. In-between the seats is a parking/emergency brake handle.

The fifth bag builds out the front bumper, what will end up as the bottom of the trunk in the front, the front axle, the gearing to make the front wheels turn when you turn the steering wheel, the steering column, and a shifter to change the transmission (which is really just for show). The front turn signals are a piece that I think is new. I couldn’t find it listed on the Brickset.com site for this set. It’s a 1x3x2 brick curved slope/bow, but unlike the back of the vehicle, this one is a full piece and it is translucent orange.
I didn’t do a direct comparison, but the steering column seems to be fairly similar to the Ford Mustang. Nothing overly special here, but I’m glad they added this bit of functionality.
Last bit to comment on here… you get a large black slope as the bottom of the front trunk. At first I couldn’t figure out why this piece went there, but it makes sense when you go to build the Targa version.

The sixth bag adds in both doors, the front dashboard, and the front windshield. The doors match the shape and curvature of the rest of the vehicle. There is a slight gap when you close the door, but nothing that I am overly concerned about as it isn’t super noticeable. One advantage over the Ford Mustang is the side mirrors. Instead of being clipped on, they used a 3x3 brick plate with bow (also not on Brickset.com). That piece is white and then a translucent clear 1x2 plate is added on for the “glass.” This makes the mirror solid and keeps it from flopping around like on the Mustang if say one of your kiddos decided to drive the vehicle around on the floor.
The dashboard is the same dark orange color as the seat. It has a few printed pieces for dials to add a bit of realism.
The windscreen is in #10271-1: Fiat 500 and #10272: Old Trafford - Manchester United. It’s a 1x10x4 screen and it’s pretty sizeable, but gets the job done. It’s installed at an angle to achieve the slope of the windshield.

Bag 7 is the last of the common bags before you have to split off and decide which version of the car to build first. It adds the front of the vehicle to include the hood and headlights. Nothing overly complicated here with this part of the build. I’m a big fan of the printed Porsche logo for the hood versus using a sticker. Given my poor sticker applying skills, this would have been off center or slightly crooked so I’m glad they printed it.
The use of the clear radar dish for the headlights works well. I’m glad they attached then with a shaft/pin type piece instead of using the stud in the back. It makes it stay on a lot better and I think it helped to achieve the angle much better than trying to align a stud to that angle.

Now you have to decide whether you want to build the Turbo or the Targa. The instructions tell you that you need bags 8 and 9 for the Turbo and bags 8 and 10 for the Targa. I went with the Turbo version first.
You build the roof which is held on in the front by 1x1 clips. If you are going to display the car, then no big deal, but if you plan to play with the car, be careful as it falls off pretty easily (when your kid plays with it).
The engine is installed as well. I’m not smart enough to know what all the pieces are, but the engine in this one is different than what goes in the Targa. You then add the trunk with the rear spoiler (if that’s what it’s called). The rear also had a 2x2 bow piece with the word “Turbo” printed on it.
The rear axle is added along with the rear wheel well and coverings. A larger white, curved bow piece is used to achieve the outer wheel well which is a nice touch.
As shown in the pictures, you can open and close the doors, hood, and trunk. Along with the steering wheel functionality, this isn’t bad for a non-Technic set.
Overall, I enjoyed the build. It has some great piece usage and techniques and it’s an added bonus that there are pieces and instructions for two cars (second car design will be reviewed next week). This isn’t the first Porsche LEGO has done, but it’s a nice middle ground between the larger Technic Porsche from 2016 and the smaller Speed Champions version.
The price is a bit high if you consider piece count. To be fair, there are some larger pieces and no stickers (all printing) so maybe that’s why. If you are looking to pick this one up, look for Double VIP points or a good Gift with Purchase opportunity like I did from Shop @ Home. Don’t forget the cash back sites like Rakuten either.
Happy building!