Set Reviews

Set Review - #42115-1 - Lamborghini Sian FKP 37 - Technic

There are a few themes LEGO has sucked me into. One is modular buildings. The other is the Technic "super cars.” The first one was #42056-1: Porsche 911 GT3 RS back in 2016. The second was #42083-1: Bugatti Chiron released in 2018. The third car was released on 2 June 2020 in the US. It’s #42115-1: Lamborghini Sian FKP 37. It contains 3,696 pieces and retails for $379.99 in the US. This works out to $0.103/piece. Considering a lot of those pieces are tiny Technic pins, this car is expensive! Thankfully, I found it locally for ~$286 which I think is a much more reasonable price for the set. So if you live in the US, now is the time to complain as the Europeans get some discounts that you never see.

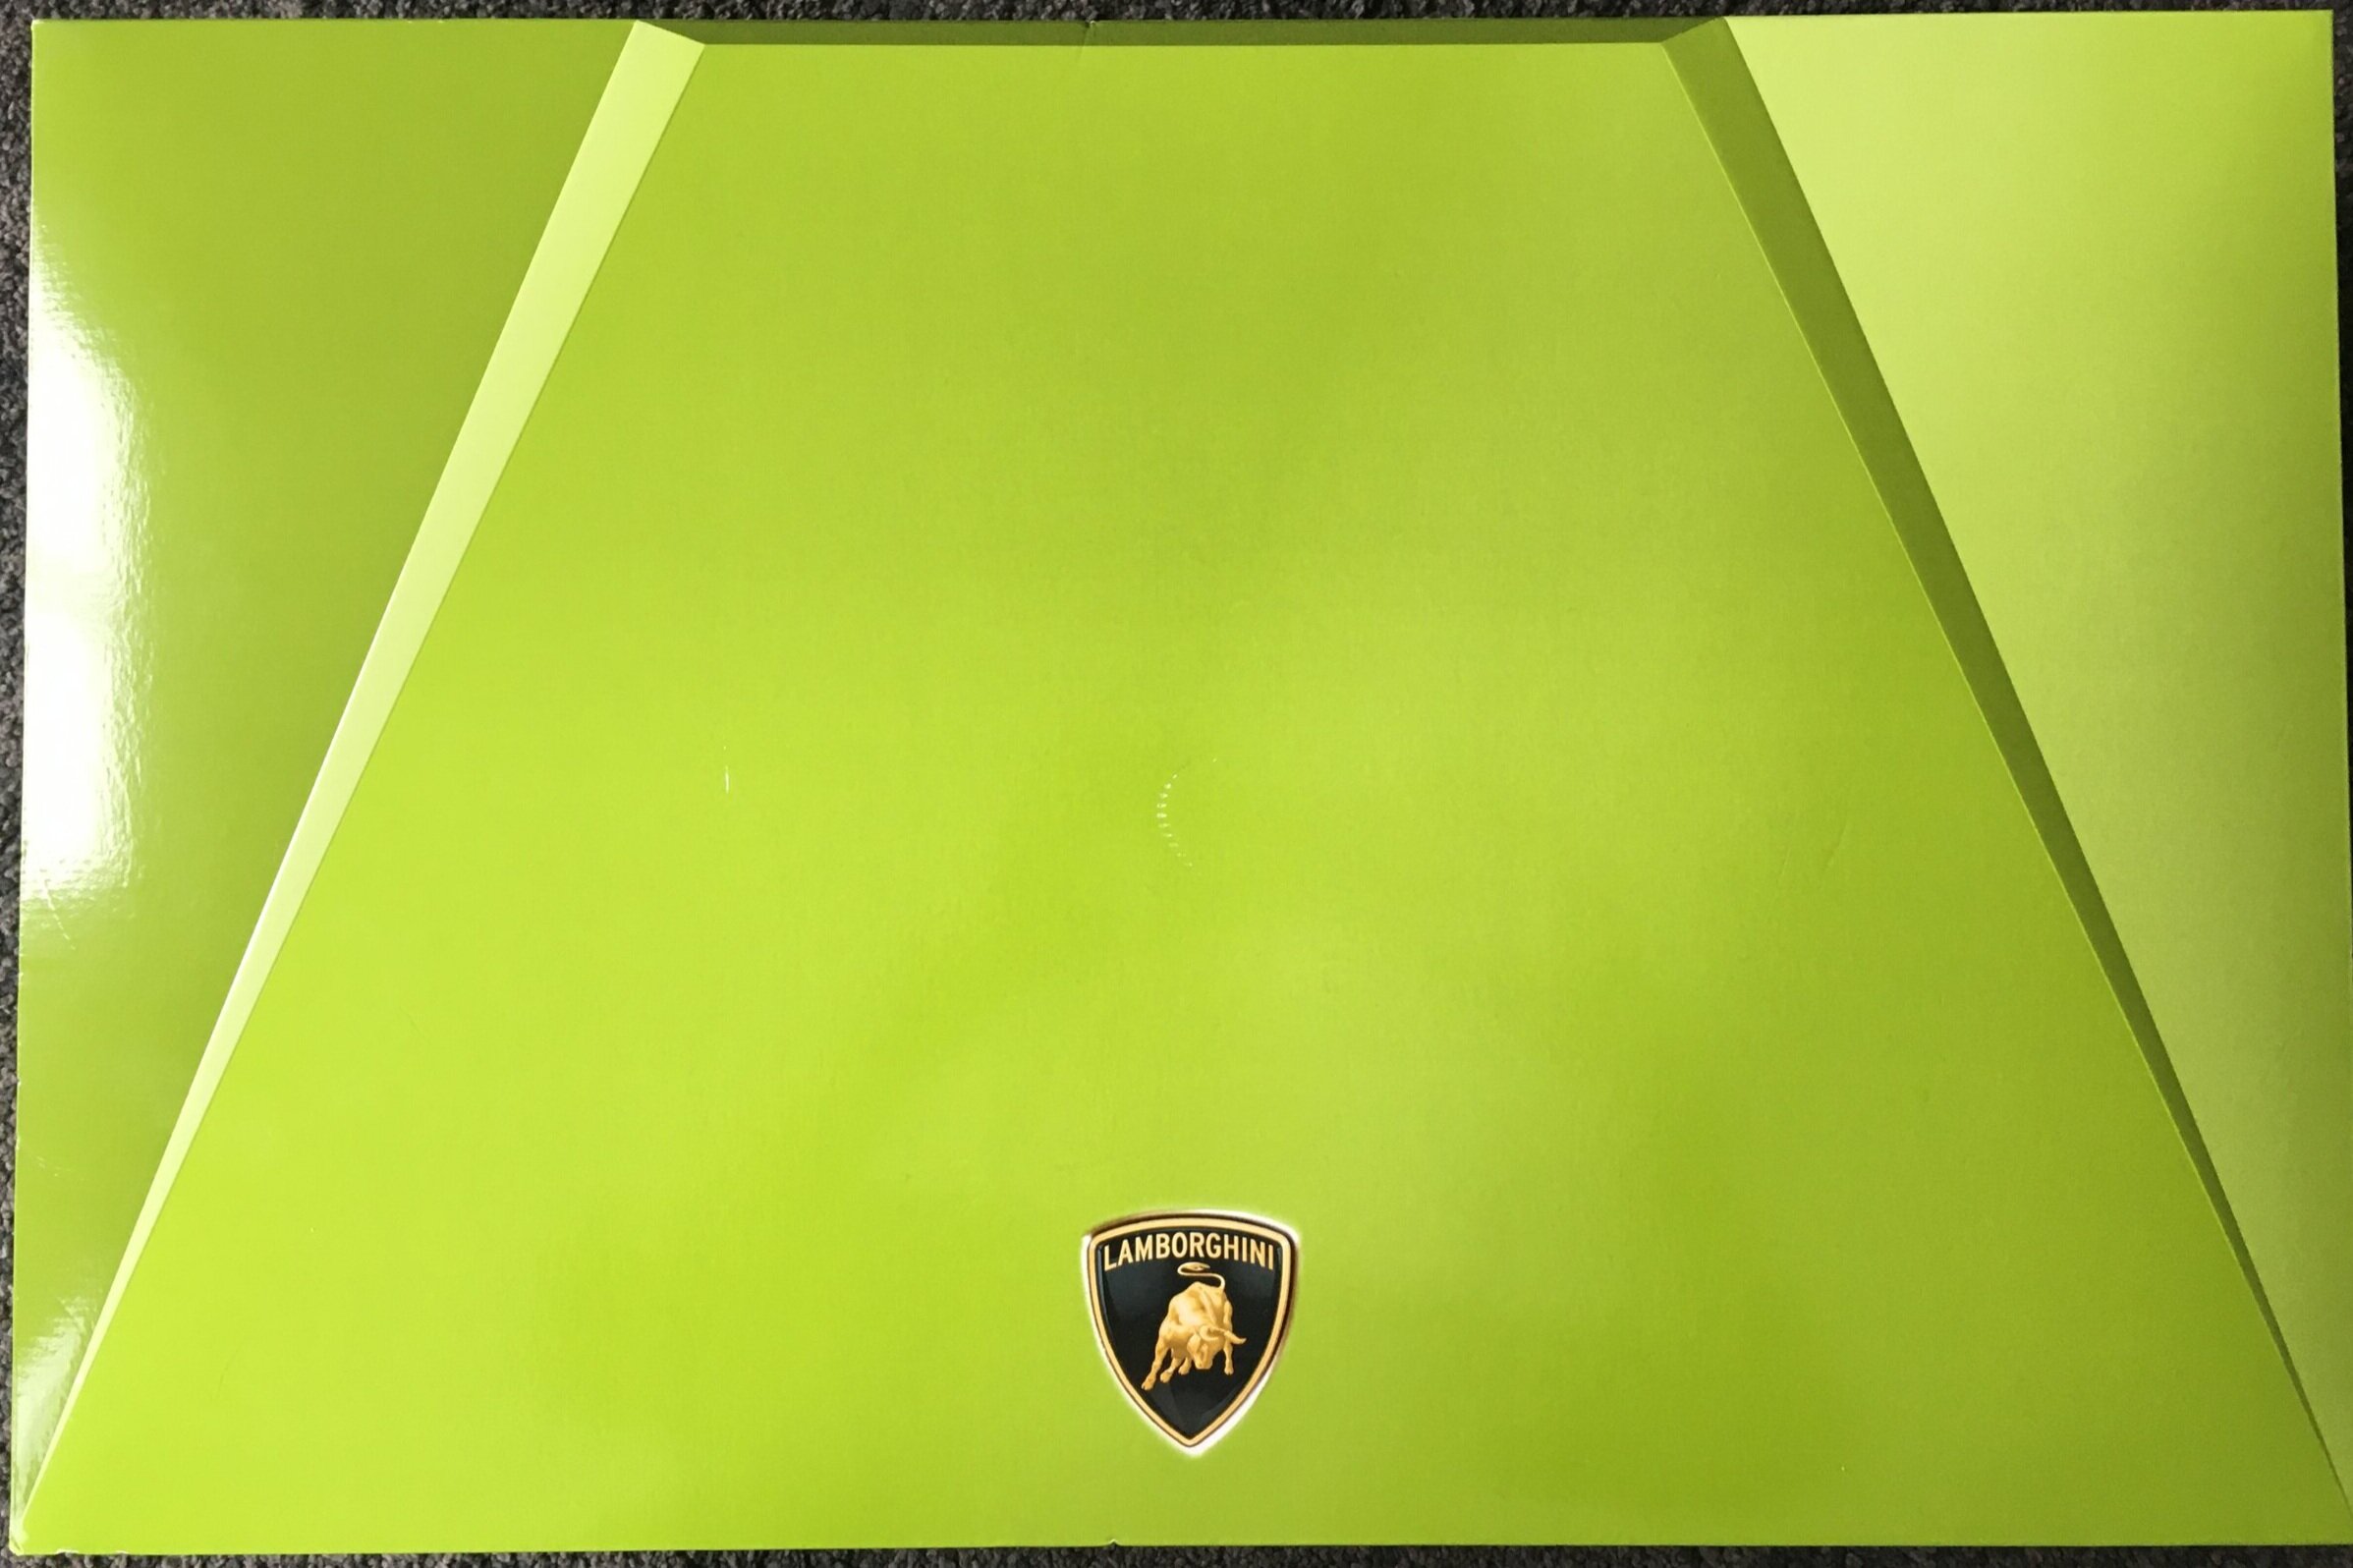
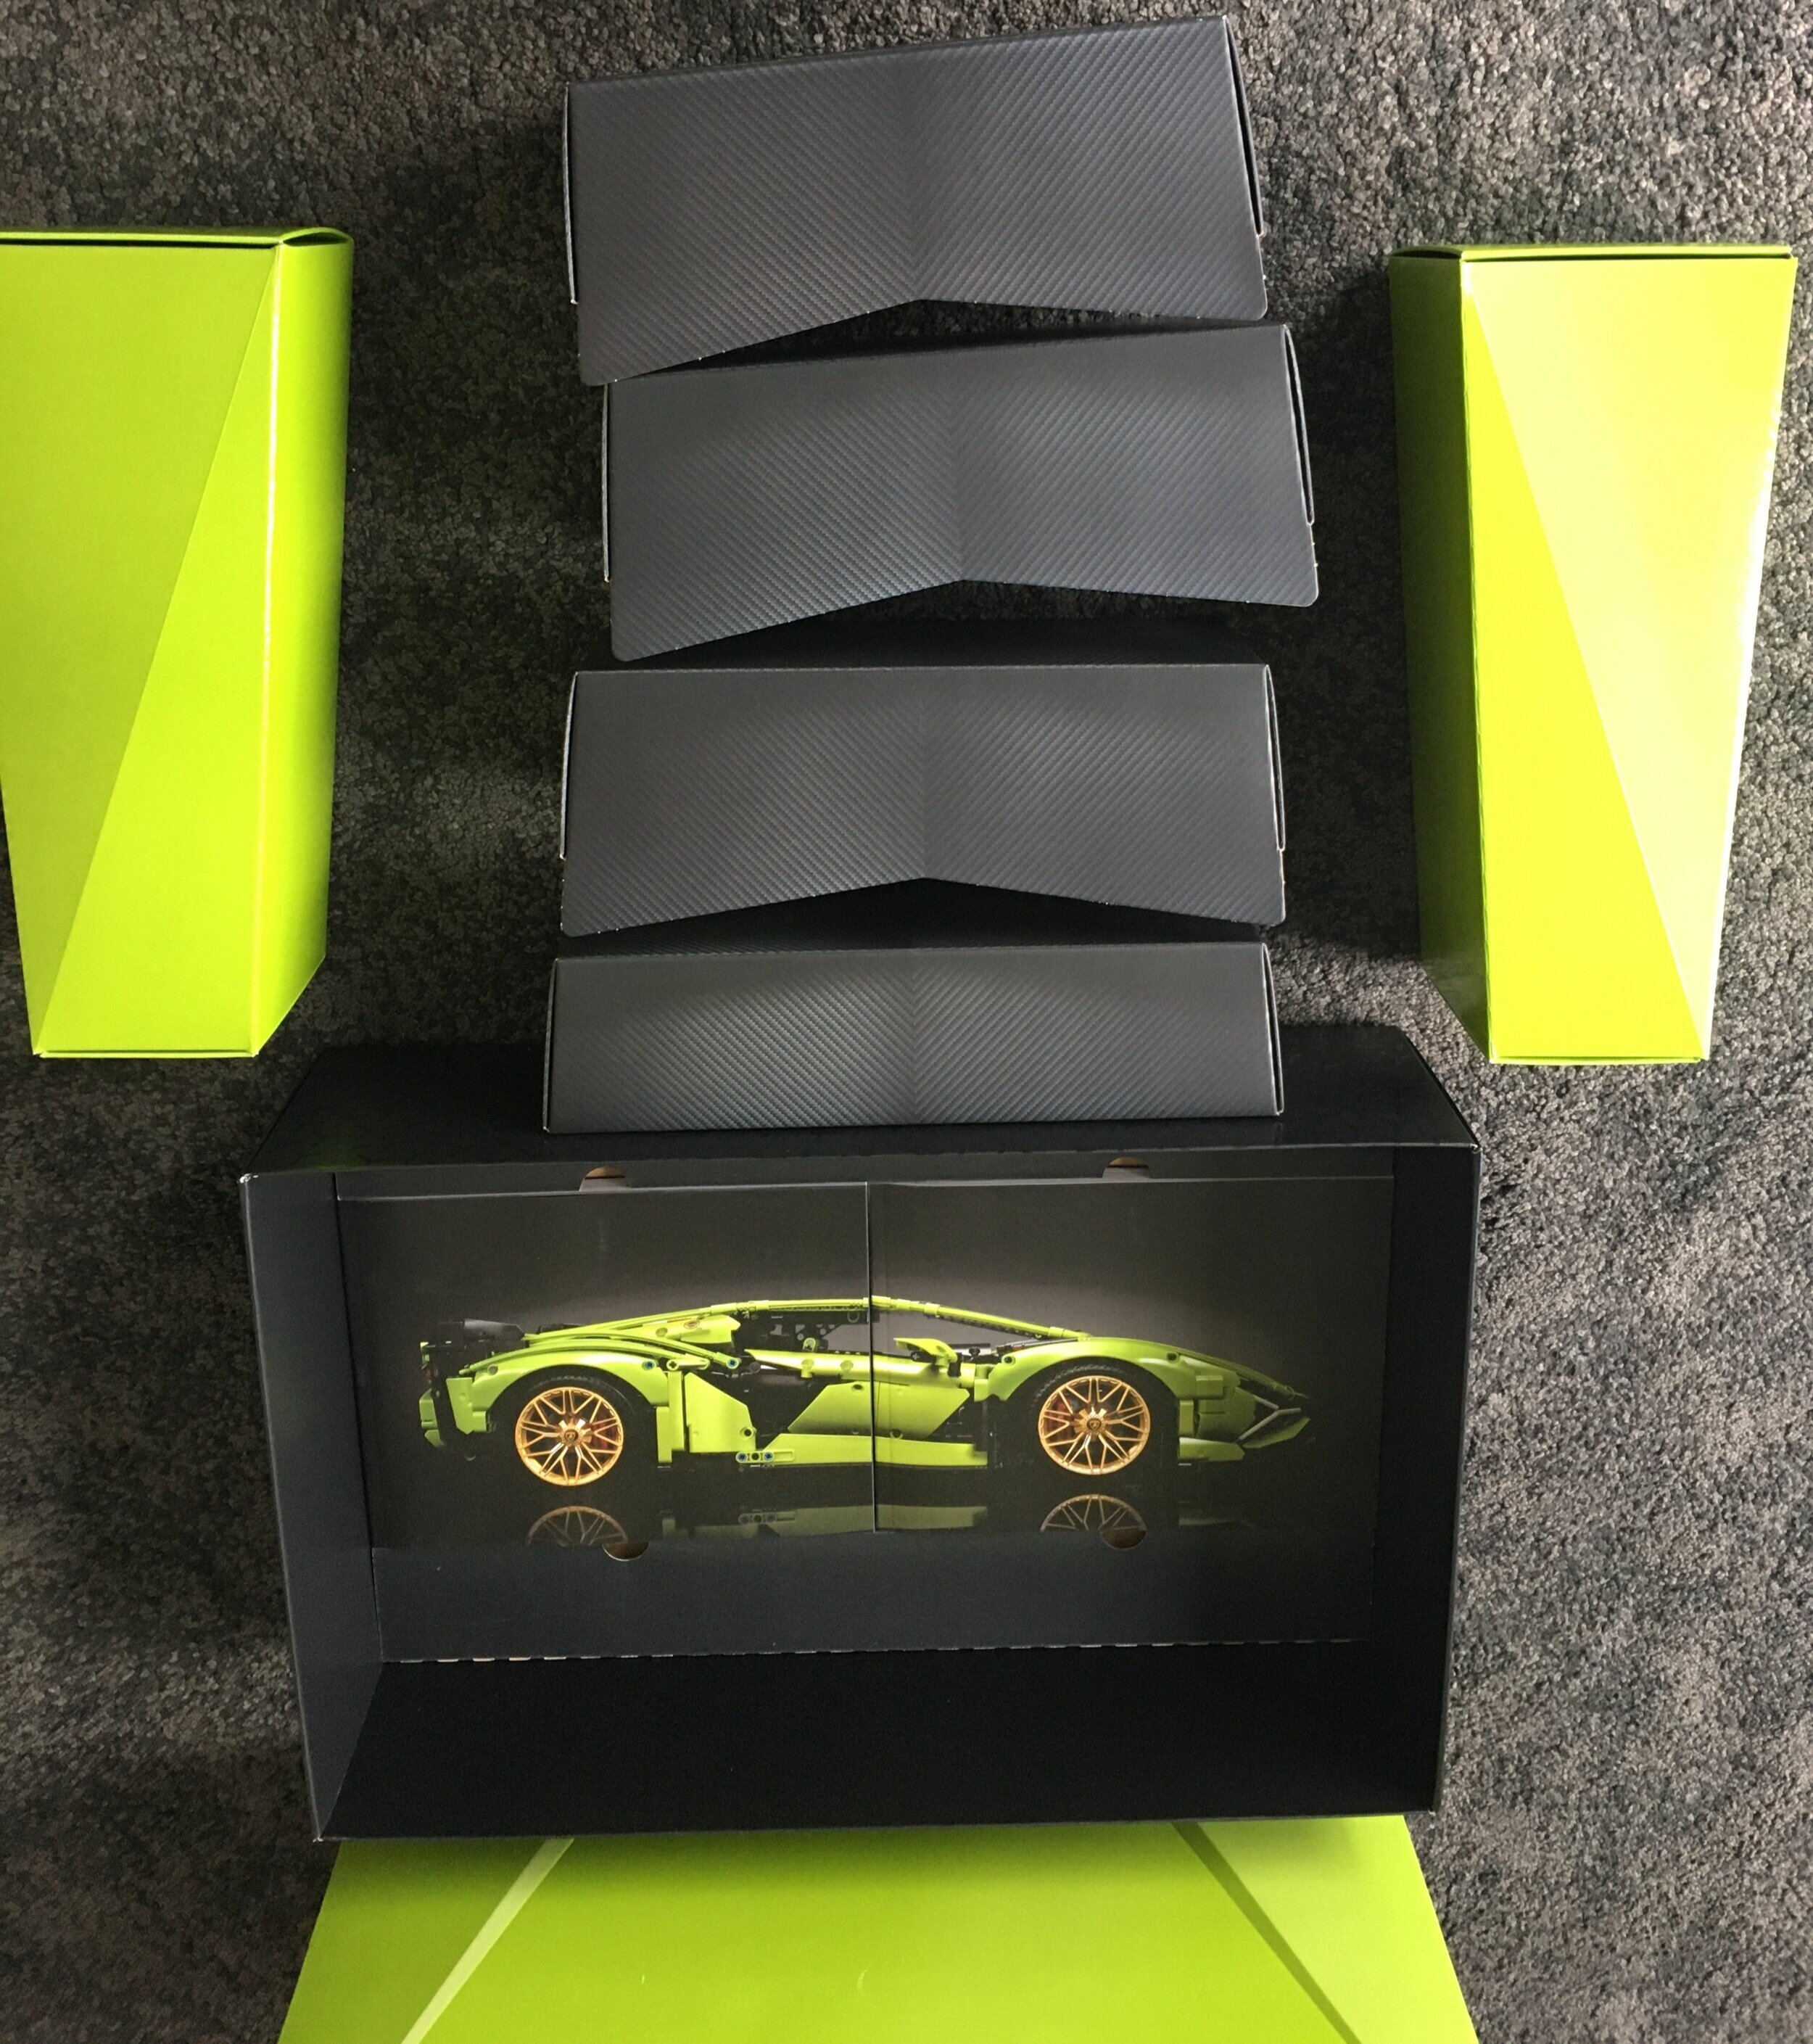
Like the previous cars, the box is unlike your standard set. The top half of the box looks like the hood of the car with the Lamborghini logo. The bottom part is a picture of the completed set with the name logo in the upper left. Unlike the Bugatti which was labeled as 16+, this one is labeled as 18+.

42115_box_front.jpg
42115_box_back.jpg

The sides of the box continue on the car shape with the front and back of the vehicle on the box.

42115_box_sidea.jpg
42115_box_sideb.jpg

Taking the top of the box off reveals six boxes in the shape of the engine covering in the back of the car. The boxes are numbered 1 through 6. After removing the boxes, there are two instruction books on the bottom. When you put the books next to each other, you can see the completed model.

For reviews, I normally pull out all of the bags so you can how many parts bags there are in the set. I didn’t do that here as the parts bags are all contained in the numbered boxes. I didn’t count as I opened them either. Sorry…

42115_box_open.jpg
421153_box_contents.jpg

The instructions are similar to previous Technic super car models with a lot of details and extras on the actual vehicle and the model. I found the extra details interesting. You are also given some QR codes that you can scan to take you to YouTube videos about the design process. The videos were interesting with some interviews of LEGO and Lamborghini personnel. I tried to watch while building, but couldn’t focus enough on the build so I watched them separately. I think I would have rather had one longer video versus a bunch of shorter clips, but not a major issue to me.

I bought my set in Germany so the instructions came in English and German. Not the North America version in English, French, and Spanish.

42115_ins1.jpg
42115_ins2.jpg

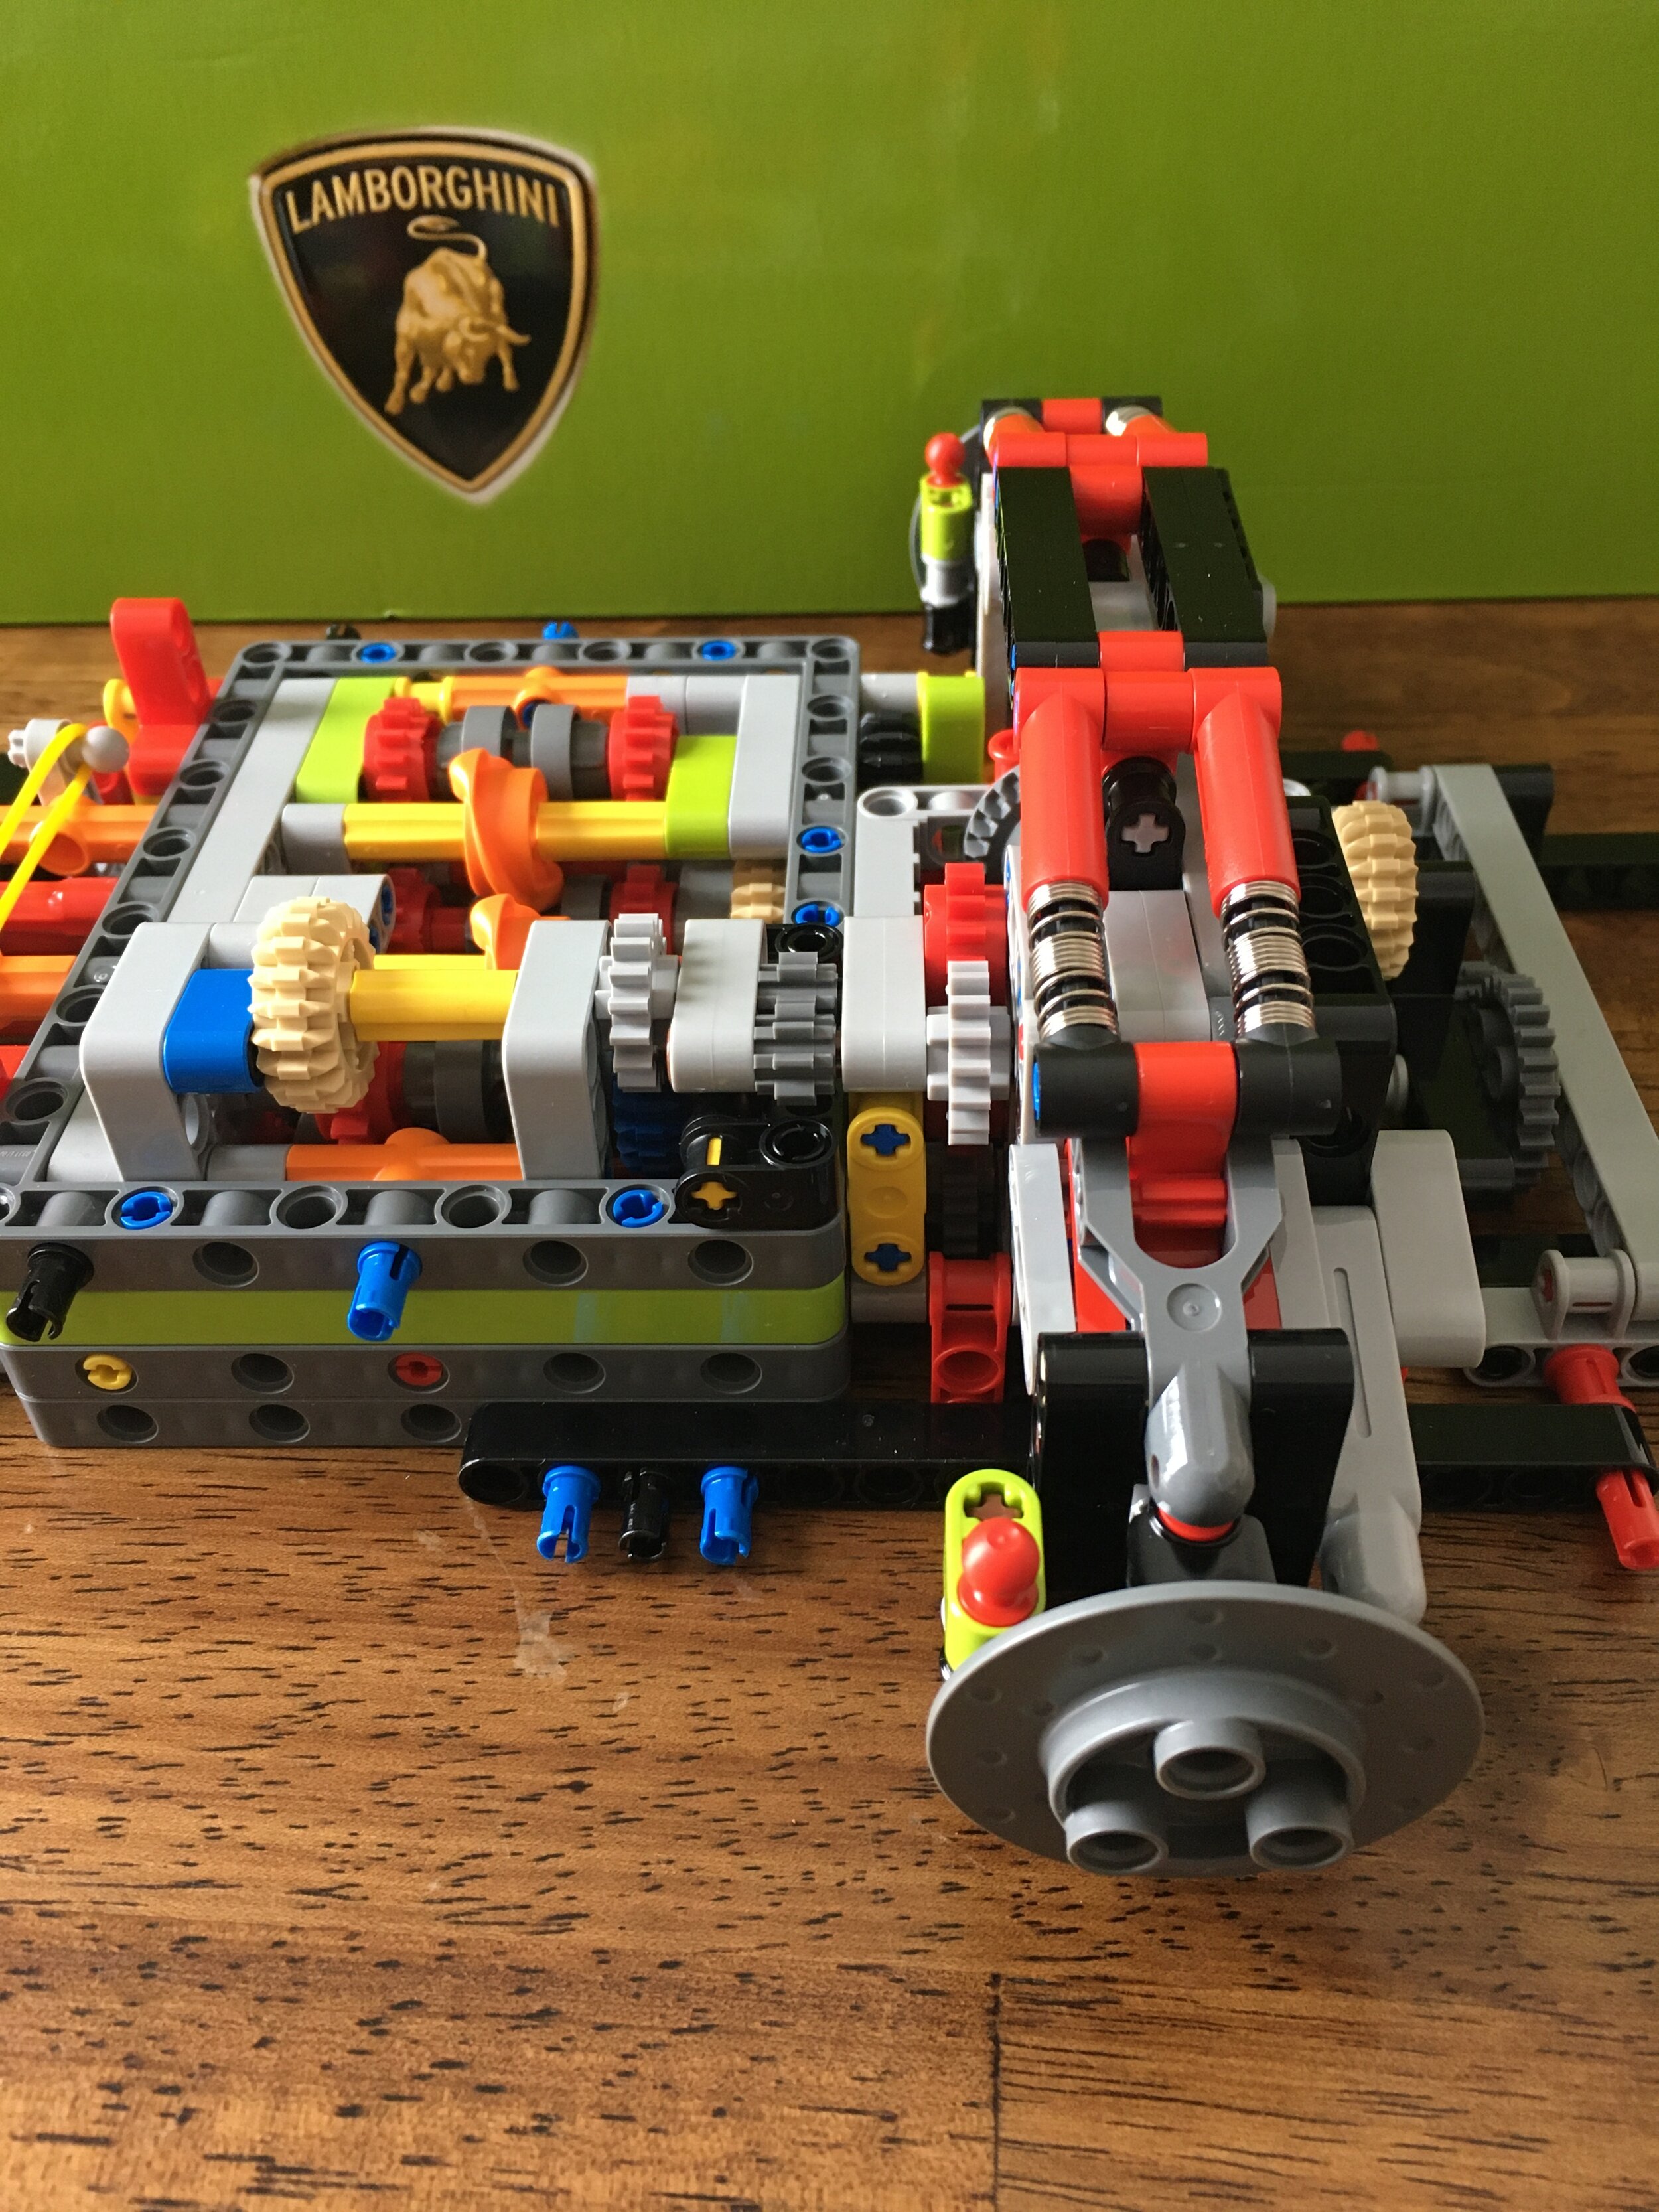
Box 1 - Gearbox and Rear Suspension

Each box is split up in the instruction book with a write up on that section and a corresponding video. Box one builds your transmission and where the back wheels go. The transmission is a challenging thing to build. I really had to pay attention to part types, angles, sizes, and how things were linked up. I made a few small mistakes, but thankfully caught them before I went too far.

The transmission is open on the bottom of the car so you can see the movement as you cycle through gears. This is different from the previous cars. While not realistic, it is a nice touch to see what is going on I guess. Also it’s on the bottom so it’s not like you see it all the time unless you flip it over.

I didn’t time myself on the build, but I think this part took a while for me. Might have been just because I was taking my time with it to make sure I got it right.

42115_build1a.jpg
42115_build1b.jpg
42115_build1c.jpg

Box 2 - Engine and Front Suspension

With box two you can attach all the wheels now and the engine is installed. You can also shift the car into drive, neutral or reverse now. The wheels have a pretty solid suspension. One of the things from the videos is the car actually has some bounce to it. It is not much, but is way more versus the Bugatti.

42115_build2a.jpg

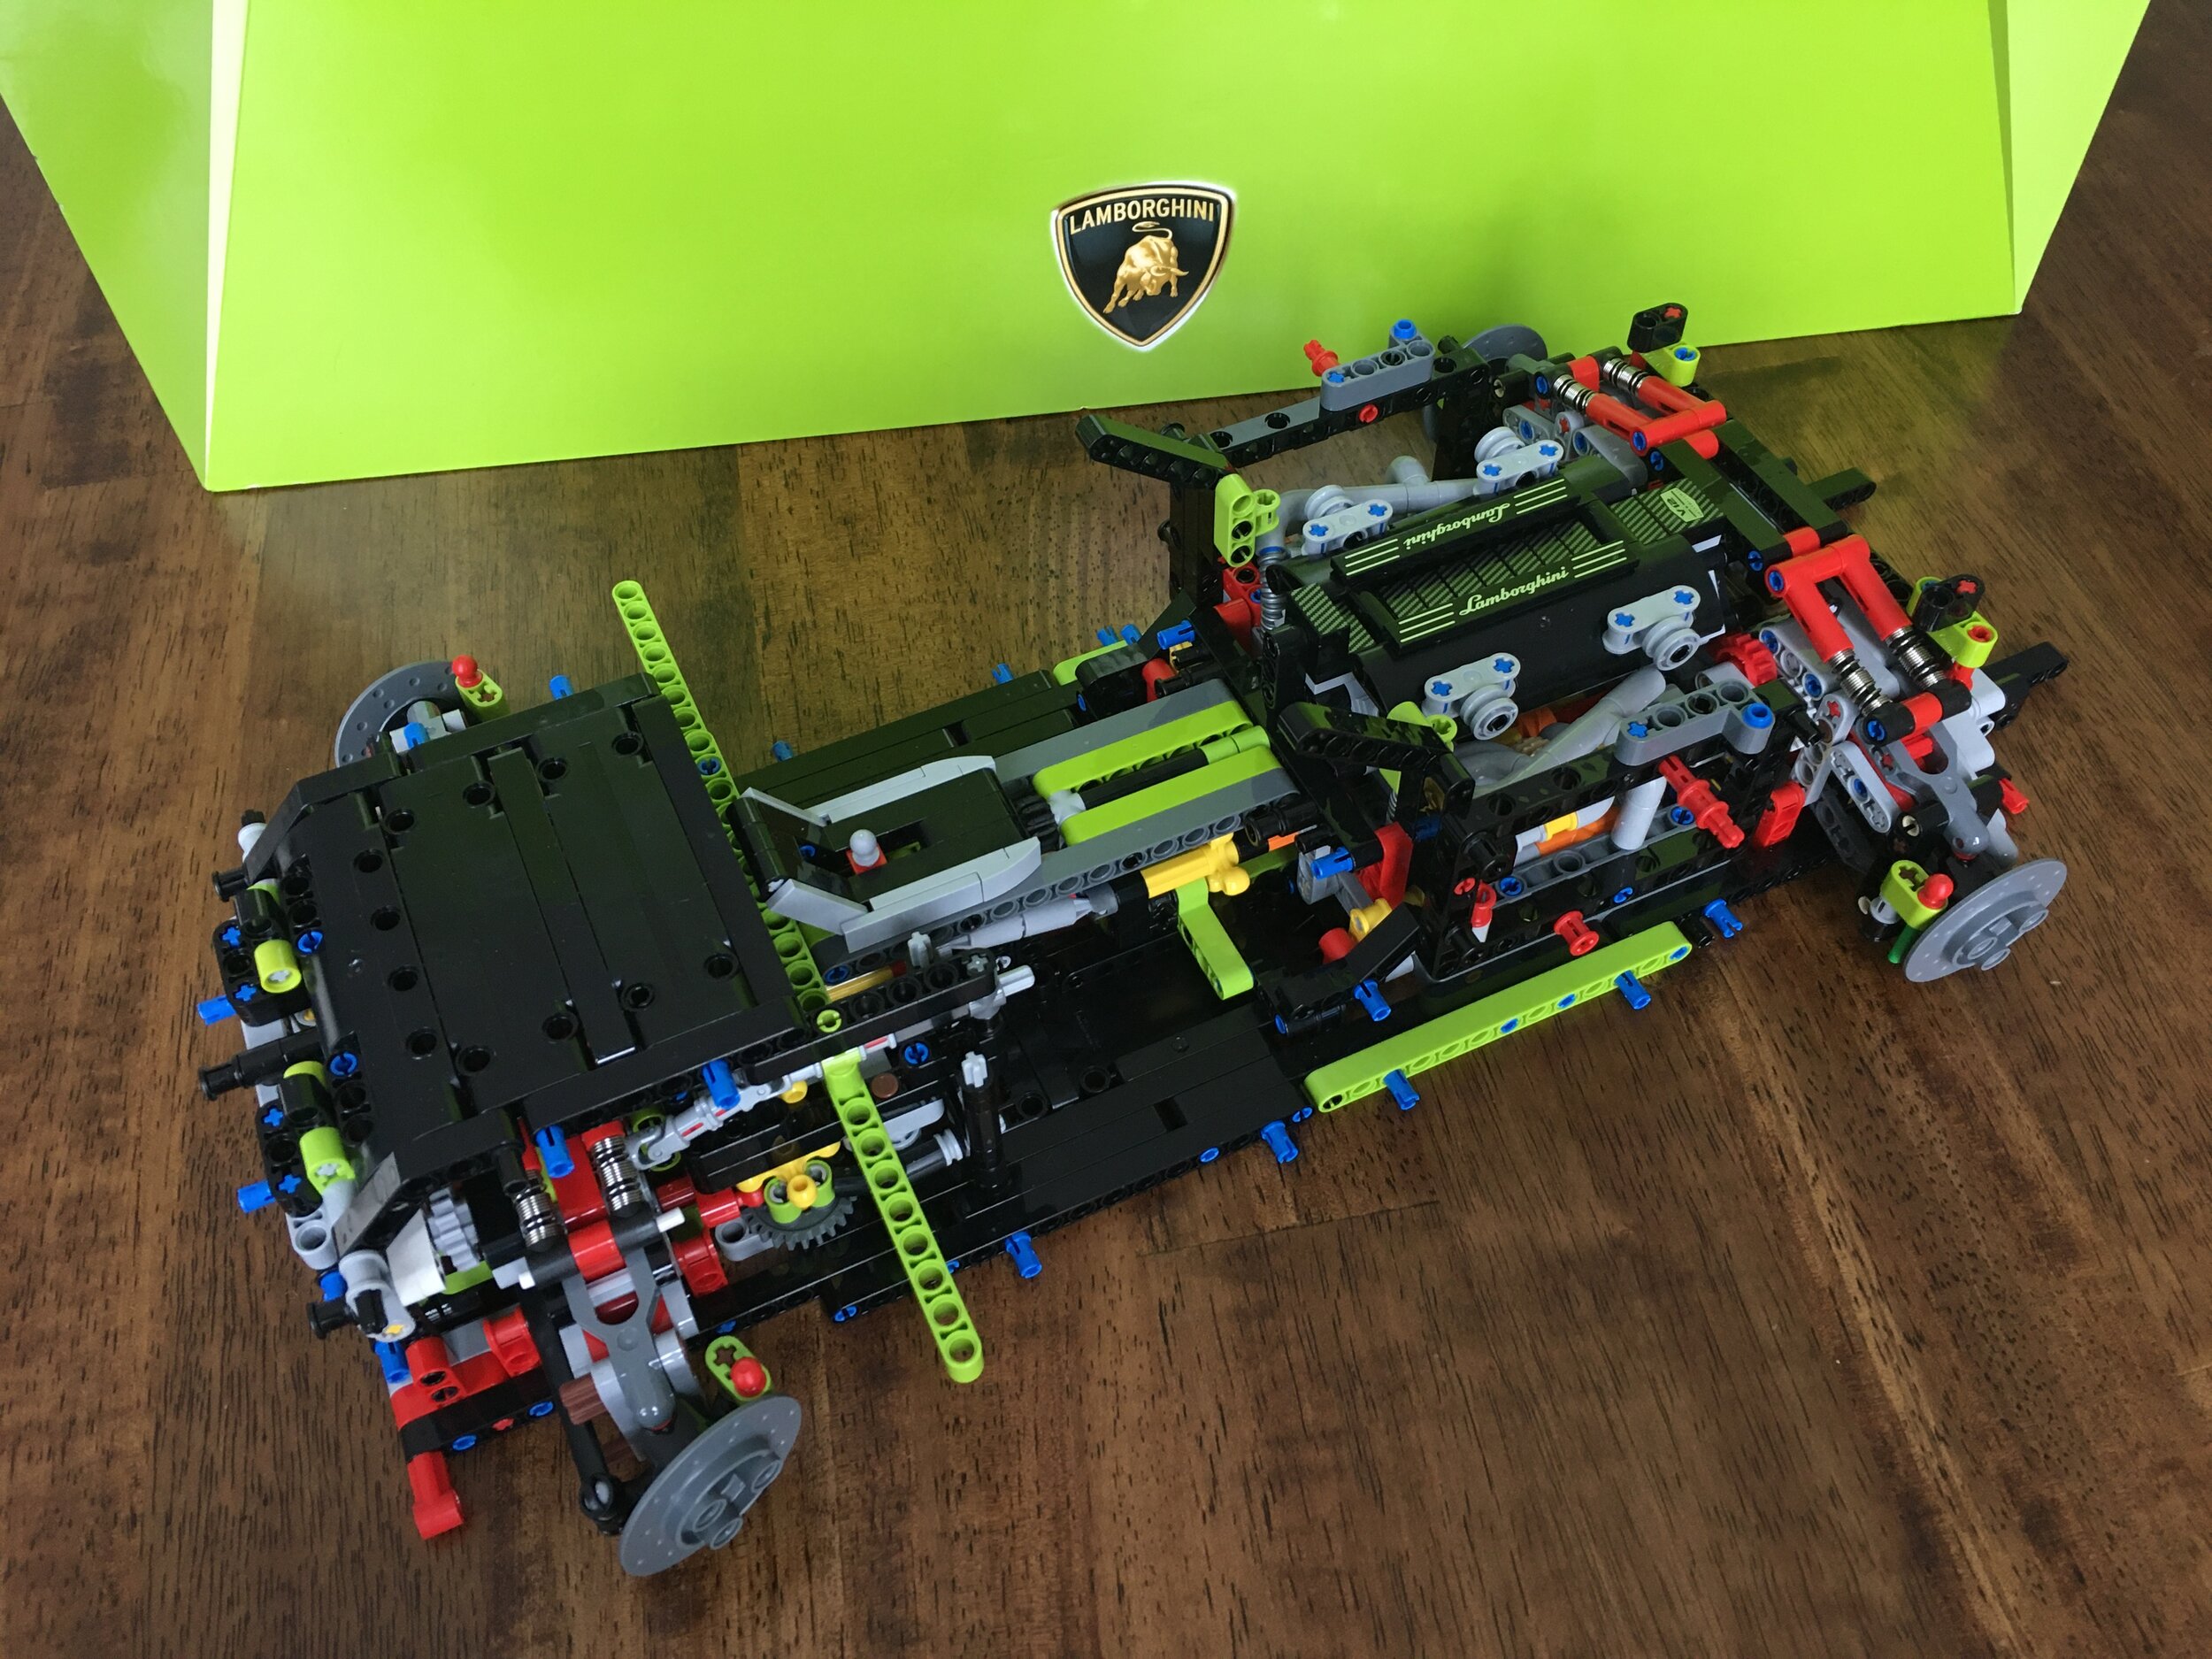
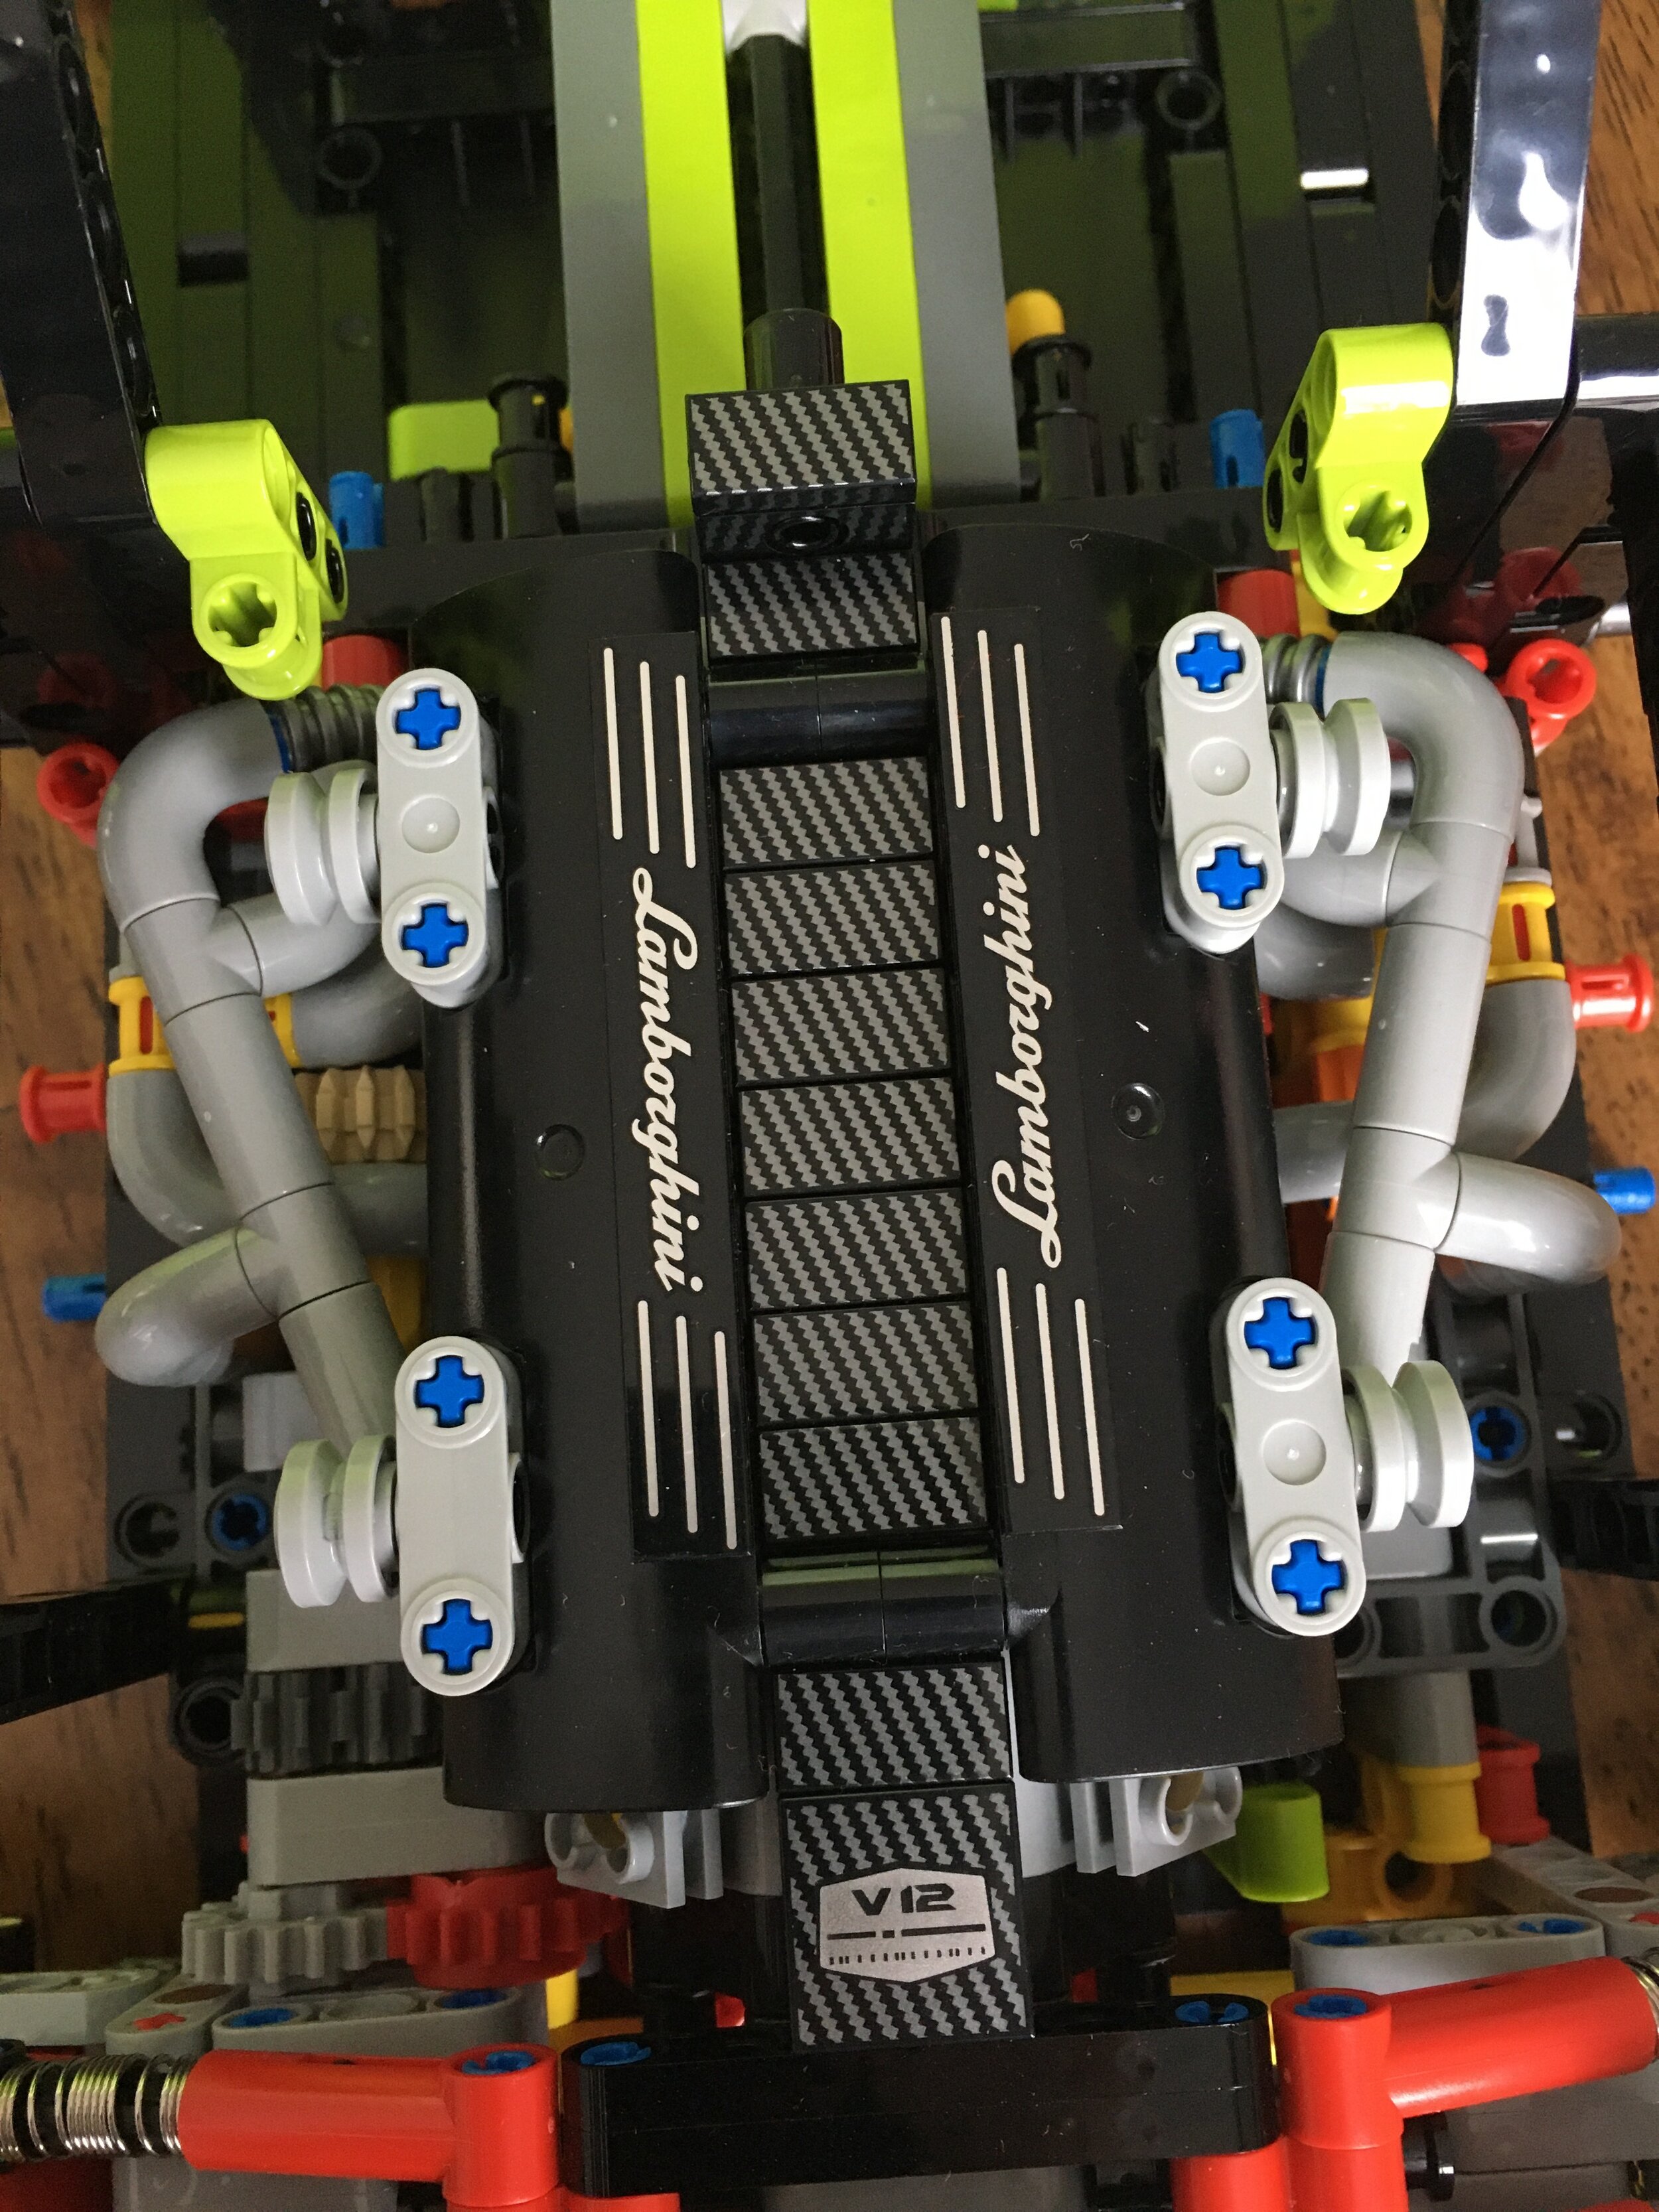
The engine has 12 cylinders that you can’t see working, but you get to install them all anyways. It’s not a big deal that you can’t see them in my opinion. I think it’s more about the build experience. The engine covering includes some printed tiles which add to the detail. I like the ones with the Lamborghini name on them. Super thankful there are no stickers on this one.

42115_build2b.jpg
42115_build2c.jpg

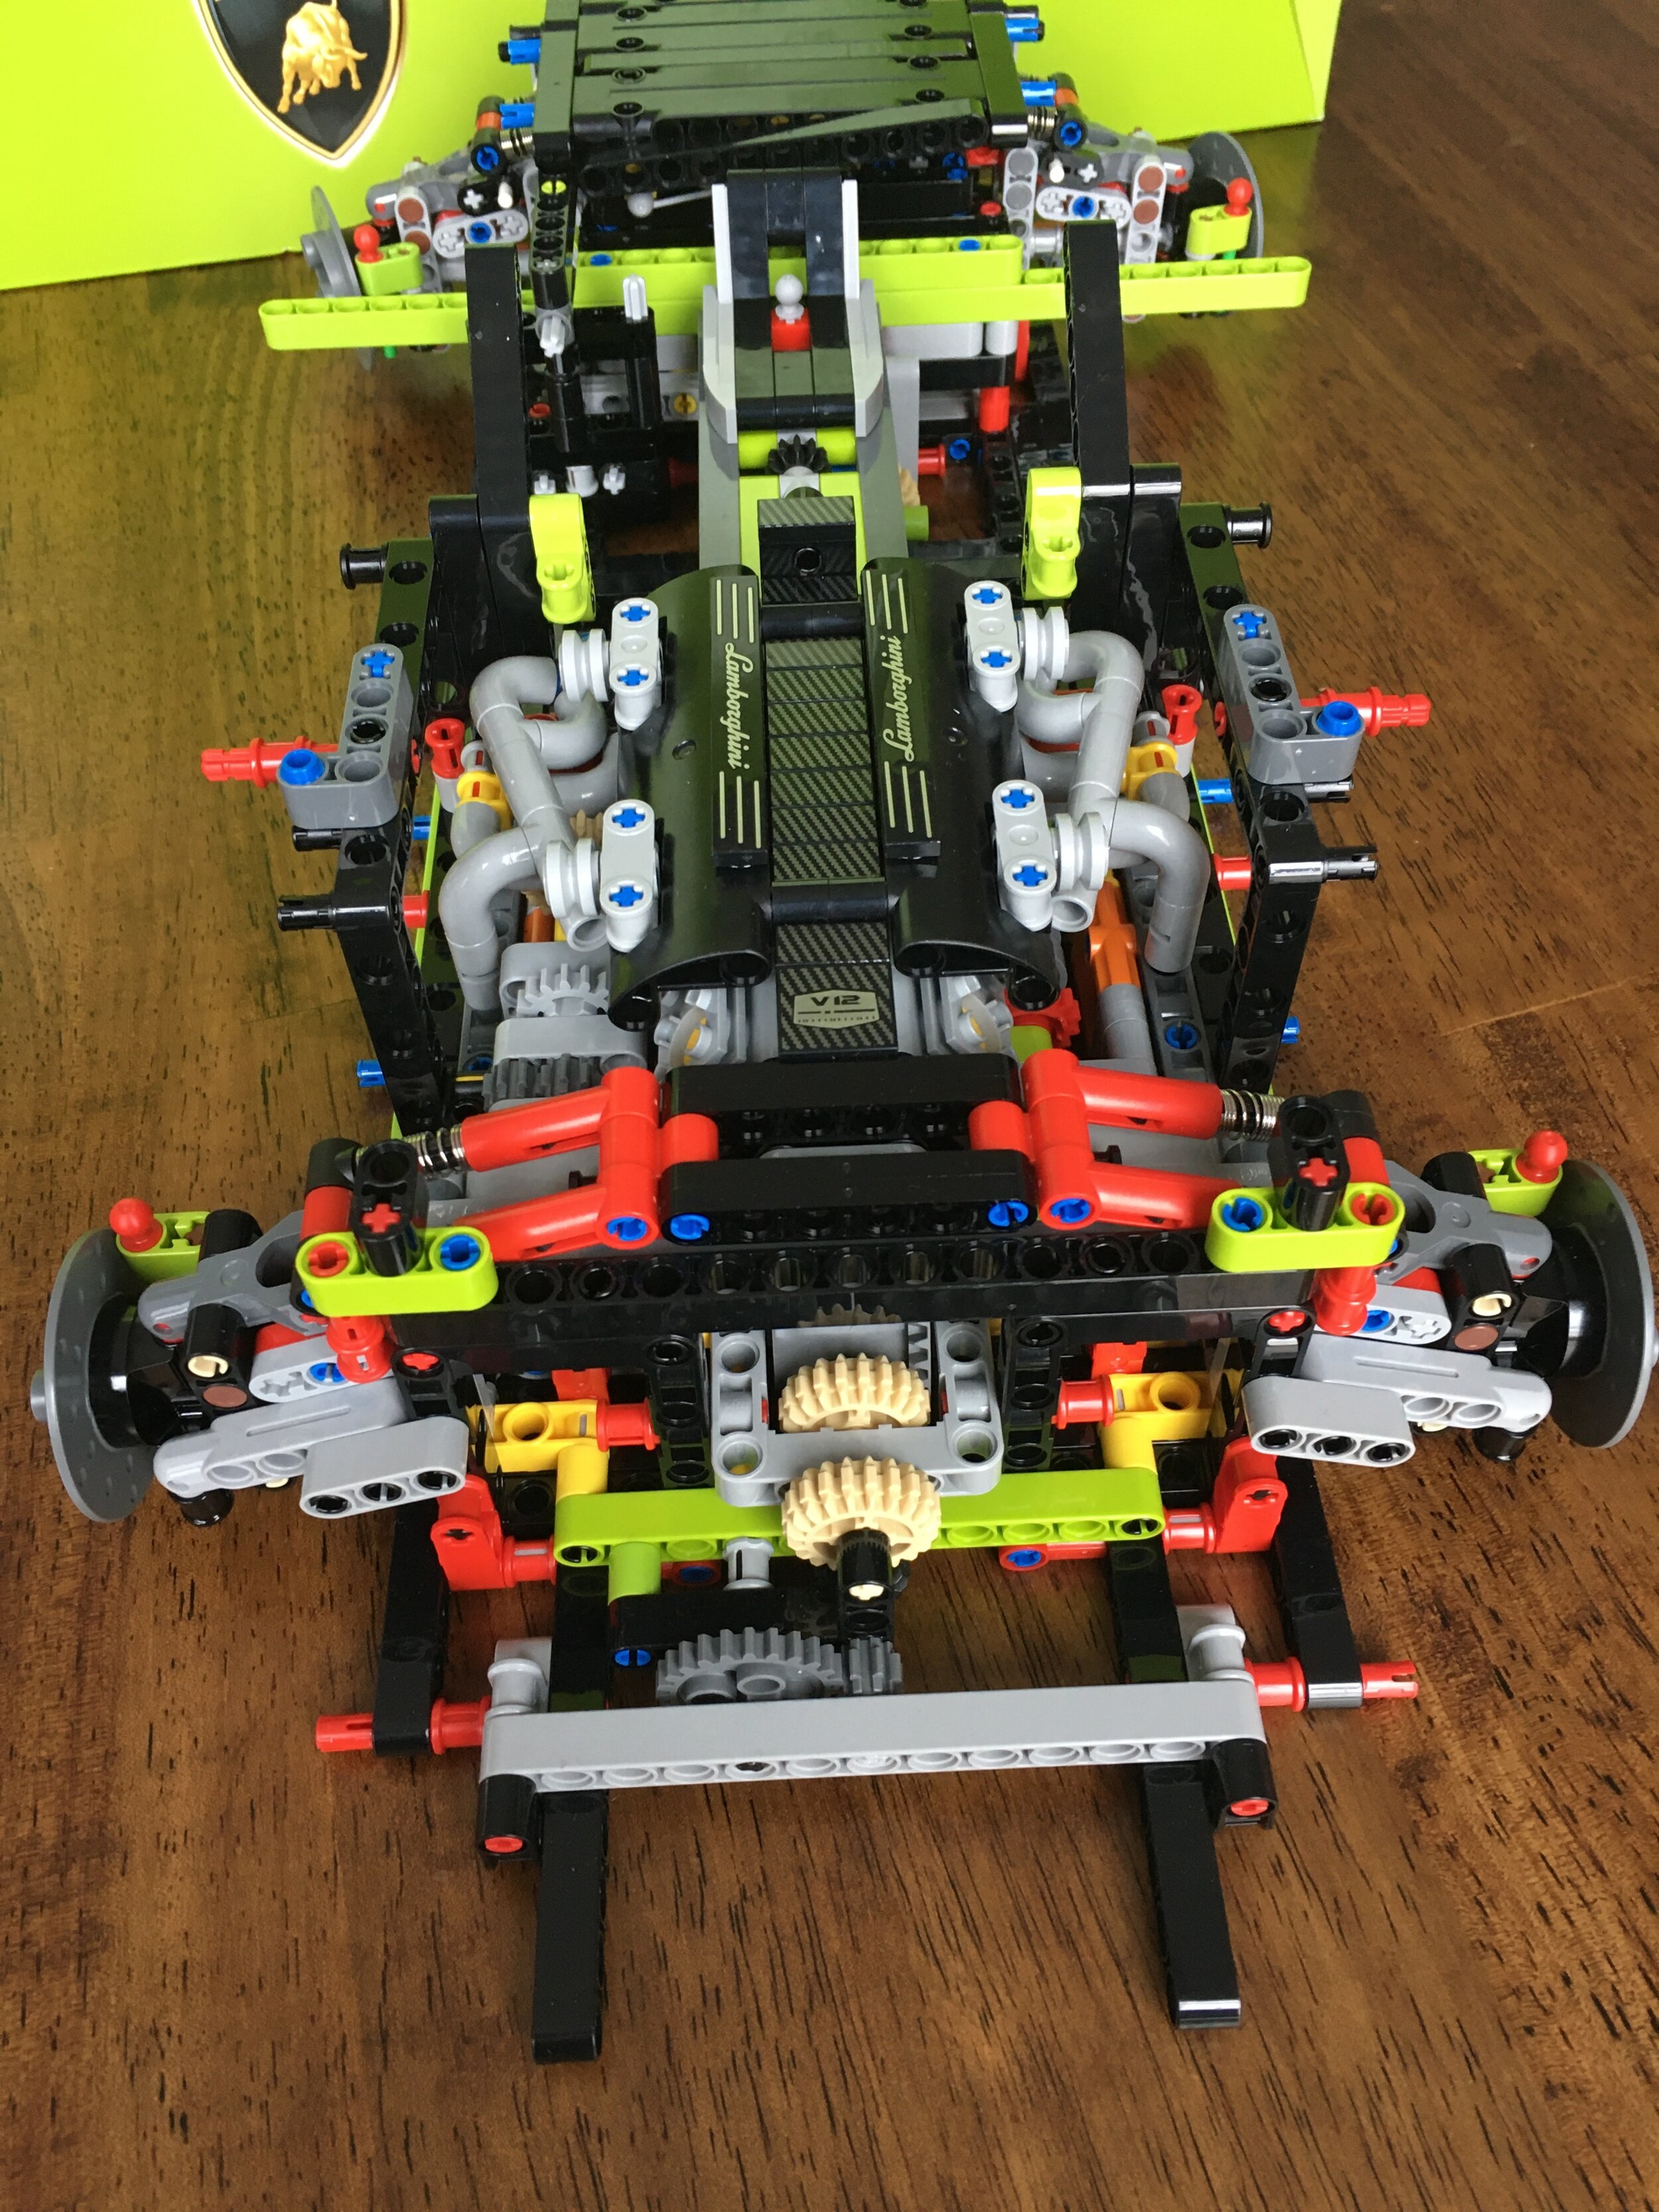
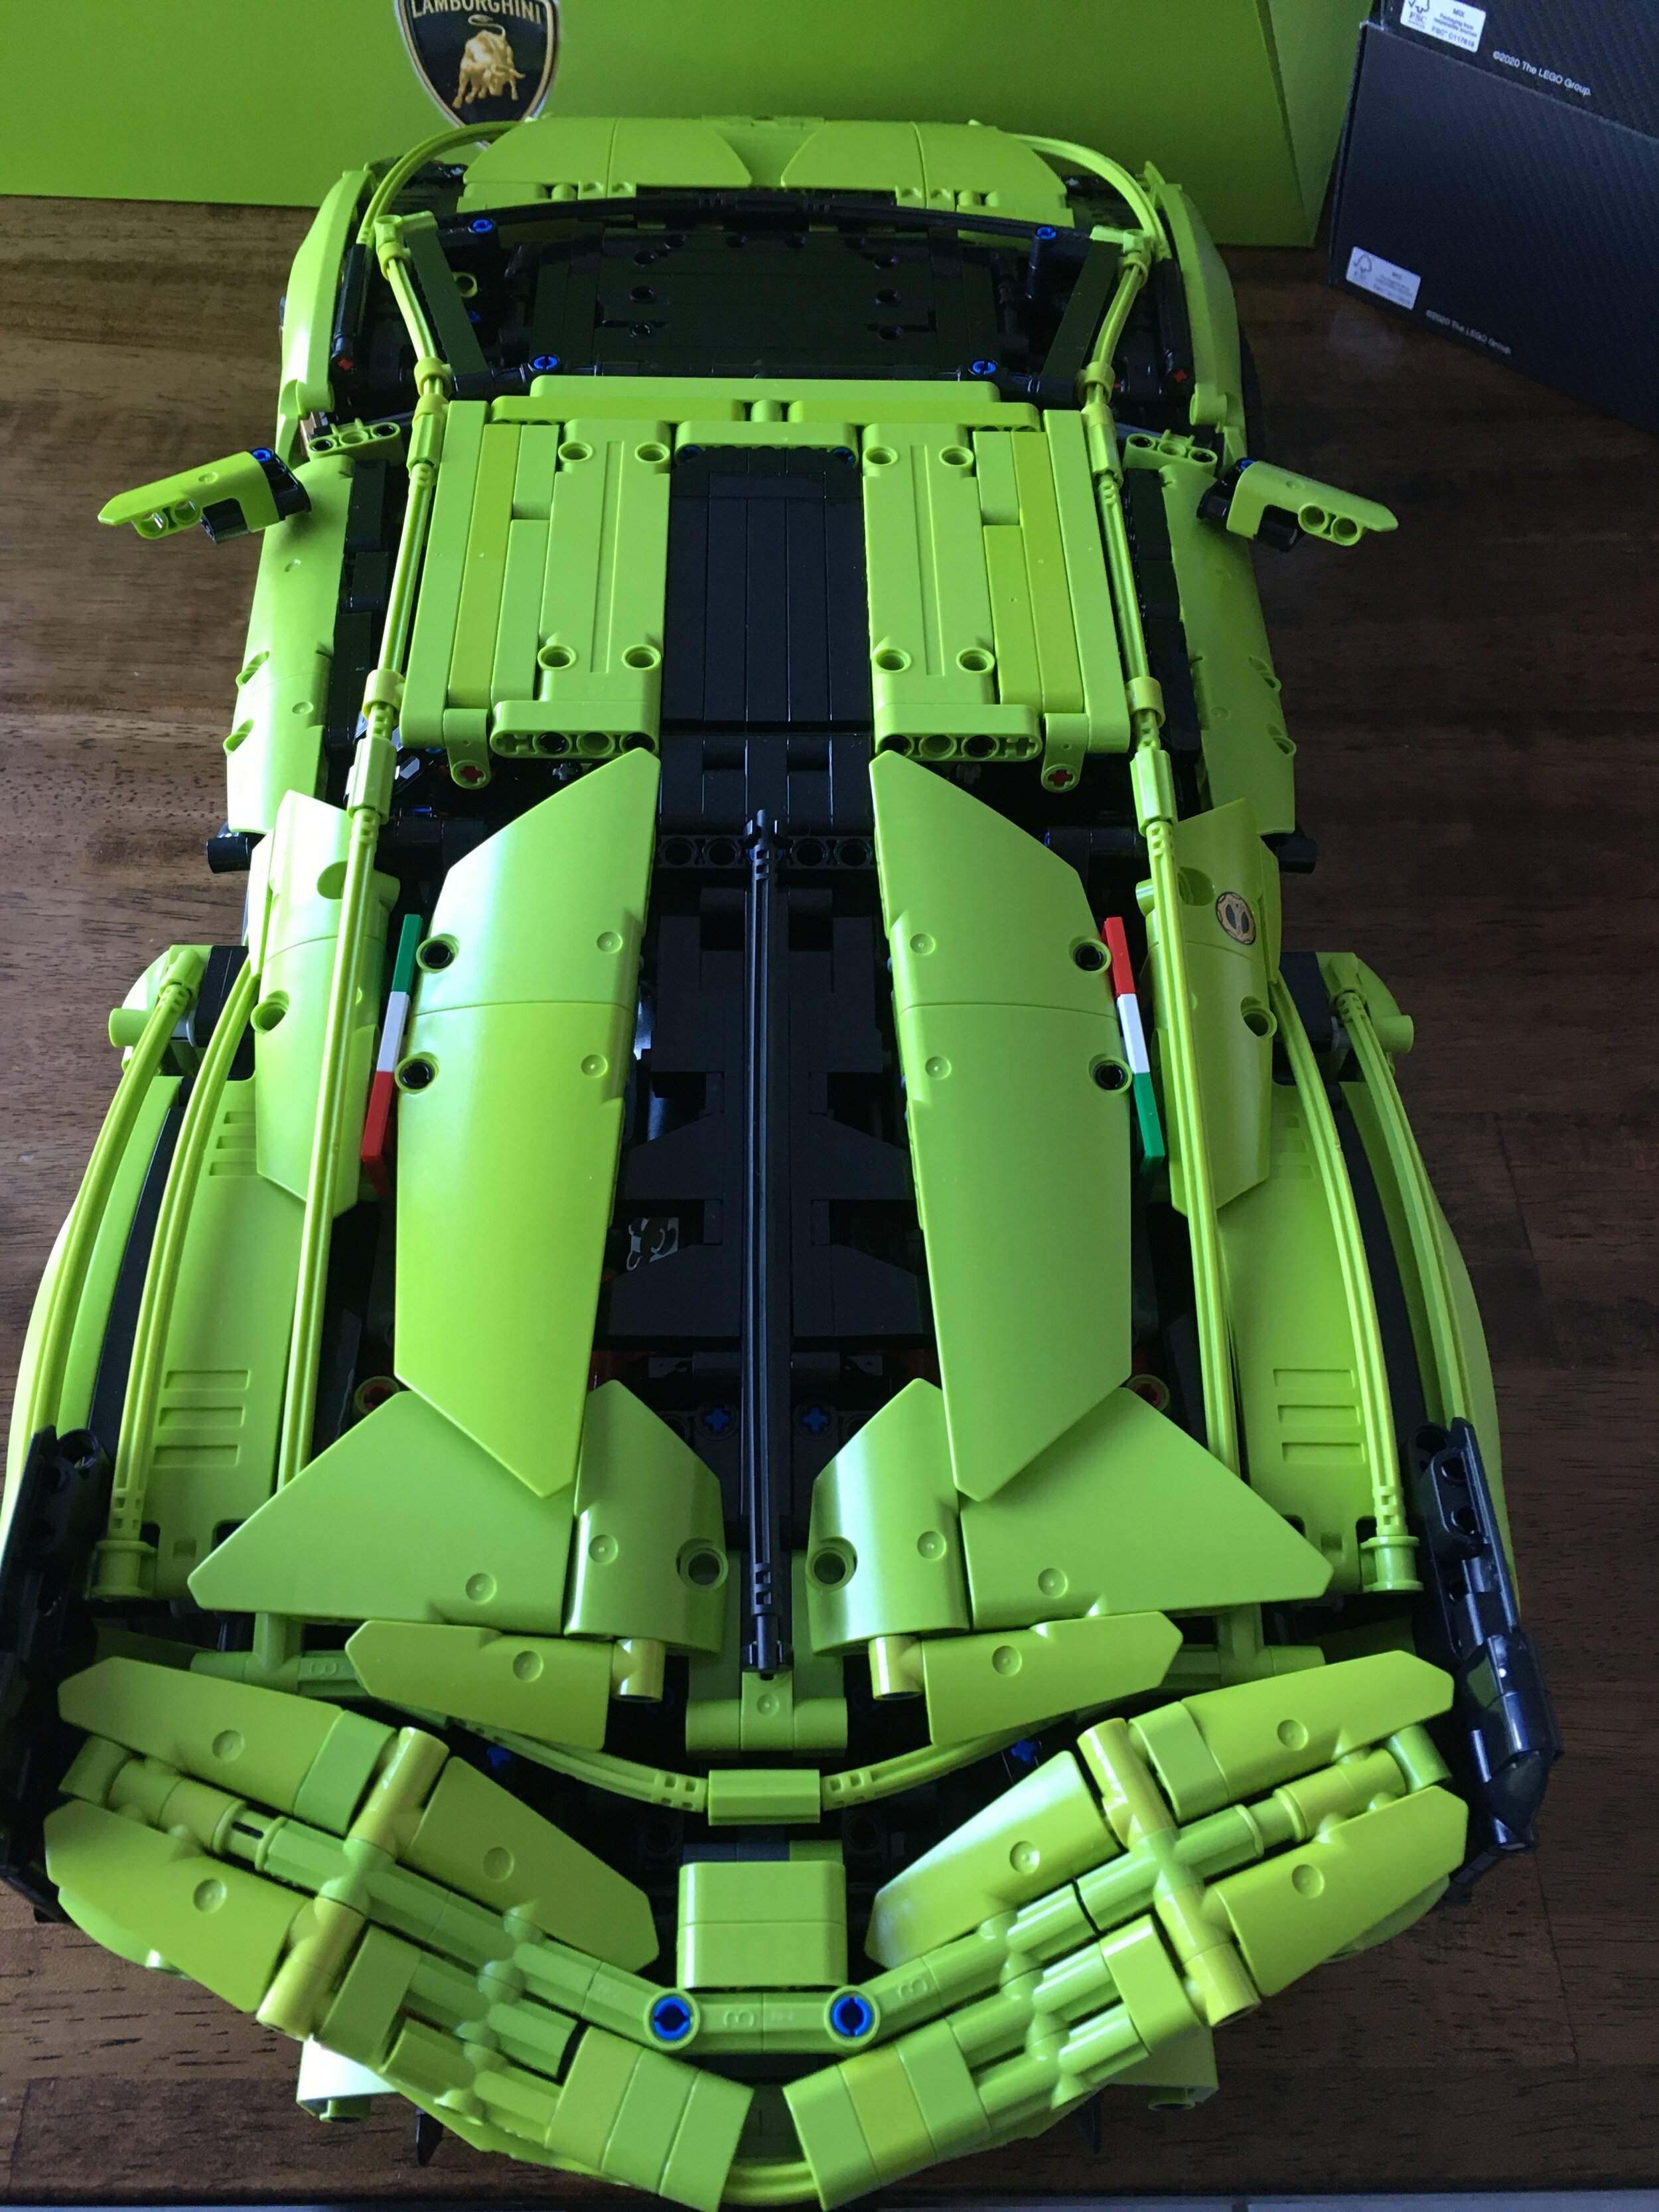
Here’s a closer shot of the front of the car at the end of box 2. I didn’t take a before step picture so you can’t see the details underneath. It’s a challenging part to assemble, but it comes together well. There were a few instances where I really had to stare at the instructions and compare it what I built to make sure it was all right. Some trial and error too. No mistakes so far…

42115_build2d.jpg

Box 3 - Interior Details and Seats

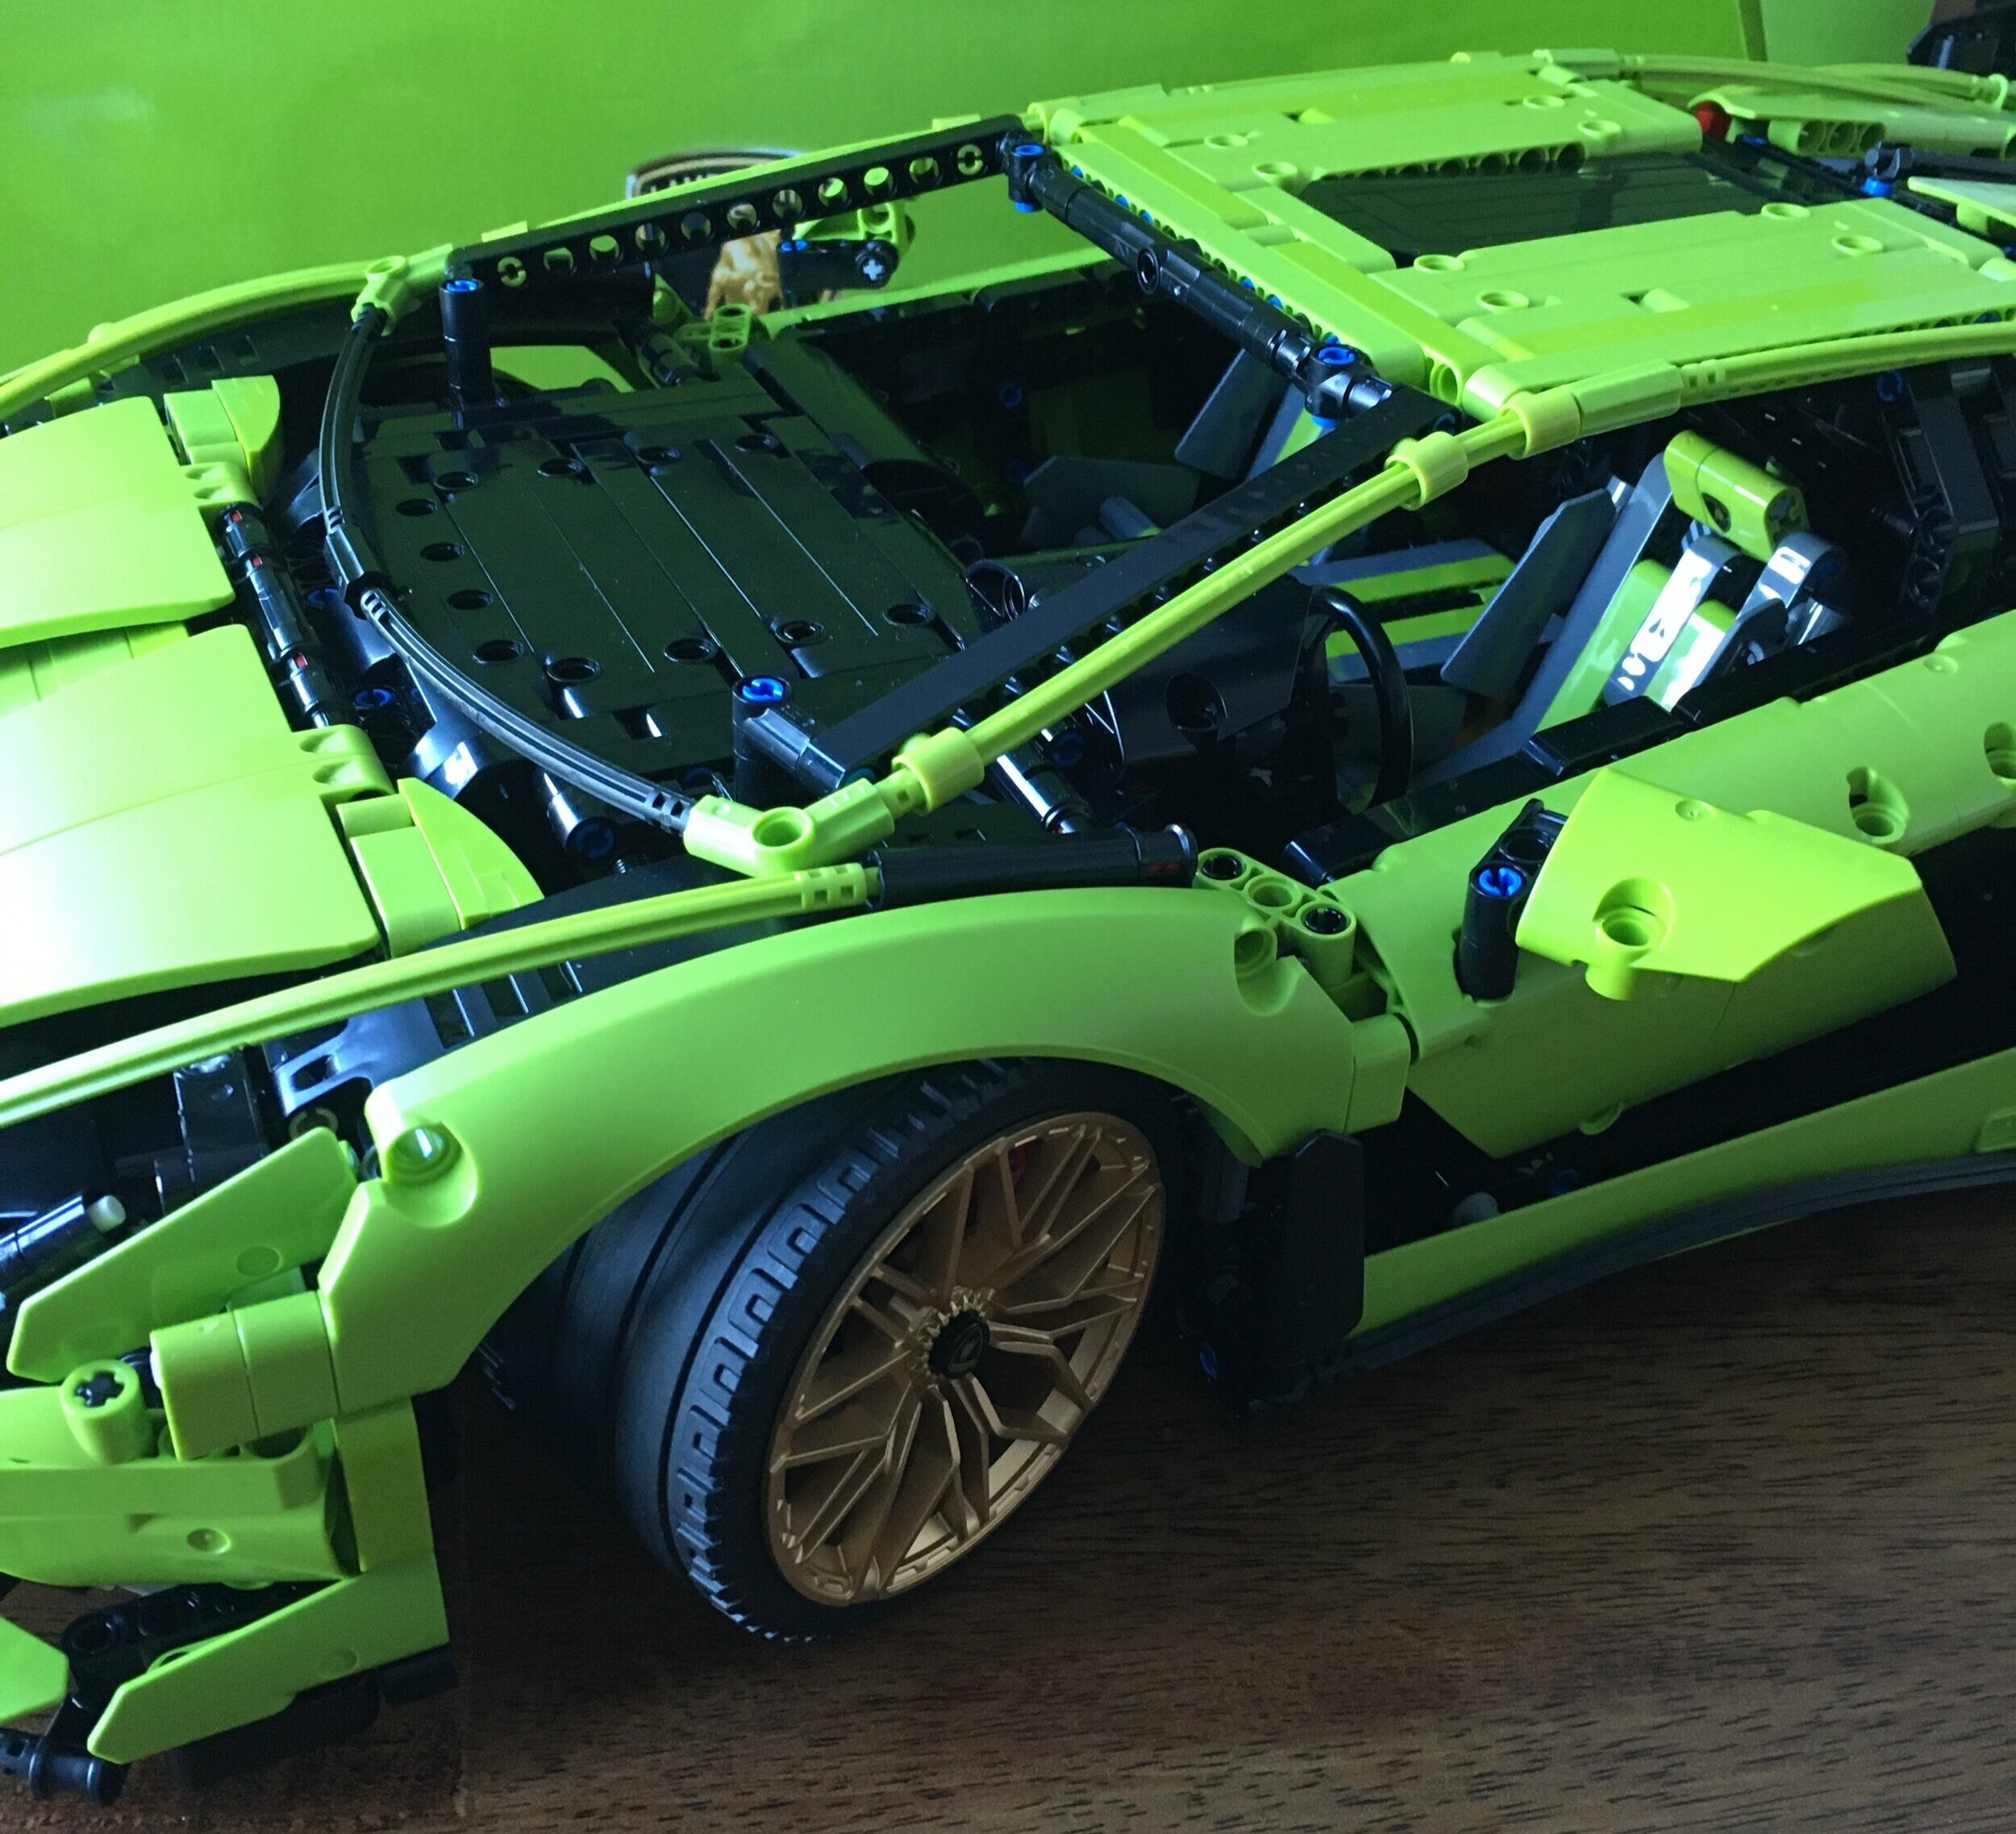
This box adds some details as mentioned, but also adds some movements. You install the initial parts of the scissor doors to come later and the mechanism to raise and lower the spoiler.

42115_build3a.jpg

The steering wheel is installed and like the previous vehicles, the wheel is functional. The other picture shown is the passenger side where you can see the Technic part used to raise and lower the spoiler. You can also see how some System pieces are added to the Technic pieces for detail purposes.

42115_build3b.jpg
42115_build3c.jpg

A quick look at the back. Not a lot of detail is added. Mostly structure to install other parts later.

42115_build3d.jpg

Box 4 - Rear Spoiler

Now the car is starting to look more like a car. We’ve got a roof over where the passengers sit, a covering over the engine in the back, coverings over the rear wheels, and the spoiler. If you’ve seen anything about this car, you know that LEGO has had some issues with parts and colors. This is the part of the build where those issues became readily apparent. The spoiler itself has multiple shades of green on it. While the design of the spoiler is cool and fairly accurate compared to the real car, the color is disappointing. With a $380 price tag, you would expect a much higher quality.

42115_build4a.jpg
42115_build4b.jpg

Here’s a closer view of the back of the car. You can see the System tiles used to create the Italian flag which is a fun detail. I’m also a big fan of the brake lights. They used more System pieces mixed in with Technic pieces. If you look closely at the spoiler, you can see the color differences. The rear also has a cool “Lamborghini” tile in the lime green with black lettering.

42115_build4c.jpg
42115_build4d.jpg

Box 5 - Scissor Doors

The fifth box finishes up the majority of the car. This includes the front hood, the lights, the front bumper, and the doors. I found a few parts a bit challenging to put together as the instructions just show the assembly next to the spot it is supposed to go.

42115_build5a.jpg
42115_build5b.jpg

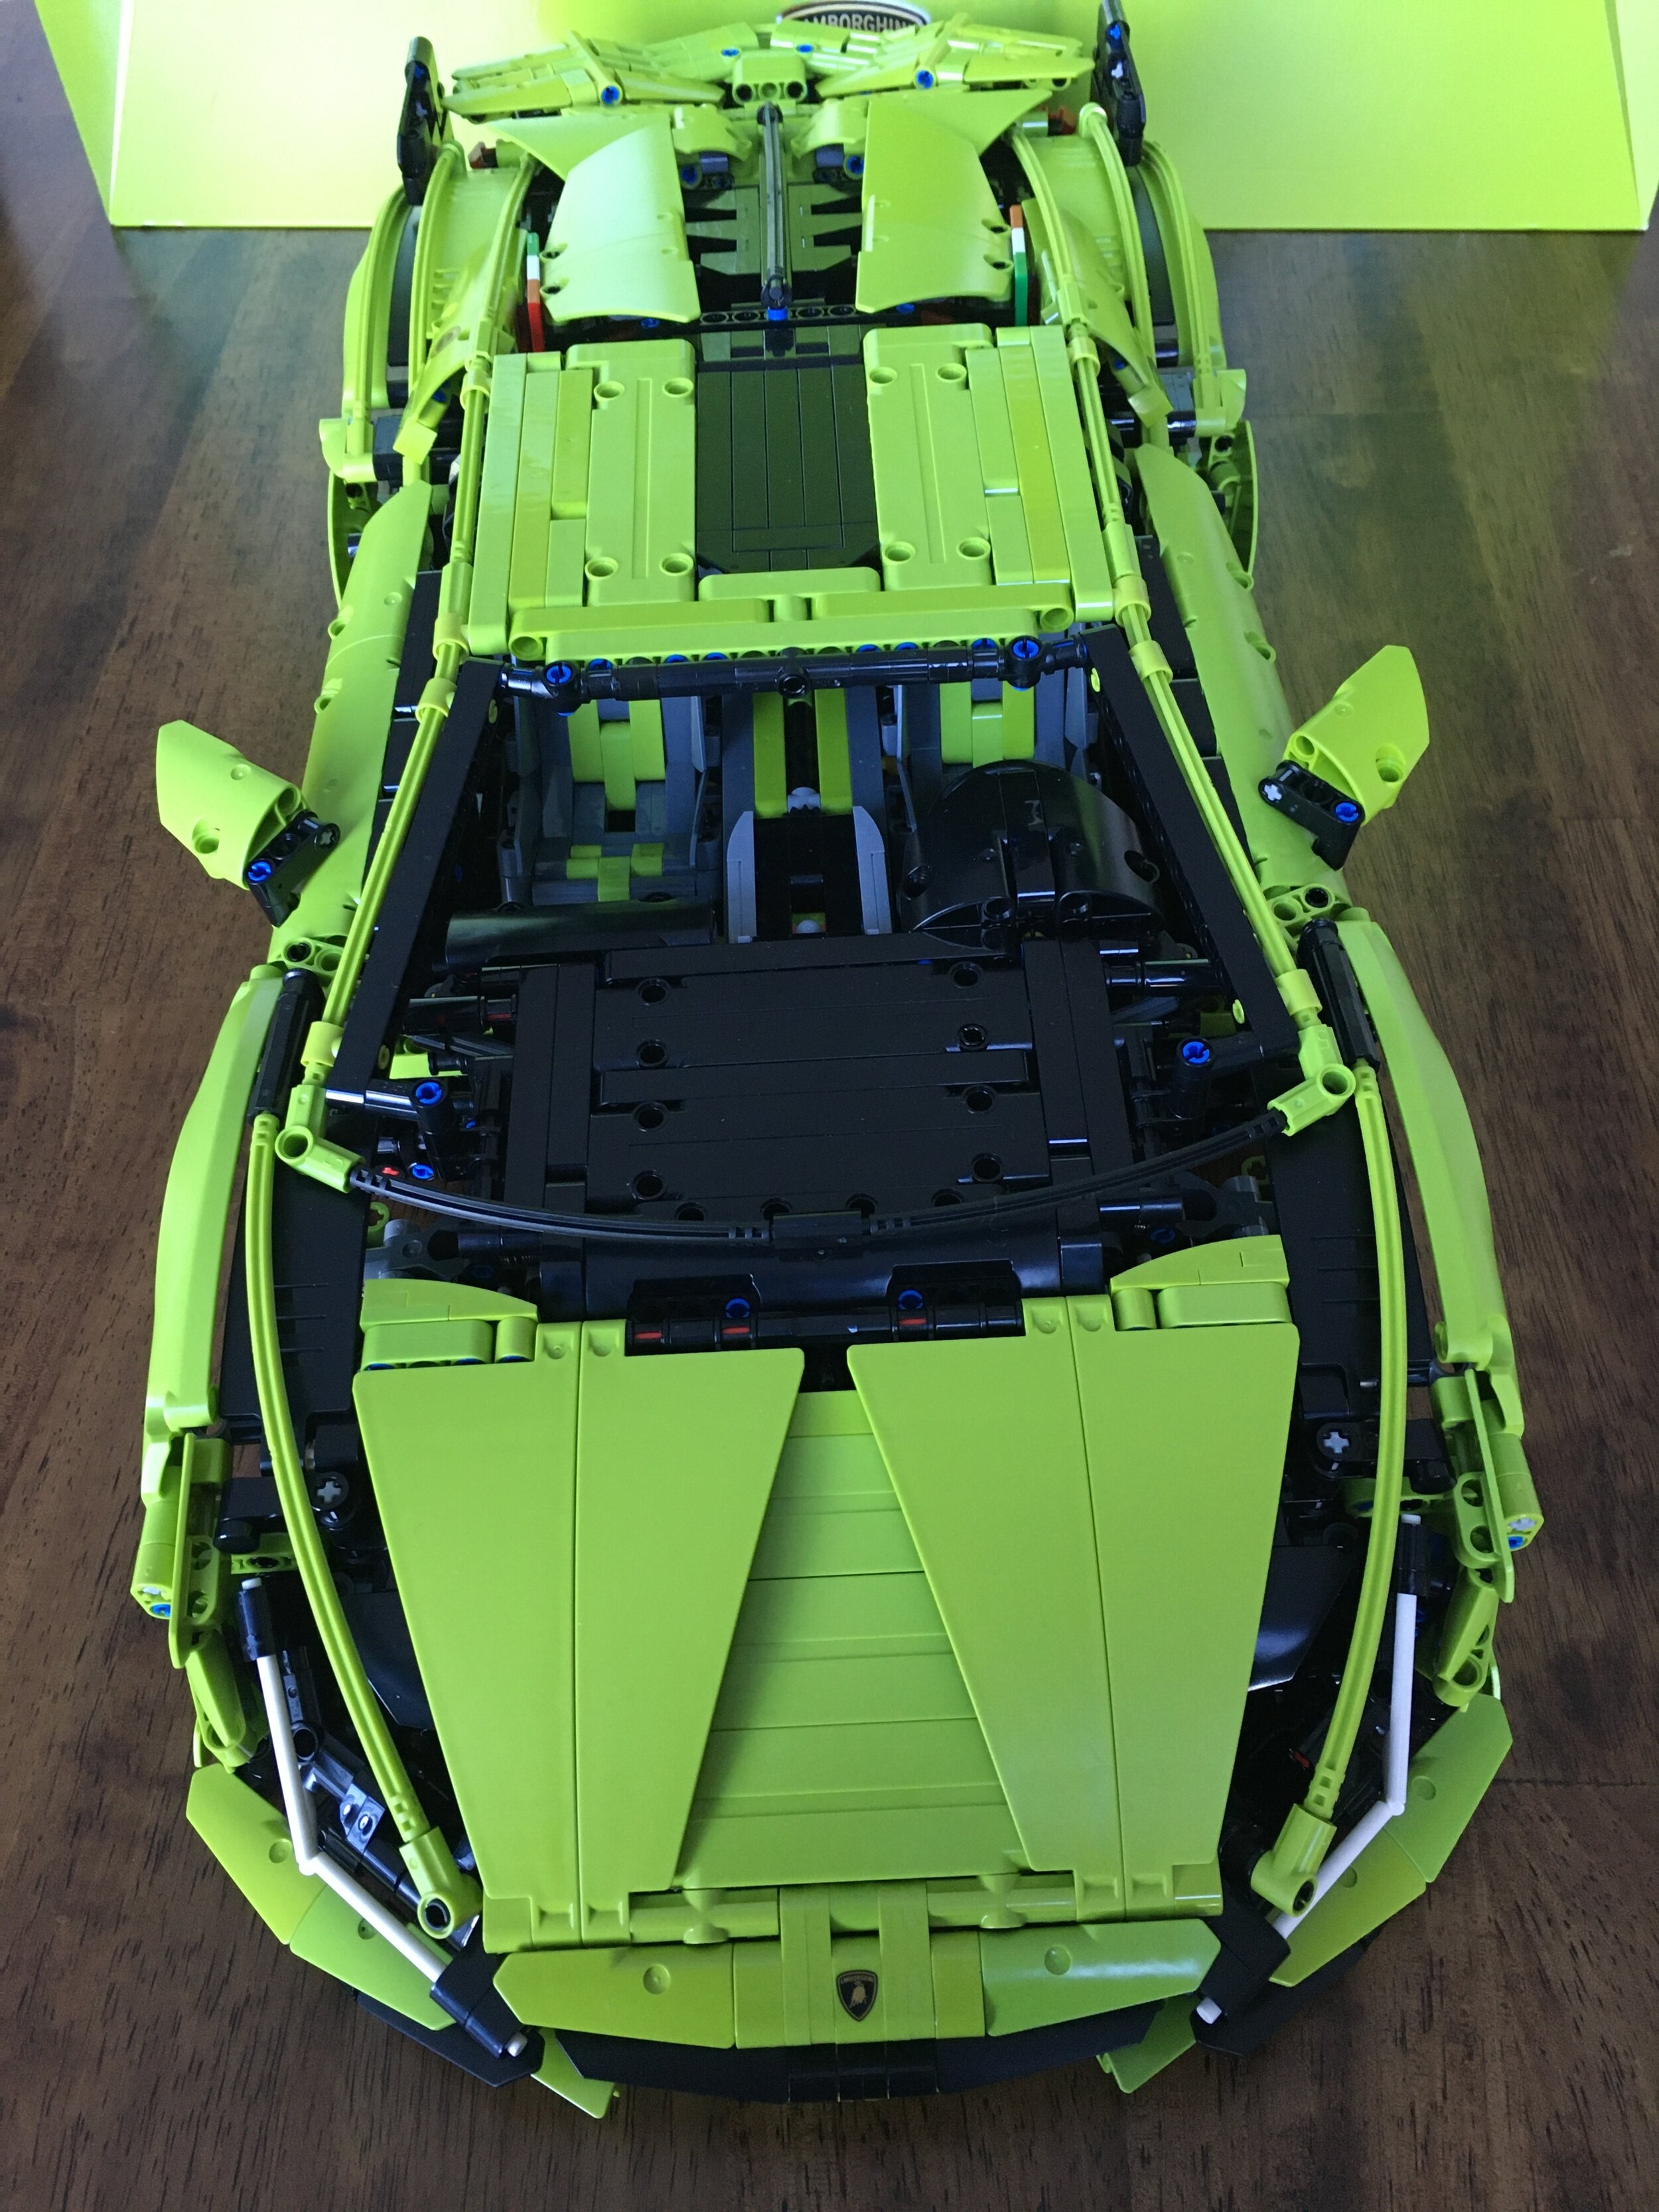
Here’s another view of the front of the car. It seems like the front dash is quite large compared to the rest of the vehicle. I’m not sure if it is proportioned correctly, but perhaps there is a reason.

The scissor doors have a piece you can push in behind the “cab” of the car. The doors pop up like a real Lamborghini. No complaints here. It’s a fun detail.

42115_build5c.jpg
42115_build5d.jpg

A few close ups from this part of the build. I’m not sure how I’d re-design the light bars, but I’m not a fan of how they were built. They do look similar to those of the actual car and I understand that the geometry is tough to re-create. I’ll have to think on this one…

I like the brakes with the printed brake calipers. I’m also glad they are not stickers. It’s a small detail that you really can’t see with the vehicle completed, but I’m a fan.

42115_build5e.jpg
42115_build5f.jpg

Box 6 - Rims and Tires

The lime green color issues with this model are disappointing, but the gold rims are awesome. They really make the vehicle stand out. It’s the same wheels as the Bugatti and there’s a small 1x1 round tile with the Lamborghini tile on it.

42115_build6a.jpg
42115_build6b.jpg

This second part of the build for this box is a brief case. The previous two cars had cases as well. This one has the fewest details of the three so far and in my opinion it seemed like a last minute add. The brief case doesn’t have much to it. It’s rather plain and bland. I would have rather done without the bag.

42115_build6c.jpg
42115_build6d.jpg

The last part of the build is a display plate. It’s a 4x6 plate with some studs. Impressively it is all printed on unlike a lot of the UCS type sets where there is a large sticker. It’s a nice addition to the model and for people who want to display it. They have it mounted on some Technic pieces so it can be angled up. A nice touch in my opinion.

42115_build6e.jpg

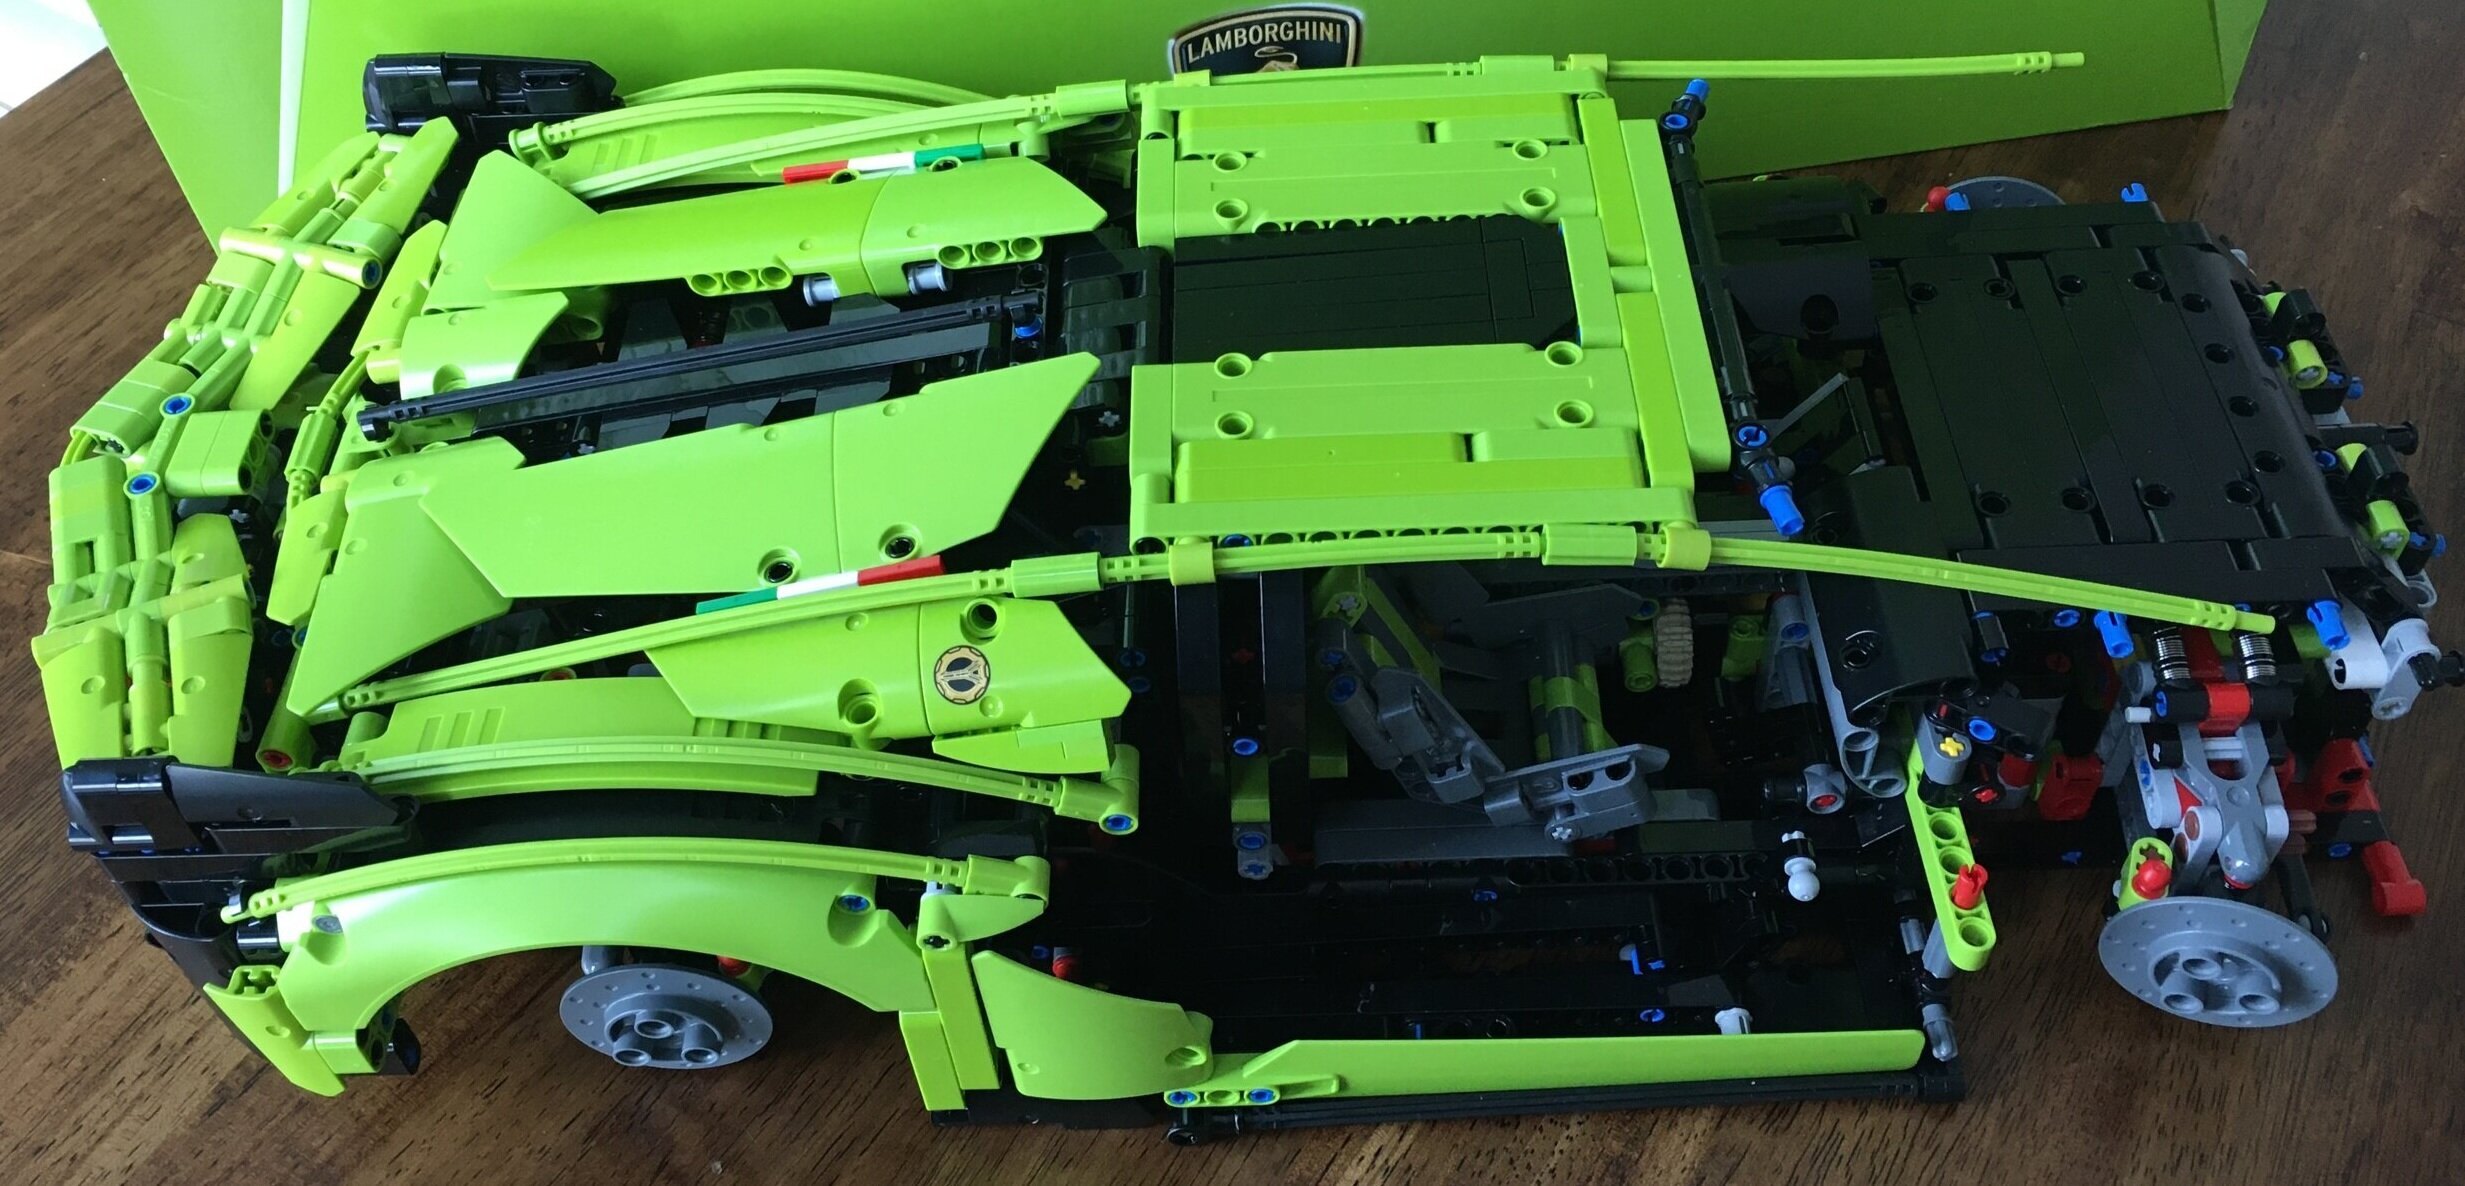
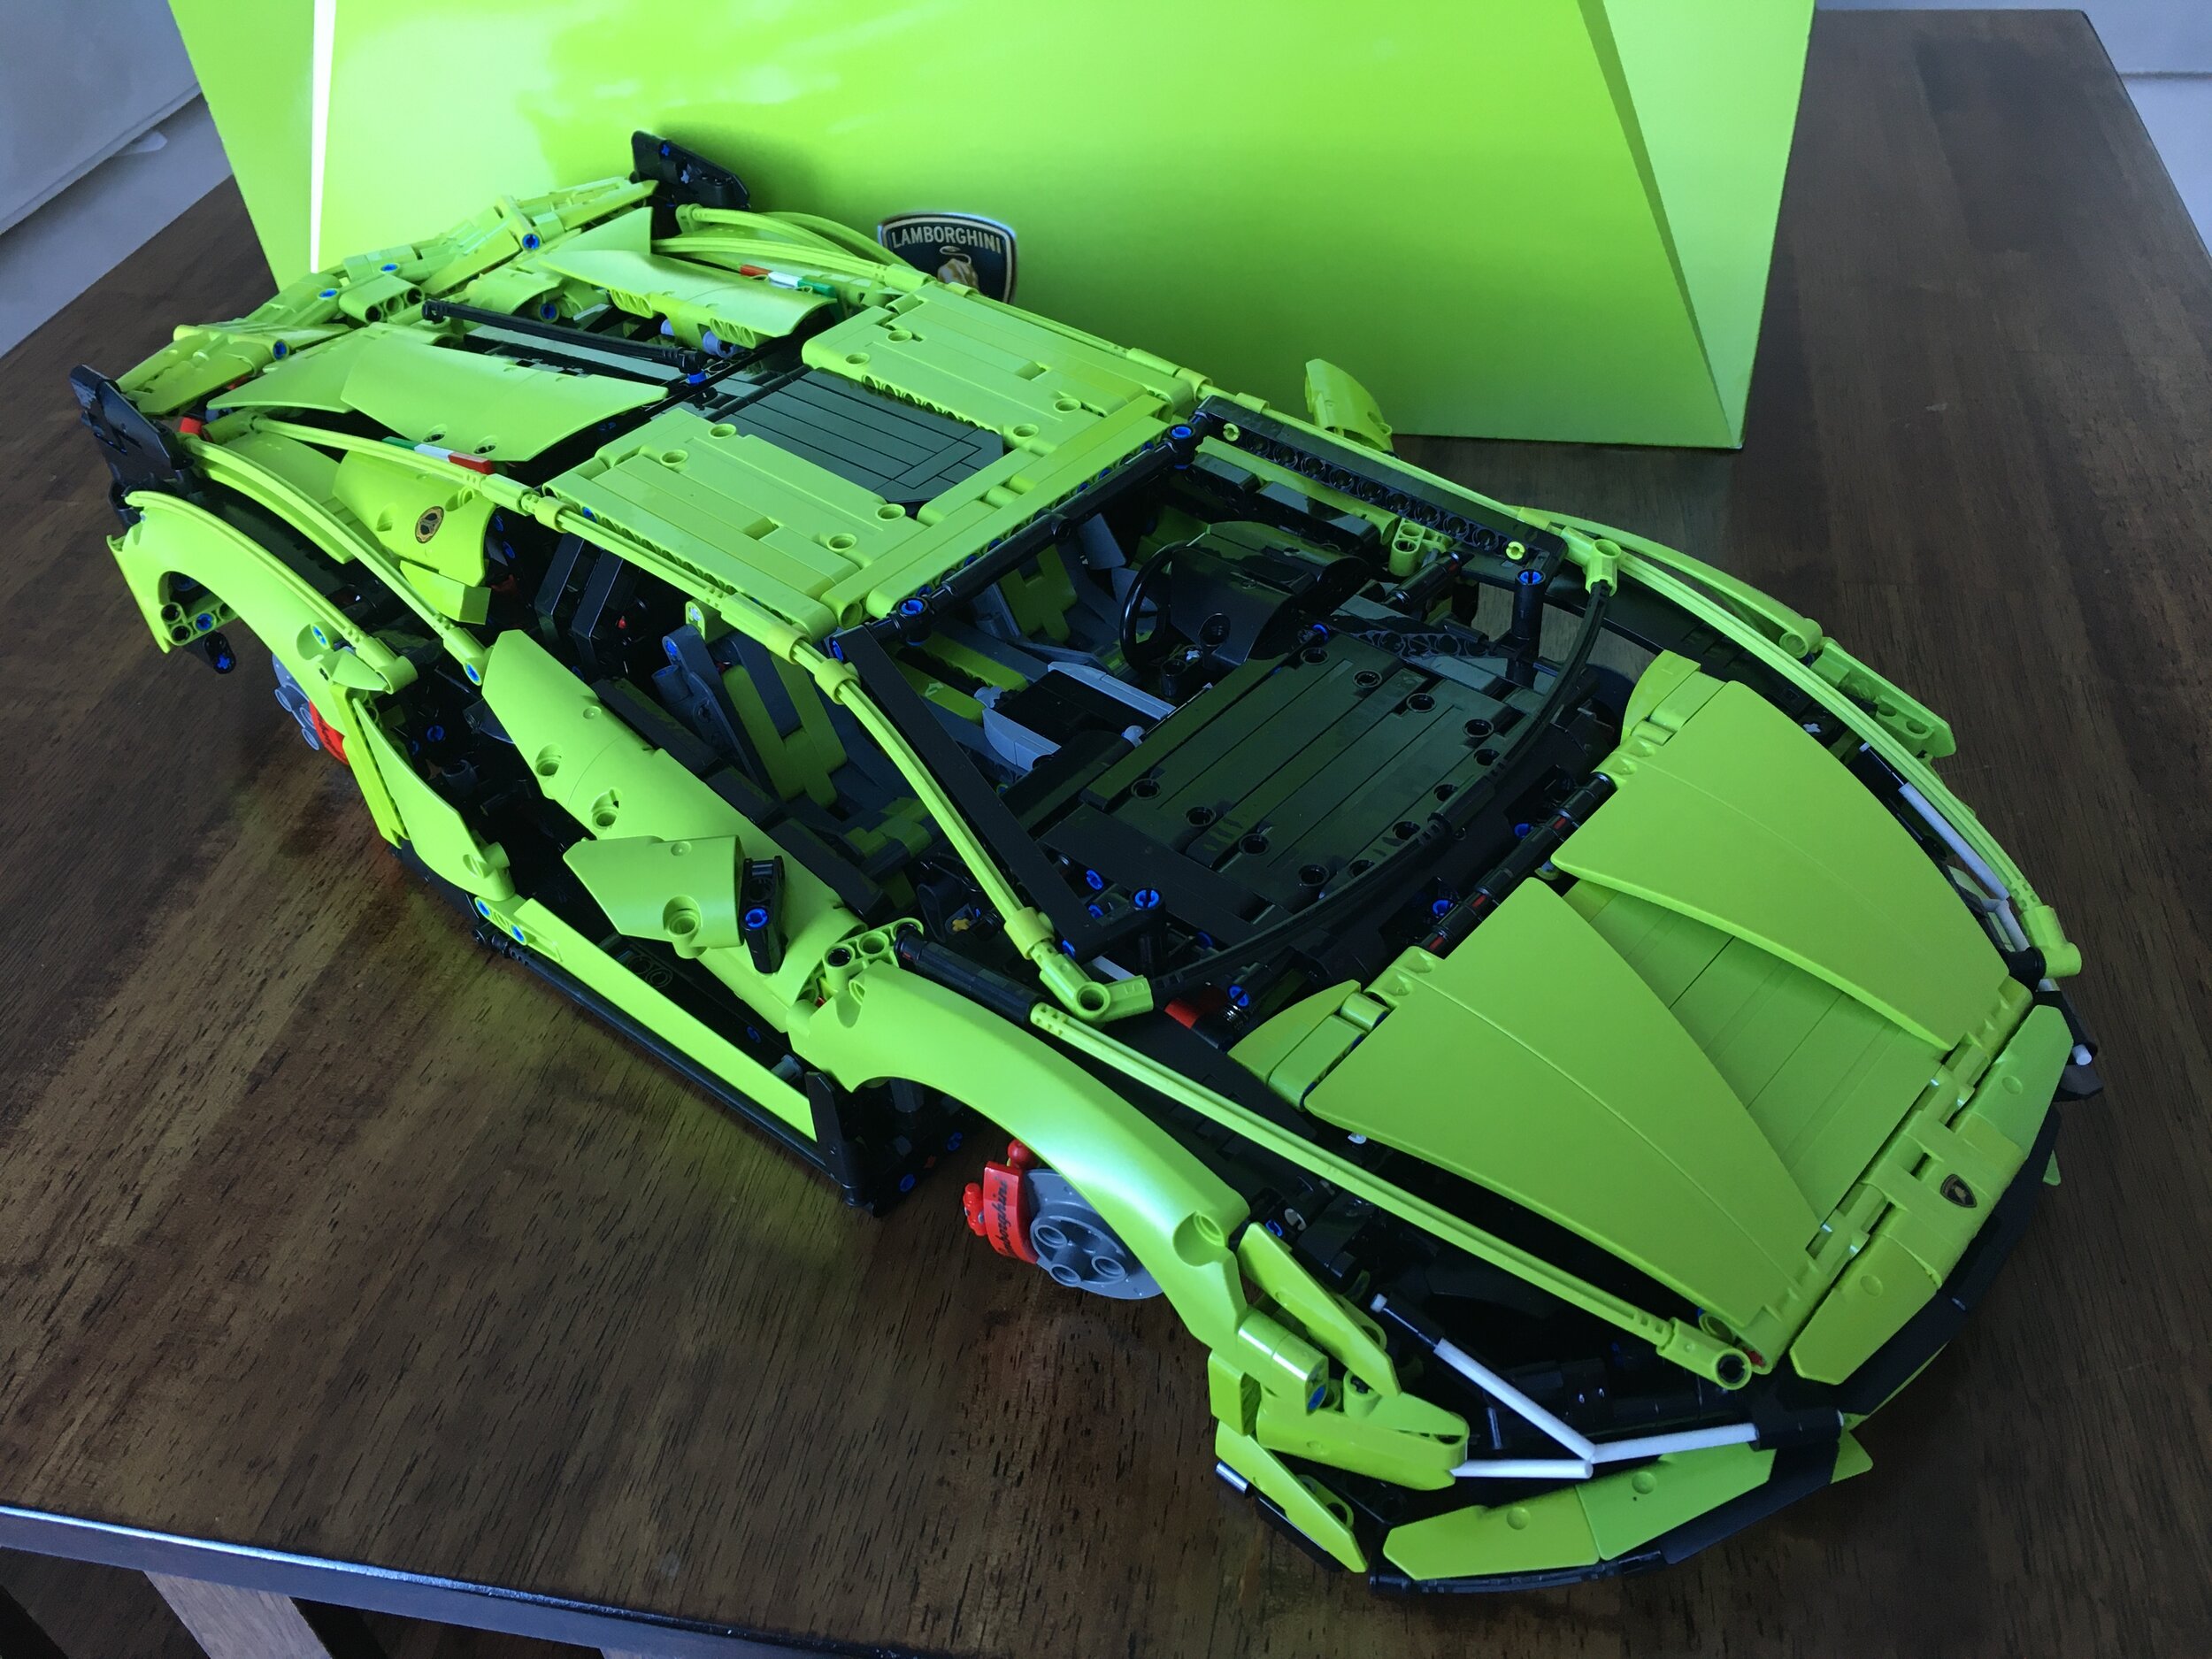
Here are a few pictures of the final product with the wheels on . Overall, it’s an impressive model. I enjoyed the build process and getting away from System builds. I enjoyed all of the details and the mechanical connections. I didn’t enjoy the price originally posted. I was super thankful to see the price come down in Germany and to get it at a substantially lower rate, but I have yet to see it go down in the US. I’m hoping LEGO can adjust pricing in the future… either more car/build experience or lower price. We’ll have to see what LEGO does in the future. In the meantime, what do you think? Is it worth it?

Happy building!

42115_final1.jpg
42115_final3.jpg
42115_final2.jpg
42115_final4.jpg
42115_final6.jpg

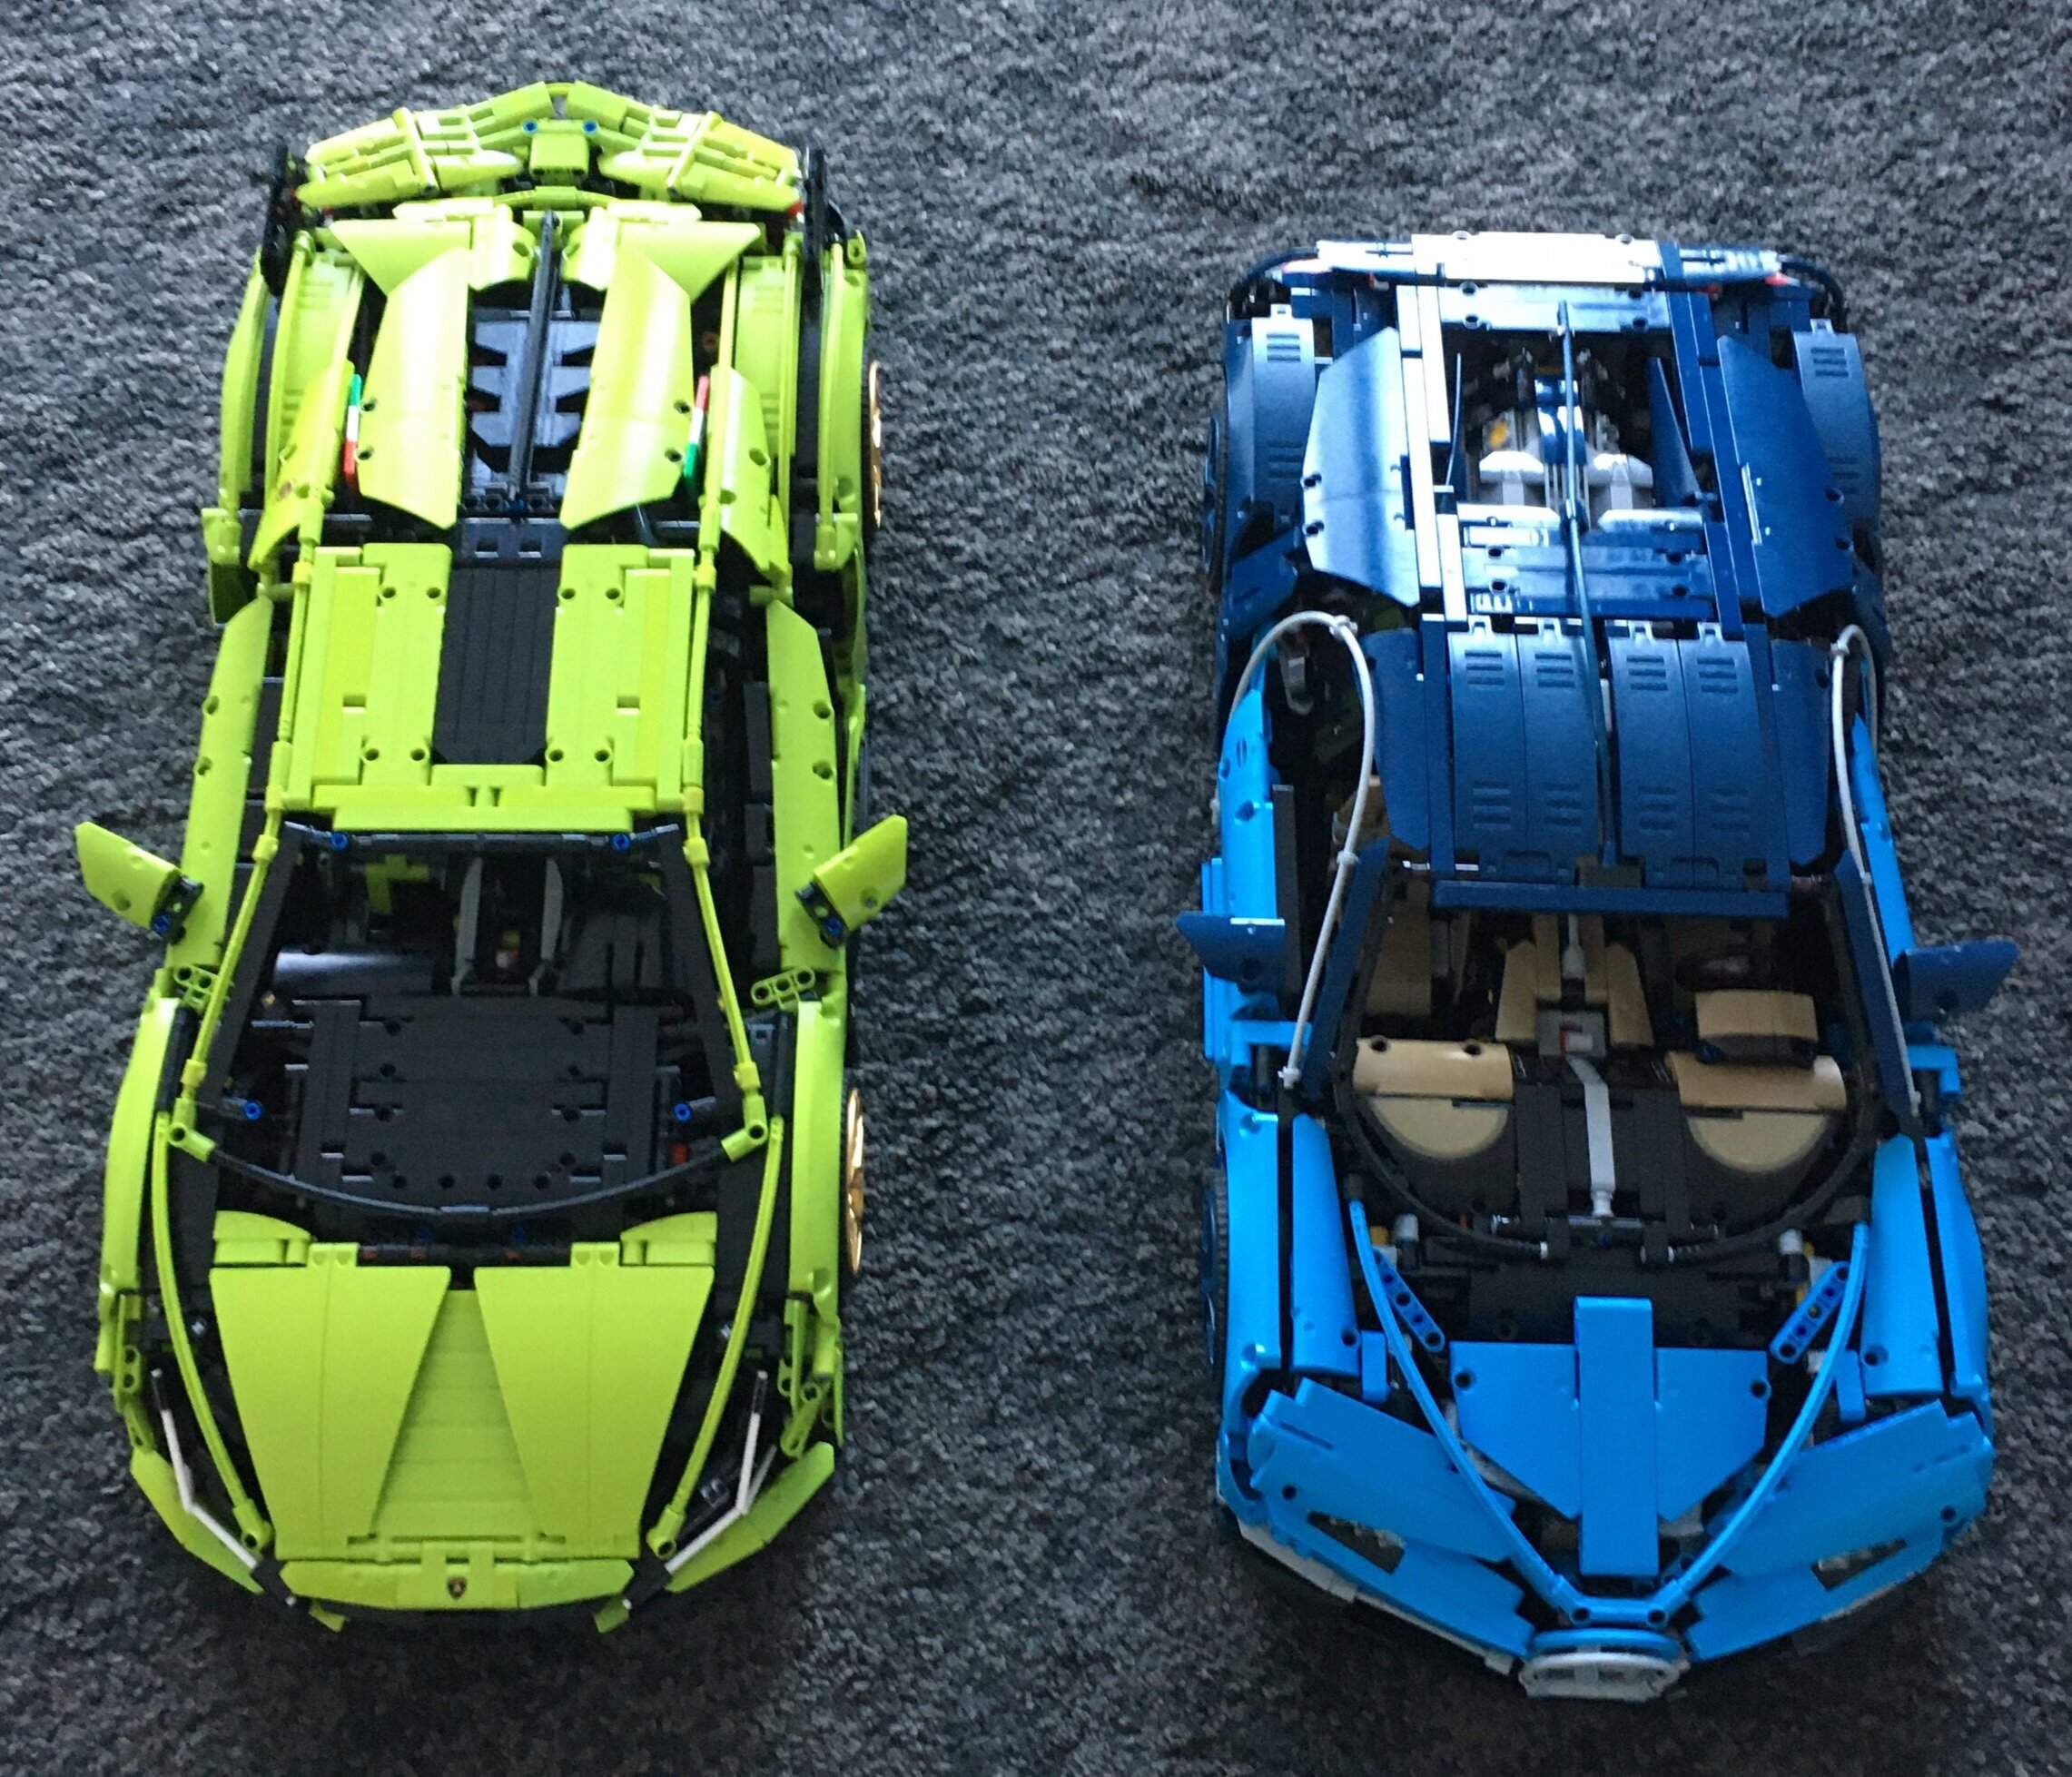
I have the Porsche in storage, but here is a picture of the Lamborghini and Bugatti together. The Lamborghini is slightly longer. Any thoughts on cool ways to display them? Here’s a Beyond the Brick clip where someone shows off his LEGO room and he has two of the cars hanging on the wall.

42115_42083.jpg

Set Review - #60203-1: Ski Resort - CITY

#60203-1: Ski Resort was release on 1 September 2019 in the US. It retails for $89.99 and contains 806 pieces and 11 minifigures. This puts it at $0.112/piece. As I write this, it shows as sold out in the US on LEGO Shop @ Home so I may be too late to the game. It still shows available here in Germany. I purchased it in Germany for around $54 which was a much better price, Why are the CITY sets so expensive all of a sudden?

While not an advertised sub-theme, the CITY theme had #60222-1: Snow Groomer back in 2019 as well. We’ll see if they add more in the future or not.

Onto the review…

The box is pretty standard with the full set displayed on the front and some of the play features on the back.

60203_box_front.jpg
60203_box_back.jpg

The set contents are eight parts bags, the instructions and stickers in a sealed package, and then an 8x16 white plate. Bag one has a piece separator.

60203_contents.jpg

The first bag builds a snow mobile, a trailer to carry a stretcher, a snowman, a dog, and 4 minifigures. The snowmobile is pretty simple, but it gets the point across and has some playability. The snowman looks pretty similar to ones in the past with a top had, red scarf, and a broom as arms. The dog is the standard CITY dog figure.

The minifigures are pretty good. There are two snow patrol figures with a male and a female and then two kids with the shorter legs.

60203_build1.jpg

The second bag is a helicopter design. I seem to have accumulated a bunch of these through the years and they all look very similar. In terms of realism, LEGO CITY helicopters lack some realism, but they must be popular as LEGO keeps repeating them. There is one minifigure who is the pilot.

One difference on this chopper is the tail piece. Instead of building out a tail with bricks you get a BURP. I’m not sure if this is a new thing or not. It looks better, but takes away from the build experience as you just attach one piece.

60203_build2.jpg

Next up is bag three with this SUV and snow plow. It’s a pretty tough looking vehicle with space for gear in the back, some skis, poles, and the ability to store some equipment. The plow in front is pretty large too. The bag comes with a female minifigure in a ski patrol uniform. I like this vehicle and am pretty impressed with how it looks despite being a CITY set.

60203_build3.jpg

Bag four gives us a small snack stand with hot chocolate and goodies to eat. You also get some trick gear to include a small rail to ski/board on and then a mini-half pipe. The half pipe is rather small. You could get maybe one trick off of it if you did it right. I get the point though and that it is meant as a play feature. You get two more female adult minifigures to eat at/work at the snack stand.

60203_build4.jpg

Instead of going by bag, I decided to go by the remaining parts of the build. Next up is a winter gear shop. It’s a small store front with snow shoes, snow boards, skis, a hat, a helmet, and poles for sale. The store is only the front part, but I like the design. The front is designed to make it look like it is built as a log cabin with printed tiles to look like the ends of logs. The stickers help with detail to include the store logo and a board out front listing the sales. I like the snow board over the door as a decoration. This one comes with a store worker and then a snow boarder and skier all decked out with helmets and gear.

The inside of the store has some inventory, a check out stand, and the display areas. Not bad considering the size and easily expandable as desired.

The top of the store has a large plate with clips. It comes with a large sticker and is supposed to be a screen you can use to watch your favorite minifigures ski. I chose not to attach the sticker as I thought it was too big and looked kind of silly there. I’ll remove the large gray part before making it a part of a city scene some day.

60203_build5.jpg
60203_build5.jpg

The last part of the build is a small chalet type building used as ski patrol HQ. Like the store, it is only the front half, but I like the design of the front and think it would look fun as a full up building if you wanted to expand it. The inside has a medical area, an office area, and a work area on the upper level.

I also like the stickers on the side with the route map for skiers and then the name of the ski area “Mount Clutchmore.” Very clever.

60203_build6a.jpg
60203_sign.jpg
60203_build6b.jpg

That wraps it up. This is a fun set in a great sub-theme of CITY, but is way too expensive at its original price. I’m glad I found it at the discount I did and recommend you look for the same. Since the set is retiring, you might be able to find a good discount out there. If you find it at a discount, this is a great start a future MOC for a ski area/resort. Lots of fun details and some good play features.

What are your thoughts on this one?

Happy building!

60203_final.jpg

Set Review - #60253-1: Ice Cream Truck - CITY

I’m not sure when the first one was, but LEGO CITY has done a few food trucks over the years. The last one I can recall is #60150-1: Pizza Van. That was from 2016. #60253-1: Ice Cream truck was released on 2 January 2020 in the US. It retails for $19.99 and contains 200 pieces. That works out to roughly $0.10/piece. I purchased mine locally for just under $17.

The box is your standard set up with the full set on the front and some play features on the back. This set is meant for the 5+ age range and it shows in the build. Onto the review…

60253_box_front.jpg
60253_box_back.jpg

This set contains two parts bags (both numbered), two instruction booklets, a sticker sheet, and two 2x16 light gray plates.

60253_contents.jpg

Bag 1 starts building the truck. The back comes with a few cones and some ice cream. The back side of the truck has hinges so it can open up for playability. Not much else here… it’s a pretty simple build.

There are two minifigures. A female figure who is the truck operator and then a male minifigure who is on a skateboard. The skateboarder comes with a purple skateboard, a blue helmet which can be switched for a black hair piece. It also comes with a black hair piece.

60253_build1.jpg

Bag 2 wraps up the build. The other side of the back has a sliding window for the minifigure to serve out of. It also adds the cab and all of the decorations. There are a lot of stickers to include the menu, some signage, and the face on the ice cream bar on top. I failed on the sticker for the ice cream bar as I centered it. If you zoom in, you can see there is a gap between the brown part and the brown drip on the sticker. I should have placed it in line with the brown. Not a big deal, but lesson learned I guess.

Overall, not a bad set. It fits in well with a city scene and adds some different vehicles besides the usual fire and police activity in LEGO CITY. The build is very simple, but to be expected for the 5+ range. My little guy tried to play with it, but the ice bar on top fell off easily and the front cab does not remain on well. Not a big deal for an AFOL thought. I’m glad I found it on sale and recommend waiting for a sale if you’re looking to pick this set up.

Happy building!

60253_build2a.jpg
60253_build2b.jpg

Set Review - #60262-1: Passenger Airplane - CITY

The LEGO CITY theme is back with another passenger airplane. This one is #60262-1: Passenger Airplane. It was released on 24 August 2020 in the US for $99.99. It contains 669 pieces and has 9 minifigures. This works out to $0.149 per piece. I picked it up locally on sale for about $72.

The last CITY passenger plane came out back in 2016. You can see my review of #60104-1: Passenger Terminal here. It had 694 pieces and 6 minifigures, but retailed for the same price. Like this set, it contained an aircraft, a small terminal, some ground crew gear, and the minifigures.

Onto the review…

The front shows the full set with the minifigures in action. It also shows the length of the aircraft (54 cm/21.2 in). The back gives the play features like usual.

60262_box_front.jpg
60262_box_back.jpg

The set contains 9 parts bags. 7 of the bags are numbered and 2 are un-numbered with large pieces inside. It also includes the large wing which has been pretty standard in CITY sets. The instructions and stickers are in a plastic wrapping. There are 4 instructions booklets and a small sticker sheet.

60262_contents.jpg
60262_instructions.jpg

Bag 1 builds a 4-stud wide red sports car. It comes with the minifigure Poppy Starr. This minifigure is from a LEGO CITY TV show that I didn’t even know existed. I’m not sure if this set or car is seen on the show or not. Anyone?

The build of the car isn’t anything special, but it’s designed to fit in the aircraft as you’ll see later.

60262_build1.jpg

The second bag builds an airport vehicle. This vehicle can tow various equipment to include stairs (built later) and the lift to transport the car to the aircraft. While there’s nothing special about the vehicle, it seems to be in line with the small vehicles you see driving around any airport in the world towing various pieces of equipment or baggage trains. You can easily create your own additional pieces of equipment to tow around and attach to this vehicle.

The trailer isn’t too hard to build, but I question if a 6 year old could do it as the box states. Maybe with some help they could? The design does hold the car built in the last bag and can “lift” it up. There is no mechanism to move the car into the aircraft, but I guess that’s something you can build on your own as most 6 year olds aren’t concerned about that.

Two minifigures in this bag. One is an airport worker with a hard hat and ear protection. The other is a passenger with a Hawaiian shirt on. He has a large piece of luggage which is different from the standard LEGO briefcase I’m used to seeing. This one looks like it could be a roller bag or something… just no wheels.

60262_build2.jpg

Bag 3 builds the small terminal. I’m not sure why it is included in this set. I understand that the set is designed for playability, but to me I’d rather see the terminal as a separate set. The aircraft set could be focused on the plane itself and some ground crew. Then the terminal set could be a bit larger with some more detail. This terminal has a small baggage claim, a vending machine, and a check in desk all crammed onto an 8x16 plate.

The facility uses roller coaster track as the roof. I like the concept, but it seems like a cop out to not putting any effort into making a curved roof. Easy for a 6 year old to install I guess. There’s also a small control tower with a radar dish attached. Like many CITY sets, the minifigure has to jump or climb to the top, but it gets the job done I guess.

Four minifigures in this bag. A female with a black bag sporting a guitar shirt, a male wearing a carrier to carry a baby and holding a bottle, the baby, and then an airport worker with a coffee mug. I love the baby carrier concept. Bonus points to the designer who came up with that piece!

60262_build3a.jpg
60262_build3b.jpg

Bag 4 starts to build the fuselage. Not a lot of details yet and like past CITY passenger planes, it uses a lot of BURPs to achieve the shape. One area I appreciate is the cockpit. Besides the printed slopes for controls, they added in a steering column which moves. It is just a bucket handle on a droid arm, but still a nice detail.

This bag has two minifigures to include a female pilot with some cool shades and a male flight attendant.

60262_build4a.jpg
60262_build4b.jpg

Bag 5 adds the standard wing piece along with some seating and details on the wings to include the winglets on the tips of the wings and the farings to hold the engines on. I’ve seen a few complaints about not enough seating, but I think the inside is large enough to make changes to as required. Add in your own additional seats if you don’t like how it looks. It is just LEGO after all.

60262_build5.jpg

The sixth bag adds in the windows in the cabin, a small bathroom on board, and starts to build the cargo compartment. The horizontal elevator on the tail is also added.

60262_build6.jpg

Bag seven finishes the build with BURP pieces to complete the top of the cabin, a BURP tail with a printed logo, a cargo door that rotates up and has a small latch to hold it down, and the engines. The engines are not a single piece, but instead are multiple cylinders attached together with around piece with a sticker on it for the fan blades. I’m indifferent on the design. Not sure if it is better or worse than previous jet engines. Besides the aircraft, you get the steps to get on and off the aircraft. No hand rails though so watch out.

60262_build7.jpg

Nine minifigures in total which isn’t’ bad. It’s a good selection with some good accessories. I would have liked a co-pilot for the second seat in the cockpit, but we’ll take what we get.

60262_minifigs.jpg

Here’s the full set. If you ask me, it’s in line with all previous CITY passenger plane sets. Lots of playability, some fun details, and good minifigures. While the piece count went down slightly, the price remained the same. If you can find it on sale like I did, even better. This is probably not a great set for adults unless you want pieces or you have a CITY airport (or like me, plans to build one). A good set for kiddos. My little guy absconded the vehicles and both of my kiddos enjoyed flying the plane around.

What are your thoughts on this one? If you’re an adult and hate the CITY plane designs, I recommend you check out the YouTube channel Big Planes. The builder here makes some incredible MOCs of actual aircraft and doesn’t use BURPs.

Happy building!

60262_final.jpg

Set Review - #75968-1: 4 Privet Drive - Harry Potter

Another of the 2020 Harry Potter series… #75968-1: 4 Privet Drive. Also released on 24 August 2020 in the US, this one cost $69.99 in the US. With 797 pieces, it works out to $0.088/piece. This set captures a scene from the second book/movie titled “The Chamber of Secrets.” It’s where Ron rescues Harry from the room he was locked into so he can go to Hogwarts. If you don’t know what I’m talking about, look it up on line.

The set has the standard box with the front showing the full set while the back shows the other side of the set along with some play features.

75968_box_front.jpg
75968_box_back.jpg

This set contains 5 parts bags, a sticker sheet, an 8x16 plate, and the instructions. Bag one includes a piece separator.

75968_contents.jpg

Bag one starts off on the bottom floor with some furniture, the door (with stickers to show the letters coming in, but they can’t fit due to the boards nailed on), stairs up to the next level, and then the street sign with an owl. Proportions wise, I think they fit a decent amount of details in considering the size of the set and it seems to match the movie scene well. The minifigure for Mr. Dursley is in bag one.

75968_build1a.jpg
75968_build1b.jpg

The second bag finishes up the first floor with some details like the fireplace, carpeting, a plant on an end table, and the railing leading to the second level. Additionally it finishes the small room under the stairs where Harry was locked away in the first book. This section has a small door on the one side and then uses hinge pieces to open up to the small space.

The minifigure for Dudley is in this bag.

75968_build2a.jpg
75968_build2b.jpg

The third bag starts the second floor where Harry’s room is located. It adds the walls, a bed and some details to include a copy of the Daily Prophet newspaper, a picture of Harry’s parents, and some clippings from Hogwarts. It also adds the window that Mr. Dursley bars up. This window is placed in using friction and there are no studs in contact with the frame so it can easily be pulled out.

On the first floor by the fireplace, a Technic gear is added. This is connected to a small mechanism that allows you to slip 1x2 tile letters down a slot. They can then come out the fireplace similar to the movie how Harry wanted his letter welcoming him to school. The gear allows you to open or close the slot as desired.

The front of the home has some plant life for decoration. I like how they did the roof with the slope bricks offset by one tile each. It’s a pretty simple way to add in some details without making it an over technical roof build.

The Mrs. Dursley minifigure comes in this bag.

75968_build3a.jpg
75968_build3b.jpg

The fourth bag finishes the roof. It uses the same technique as the small porch area on the first level. I’m a fan of how it looks. If you don’t like it or the set, at least you get a bunch of the black slope pieces to use in MOCs as desired.

This bag contains Dobby and the cake/pudding Dobby levitates over the Dursley’s guest. It also contains Hedwig which is the same figure from #75969-1: Hogwart’s Astronomy Tower and #75979-1: Hedwig.

75968_build4a.jpg
75968_build4b.jpg

The fifth build completes the set with the Harry minifigure and the Weasley’s flying car. It’s a different build from the original one we saw in #75953-1: Hogwart’s Whomping Willow. The two minifigures don’t fit in super well, but the truck has space for Harry’s trunk.

75968_build5a.jpg
75968_build5b.jpg

Lastly, there’s the final view in the side room of the house. Not much has changed there other than the light on the outside.

Final look at all the minifigures… There are 6 in total plus a Hedwig. Not a bad mix if you are a Harry Potter minifigure collector.

Overall, it’s a good build with some good play features and it captures the movie scenes well. There are some decent pieces you can use in MOCs if you don’t want to keep the set together. The small size of the set with the ~$70 price tag make it seem a bit overpriced. I picked it up on sale here for ~$52 and I recently saw it on sale on Amazon.com for around $56 so better. Unless you’re a big Harry Potter fan or collect the minifigures, I would steer clear of this one. Or maybe if you can find a better sale. This one seems to me like a $39 set.

What are your thoughts on this one?

Happy building!

75968_final_side.JPG
75968_minifigs.jpg

Set Review - #75967-1: Forbidden Forest Umbridge’s Encounter - Harry Potter

Continuing my review of the 2020 Harry Potter sets, this one is #75967-1: Forbidden Forest Umbridge’s Encounter. It depicts a scene from the fifth book/movie titled “Order of the Phoenix.” The set contains 253 pieces and retails for $29.99 in the US. This works out to $0.119 per piece. The US release date was 24 August 2020. The set was released on 3 May in Germany and I found it on sale for around $22.

Nothing special about the packaging. Full set on the front with play features on the back.

75967_box_front.jpg
75967_box_back.jpg

The contents are 2 parts bags, 2 instruction booklets, and a small sticker sheet.

75967_contents.jpg

One highlight for me in this set was seeing the sand green sausage. I thought it was new, but apparently this is the third set it has been in. I’ve only seen this in red so nice to see another color.

hot_dog.jpg

Bag 1 builds a small tree structure that opens up to include some of Grawp’s items. It also includes a Harry Potter minifigure and 2 Centaurs. For minifigure collectors, these are probably a big draw in this set.

75967_build1.jpg

Bag 2 includes Hermione and Professor Dolores Umbridge. The build is Grawp who is a relative of Hagrid (I forget the exact tie). In seeing the box, I thought Grawp would be a lot of BURP pieces, but it uses a lot of SNOT techniques and not as many molded pieces. The hands are molded and the face, but everything else is regular pieces.

Overall, not too much special to this set besides the Centaur figures. Probably a must buy for Harry Potter collectors. I recommend finding options to get it on sale as it’s a bit much at over 10 cents per piece.

Happy building!

75967_build2.jpg

Set Review - #75966-1 - Hogwarts Room of Requirements - Harry Potter

Continuing with the 2020 Harry Potter series, here is #75966-1: Hogwarts Room of Requirements. It was released in the US on 24 August 2020 (3 May 2020 in Germany). It contains 193 pieces and retails for $19.99 in the US. This works out to $0.104 per piece. I picked it up here in Germany on sale for just under $17.

Onto the review…

Here’s the box with the set on the front. It is the standard front with the Harry Potter logo, pictures of the actors, and the minifigures on the bottom. The back shows some of the play features as well as the other side of the set.

75966_box_front.jpg
75966_box_back.jpg

The contents are two numbered parts bags, the instruction booklet, and a sticker sheet. It’s not a ton of stickers, but I am not a fan of the small stickers you have to place on a larger panel or brick.

75966_contents.jpg

The first bag builds part of the room. It includes the outer sliding door that opens when the students need it to. There is a door behind it so they can get in. I like the larger translucent blue bricks for the windows and am trying to think of some cool ways to use them elsewhere.

This bag has the Luna Lovegood minifigure.

75966_build1a.jpg
75966_build1b.jpg

At 193 pieces, the build goes quickly. Bag 2 includes the remainder of the set to include Technic elements to knock down the proclamations. For minifigures you get Harry, Hermione, and the training Dementor. You also get some patronus charms to include a rabbit and… a gopher? Finally you get some “flick pieces” to shoot your charm from the minifigs and have them land somewhere on the floor for you to find later.

75966_build2a.jpg
75966_build2b.jpg

Overall, it’s not a bad set. You get a few decent pieces, there are minimal stickers, the minifigures are okay, and you get some translucent pieces. It’s not a bad set to pick up if you are a Harry Potter fan and you can get it at a discount. The set has holes for Technic pins so you can connect it to others released over the past few years to create a larger scene. Beyond that, not much else to say. It’s a smaller set with not a lot too it, but it’s designed for that price point so you can’t expect much more.

What are your thoughts on this one?

Happy building!

Set Review - #31109-1: Skull Island - Creator 3-in-1

Here is the last review for #31109-1. The Pirate Ship is here and the Pirate Inn is here. Skull Island is the smallest of the builds and I found there were a lot of pieces left over when it was complete. The design includes a brick built raft, a brick built row boat, and then the island itself. The island includes a brick built palm tree and a brick built monkey. The skull itself protects a pirate treasure of gold coins (1x1 round plates) and the treasure chest. The skull is mounted by a Technic axle and you can spin a wheel to have it move up and down. It doesn’t move much, but it would scare away anyone trying to steal the treasure.

The pictures below include the front and the back of the build. Overall, I think the skull could look slightly more realistic, but I guess that’s what is left up to the builder to adjust as required. The three builds for this set are all great and I could see wanting to keep all three assembled (I don’t plan to buy two more of these sets). They all would be a great part of a pirate scene or layout.

I haven’t bought a 3-in-1 set in a while, but this one was definitely worth it. I highly recommend this one… especially if you can find it on sale like I did. The builds are great and the pieces available are useful in other builds.

What are your thoughts on this one? A great addition for your Pirates or a lame attempt?

Happy building!

31109_skull_island1.jpg
31109_skull_island2.jpg

Set Review - #75969-1: Hogwarts Astronomy Tower - Harry Potter

The Harry Potter sets are back for another round. The 2020 releases came out in late August in the US and in early May in Germany. A few of them are already on sale here in Europe so I picked them up and will let you know what I think.

The first is #75969-1: Hogwarts Astronomy Tower that was released on 24 August 2020. It contains 971 pieces and 8 minifigures and retails for $99.99 in the US. That works out to $0.103 per piece. I found it locally for around $74 and thought that was a much better deal.

The box format looks similar to last year. The front shows the set with a digital background and the three main characters from the movie in the upper right. The back shows some of the play features and the back side of the set.

75969_box_front.jpg
75969_box_back.jpg

The set contains 6 parts bags and the instructions which are wrapped up in plastic with the stickers. There is also an 8x16 dark gray plate that comes separate.

The sticker sheet isn’t too bad although I don’t like trying to put the smaller stickers on the larger pieces as you’ll see later. I can never seem to properly center them.

75969_contents.jpg
75969_stickers.jpg

Bag one builds the green house. It’s a simple build, but the roof is done differently. There are no stud connections and instead it is attached based on friction between the pieces. I found it to fit well and wasn’t super loose. This bag has the minifigures for Harry and Professor Horace Slughorn. It also has Hedwig the owl.

The only other notable part of this build are the Mandrake plants which are printed 1x1 round bricks. They have a plant piece attached and I thought this was a nice detail in the set and I was glad it wasn’t a sticker.

75696_build1a.jpg
75969_build1b.jpg

The second bag starts the base of the tower. It’s a fairly simple build, but I do like the curves and arches and how they add detail to the castle look. The use of stickers on the front columns wasn’t fun to apply. You can see from my picture that I didn’t put them on evenly.

The inside of this part has a classroom. It is maybe a potion classroom with various items to pour into pots. This is a cool part of the set, but is rather small. It needs expansion in my opinion.

75969_build2a.jpg
75969_build2b.jpg

Bag 3 builds the roof of the bottom portion of the tower. I like the design and the use of angled plates to create the detail. The spires are fun too. The inside adds a few candles hanging from the wall.

75969_build3a.jpg
75969_build3b.jpg

The fourth bag adds to the base of the tower which is hooked into the other section with Technic pins. This section appears to just be a hallway. There’s a shovel hanging up and well that’s about it. There’s also a decoration with red lanterns/balls. It appears this is part of the scene from book number 6 “Harry Potter and the Half-Blood Prince” where Professor Slughorn hosts a “Slug Club” party before Christmas. This set includes a table with a food set up and Neville serving a drink. Hermione is the other minifigure included here.

75696_build4a.jpg
75696_build4b.jpg

The fifth bag builds the next floor up and includes Luna Lovegood. This floor is the Ravenclaw common room which I don’t ever recall seeing in the movies. Was it mentioned in the books? It’s a pretty simple set up with a few beds, the house colors as a sticker, and some books on a brick books shelf.

75696_build5a.jpg
75868_build5b.jpg

Bag six builds the last floor and roof for the astronomy tower. It has the actual astronomy tower portions with the telescope. The minifigure included here is Malfoy. While I like how this set looks from the front, I would have liked to have seen how the telescope points out. Is there a retractable roof piece or something that opens? Again, another part not seen in the movie, but it would have been interesting to build or it could be something you build on your own.

75696_build6a.jpg
75696_build6b.jpg
75696_build6c.jpg

As mentioned, you get 8 minifigures in this set and a Hedwig. Hedwig appears in six sets this year in the same manner so if you’re looking to get the owl, no need to get the most expensive set. The minifigures all appear in this form only in this set so if you collect Harry Potter minifigures, sorry…Also of note, these all have dual expressions. I tend to go with the happy or not mad expressions when I do reviews. The remainder of the expressions are either mad or a look of disgust or something similar.

75696_minifigs.jpg

Here’s the final build. Overall, I think it’s a cool structure from the front and I look forward to some day having the space to connect the sets from the previous few years. While I understand the back is open for kids to play with, I think it would be cool to have the full set filled in. Perhaps some day I will work on a minifigure scale Hogwarts castle.

I recommend trying to find a sale on this one before buying. It sits a little about the $0.10 per piece point at retail and I think it could be slightly cheaper (although you are paying for the license as well).

Happy building!

75696_final1.jpg
75696_final2.jpg

Set Review - #31109-1: Pirate Inn - Creator 3-in-1

This is part two of the set review. You can see part one here. I built the Pirate Inn after the ship just based on how the instructions are set up. The ship is first and you build it following numbered bags. Then the inn is next. You had to take apart the ship first to get all the pieces. It then takes a bit longer to build as you aren’t building by bag, but searching for pieces through the 1,264 available. I could have made it easier by sorting the pieces first, but what’s the fun in that?

I didn’t take pictures of the build process, but instead included a few pictures of the final build. It appears as though the ship was designed first and then the designers figured out what they could build based on the pieces available. Or maybe the inn was designed already and they just had to tweak it for parts availability. Either way, you will have a bunch of pieces leftover when the inn is complete so don’t fret.

Here’s what you get at the end.
-the inn
-a brick built horse and cart
-the same 3 minifigures only one now has an accordian
-a brick built bird on the top of the inn

31109_pirate_inn1.jpg

The build has some interesting features. The front has a small crane that you can crank up and down. I’m not sure what you’d use it for, but it’s a cool looking feature. The crow’s nest is on top so you can look out or maybe someone sleeps there?

I don’t know my styles of architecture, but I like the front façade of the inn. The angle of the roof, the windows, and colors all seem to make it fit right in with the pirates theme. The V roof in the front left of the house is made by connecting plates to ball and hinge joints. I had never seen that method of build before and I like how it was done.

The back of the inn folds out so you can have access to it. There are 3 beds on the upper level and then the lower level has a table and some cups for beverages.

Outside is a large wheel which I assume is a water wheel. It spins either by you rotating the wheel itself or by spinning the Technic pin that is inside the inn. You could hook it to a motor if you really wanted to. This feature would help you build out this set to connect it to a stream running down from a hill/mountain and meeting the bay that the inn overlooks. And in the bay would be a pirate ship… and you’d have to buy another set #31109… and LEGO continues to make money…

31109_pirate_inn2.jpg
IMG_1467.JPG

Last shot is a closer view of inside the inn. I’m not sure what the build in the center on the ground floor is. Maybe a clock?

Overall, it’s a good build with some good techniques. Since it is limited by parts, a few of the steps don’t make sense like using three 1x1 pieces versus a 1x3. I get why it’s done that way so not a major complaint. Along with the ship, this build would fit well with any pirate scene and is a welcome addition to the slight come back of the LEGO Pirate theme through other themes.

Onto the third build… Skull Island…

Happy building!

31109_pirate_inn4.jpg